Video: Part 5 - HandBrake
by Paul Arnote (parnote)
One handy tool to have in your “video
toolkit” is an application that makes it easy to get your videos onto
your portable devices. Those portable devices could be an iPod,
Blackberry smart phone, an Android smart phone, or a tablet, whether
it’s Android-based or an iPad.
Enter HandBrake, a GPL’d multiplatform, multithreaded Gtk+ application that makes the job of converting videos into a format playable on your portable devices quite easy. HandBrake can convert any video format that can be read by libavformat and decoded by libavcodec. This includes *.flv files, *.mpg files, *.avi files, and most anything else. HandBrake can also convert your DVDs to a format that can be viewed on your portable devices. Although HandBrake itself does not decrypt DVDs, on a Linux system, it will allow libdvdread to use libdvdcss2 to decrypt the DVDs on-the-fly. Background HandBrake was started in 2003, by “titer.” One of the first DVD-to-MPEG4 conversion programs out there, it was originally written to run on Be OS and Mac OS X. It has since expanded to be able to run on Linux and Windows. “titer” dropped off of the radar in 2006, while work continued by Rodney Hester and Chris Long to reverse engineer the new 640x480 H.264 iPod firmware 1.2 format from Apple. They were working independently, but found that their work complimented one another, so they banded together to put out an unofficial version of HandBrake.

Unable to fully access the changes made in the HandBrake subversion repository (due to lack of prior authorization from “titer”), HandBrake was forked to a parallel project, called MediaFork. Finally, in February 2007, “titer” resurfaced and gave his blessings to the continued work on HandBrake. The MediaFork project was officially “reabsorbed” by HandBrake, and all work continues under the HandBrake project. Labeling the *.avi and *.ogm formats as obsolete, the HandBrake developers later dropped support for outputting files in those formats. Today, HandBrake supports (mostly) H.264 MP4 video file conversions, with the lesser MPEG4 format created by ffmpeg. Using HandBrake The use of HandBrake is quite simple and straight forward.
![]()
Icon toolbar during transcoding
![]()
Icon toolbar prior to starting transcoding Starting at the top left part of the HandBrake window, you will find a simple icon toolbar. The clapboard icon allows you to choose the source video to convert from. Clicking it defaults to a pointer to the DVD drive, but you can also use the dialog box that opens to point to a video file stored on your computer. The second icon changes its appearance. When video is in the process of being transcoded, the icon appears as a “stop sign.” Clicking it halts the video transcoding. To start the video transcoding, click on the green icon with the arrow on it. Clicking on the green “Pause” icon will pause the video transcoding. Clicking on the fourth icon (from the left) will add more videos to the cue for transcoding. The fifth icon will display the cue, when clicked. We’ll take a look at the sixth icon, the Picture Settings & Preview button, depicting the color bars, separately. The last icon will show messages generated during the transcoding process.
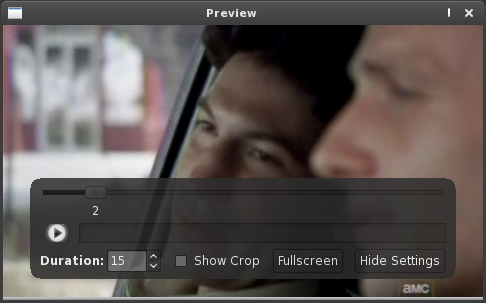
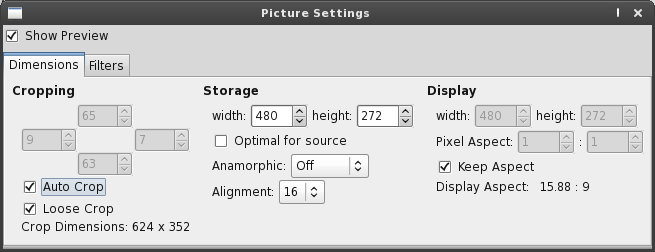
Clicking the “color bar” icon will open the preview window (top, above) and the Picture Settings dialog (bottom, above). Here, you can set the final size of the video you want (or need) for your portable device. HandBrake will automatically crop your video image, by default, to remove any irregular edges or letterbox bars. You can, of course, turn off this behavior, if you like.

Immediately beneath the icon toolbar is the source for the video transcoding. In our case above, it is a file stored on my computer. If you are transcoding from a DVD source, then you can select from among the various titles on a disc. When transcoding from a DVD source, HandBrake will automatically scan the DVD (once selected as the source) and select the longest program on the disc, since this is usually the main title of the disc. You can, if you wish, select any of the other titles on a disc, via the drop down list box.

Next, you can specify where the output file is stored by selecting the destination directory, as well as the destination filename. You can choose between MP4 and MKV file formats. The *.m4v file extension is to assist certain models of iPods in recognizing the file as a compliant MPEG4 file. You can change it later (after the transcoding) to *.mp4, if you need.
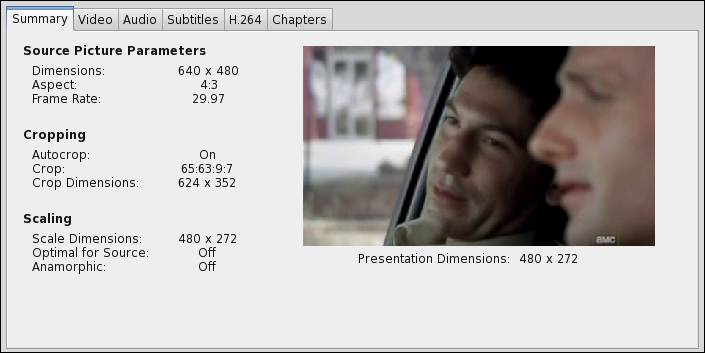
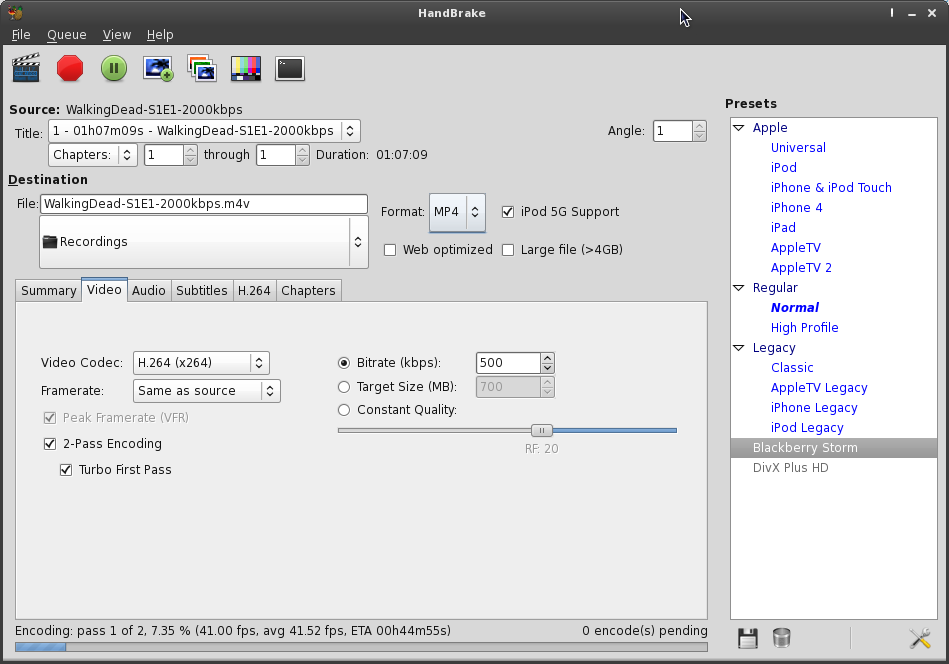
The meat and bones of the settings for the video transcoding in HandBrake take place in the lower half of the HandBrake window. Above is the “Summary” tab for the current transcoding.
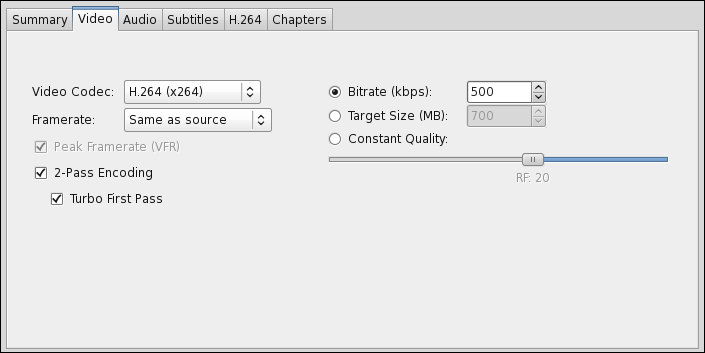
Under the “Video” tab, you can set various parameters for your transcoding session. Here, I’ve selected H.264 as the video codec. You can also select “MPEG4 (FFmpeg)” as the other output codec, should your portable device not be 100% H.264 compliant. I’ve actually found the alternate “MPEG4 (FFmpeg)” setting to be less troublesome, in my tests. Even though my portable device touts itself as being H.264 compliant, I have been unable to get consistent results. With some videos, the video would not encode properly, giving me a blotchy green screen in place of the actual video image. For “Framerate,” it is probably best to leave this set to “Same as source.”
If you desire, you can transcode the video to match the framerate used by the broadcast standard for your region. This may be advantageous if you are saving videos to a media server that feeds videos to your television. For portable devices, this shouldn’t make too much difference. On the right side of the “Video” tab, you have three settings to choose from. You can select the “Constant Quality” setting (the default), and the file will be created without regards to file size, but providing consistent results throughout the video. You can also select a “Target Size” in MiB. This is helpful if you want to keep the size of your video transcoding small enough to fit on an optical disc, such as a CD or DVD. The default value here is 700 MB, for a CD.
For use on my portable device, I’ve elected to choose the bitrate for the video transcoding. Since my portable device is a Blackberry Storm (which I no longer use for phone service, but still use as a portable video player – a long story for another time, I’m afraid), the screen size allows me to reduce the bitrate and still maintain a quite decent image. I took a look on the Crackberry forums for some guidance in what works well for video transcoding, and one recommendation was for a 500 kbps bitrate. As an added benefit, the lower bitrate results in a smaller file size, which means I can put more videos on the 8 GB microSD card. I can attest that the image looks quite good on my Blackberry Storm.
I suspect that a similar bitrate will work equally well for other portable devices with similar smallish screens, such as an iPhone, iPod Touch, or Android phone. To get the best video possible, especially when using the lower bitrates, I highly recommend using the “Two pass encoding” option, coupled with the “Turbo First Pass” option. On the first pass through the video, HandBrake will “study and analyze” the video. On the second pass, it will use the information gathered from the first pass to optimize the final video image that is saved. Trust me – the added time involved is definitely worth the increased image quality that results.
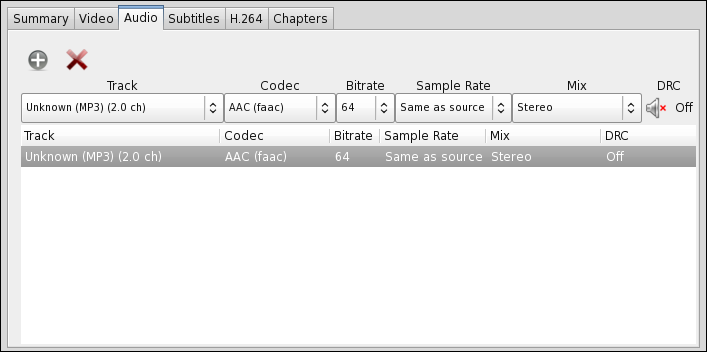
Under the “Audio” tab, you can set the parameters for the transcoding of the audio portion of the video file. My portable device prefers AAC as the audio codec. You can select from between AAC, MP3, Vorbis, AC3 (FFmpeg), AC3 (pass-thru), DTS (pass-thru), or Choose for me. Not all codecs will be available at all times, and some may appear “grayed out” at times. To further save file space in the final transcoded video file, I’ve opted to reduce the audio bitrate to 64 kbps.
It still sounds decent enough, in my opinion. For “Sample Rate,” the default value is to keep it the same as the source. In my instance above, that is definitely the correct choice. However, if you are transcoding from a DVD, this may not work out so well, if your portable device does not “like” the sample rate at 48,000 Hz, which is the default sample rate for audio tracks on DVDs. You can set it manually to 44,100 Hz, or as low as 22,050 Hz. This may help make the file size of the transcoded video smaller, but in my estimation, the savings are minimal and not worth the trouble. Unless you are transcoding a video file to burn another DVD, you would be wise to keep the sample rate set to 44,100 Hz.
The “Mix” setting allows you to set whether you want your audio as stereo, mono, Dolby Surround, Dolby Pro Logic II, or 6-Channel discreet. For most portable devices, stereo works just fine. For transcoded files stored on a media server, you may prefer one of the more “advanced” mix choices. Finally, DRC stands for “Dynamic Range Compression.” This only works with AC3 audio, and makes the softest sounds a bit louder. This may help when listening to the audio of the transcoded file in noisy environments.
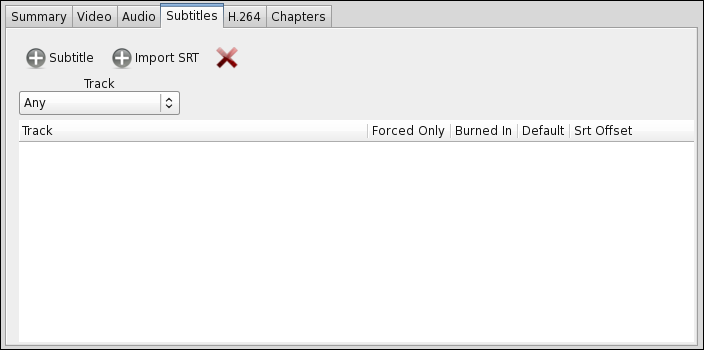
Under the “Subtitles” tab, you can specify any subtitles you might want to include in your transcoded video. If you are trancoding from a DVD, you can specify the language that you want to use for your subtitles (from those on the disc). You can also specify an external SRT file containing the subtitles for your trancoded video. The HandBrake wiki has a whole section on subtitles
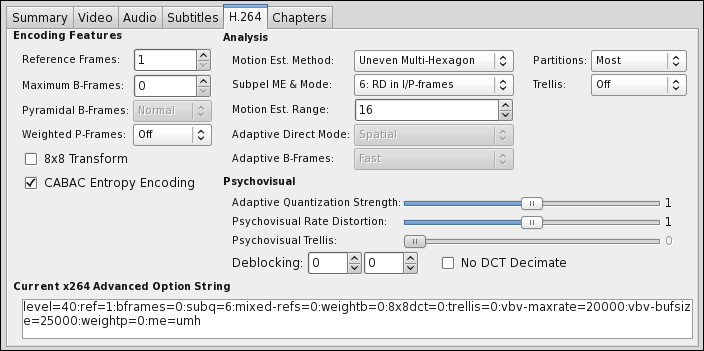
If you are transcoding your video as H.264 MPEG4 video, there are a host of additional settings you can make to fine tune the transcoding. Rather than turn this article into an explanation of what all of these settings do, you can mouse over each of the settings for a brief explanation, which will appear in a popup window. You can also visit the HandBrake wiki page for a discussion of advanced x264 options.
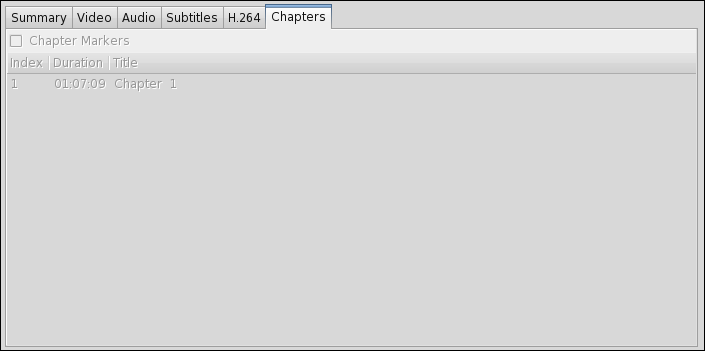
The “Chapters” tab is particularly useful if you are transcoding video from an DVD, which has chapter information. In the example above, since I have chosen to transcode from another video file that does not contain chapter information, my options are “grayed out” and unavailable. But when you transcode from DVD, you can preserve the chapter information that is on the DVD disc. In fact, this is one of the advantages of using MPEG4 video. It can preserve and maintain chapter information throughout the file. It is also one of the reasons that output support for *.avi and *.ogm files were dropped, since both of those file formats do not support the inclusion of chapters. However, not all portable devices that support MPEG4 video playback support or recognize chapters in the MPEG4 video file.
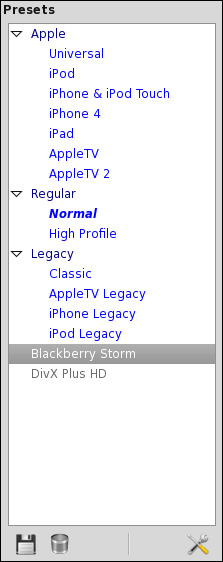
At the far right side of the HandBrake window are presets for the transcoding of your video files. If it looks rather Apple Mac OS X specific, you are not mistaken. Given that HandBrake was originally written for the Mac OS X, coupled with the market dominance of Apple products in the field of portable media devices, it is no wonder.Chances are high you will find that one of the listed presets will work just fine for your portable device, right out of the box. Even minimally, you are likely to find that one of the presets works particularly well with your portable device, with only a small amount of tweaking of the settings.
I found that the iPhone & iPod Touch preset works very well at producing video files that play back on my Blackberry Storm. While it works well “out of the box,” I have tweaked it to achieve a smaller file size. Once you have your preset tweaked how you like it, simply click on the “disk” icon at the bottom part of this panel to save your custom preset for future use.
It is also possible to find other custom presets for HandBrake on the internet. For example, the custom “DivX Plus HD” preset was found on the DivX site. Also, if you want to find custom presets for your portable device (or information on creating your own custom preset), you can perform a web search for “handbrake presets for htc incredible,” replacing “htc incredible” with the name of your portable device.

Once you have all of your settings as you like or want them, it’s time to start your video transcoding. Simply click on the green icon with the arrow on the icon toolbar, and go make yourself dinner. The progress bar at the bottom of the HandBrake window will keep you updated on the progress of the transcoding. The video transcoding process is likely to take some time to complete. Remember that working with video files takes a fair amount of time, so I would recommend that you go do something else until the process is complete. How long the process takes is quite dependent on your processor speed and the number of cores your processor possesses.
On my single core AMD Athlon XP 3000+, a video just over 1 hour in length takes over an hour and a half to finish transcoding. Meanwhile, on one of my laptops with a dual core Intel processor, I can transcode a two hour video from DVD in less than an hour. Also, don’t forget that working with video files requires that you have plenty of free hard drive space. Video files tend to be quite large, and their size seems to grow exponentially when you select the higher quality settings for your transcoding.
Menu Highlights First of all, under the “File” menu, you will want to set the location of where you want HandBrake to save your transcoded video. Without doing anything at all, your video files will be stored in your /home directory. It would be much handier – and tidier – to store them in a subdirectory. The second thing under the “File” menu that you may want to tweak are the “Preferences.”
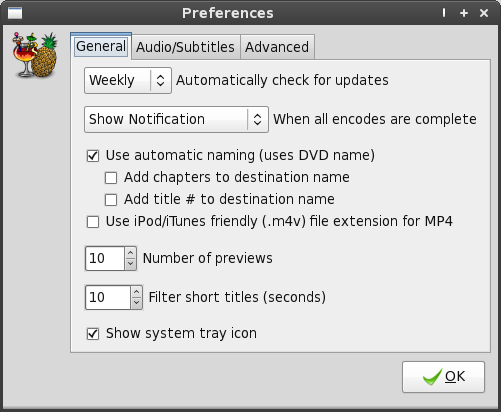
Under the “General” tab, there are two
settings which you are likely to want to tweak. The first, “Use
automatic naming (uses DVD name),” will use the name of the DVD as the
filename for your transcoded video file. The default value is checked.
The second thing you may want to tweak is the “Use iPod/iTunes friendly
(.mv4) file extension for MP4” setting. Since I’m not using an iPod or
iTunes, I prefer to have my *.mp4 files saved as *.mp4 files. Since the
default is to have this option turned on, I have unchecked this option.
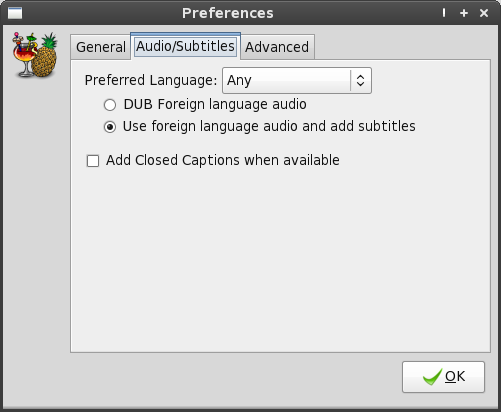
Under the “Preferences” tab, you can set
the preferred language to use for audio and subtitles. You can also
choose to include Closed Captions, whenever they are available.
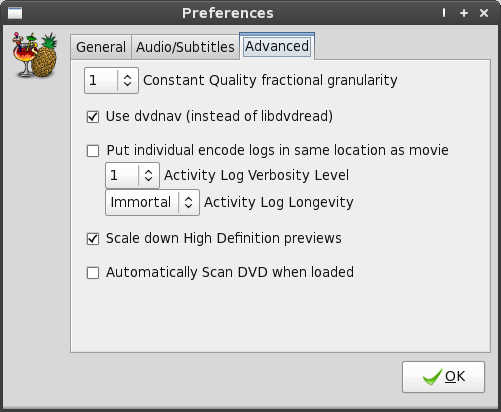
Under the “Advanced” tab, you can choose
some options that govern the behavior of HandBrake. The only one here
that may not be obvious is the “Activity Log Verbosity Level” setting.
A setting of “1” is default, and is medium verbosity. If you want a
less verbose output in the activity log, choose “0” as the verbosity
level. Similarly, if you want more information, select “2” as the
verbosity level. You may also want to keep the encoding logs in the
same directory as the encoded video, to make their access more
convenient. Unless you check this box, all of your encoding logs will
be stored in the /home/[user]/.config/gbh directory.
Checking the “Automatically Scan DVD
when loaded” option will save yourself a little time, especially if you
are transcoding from several DVDs during a transcoding session.
Summary
HandBrake is a very powerful tool that
should fit very well into any digital video enthusiast’s chest of
tools. It makes the transcoding of video for playback on portable
devices quite simple, with a minimal learning curve. The quality of the
video produced is quite good, as well. With more and more portable
devices – such as tablets – hitting the market, PCLinuxOS users are
going to find themselves turning to HandBrake more and more, so they
can get digital copies of their content stored on those portable
devices.
Personally, I find the lack of support
for *.avi and *.ogm files as choices for output file format a bit
limiting, especially the lack of support for *.avi files.
I personally
wouldn’t miss support for the *.ogm files, since there isn’t widespread
acceptance or usage of that particular file format. Despite the
declaration by the HandBrake developers that those formats are
obsolete, I would prefer, as a user, to have the choice to use them.
The AVI format does, after all, have widespread and near universal
acceptance, and can be played back on the greatest number of platforms
and devices.
I feel it should be my choice whether or
not to use an “obsolete” format, and not left to the lofty agenda of a
handful of developers who think they know better than me what I need.
The HandBrake developers have made it abundantly clear in the HandBrake
FAQ that support for AVI and OGM as output
formats are gone from HandBrake for good and forever.
In the end, I could further transcode
the MP4 file produced by HandBrake into an AVI file, using Avidemux.
However, that added step will mean an extra step in the process, could
adversely affect video quality, and will require additional time to
accomplish.
Yet, even with this limitation,
HandBrake comes highly recommended.
It does what it does, exceptionally
well. For more information, visit the HandBrake web
site, where a full wiki, user manual and forum can be accessed.