| Previous
Page |
PCLinuxOS
Magazine |
PCLinuxOS |
Article List |
Disclaimer |
Next Page |
Xfce Power User Tips, Tricks & Tweaks: Archive File Management
|
|
by Paul Arnote (parnote) If you've been around or worked with computers for any length of time, you've certainly had to work with archive files, bearing such filename extensions as zip, tar.gz, tar.bz2, xz, 7z, rar, etc. In fact, you might have even had to create a few (or a few thousand) yourself. Without a shadow of a doubt, you've had to extract the information from an archive file that a friend or family member sent you, or that you downloaded from some corner of the Internet.  The assorted archive formats have been around since ... well ... forever. They are very useful for placing a multitude of files -- related or not -- into one file. This makes it easier to keep things organized -- one file to keep track of, instead of 147. They also help to keep associated and related files together, so that the recipient has everything all in one file. It also makes it easier to share files with friends, family members, co-workers, associates and anyone else that you might want to share files with. Most archive formats compress the files in the archive, allowing you to store those files in less space on your hard drive. Other archive formats don't compress the files at all. Their "job" is to just keep all of the files together, in one convenient spot. We're not going to discuss the different archive formats in any detail here. This article isn't intended to be a tutorial about the various archive file formats. That information is readily available and easy to find, and goes into much more detail than is necessary for our needs here. 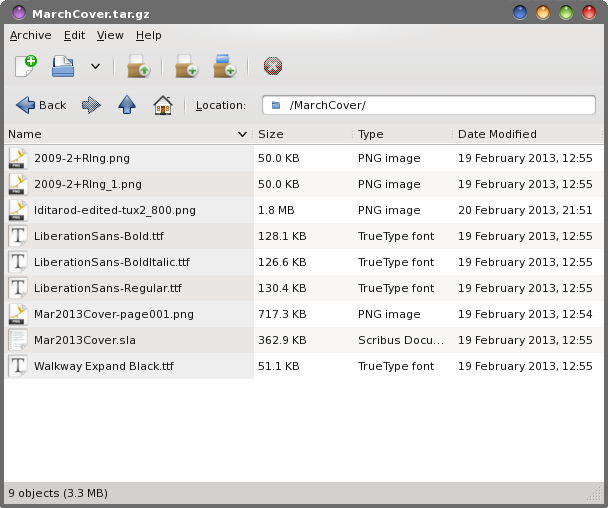 File Roller displaying the contents of a tar.gz file Linux is blessed enough to have several choices. Ark, File Roller and Squeeze are three popular programs with excellent graphical user interfaces. There are many more command line programs available for dealing with the assortment of archive file formats floating around out there. I have to admit that it gets tiresome to open each archive file individually in a typical archive manager program, though. As good as those programs are, there are times when I simply want to take a brief peek into the archive file without having to launch my trusty archive manager program. Sometimes, I want to simply create an archive file. Other times, I simply want to extract an archive file to my hard drive, without even looking to see what's inside (I receive many archive files every month from trusted sources). As an Xfce desktop user, I have some "other" choices for how to deal and work with archive files. Thanks to Thunar's Custom Actions, even more of those choices are available to me with only one or two clicks of the mouse. If you are not a Xfce user, don't worry. A lot of the information in this article can be used from the command line as well, with minor modifications in some cases, and virtually no modification in other cases. The Native Xfce Solution Fortunately, the Xfce developers have included a plugin for Thunar that assists with working with archive files. Unfortunately, in the four years I've been using mostly Xfce as my main desktop, that plugin would break, they would fix it, then it would break again, then they would fix it again. On and on this cycle seems to go, without an end in sight. As a result, I've lost confidence in using the Thunar archive plugin. In fact, I've uninstalled it from my computers, to prevent being disappointed the next time it breaks (and to prevent confusing it with my home brewed solution, below). So, as much as I hate to admit it, I don't recommend using the Thunar archive plugin. If you're like me, you need something that performs properly, every time out of the gate. I don't want to have to worry whether everything made it into the archive file. I need unfettered dependability, and something that works consistently -- every time. An Alternative Solution Since archive files have been around forever, there are many other tools available to help me deal and work with them. All of the individual archive file formats has its own command line tool for working with them. Some have two tools to use, depending on if you are creating or extracting an archive. Of course, no two command line tools could possibly have the same command line switches, so you have to remember different command line switches for every tool you use, which quickly gets confusing and cumbersome. Granted, using the dedicated command line tool for a particular archive file format gives you the most control over your archive file formats and any work you need to perform with (or on) them. But those dreaded command line switches .... Of all of the tools available, I've stumbled upon one that truly makes working with archive files easy and painless. It is a command line tool, called atool. Currently up to version 0.39.0, atool is a collection of Perl scripts that provide a common set of commands for dealing with every type of archive file supported on your system. Thus, you have but only one set of command line switches to remember, rather than a different set for each and every archive tool. You can install atool from the PCLinuxOS repository, via Synaptic. This would also be a good time to install any other archive formats you wish to work with -- or think that you might encounter. If you want to work with 7z files, you will want to install p7zip. If you want to work with rar files, you will want to install rarlinux. Most of the more common archive tools (zip, unzip, tar, gzip, bzip, etc.) should already be installed on your PCLinuxOS installation. Here are the command line options, gathered up for you by running atool --help at the command line:
atool --help
Usage: atool [OPTION]... ARCHIVE [FILE]...
atool -e [OPTION]... [ARCHIVE]...
Manage file archives of various types.
Commands:
-l, --list list files in archive (als)
-x, --extract extract files from archive (aunpack)
-X, --extract-to=PATH extract archive to specified directory
-a, --add create archive (apack)
-c, --cat extract file to standard out (acat)
-d, --diff generate a diff between two archives (adiff)
-r, --repack repack archives to a different format (arepack)
--help display this help and exit
--version output version information and exit
Options:
-e, --each execute command above for each file specified
-F, --format=EXT override archive format (see below)
-O, --format-option=OPT give specific options to the archiver
-D, --subdir always create subdirectory when extracting
-f, --force allow overwriting of local files
-q, --quiet decrease verbosity level by one
-v, --verbose increase verbosity level by one
-V, --verbosity=LEVEL specify verbosity (0, 1 or 2)
-p, --page send output through pager
-0, --null filenames from standard in are null-byte separated
-E, --explain explain what is being done by atool
-S, --simulate simulation mode - no filesystem changes are made
-o, --option=KEY=VALUE override a configuration option
--config=FILE load configuration defaults from file
Archive format (for --format) may be specified either as a
file extension ("tar.gz") or as "tar+gzip".
Report bugs to Oskar Liljeblad Notice how some of the commands have a separate command listed in parenthesis at the end of the line of text in the help statement. The really nice thing is that you can use the atool command, or you can direct your commands straight to the command that atool will ultimately use and call. There are six separate commands (other than atool) that you can use:
als - lists files in an archivea We'll use three of these commands (als, aunpack and arepack), along with the atool command, in our Thunar Custom Actions. These four commands will cover 99.9% of the archive file management tasks that most users will need to perform. If you have or find a need for any of the others that we didn't use, please feel free to use the information here to help tailor your own Thunar Custom Action to perform your desired task. Plus, if you develop a Thunar Custom Action using any of the "other" atool commands, please drop me a note about it at pclinuxos.mag@gmail.com. Listing The Contents Of Archive Files Sometimes -- ok, often times -- the name of an archive file is a bit less descriptive of its contents than you might like it to be. This can make it difficult to figure out what's in the archive file, unless you open it up in the resident archive manager. However, we can take a peek at the files in an archive file much more easily, and with less overhead. Create a new Thunar Custom Action. Give it a name on the first line. I called mine "View Archive Contents." On the second line, enter a description. I entered "View the contents of the selected archive file." On the third line, enter the following command: als -l -e %N | zenity --text-info --width=800 --height=300 --title="Archive Contents" Choose an icon for your new Thunar Custom Action. Under the "Appearance Conditions" tab, select "Other Files" and set the file pattern to *.tar.gz;*.tar.bz2;*.7z;*.rar;*.zip; *.tar;*.tar.xz. 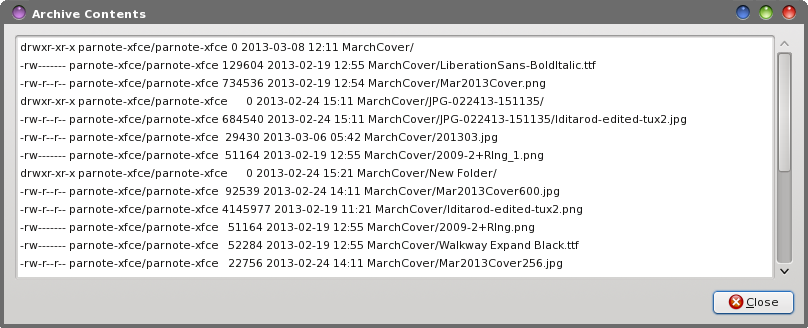 Now, whenever you select "View Archive Contents" from Thunar's right-click context menu, you will see a dialog box similar to the one above, with the contents of the archive files listed in the dialog box. You can select multiple files in Thunar, and the contents of all the archives will be displayed in the dialog box, one after another. Unpacking/Extracting Archive Files Probably one of the most common activities when working with archive files is extracting the archive contents to your hard drive. For being able to extract files from the wide assortment of archive files, this activity begs -- no, cries out -- for some simplification. Sure, you could write a bash file that handles all the different archive file formats, but thanks to atool, we don't have to. 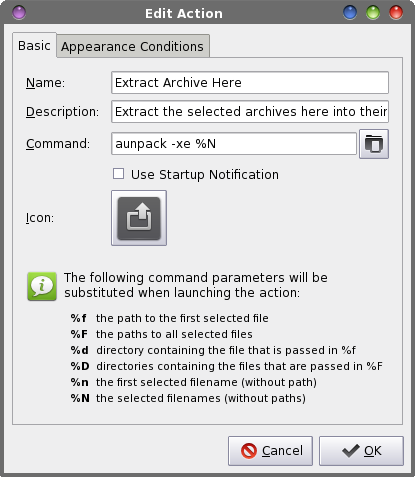 One of the commands that makes up the atool "suite" (it really is a suite of Perl scripts) is the aunpack command. As you can see in the "Edit Action" Thunar Custom Action dialog box above, we give it the name "Extract Archive Here." Under the description, enter "Extract the selected archives here into their own directories." Then, enter the following command: aunpack -xe %N Choose an icon for your new Thunar Custom Action. Under the "Appearance Conditions" tab, select "Other Files," and enter the following as the file pattern to match: *.zip;*.tar;*.tar.gz;*.tar.bz2;*.rar;*tar.xz;*.7z Now, whenever you select "Extract Archive Here" from Thunar's right click context menu, your selected archive files will be extracted, each to their own individual directory. This is one of the added benefits of using atool's aunpack command. The extraction of the archive file's content is automatically placed into its own directory, and you actually have to force the atool suite of commands to overwrite files. Thus, you get an extra layer of "safety" that prevents any of your current files from being overwritten. With that in mind, if you have extracted the files from an archive file previously and wish to repeat that action, it might be a good idea to rename the folder to where the archive file's contents were extracted the first time. Creating Archive Files To fully replace the Thunar archive plugin, I had to find a way to an create an archive file from multiple, non-contiguous files, as well as being able create an archive file from an entire directory. Luckily, the atools suite of commands provided just that. Plus, since we're creating a file, we need a way to give that file a name. The easiest way to satisfy all of the requirements is to create a bash file. Here is that bash file, which I have called compressor.sh: #! /bin/sh This bash file has had a few other versions before getting to the version you see above. Looking at it again, I notice that we can make the bash file even shorter by completely eliminating the long if-then-else statement where it checks for a proper archive file format extension. From that long statement, we'll save only the atool command. Previous versions had the user entering the archive file extension manually, instead of selecting it from a list (as this version has you do). The long if statement helped to check if the archive file extension was properly entered without typos, and if it wasn't, to display an error message and exit. Since the end user is selecting the archive file extension from a list, we've eliminated the possibility of entering an improper file extension. As a result, the error message box will never, ever be displayed. So, with those changes, the compressor.sh bash file becomes this: #! /bin/sh ARCHIVE=`zenity --title="Archive name" --entry --entry 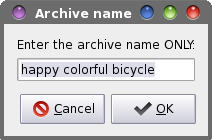 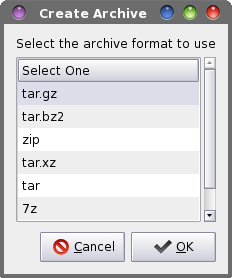 The bash file also pre-selects a filename for you, based on the first filename passed to the script. If you have selected multiple files, then the name of the first file in the list of files is automatically filled into the archive name dialog box, stripped of its file extension. If you have selected a directory to compress, then the name of the selected directory is automatically filled into the archive name dialog box. In either case, if you want to name it something else, simply type the preferred name into the archive name dialog box. Although using spaces in filenames shows bad form, I've attempted to create this bash script to be tolerant of spaces in filenames. Spaces in filenames can cause problems with many command line tools, the group of programs to which atool definitely belongs. Whenever possible, you should avoid using spaces in filenames. Hence, if you are typing in this bash script, be extra careful with what quotes you are using throughout the bash script. "" is not the same as ‘', and neither are the same as ``. They all have different meanings in a bash script. Type (or copy) the bash script into your favorite plain text editor, and be sure to save it (preferably somewhere within your system's path). Don't forget to make the file executable (Properties > Permissions > Allow this file to run as a program). 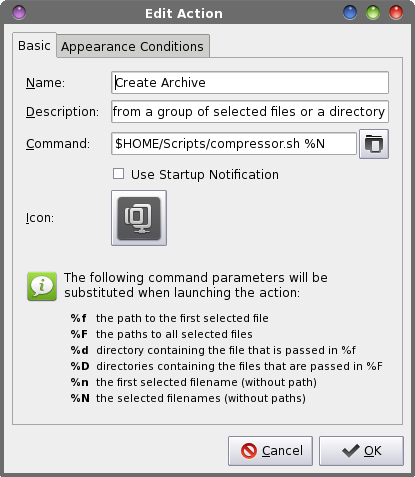 Enter "Create Archive" as the name. Under the description, enter "Create an archive file from a group of selected files or a directory." Enter the following command on the third line: $HOME/Scripts/compressor.sh %N (I store all of my custom scripts in my /home directory, under a "Scripts" directory). Select an icon for your new Thunar Custom Action. Under the "Appearance Conditions" tab, leave * as the file pattern, and place a checkmark in front of every file type. Now, when you right click on a group of files or a directory and select "Create Archive" from the Thunar right click context menu, an archive of the name you specify and of the type you specify will be made in the current directory. Repacking An Archive This handy command is rather unique. It will take the archive files you specify (multiple files are allowed) and it will repackage them into a different archive file format. Let's say you have a tar.gz archive file containing images from your recent vacation. You want to share them with your sister, cousin and parents. However, they all use Windows, and everyone knows that zip files "rule" on Windows. To be sure that they can open and view the images, you need to change the tar.gz file to a zip file. Sure, you could just extract the tar.gz file and re-compress it as a zip file. But that involves quite a few extra steps. What if we could just automagically change the tar.gz file to a zip file in just one easy step? With the atool suite, it is possible. To properly handle multiple archive files and to properly rename the files, a bash script becomes necessary. Here is the bash script, which I've named archive-repack.sh: #! /bin/sh n=1 TYPE=$(zenity --list --column="Select One" --title="Repack Just as with the compressor.sh bash script, I've attempted to make the archive-repack.sh bash script tolerant of filenames with spaces in them. I won't belabor the previous discussion about spaces in filenames here, again. The same statements made earlier still stand. Copy or type in the archive-repack.sh bash script in your favorite plain text editor. Save the file, and don't forget to make it executable. Create a new Thunar Custom Action. On the first line, enter a name. I called mine "Repack Archives." On the second line, enter a description. I entered "Repack the selected archive files to another archive file format." On the third line, enter the following command:$HOME/Scripts/archive-repack.sh %N Select an icon for your new Thunar Custom Action. Under the "Appearance Conditions" tab, select "Other Files," and set the file pattern to this: *.zip;*.tar;*.tar.gz;*.tar.bz2;*.rar;*tar.xz;*.7z 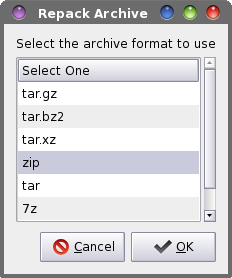 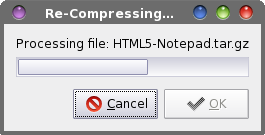 Now, when you select "Repack Archives" from the Thunar right click context menu, the selected archive files will all be repackaged into the archive file format that you select. A Zenity dialog box displays the progress through the process. Summary The addition of these four new Thunar Custom Actions not only adds new capabilities to archive management with Thunar, but it also completely replaces the often-breaking Thunar archive plugin. Managing your archive files has never been so easy. |


