
| Previous
Page |
PCLinuxOS
Magazine |
PCLinuxOS |
Article List |
Disclaimer |
Next Page |
Using gLabels: An Update |
|
by Meemaw It came to my attention recently that since I wrote my previous article on gLabels, it1s been nearly 9 years! While I did mention several features of gLabels, my favorite label program, I didn't do an actual tutorial or even review of the program. However, I did another one earlier. This one1s the how-to, but it1s been over 9 years since I wrote that. I recently had to do some labels at work (using my Windows 10 laptop) and found myself wishing I had gLabels with me in the town where my meeting was. It would have been MUCH simpler. gLabels is my absolute go-to for labels. It is in the PCLinuxOS repo and has been for as long as I can remember (it1s been a while since I registered on the forum in 2006). The current version is 3.4.1. Let me refresh your memory. I1m sure many of you already know this, but I1m going to try to cover details anyway. When you open the gLabels window, it1s pretty blank, until you choose the label you want to use. 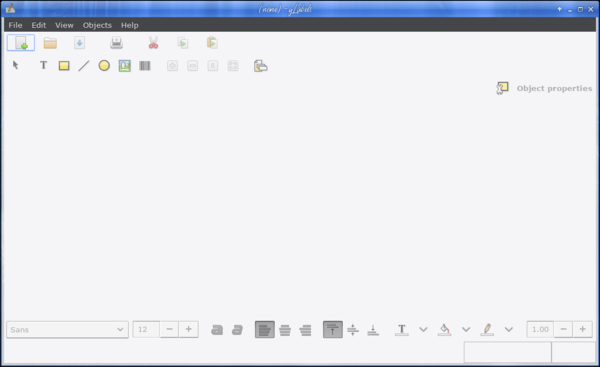 At this point, the only two tools that will function are the Create new file and Open file buttons at top left. Click on Create new file to start a label from scratch. The first window you'll get is one which asks which label style you want. If you have a certain label style you want, (and it seems to have most all of the standard Avery numbers saved), you can choose it from the list. 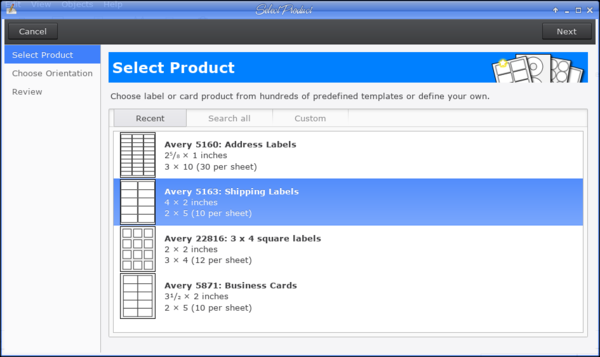 Just under Select Product you will see 3 tabs: Recent, Search all and Custom. If you have used some recently, like I have, they will appear in your Recent tab. Search all is just what it says, a listing of all the label styles the program has. It1s organized by brand, paper size and category (square labels, round labels, CD/DVD cover labels, etc). If you can't find what you need, you can always create your own, and that will be stored in the Custom tab. The last label I did was a 2 x 4 label for a manila envelope for a project at work. They were all alike, so it was the easiest to do. The steps were as follows: * Choose the label - mine were 2 x 4. Clicking on the 2 x 4 label illustration and clicking next, you are then asked which way you want your label oriented. Depending on what you are doing you can turn it either way. (I haven't seen this feature in Office.) 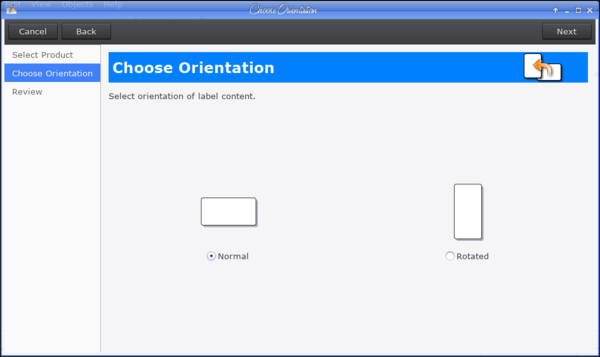 * Review Selection - The third window will ask you to review what you chose to verify your choices, then you can click Apply.  Now you will have a nice window with your label in it, ready to design. 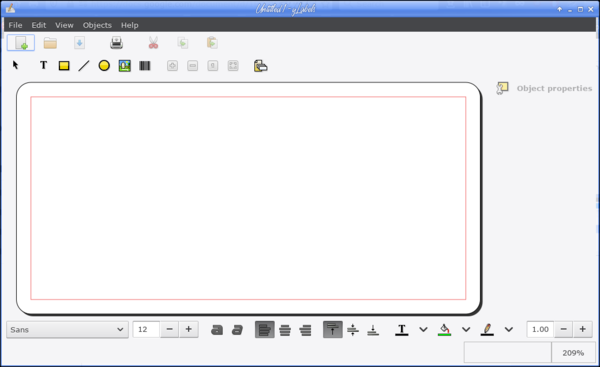 You'll notice that most all of the tools work now. The first row is standard New, Open Save, Print, Cut, Copy and Paste. The second row is the ones you need now. From left to right, Select, Move and Modify - Create text object - Create box/rectangular object - Create line object - Create ellipse/circle object - Create image object - Create barcode object. The next four tools Increase magnification, Decrease magnification, Restore scale to 100% and Set scale to fit window. The last tool is the Merge Properties tool. 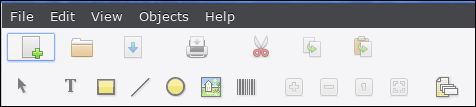 Let1s add some text. Click on the Create text object, then click where you want the text to be. You'll get a box with the word Text in it, and a sidebar will appear at the right of the window with all the editing tools you need. The tools are arranged in tabs, depending on what you want to do. The first tab says Text, and you can type your text there, or directly into the text box on your label. 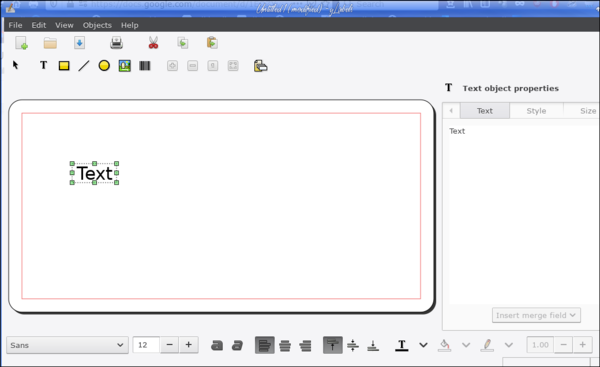 The next tab says Style, where you can change font, font size, bold, italic, font color and whether the font is centered either way inside the text box. The Size tab controls the size of the text box. The Position tab controls the position of the text box in the label. The Shadow tab is where the text shadow is enabled, and where you can set the offset, color and opacity of the shadow. Also, some of the most used text tools are across the bottom of the window. Here I have added 2 text boxes, and want the selected one centered. To do that, right click on the text box and choose Center > Center Horizontally. 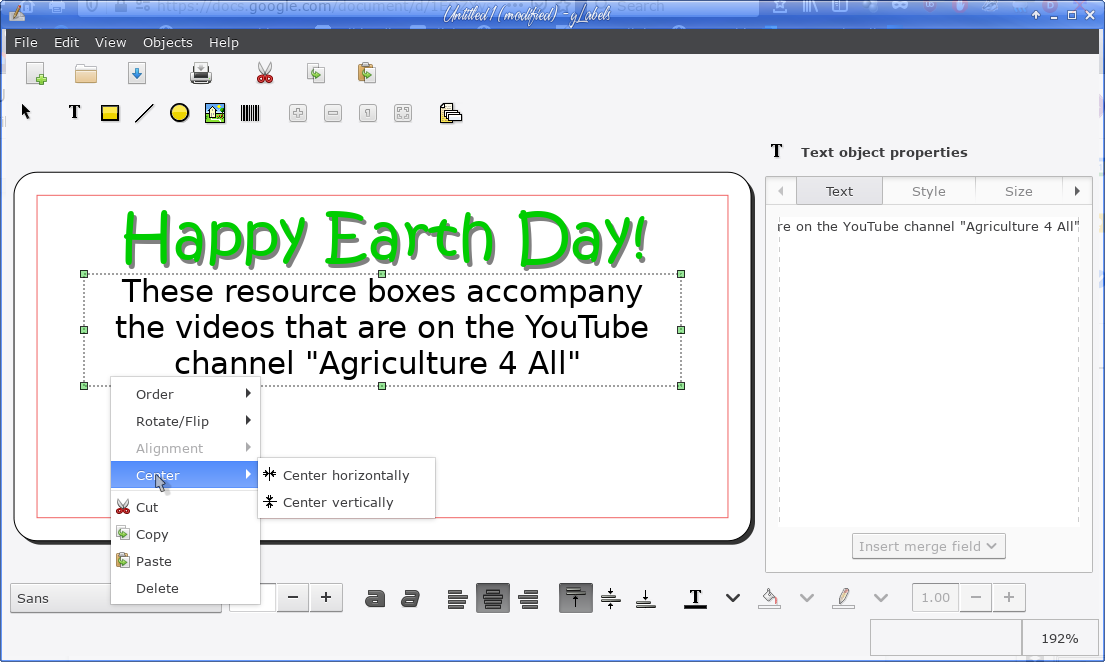 You can add rectangles, circles, lines and images using the other tools. You can even create a barcode if you know what you1re doing. I clicked on Style and changed the Backend setting to QREncode, then used the web address for this magazine, and got a QR code for the magazine site. 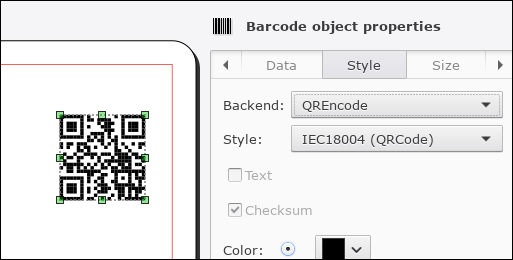 So, what if you want to make labels with names and addresses? gLabels is the best/easiest program I know. You should have a spreadsheet of your names/addresses already created. Save it as a .csv file. When you have opened your label file, click on the Merge Properties tool. You will be asked what kind of file you have: choose Comma Separated Values (CSV) with keys on line 1 (that means your spreadsheet columns have the names of each column on the first line). I was also doing labels for boxes of educational resources we were gifting, so mine says Teacher Name, School, Town and Number of Students on line 1 with the information below. After you choose that, the next line will enable you to specify your spreadsheet and file location. 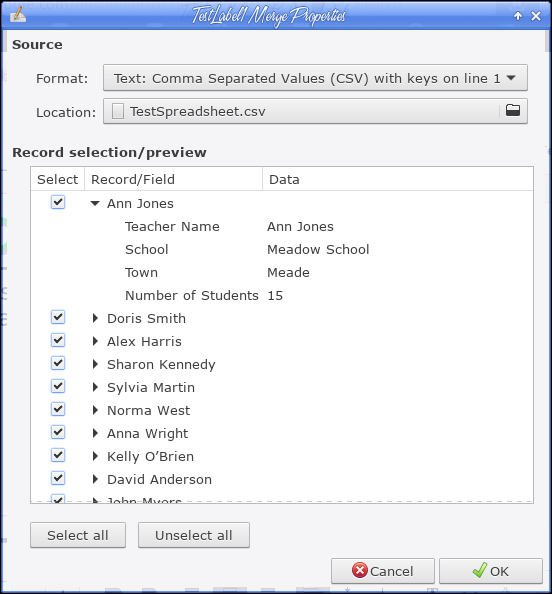 What I really like about this screen is that you don't have to make labels for every name if you don't want to (if you send Christmas cards, do you send to every single person in your address book?) All you have to do is uncheck the ones you don't want to use. I expanded the first line so you could see that the headings are there. If I wanted to leave someone out, I would just clear the checkbox at the left. I don't, so everyone is selected. Click OK, go back to your label and add a new text box. Now, in your Text tab, the Add Merge Field Button will be activated. Choose your fields, then add and arrange them. 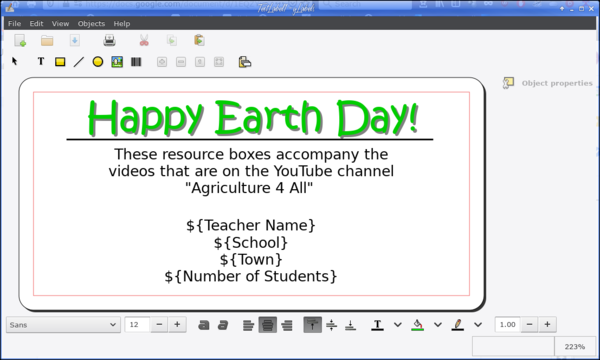 To see your merge, simply press Print, then look at the Print Preview. If it looks the way it should, you can print your labels from there. 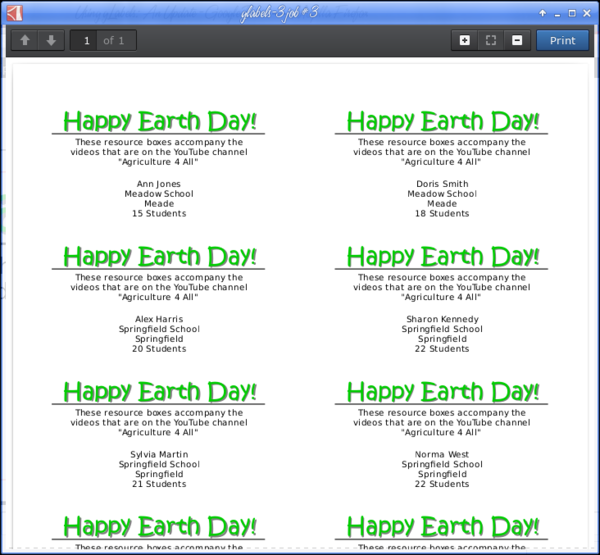 I usually close my print preview and go one step further, exporting my labels as a PDF. I1ve had trouble in the past with my printer pulling through 2 pages unevenly, and ruining both pages. If I can go back to a PDF, I can print only those pages which were ruined. Also, if I make it at home and print it at work, which I do sometimes, the PDF is really convenient because I don't have gLabels on my work computer (unfortunately). Some labels can be printed again many times, like return address labels. If I have it saved as a PDF, the spacing is perfect and I can print it as many times as I want. gLabels just works. Every time. Easily. I love it! |