| Previous
Page |
PCLinuxOS
Magazine |
PCLinuxOS |
Article List |
Disclaimer |
Next Page |
Video Editing With Shotcut |
|
by Meemaw I recently took on a project at work which involved editing videos. I wasn't sure how to do that, or even what editor to use, but Shotcut and Avidemux were recommended to me as good programs. Both have Windows versions as well, and both are in our repo. I chose Shotcut, knowing I could use it on my work computer (Windows) and my home computer (PCLinuxOS, of course!). I also frequently take my work laptop to another office, and wanted to be able to work there as well. While working on my project, I have gotten started learning Shotcut. I won't pretend I know everything about it, but this article might get you started if you're interested. Let's explore. Installing Shotcut is very quick and easy. When you open it, you get the following window: 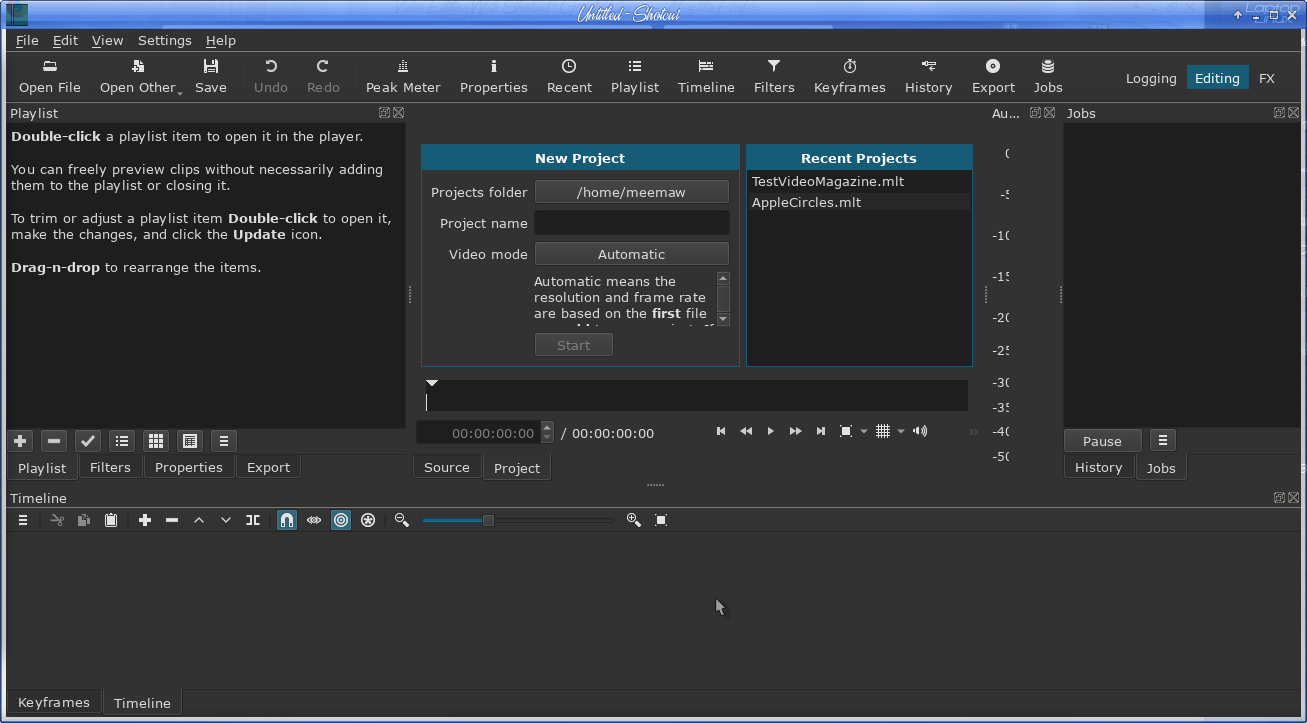 Wow! There's a lot of stuff there! Some of it you can close, but it's actually arranged pretty well, with some of the important items in tabs. Across the top of the window are several tools you will use (Open, Save, Undo, Redo) plus buttons for something you may have closed (Peak Meter, Playlist, Timeline or Filters). Across the middle of the window is the Playlist, the New Project window, the Recent Projects window, the Peak Meter (that's the vertical line of numbers) and the Jobs window. Below the New and Recent windows you will see the controls for the player. Once you have a file to play, the New and Recent sections will be replaced by the screen for the video player. You can start off by entering a name for your project, and designating the folder you're saving it to using the New Project window. Or, you can start by adding some files to your Playlist. You can choose Open, or you can position your file manager near Shotcut, highlight the clips you want to use, and then click and drag them over to the Playlist window on the left. Notice that at the bottom of the Playlist window, there are some tabs. You'll most likely see Playlist, Filters, Properties and Export. These are the tools you'll be using most of the time (however, I haven't used Properties much). If you started off clicking and dragging, be sure to click on File > Save As… and save your project. 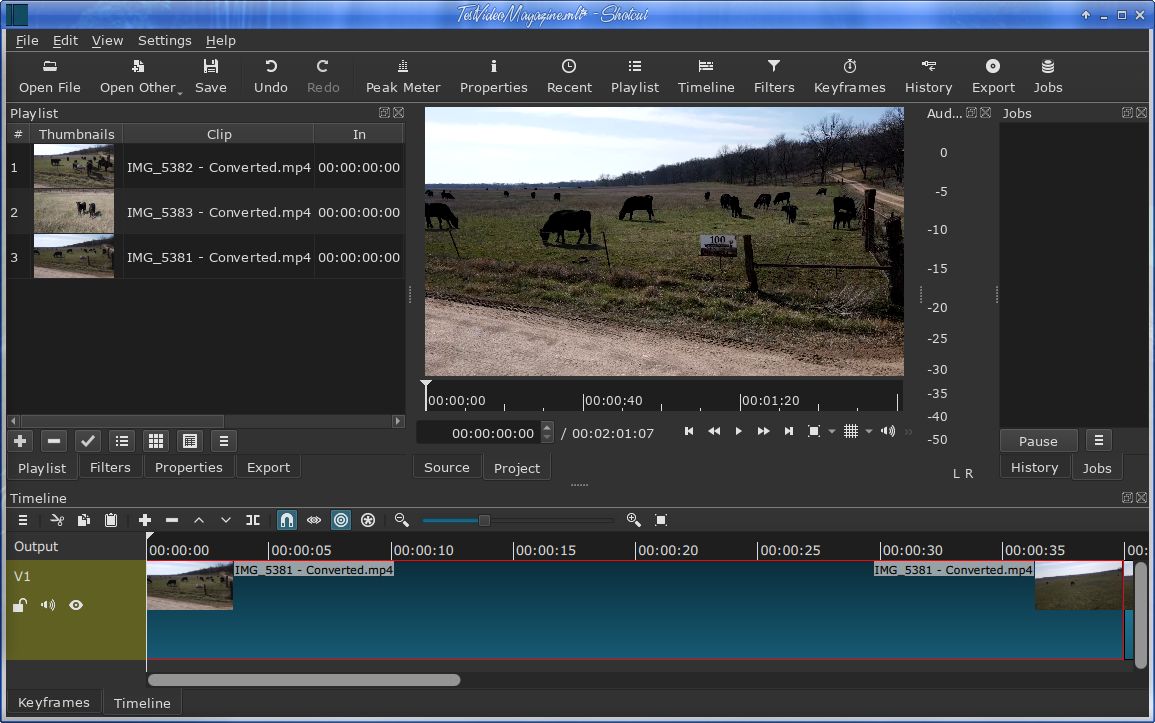 With video clips in your playlist, you can start by choosing the clip you want to use first, and dragging it down to the bottom of the window into the Timeline. When you have a video selected, the Properties tab shows the properties of that particular clip. It will show handy things like speed, duration, codec, resolution and aspect ratio. 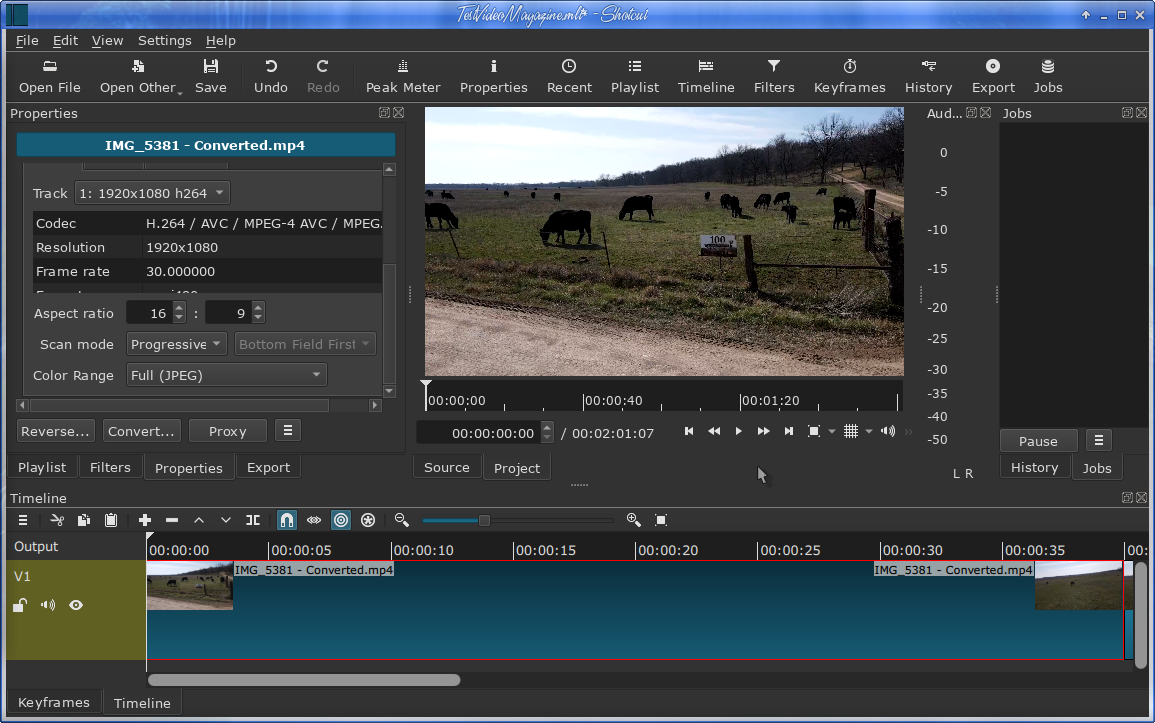 Above the Timeline, you'll see another toolbar. These are the tools you'll use to edit the clip.  The hamburger at the left has another menu of additional tools that might be used, such as adding another track or removing one. After that from left to right: Cut, Copy, Paste, Append, Remove, Lift (remove clip without affecting the position of the other clips), Overwrite clip onto the current track, Split at playhead, Toggle snapping, Scrub while dragging, Ripple trim and drop, Ripple edits across all tracks, Zoom in and out, and Zoom timeline to fit. If you hover your mouse over each, you will get these descriptions. Let's look at each briefly. Cut, Copy and Paste are just what they are everywhere else. Append can insert a clip into your timeline, either at the beginning (if you're just starting) or after a track that is selected. Remove can remove a clip or part of a clip. Lift removes a clip without moving any of the other clips. If you have 3 clips in a row and you lift the center one, the space will remain. Overwrite clip onto the current track lets you place a clip in the place of another one. Split at playhead allows you to choose a spot in your clip and cut it into two pieces. The playhead is a vertical line that travels through the clip while it's playing to show you where you are. Toggle snapping is one of the tools that works automatically when it's toggled on. It shoves one clip up against the end of the clip before it without any effort on your part. Scrub while dragging lets you drag the playhead across your clip and it will play at whatever speed you are dragging (instead of normal speed which may be too fast for you) in order for you to be more precise on your split. Ripple trim and drop is actually trim & drop which has a "ripple effect" - this means that you can drop a clip in anywhere, but it will move every clip after it over to the right, and if there's a space between them, the space will stay. Ripple edits across all tracks - You might have to experiment with this a bit, because I'm not sure I used it. However, the documentation says that Ripple trim and drop has to be toggled on to use this one. Zoom in and out is the slide bar with the plus and minus on each end. It zooms into the timeline so you can edit more effectively.
Okay, now you have your clips in your Playlist and have dragged one down into the timeline. Choose the one you want to use next and drag it down as well. If you have Toggle snapping on, the second clip will snap up against the end of your first. 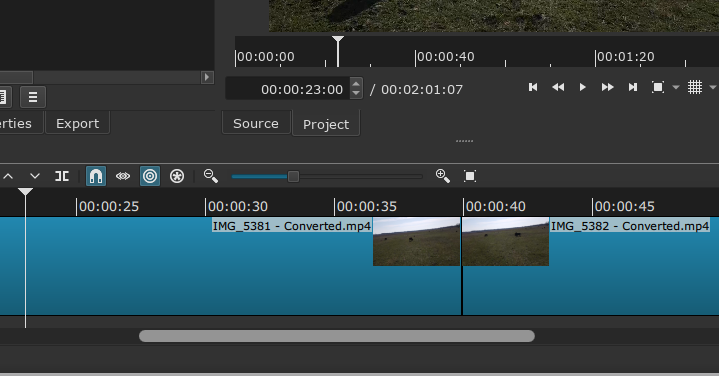 While my clips look identical, they are only similar in that they are successive clips of a drone flying over a cow pasture. I want to make them smoother than just one clip snapped up against the one before it. There are a couple of methods of fading out of one clip and into another, and the first one's fairly easy. Grabbing the second clip, move it over the edge of the first. You'll have to experiment with your clips to see what works the best, but if you have 2 or 3 seconds that you can overlap, it seems to work pretty well most of the time. As you can see in the player, one clip is fading out in favor of the next. In the timeline, you can see the overlap (it looks like a box with an X in it).  If you have a soundtrack, make sure your speakers are finished speaking before your overlap. Another way to connect your clips with a smooth transition is to Fade In and Fade Out. These are filters. In your main screen, the tab next to Playlist is Filters. With a clip chosen, and the Filters tab chosen, you must Add a filter to see the list. 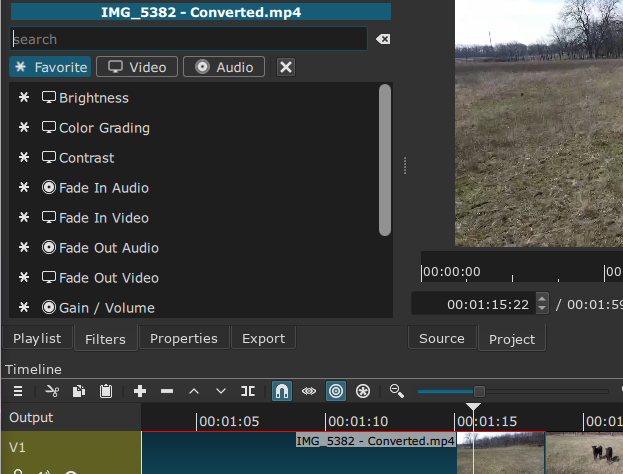 As you can see, there are three sections in this window: Favorite, Video and Audio. With the clip chosen, I selected Fade Out Video. The program will add a black triangle at the end of the clip, and the default is 1 second. If you hover your mouse over the clip at the top, you can see that your cursor has changed to a finger and a circle has appeared on the end of the triangle. Moving the circle with your mouse will lengthen or shorten the time your fade-out lasts. You might have to zoom into the clip to grab the handle. 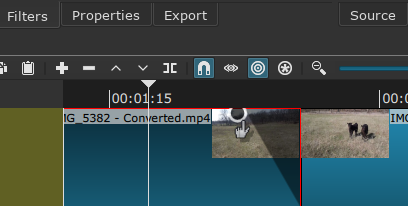 You can see here that the clip is darker, and it fades out to black (although there is a setting to change the opacity of the fade). 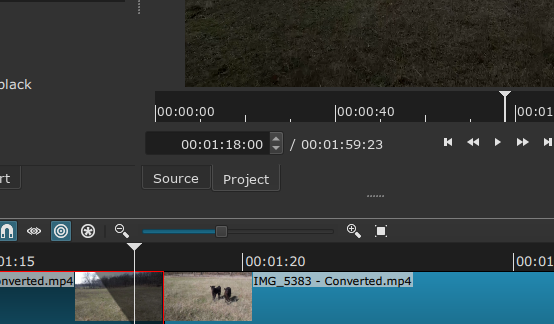 Many of the most-used filters are in Favorites and have an asterisk (*) to the left of the title. If you can't find what you're looking for, look in one of the other tabs, and then make it a favorite by clicking on the asterisk on that line. I might use Hue/Lightness/Saturation a bit, so I made it a favorite. When I go back to the Favorites Menu, it is there. In my editing I found a great variation in the volume of the individual clips. No one wants to watch a video that they have to keep turning up and down, or a section that blasts really loud, so another one of the useful filters is Gain / Volume. When your video has an audio track, the Peak Meter (the vertical line of numbers to the right of the player window). measures the volume. This clip is from a different video. You can see the volume in the Peak meter. This particular clip was recorded loud, so I used the Gain/Volume filter to reduce the volume so it was a bit less loud, and the same filter on the subsequent clip to boost the volume a bit, aiming for something similar on each clip so the volume on the whole video would be fairly uniform. 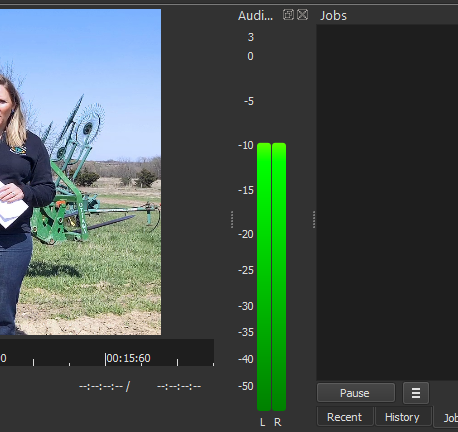 In the filter window you have a slide bar to control the volume. I slid the bar to the left a bit to turn it down, and replayed the clip, going back & forth until it was where I wanted it. I'm sure there's a better way, but that worked for me. Another filter I used was the Text filter. You can use this to add text to a clip. Again, make sure you have selected the clip you want to use, then click Filters. Text: Rich is in Favorites, so add it. 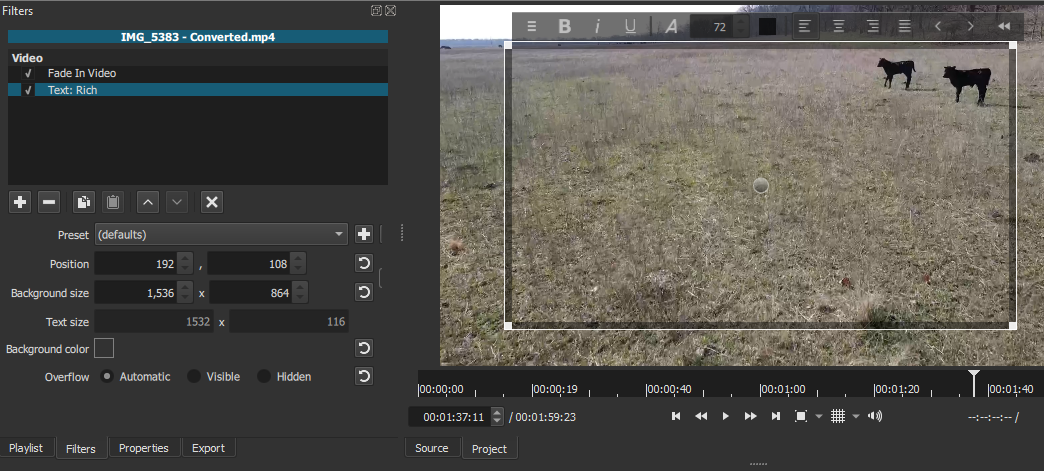 Notice now that I have a big text box on the screen with formatting tools at the top and a faint circle in the middle of the box. You can use your mouse to change the font, size, alignment, etc., before or after you add your text (after you add it, you will, of course, have to highlight it). At left, you can choose size and position, plus text size and background color. The Preset drop-down allows you to choose how you want the text to appear on the screen, with choices like Slide in from left, Slide out top and Slow zoom in (or out). I could have taken advantage of these, but didn't, as I had an email I wanted to display during all of the conclusion clip. The handles at the corners help resize the text box and the circle in the center lets you move it to your desired location. To get rid of the text box so you can see the result, just click on another filter or deselect the text filter. 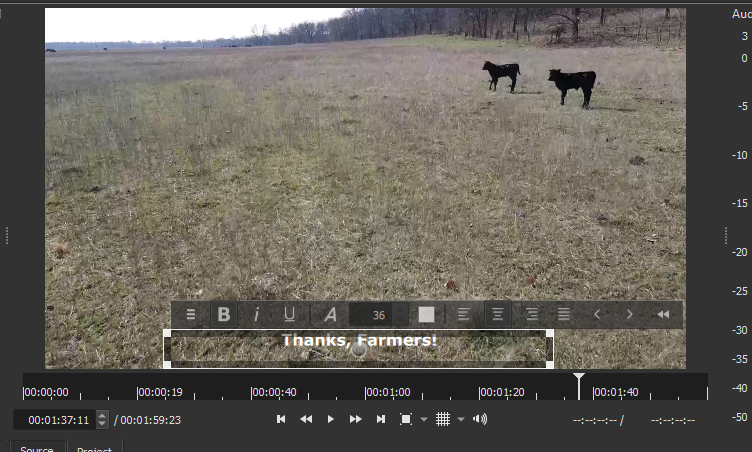  Another thing you can do is add an audio track to your video. The ones I did for work already had them, so I didn't get too much experience with that, but clicking the hamburger menu in the Timeline, you can choose Timeline Operations > Add Audio Track, and experiment. This video had no audio. When you finish your editing, you can Export your work as a video file. Not knowing enough about the types of video file formats, I chose to stay with the default. Here's the Export window with the standard message. It says "The defaults create a H.264/AAC MP4 file, which is suitable for most users and purposes. Choose a Preset at the left before deciding to use the Advanced mode. The Advanced mode does not prevent creating an invalid combination of options!" 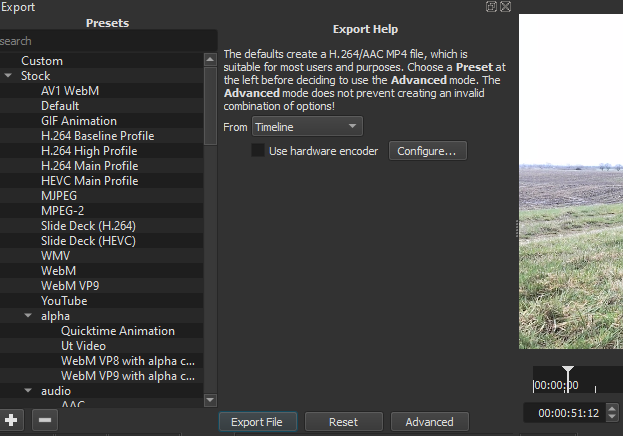 I just stayed with the default. There's a button that says Export File, so click on that. You will see a window that gives you the opportunity to change the filename and location if you wish, then it will export it. Be prepared for it to take a while (some of mine were finished in 10 - 15 minutes). Longer videos will take longer to export (my longest video was 19 minutes long when completed). This so far is my experience with Shotcut. I intend to do lots more experimentation, but if you have a project you want to do, you should be able to get started with this short tutorial. You can find the sample video here. I did an article on OpenShot in Sept, 2015. With all the problems that OpenShot seems to be having at the moment, I think Shotcut may be a good substitute. Agent Smith did an earlier article on Shotcut in May of 2020. |