Linux Financial Apps: Money Manager EX
by Meemaw
The next financial program we will look at is Money Manager EX. Their website is http://www.codelathe.com/mmex/ and your introduction to the program says:
“Money Manager Ex is a free, open-source, cross-platform, easy-to-use personal finance software. It primarily helps organize one's finances and keeps track of where, when and how the money goes. It is also a great tool to get a bird's eye view of your financial worth.”
You will find a User Guide in 4 languages (English, Italian, French, Russian) at http://moneymanagerex.svn.sourceforge.net/viewvc/moneymanagerex/trunk/mmex/doc/help/index.html
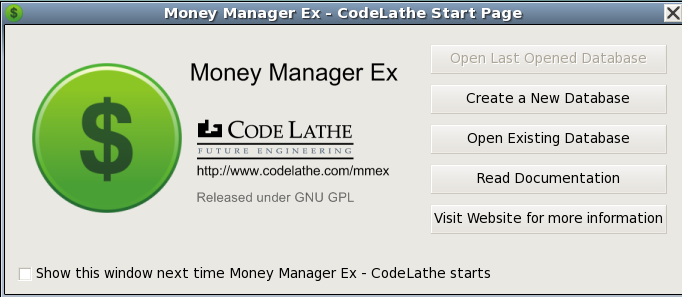
The first time you start MMEx, you will be asked to create a new database or open an existing one. Since you have none, you will have to create one. Notice that you won’t get this window after the first time unless you check the box at bottom left.
Clicking on Create a new database, you will see the main screen with a blank section on the right. In front of it, a Save dialog will open, asking you to name your database. Then, a New Database Wizard will open. You will see windows to set your currency and a user name. The user name can be different from your file name and is optional. The Add New Account window will appear asking what the name of the account is (they suggest the name of the bank) and what type of account it is (Checking/Savings, Investment or Term). Then an account window will appear to let you put in more details about the account you are creating.
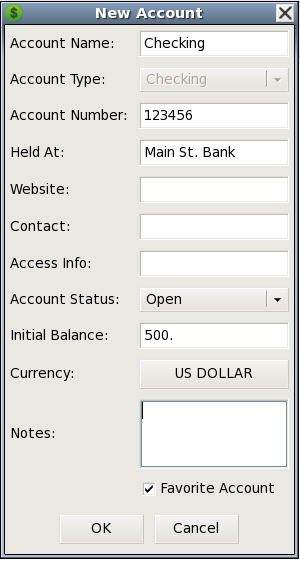
You can edit the name of the account, put in the account number, contact information, website and even notes about the account. The only thing that is required here is the Initial Balance, but if you forget it, you can right click the account in the tree at the left and choose Edit Account. You can create your main accounts now, and can always go back and add other accounts later. I added checking and savings accounts first, and I can go back at any time and add an investment account.
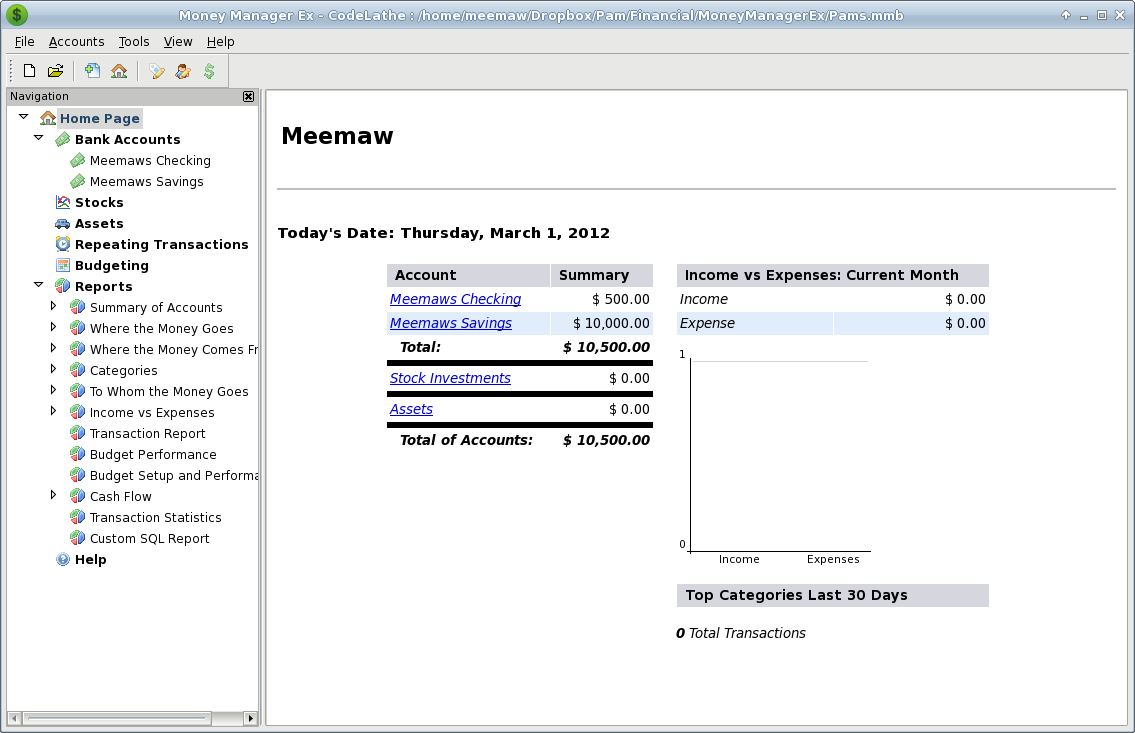
Now the main screen looks like this:
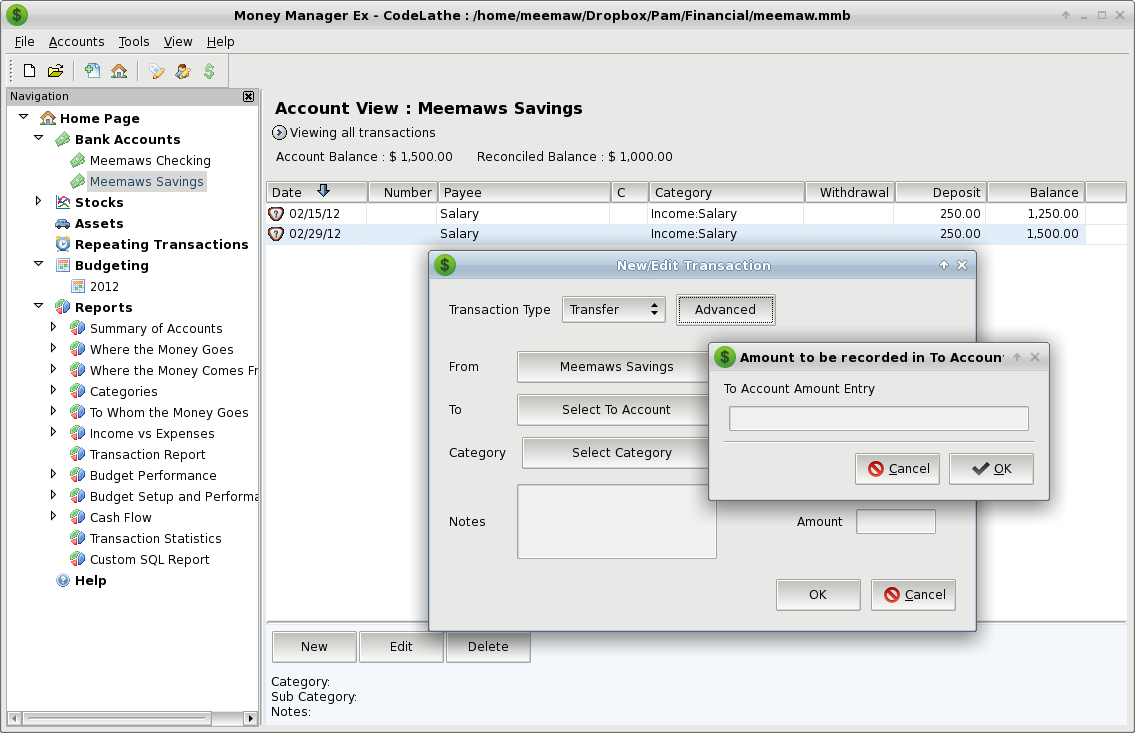
Now we should start entering transactions. In the tree on the left, click on the account you want to use. You will get the following screen:
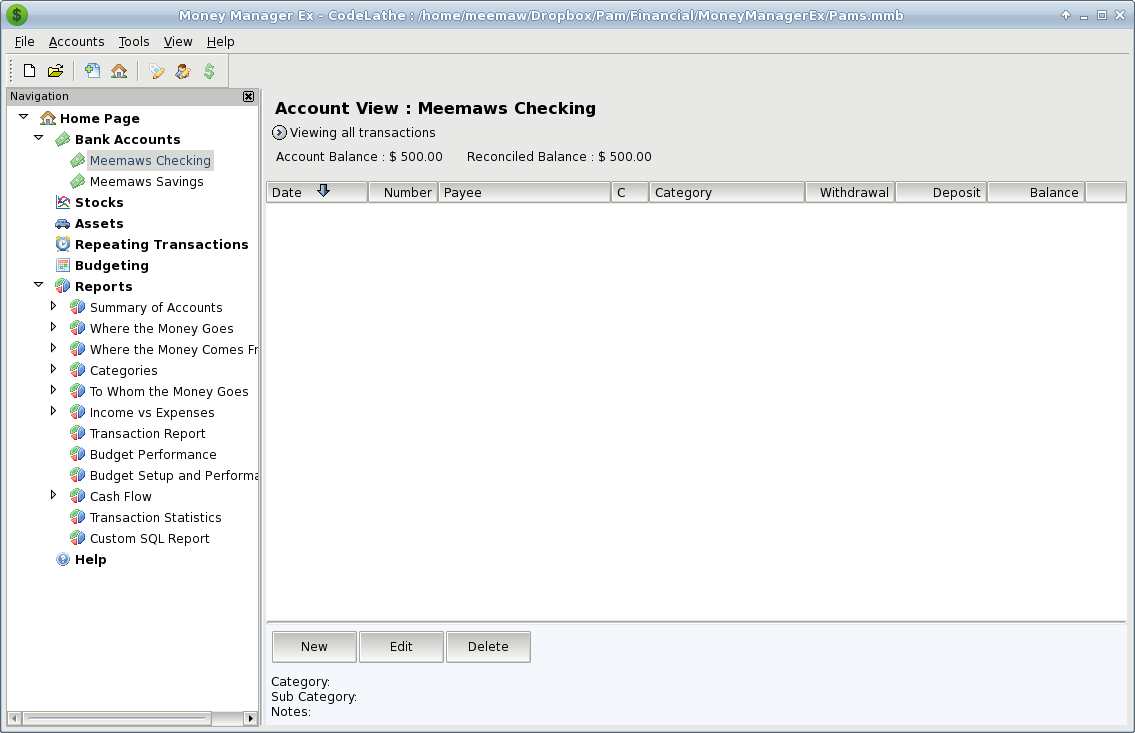
At the bottom of the window you will see three buttons: New, Edit and Delete. Click on New to add a new transaction. You will get the following window:
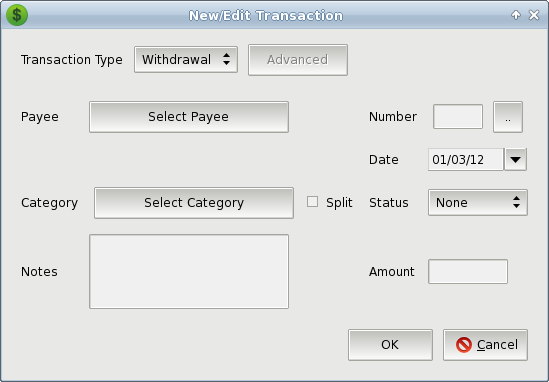
You need to choose the type of transaction: Withdrawal, Deposit or Transfer. Most of the time you will use Withdrawal and Deposit. To enter a payment (withdrawal) you will need to put in the check Number, Payee, Date, Category and Amount. You will have to add your own Payees, but you will have a standard list of Categories to use. You can always add more categories and payees with the Organize Payees and Organize Categories dialogs buttons in the toolbar.
If you need to do a Transfer, you will need to be in the account from which you are transferring money. Change the transaction type to Transfer and the Advanced button will show up. Click on it and a pair of different transactions windows will show. In the first, you will need to designate how much you are transferring, then click OK. Then the other window will need to be completed with the account to which the money is going, along with the date, category and amount.
As you add transactions, your payee list will grow, since you add every new payee yourself.
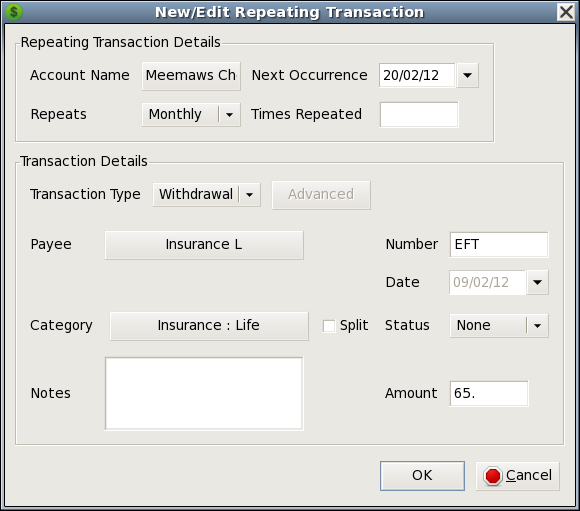
This program has a separate section for recurring transactions, rather than making that section obscure like in a couple of programs we’ve seen. From the tree at the left of your window, click on Repeating Transactions, and you’ll get another window at right where you have Add, Edit, Delete, Enter and Skip buttons at the bottom. Add, Edit and Delete are the same as for the transaction screen. When you add a transaction, you will get the add screen and fill in the same information as for a regular transaction, with the addition of the frequency of the transaction and which account it is to be used. You also have the option to have the program add this to your designated account automatically. If you don’t do that, the Enter and Skip buttons in the main window make it possible for you to place the transaction into your checkbook when you want them there. You can also skip the next occurrence if required. When you go back to the main window, you will see the payee, account, category and amount of the transaction, along with the frequency of the transaction plus how long it is until the next occurrence.
After you have your transactions entered, you can look at reports. There are several reports already set up in the program, so you may find the one you need without trying to configure one yourself. Most of the pre-configured reports have versions for different time frames: this month, last month, last 30 days, this year and last year. You can do a report for a specific category by using the transaction report. When you click it, you will get a window which asks you to specify the account you want to use, the category and/or payee, and the time frame desired. You will then get a list specific to those items, so if you want to know how much you paid to your landlord for rent last year, you can narrow your transaction list to that specific information.
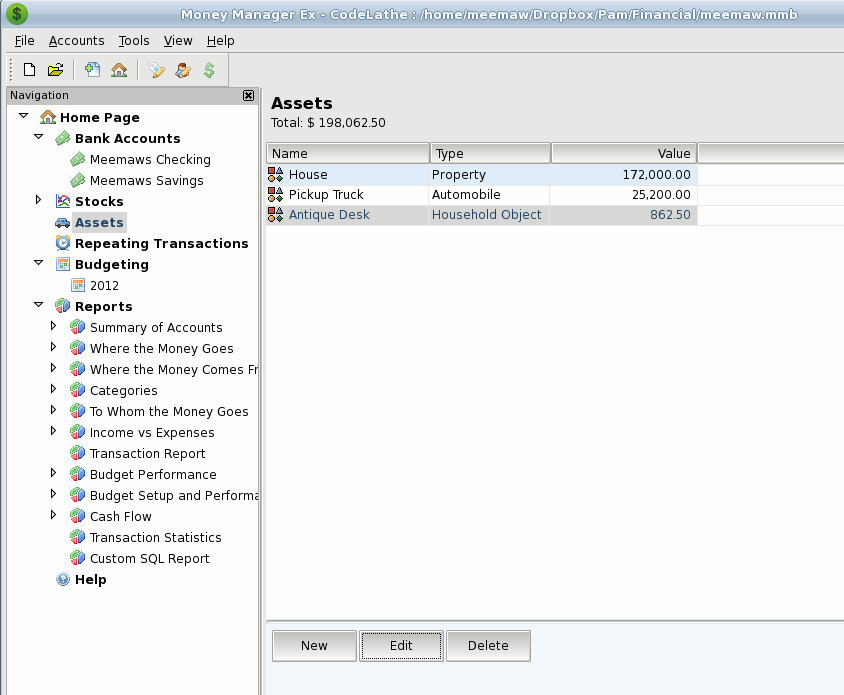
MoneyManagerEX also allows you to keep track of not only financial assets, like bank accounts and stocks, but it also has a section where you can list your property assets, like cars and houses and personal belongings. This may be a good place to make a list of that coin collection or gun collection or your valuable pieces of jewelry. Your Add window will ask for the following: Name of Item, Date of Purchase and Asset Type (this is a dropdown containing Property, Automobile, Household Object, Art, Jewelry, Cash or Other). In addition, you will have to insert the Value, Change in Value (you should designate whether each item appreciates, depreciates or doesn’t change) and the percent of change per year. You can also add notes to your entry. Clicking OK takes you back to the summary window where your item is listed. If you have had it for a while, the appreciated or depreciated value is already there.
Just as with one of our earlier programs, you can keep track of your stock portfolio with this program. Right-clicking on Stocks in the tree at left, choose Add Account. Instead of a checking or savings, this should be an investment account. You will again get the New Account window where you can add other information if you wish. Click on the new account you just created. I named mine Stock Portfolio. In the window, you will get the buttons New, Edit, Delete, Refresh and Settings. The Settings button is used to designate the site you wish to use for your prices. The program’s default setting is finance.yahoo.com and asks you to designate when the market opens and closes and how often it should refresh your prices. Clicking New gives you the smaller window shown, where you can add a new stock acquisition. You need to enter the name of the stock, plus the symbol used, the date you bought the stock, the number of shares, and what you paid. You will see a handy button which pulls up the stock’s web page in the stock site you use. After you are finished you can go back and Edit any of them if you’ve made a mistake.
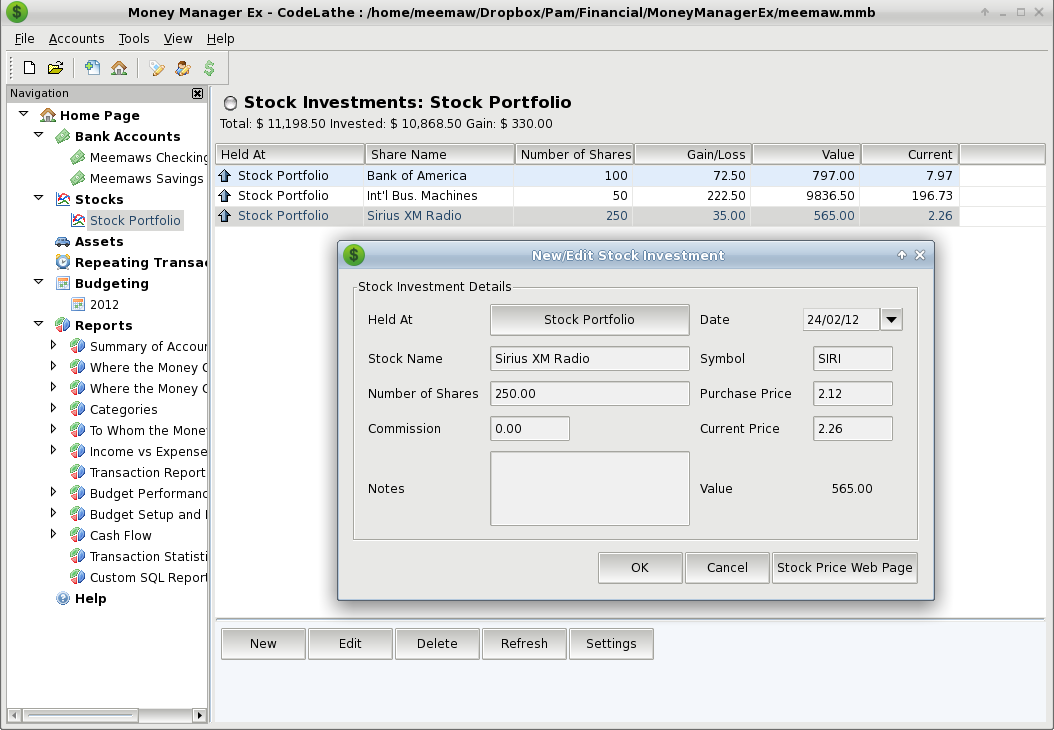
If you sell all of a stock, you can delete it. Using the Refresh button will give you your current values.
This program works pretty well. I haven’t found any idiosyncrasies that irritate me like I did in earlier programs, and everything displays well.


