| Previous
Page |
PCLinuxOS
Magazine |
PCLinuxOS |
Article List |
Disclaimer |
Next Page |
Inkscape: Getting Started
|
|
by Meemaw While we have enjoyed creating many wonderful things with GIMP, you should know that GIMP is not the only graphics program to use. GIMP is primarily for editing photos. Inkscape is a great program for creating images from scratch. While that sounds daunting, it really isn't too hard. With a little practice, you can make some really nice images. I have done much more with Inkscape than I ever could with a pencil and paper. I'm far from being an artist, but with the Inkscape program to help, things come out much better. Let's take a look at the basic window and see what's there. 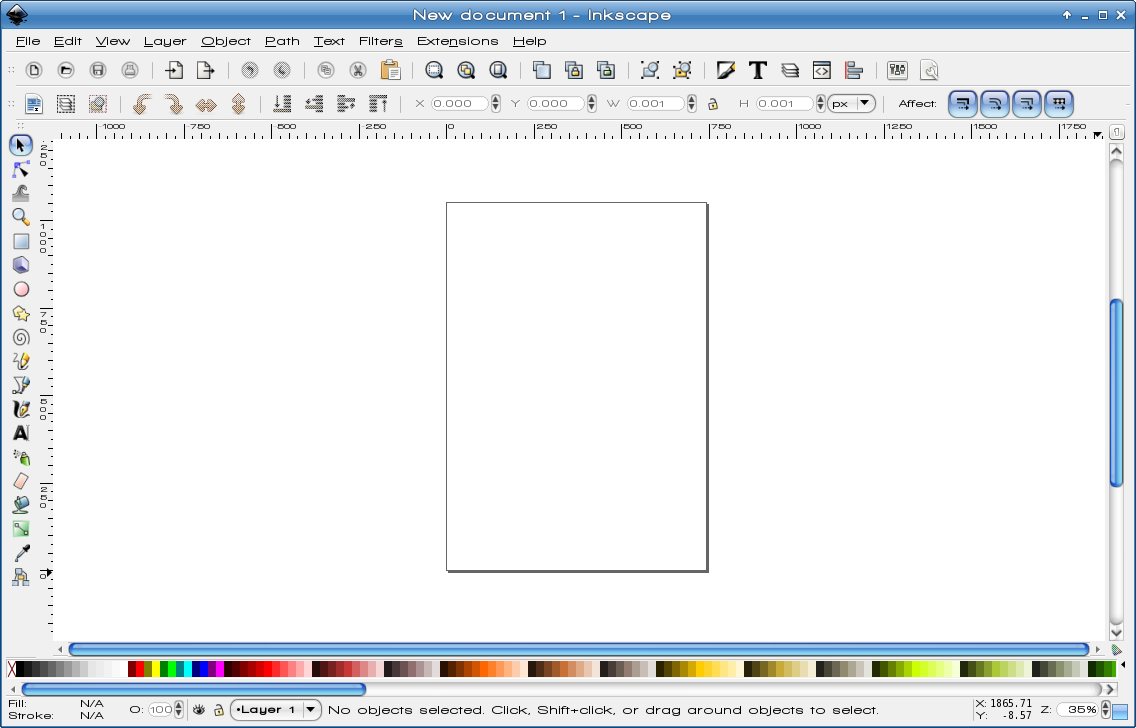 When you open Inkscape for the first time, you get the window as shown above. You already have a new document in your work area, and rulers across the top and down the left side. You can change your preferences to show or hide any number of tools as you want. Across the top we see the Menu bar with the items File, Edit View, Layer, Object, Path, Text, Filters, Extensions and Help. Many of the items can be accessed elsewhere, and we'll see that soon.  Under the menu bar is the Commands Bar, which has many of the most used tools. The first eleven default tools here are New, Open, Save, Print, Import, Export, Undo, Redo, Copy, Cut & Paste. The rest of the tools are used together with the tools at the left side of the window, or to help you navigate your project, and need a little explanation. The next three look like magnifying glasses with boxes inside. These are zoom tools: from left to right, they are 'Zoom to fit Selection in Window', Zoom to fit Drawing in Window' and 'Zoom to fit Page in Window'. They are an easy way to zoom in and out conveniently between the whole page and any selection you are working on. These are also accessible from the menu bar under View > Zoom. The next three look like two overlapping sheets of paper with one blank, one with a closed lock and one with an open lock. These are 'Duplicate the selected Object', 'Create a Clone of the Selected Object that is Linked to the Original' and 'Cut the selected Clone's Links to their originals'. These are used to duplicate or clone something you are making, in case you need more than one of the same thing (like stars or flowers). If you duplicate your object, you can make different changes to it than are made on the original. If you clone your object, the changes you make to the original also are made on the clone. This is handy if you need two objects exactly alike except for color, for example. If you have cloned the original, you can make all the changes, then use the third button to cut the connection between the two, then change the color on one of them. These items are also available from the menu bar under Edit > Duplicate or Edit > Clone. The next two look like a circle and rectangle with black dots around them. The one on the left is 'Group Selected Objects' and the one on the right is 'Ungroup Selected Objects'. In some of your creations, you will want to group certain objects together to make your finished project. These buttons are very handy to group them, and also to ungroup them again if you find you need to undo something. These are available from the menu bar under Object > Group and Object > Ungroup. The last seven tools are probably the most used on this bar. From left to right, they are Fill & Stroke, Text Configuration, Layers, Edit XML Tree, Align & Distribute, Inkscape Settings and Edit Document Properties. Each of these tools, when clicked, brings up a separate window, so we'll look at them.
Just in case you haven't noticed, every time you hover your mouse over a tool, you get a tooltip with the description of the tool and also the keyboard shortcut for that tool. So if you hover over Fill & Stroke, the shortcut is <Shift> + <CTRL> + F. Now you have three ways to get that tool. Use whichever is easiest for you. Oh, by the way, the Undo command, which is under Edit > Undo is Now let's look at the left side of the window. Your tools are here, and everything you want to make can be done with these tools. In addition, the third toolbar will change depending on what tool you are using. The tools are as follows; Selection Tool - This is the arrow we all know so well. It selects an object with a single click. You will see arrows at the corners of the object's frame, pointing outward, which you can use to resize your object. If you click once more, your arrows will change direction and you can rotate your object. These arrows are called 'handles', and allow you to edit your object in a certain way. 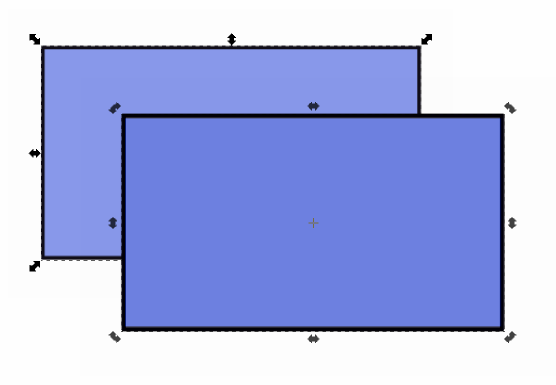 Nodes Tool - When you have an object selected and click on the Nodes tool, your handles will change to small squares and circles, and you will be able to manipulate your object even more. One of the first things you can do is move the circles at top right and it will make rounded corners on your rectangle. When you grab the small circle on an ellipse, you will get either a pie-shaped object (with a piece cut out!) or an arc (where your stroke doesn't go all the way around). The left-hand object was the result of pulling the node handle with the mouse pointer inside the circle, while the arc was made by pulling with it outside. Be prepared for the ellipse to flicker a bit while you are working. The nodes tool is very useful for all your objects. 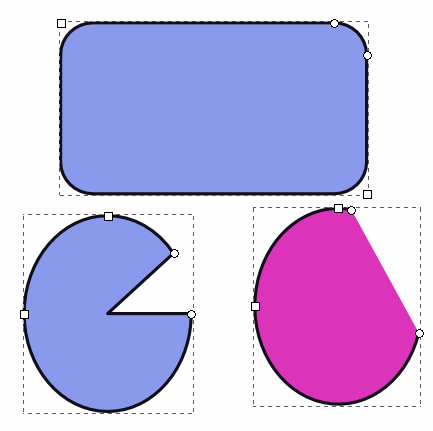 Tweak Tool - The Tweak tool allows you to change your object - blur, move, enlarge, and several other changes. Hovering your mouse over the tools will tell you what each does. Truthfully, I haven't used it much yet, but the tool below is the blur tool. 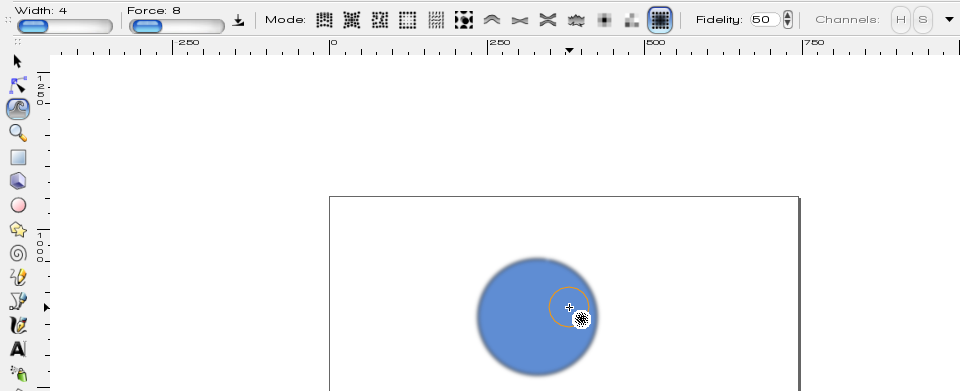 Zoom Tool - Hey, here's another way to zoom into and out of your drawing! Choosing this tool turns your mouse cursor to a magnifying glass with a plus sign in it. Left-clicking in your object zooms in: right-clicking in your object zooms back out. You can also use your scroll wheel - but hold the <CTRL> key while you use it.
Rectangle Tool - Any rectangle you draw will be done with the rectangle tool. You can place your mouse pointer on the page, click and drag to make your rectangle. If you hold down the 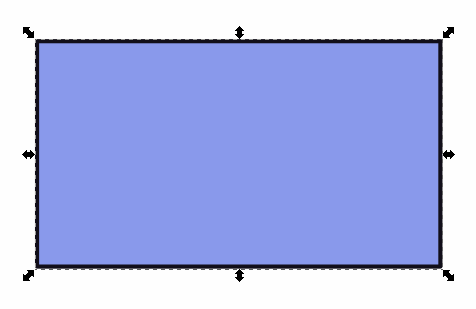 3D Box Tool - This is a tool that will allow you to draw 3 dimensional solids. The box is drawn in perspective, and to manipulate it, you must also move the axes that appear. You will need to experiment with this a bit. 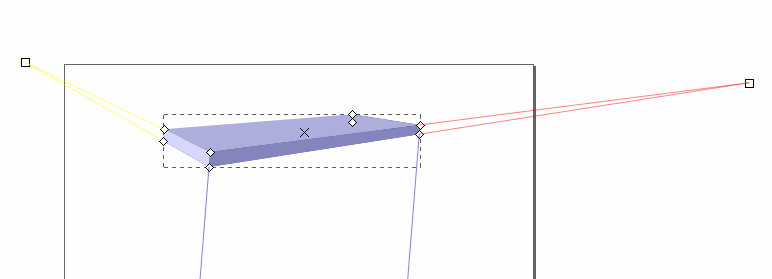
Ellipse Tool - This tool draws ellipses and circles. If you hold down the
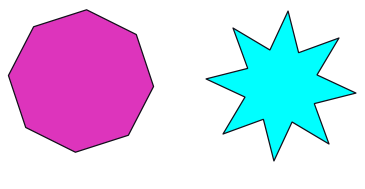
Star Tool - If your desired object has three or more sides, use this tool. With the accompanying toolbar at the top, you can choose whether it will be a polygon or a star, and configure the number of corners you want in your object. If it is a star, you can set the spoke ratio as well (the smaller the number, the more 'pointy' your star is and as the number approaches 1, your star approaches the appearance of a circle). Both examples below have 8 corners, and the star has a spoke ratio of .5. As long as your tool is selected you can change the appearance of your polygon or star, adding more corners or changing the spoke ratio.
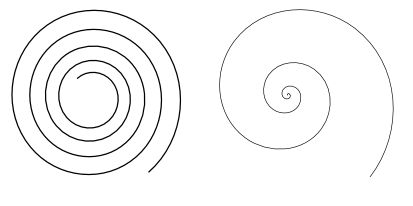
Spiral Tool - The Spiral Tool does just what it says: it draws spirals. The toolbar has three settings: Turns, Divergence, and Inner Radius. Turns designates how many times your line curls around. Divergence is how much farther apart the outer lines are than the inner, and Inner Radius is the radius of the open area inside the spiral. The spiral on the left is 9 turns, divergence of 2 and inner radius of .5. The spiral on the right is 5 turns, divergence of 4 and inner radius of .25. Again, if your tool is still chosen you can change the spiral you just drew to your wishes.
Pencil Tool - The pencil allows you to draw freehand lines on your page. While this is good sometimes, the tool also shows any shake your mouse might have, so if you want an absolutely straight line, you need the pen tool.
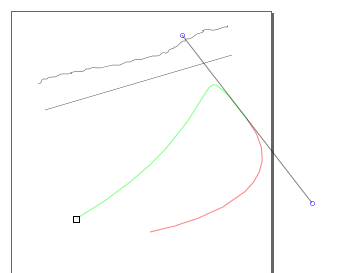
Pen Tool - The pen tool is for Bezier curves and straight lines. A bezier curve is drawn with control points which allow you to edit your curve. Below are three lines: the top was drawn with the pencil, the second was drawn with the pen and the curve is a bezier being drawn. The tools shown above your page will allow you to draw what you want. You can actually draw a spiral using this tool and the node tool, but the spiral tool is easier and faster.
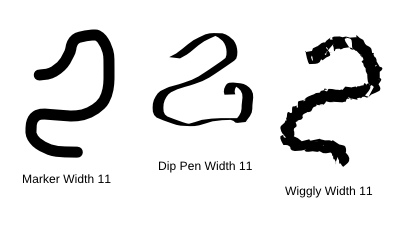
Calligraphy Tool - This is another pen-type tool, but here you can draw calligraphy-type lines with it. The tool settings above your page will change the appearance of your line. You have 6 pre-configured tools, plus a 'No Preset'. The tool can make some interesting variations in lines drawn.
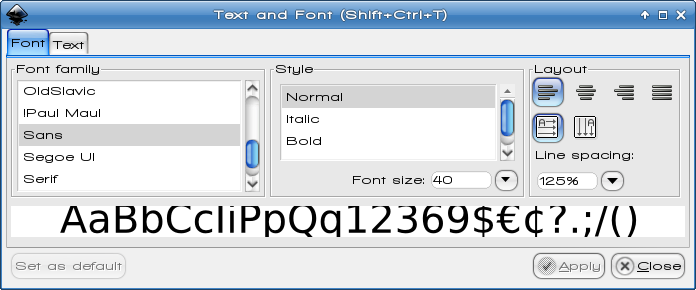
Text Tool - This is the tool which allows you to enter your text. Choose it, then click on your page and you will get a cursor. Type your text, then click the text button at the top to change the font and size. Your text is also displayed there and you can change it, just in case of a typo or any other correction you might wish to make.
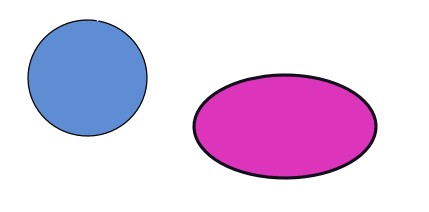
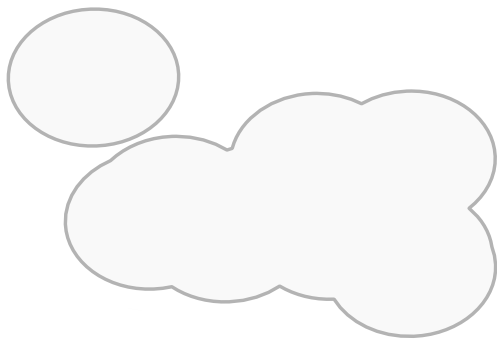
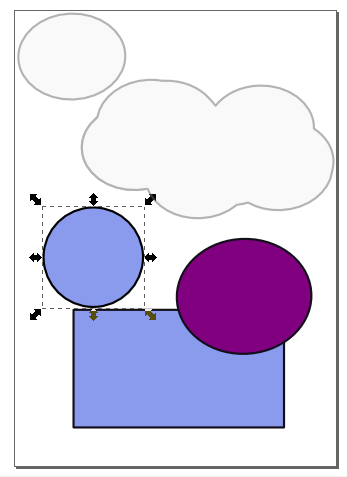
Spray Tool - Spray is an interesting tool. It has three settings: 'Spray copies of the selected object', 'Spray clones of the selected object', or 'Spray objects in a single path'. Remember, if you make a copy, each of the objects can be edited independently, and if you make a clone all edits on the original affect all the clones until you unlink them. If you spray objects in a single path, you get an extension of the object you used, all enclosed within the same stroke. One example of this is using an ellipse to make a cloud. In the example, the ellipse on the left is the original, and the cloud on the right was what I got when I copied the ellipse, then sprayed in a single path.
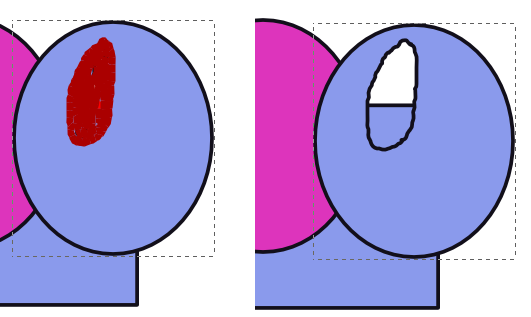
Eraser Tool - This tool looks like most other eraser tools: like a little pink eraser. Choose the object you want to erase, then choose the erase tool. The toolbar at the top will display a fill and stroke color and you will see it while you are erasing, which is kind of unnerving, but it will be fine. As soon as you lift your finger off the mouse, whatever you erased will be gone. If you don't choose an object, then all objects under your mouse pointer will be erased.
Bucket Fill Tool - I think all bucket fill tools are the same! Choose a color, click in the area you want to fill, and there it is.
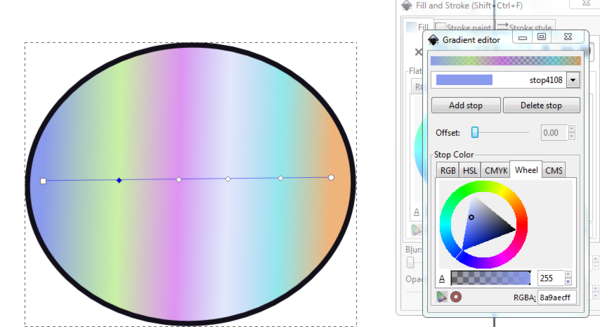
Gradient Tool - The Gradient tool works together with Fill & Stroke to make gradients. Choosing a gradient in Fill & Stroke results in a simple gradient of the last color you chose: that color to transparent. However, clicking on the gradient tool allows you to see which direction your gradient is going, change it if desired, and allows you to edit your gradient for a different effect. You can add Stops, as they are called, and change the color at every stop while in Edit Gradient. You can then arrange your stops to get your desired effect.
Dropper Tool - The Dropper tool is an easy way to choose a color for fill on an object. Say you have two objects that you want the exact same color. Choose the one you want to change, then choose the dropper tool and click in the one with the correct color, and your selected object will be filled with that color.
Connector Tool - With the Connector tool, you can draw lines between objects. As you arrange the objects, the lines stay between them instead of just staying in one place. This is useful for flowcharts or any other instance where you need a line between two objects. The settings allow you to ignore or route your connector around an object if you don't want to include it in your connected group. The lines below were drawn to connect three of the ellipses, while routing around the center one. Connectors are strokes, so you can go into Fill & Stroke and edit the design of your connector (wider line, dotted line, etc.)
These tools are fun to play with! You might choose a few and get a feel for how they work.
This is a good time to look at the bottom of the window. It looks pretty and all, with the color palette there, but actually, the bottom of this window has a wealth of information.
This display actually tells you about your selection. On the left side it says Fill and Stroke, and they both have colors. You can use this to change the fill and stroke in your object if you wish. Clicking on a color will change the fill to that color, and Shift-click will change the stroke. These are the colors of my circle selected below. Just to the right of the Stroke color is the number 5. I used the same settings to draw the ellipse below that I did to draw the rectangle earlier, and my stroke size was 5 pixels. (I have obviously changed the Fill since then.) There is a right-click menu there with a few standard sizes, so you can set your stroke size there, or even remove it if you wish. Next to that is a box that says 100. That is Opacity, which can be set here and also in the Fill & Stroke tool window. Next to that, there is the 'eye' you can click to make your layer invisible and the lock you can click to lock your layer so it can't be changed. In the center, it says, “Ellipse in layer Layer 1”. It
looks like they have repeated the word layer, but I think of it as “Ellipse in the layer Named Layer 1”, so if you name your layer something else, the line will make perfect sense. You will also see some helpful text just to the right. Since we selected the ellipse with our selection tool, it is telling us that if we click again, we can toggle to tool to the rotation handles. To the right of that we get an X and Y location. This tells you where your mouse pointer is at any given time. Last on the end, the percentage shown tells you how much you have zoomed into your drawing.
I know it seems like a ton of information, but we can make sense out of it soon. Notice that Inkscape is designed to provide several ways of doing any task, so if you want to use a certain method (menu bars) and your friend does things differently (keyboard shortcuts), you can both enjoy Inkscape.
Next time we'll start a project. |
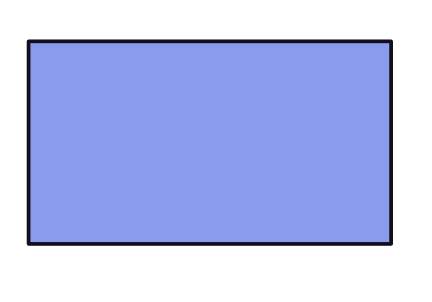
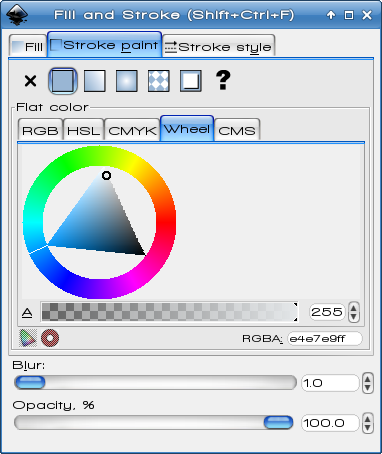
 Fill & Stroke - This is the tool you use to put color inside most objects and borders on the outside. If I draw a rectangle, Stroke is the border and Fill is the inside color. I can change the inside color by clicking the Fill tab and choosing color, gradient or pattern. I can change the border by clicking the Stroke tab and choosing color, gradient or pattern. In the example below, I have drawn a rectangle, filled it with a blue color, and made the stroke black, then clicked Stroke Style and changed the stroke size to 5 pixels. You can do loads of variations just using the Fill & Stroke dialog. You can open it from the menu bar under Object > Fill and Stroke.
 Text Configuration - Any time you put text onto a project, you will use this tool, because it is where you change the font settings for the text you have. This works in cooperation with the Text tool on the left side of the window. You choose the text tool at left and then, after you've typed the text you want, open this tool to configure the text you have written, or even alter your text. The menu bar has a Text section which contains this tool.
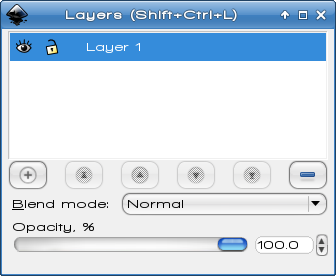
 Layers - Just as in many other programs (like LibreOffice Draw, Scribus and GIMP), the Layers tool is very useful in creating your project. You can create your artwork on one layer, your background on one layer, and your text on another. This keeps things organized and also can help you keep from moving things that shouldn't be moved. If you are sure of your background, you can put it in the bottom layer and lock the layer, and you won't ever move your background until you unlock it again. This leaves you free to work with your other objects . The Layers tool is also available from the menu bar under Layer. The buttons are the same as we saw in Gimp: clicking the eye hides the layer, and clicking the lock closed locks the layer so nothing on that layer can be changed.
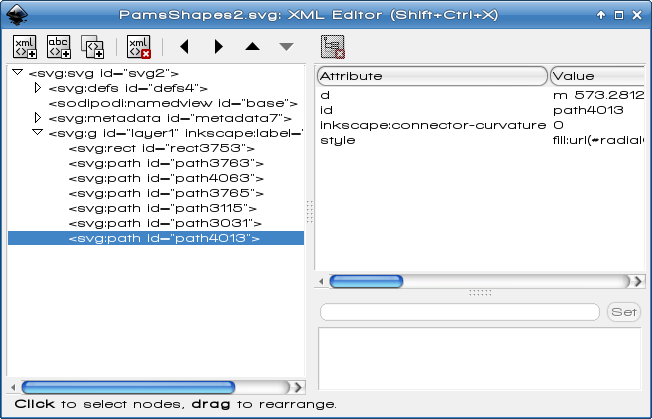
 Edit XML Tree - Each Inkscape drawing you make has a text description which is saved in the drawing's file format of .svg. Each object you add has a descriptive name and is listed in this text file. Clicking on the descriptive name gives you a whole list of parameters for that object (size, color, location on the page, etc.) The more complex your object gets, the larger this file becomes. Even though I've never done it, the drawing can be altered by simply altering the file. I tried it, though, by duplicating an entry in an XML file which represented a circle I had drawn. I ended up with 2 identical circles. If you understand it well enough, you could probably edit a whole drawing this way. It is also accessible from Edit > XML Editor.
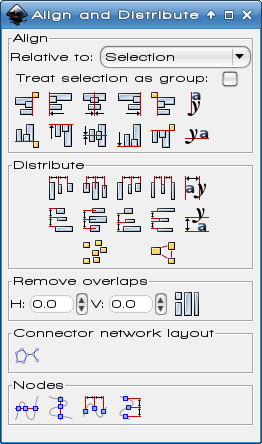
 Align & Distribute - If you have an
object that you want to center on the page, this is the tool you grab. It's also in the menu bar under Object. Clicking on your object, you can click any of the align buttons and center it. Choosing two objects, you can center them, line them up by their borders or, in the case of the distribute section, spread them evenly across the page.
Align & Distribute - If you have an
object that you want to center on the page, this is the tool you grab. It's also in the menu bar under Object. Clicking on your object, you can click any of the align buttons and center it. Choosing two objects, you can center them, line them up by their borders or, in the case of the distribute section, spread them evenly across the page.
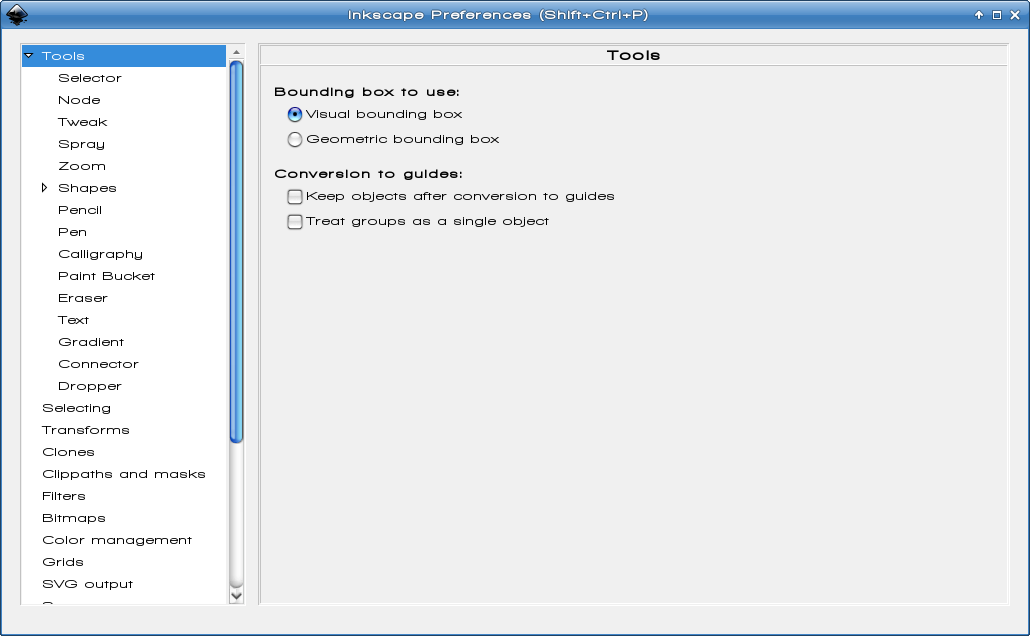
 Inkscape Preferences - This is a quick and handy button to access your preferences window. You can also find it under the File menu.
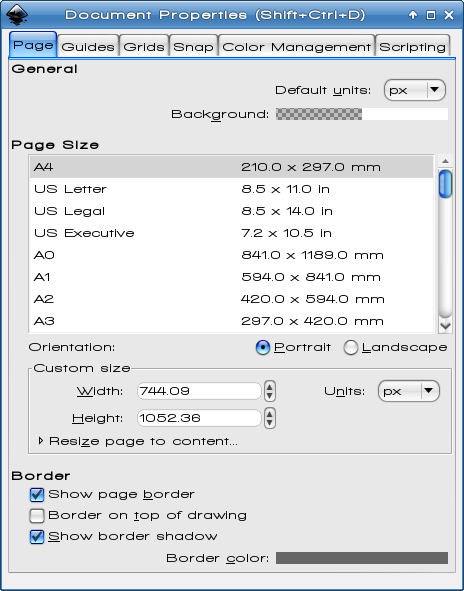
 Document Properties - Each document you create is different. This tool allows you the opportunity to edit the properties of that document, setting orientation, margins, page size and even whether you have gridlines or guides enabled. It is also located in the File menu.