| Previous
Page |
PCLinuxOS
Magazine |
PCLinuxOS |
Article List |
Disclaimer |
Next Page |
Watermark Your Photos With Ease
|
|
by Paul Arnote (parnote) Imagine that you just returned from vacation or holiday. You shot lots of photos. You would like to share those photos with friends and family, and possibly even post them to your favorite photo sharing site. But, before posting your photos to the photo sharing site, you might want to add a copyright watermark to your photos. It will allow everyone to know who the photo belongs to, who shot it, and may help prevent less capable users from stealing your work. The copyright statement is also appended to the Exif data of JPG files. For months, I've been reading (and re-reading) a column on the Linux and Life blog that shows how to add a transparent watermark to photos. The only problem was that it required a fair amount of manual manipulation, and it only worked on one photo at a time. As a result, it wasn't very efficient if you have a lot of photos that you want to apply a watermark to. I thought there ought to be a way to automate the entire process, so I created a bash script to do exactly that. The script requires that you have ImageMagick, jhead and Zenity installed on your system. You will need to install them from Synaptic, if you don't already have them installed. Before we go any further, let's take a look at the script. It ended up not being very long or involved. You can type in the script, copy and paste it, or download it from The PCLinuxOS Magazine website. If you choose to download the script, be sure to strip the "txt" file extension from the file name, and mark the file as executable. You will want to place the script in a directory that is in your path statement. If you are typing the script in a text editor, or if you are copy and pasting it, be sure to delete the line numbers that I placed below to help you follow along in the script. Commands that span multiple lines are intended to be typed/entered on one long, contiguous line in the plain text editor.
Running The Script Running the script, which I've named watermark.sh, is actually quite easy. Open a terminal session and enter the following at the command line: watermark.sh /path/to/your/image/folder/*.jpg The script will work with any graphic file format that ImageMagick recognizes (which is just about any graphic format you can throw at it). I only used *.jpg files as an example, since that is the format that most digital cameras use to save their images. 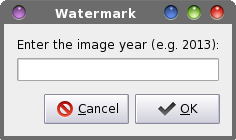 Using the defaults of the script, you will first be prompted for the year of the image. 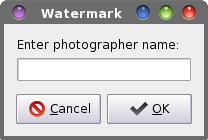 You will next be prompted to enter the name of the photographer. This information is used to "assemble" a proper copyright statement to display as your watermark. 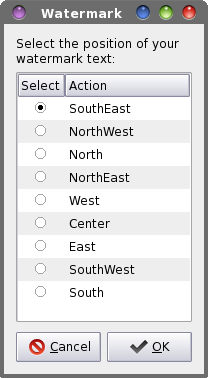 Next, you will need to specify where you want your watermark to be placed. The script uses the ImageMagick -gravity command line parameter, which itself takes on a compass point style of parameter to help determine the placement of the watermark text. The following graphic will give you an idea of where your watermark text will be placed, with all nine possibilities listed:  "SouthEast" is the default value, placing the watermark text in the lower right corner of the photos. 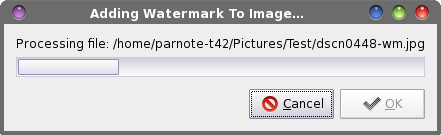 Once you've determined where on your photo you want to place your watermark, select the OK button. A Zenity progress bar dialog box will be displayed to keep you informed of the progress through the job. Also, each image is renamed with "-wm" appended to the original filename, to differentiate it from the original, to identify the image as possessing a watermark, and ... most importantly ... to prevent your original photo from being overwritten. What You Get   The top image is the original image. The second image is after application of the watermark. For the watermark, I used 2006 as the year that the photo was shot, along with my name. The watermark is created and applied to the image, in yellow text using the Liberation Serif Bold Italic font, in 25 point size, at the bottom right corner of the image. How It Works As the script "walks" through a whole directory full of images, the copyright statement is constructed from the information entered in the first two Zenity dialog boxes. Then, as each image is processed, the width and height of each image is read into variables. A PNG file with a transparent background is created, and the text written in yellow, 25 point Liberation Serif Bold Italic text, at the location specified by the ImageMagick gravity parameter that you specified. That transparent PNG file is then laid over the original image, and a new image is created from the two, creating the transparent text. The script also checks to see if the output file is a JPG file, and if it is, appends the text information (our copyright statement) to the end of the JPG Exif data. After all the images have been processed, the temporary transparent PNG file (stored in your ~/tmp folder as overlay.png) is deleted just before script exits. Customizing The Script What if you don't really want a copyright statement watermarked on your photos? What if, instead, you want your email address and/or your website address to serve as the watermark? In that case (or any other case where you want different text displayed other than the default copyright statement), alter line 23 of the script with the text you do want displayed. If you don't want or need the dialog boxes to prompt you for input, you can comment them out, simply by prepending "# " to the beginning of each line you want to prevent from being executed. What if you want to use a different color for the watermark text? That one's easy enough. The default color is yellow (which happens to be my favorite color). You can choose any color that ImageMagick recognizes in line 38 of the script. Right after the -fill parameter, replace Yellow with whatever other color you want to use. You can find a complete list of colors that ImageMagick recognizes here. You can use the color name, the RGB values, or the hex values. Most users will find it simplest to use the color name. It's best to avoid using colors that are too light, too bright, or too dark. I recommend trying a new color choice on a few different photos to be sure it works well and is visible on a variety of backgrounds. What if you want to use a different font for your watermark text? Simply change the path and filename in line 38 of the script to reflect the filename of the font you want to use. Liberation Serif Bold Italic is the default, and is located in /usr/share/fonts/TTF/liberation/ directory. While you're at it, you can also change the size of the text by changing the -pointsize 25 entry on line 38 to whatever font point size you want. I would caution you to not make it too small, however. It would be an equally bad idea to make it too large, since the watermark text may detract from your photo(s) if it's too large. "Advanced" Uses Having just completed the Xfce Power User Tips, Tricks & Tweaks article series, this script is yet another tool that can easily be turned into a Thunar Custom Action. Simply set the command as watermark.sh %F or watermark.sh %N. You can name it whatever you like, but I would recommend "Watermark Images" as the name. Under the "Appearance Conditions" tab, set the file pattern to *, and place a checkmark in front of Image Files. You can also create a custom KDE context service menu. Ensuring that the script is stored in a directory in your path, you can create a custom KDE Service Menu entry that's available in Dolphin's or Konqueror's right click context menu. You can refer to the article in the October 2012 issue of The PCLinuxOS Magazine for more information about creating a new KDE Service Menu. Below is my suggestion for the .desktop file that creates the KDE Service Menu for using the watermark.sh script. [Desktop Entry] Type=Service Name=Watermark Encoding=UTF-8 ServiceTypes=KonqPopupMenu/Plugin,image/* Actions=Watermark; MimeType=mif;PNM;pgm;ppm;bmp;ras;JP2;JPC;jpg;jpeg;png Icon=image-x-applix-graphics X-KDE-Submenu=Watermark [Desktop Action Watermark] Name=Apply Watermark To Selected Photos Exec=watermark.sh %F Icon=image-x-applix-graphics Be sure to run the command kde4-config --path services at a command line prompt in Konsole to find out where to store the .desktop file for your new KDE Service Menu. If you want your new service menu to only be available to you, choose to store your .desktop file in the location indicated in your /home directory. If you want your new service menu to be available to every user on your computer, choose to store your .desktop file in the location indicated in your /usr directory. Remember that the latter can only be written/placed there with root user privileges. Summary Now, with the watermark.sh script, it's easier than ever before to watermark your photos. It may take a little bit of time to do a large number of images, but you can start the process and simply allow it to run in the background while you perform other tasks. Furthermore, thanks to the script renaming the output file, you can rest assured that your precious original photos are not overwritten. Still, it's always a good and prudent practice to only EVER make edits to copies of your images, with the originals safely stored elsewhere. |