| Previous
Page |
PCLinuxOS
Magazine |
PCLinuxOS |
Article List |
Disclaimer |
Next Page |
KDenLive: Part Three |
|
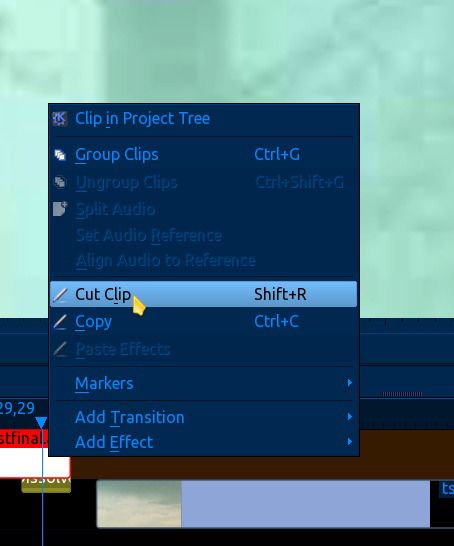
by loudog Now that we have a nice stable platform of basic knowledge in Kdenlive, we will begin to dissect each of the many effects in a much more detailed manner. With that said, we want Kdenlive to be using our prefered editing software for its effects stack and MLT framework. Here is an image of my selections. You may choose what suits you best. 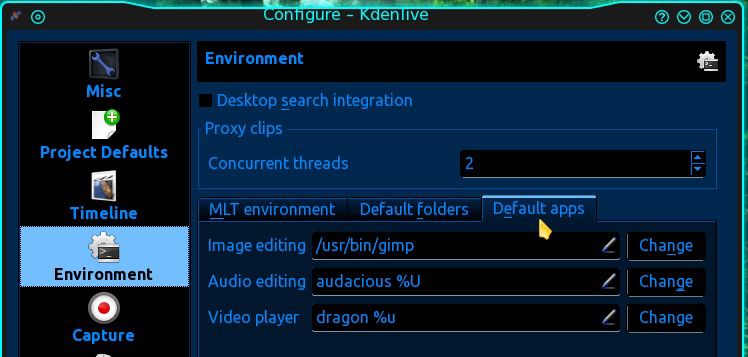 As you will see, just one effect will require many pages of instruction and guidance. Consider yourself graduated to middle school at this point. With graduation into higher learning there comes some added responsibilities, namely homework. Well, what can I say, like any good teacher I will be assigning a little homework at the end of certain articles, so you will be fully prepared for the next lesson. In this months article we will be building on our previous work with single clips and more importantly single images. Videos are just lots and lots of pictures basically, and so the need arises often to edit singular images. This knowledge will not be required in this tutorial, but for next months installment, you will want to have the basic skills needed. The last consideration we need to explore before we move on is image quality. Obviously an image of 2160 x 1440 pixels will have twice the detail of a 1080x720 image. After much experimentation, I try to only use images in this type of undertaking with no less than a 1920x1080 resolution. When zooming in, it is desirable to keep pixelation at a minimum so the video looks more polished. This month, we will be learning a few different effects and a few quick editing tips. Let's start with the quick tips. The first thing we will do is insert an image into the timeline. Next, we want it to play for longer than the default 5 seconds, so we stretch it out in the timeline. I like to stretch my images out to roughly 30 seconds or so and cut them down later, if need be. 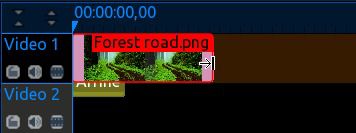 With that done, you may notice that Kdenlive has added an effect by default. Since we are wanting a different effect, we will remove this one. Click on the effect (or video clip, or sound clip) and it will be highlighted in red. 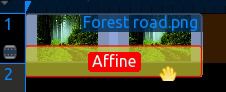 Hitting the delete key on the keyboard will remove the selection from the project timeline, but not from the project tree. If deleting an effect, it will be removed from the effect stack. Now you know how to stretch out an image clip and delete clip/effect from project timeline. Let's get to the meat and potatoes, shall we? Our plan in this tutorial is to set the hook, so to speak, on the picture taking generation. We are going to teach you how to breath some new life into those still images of yours. Select three or four images that you like and import them into the project tree (I will be using only two for this tutorial, beginning and end). Drag the first image into video track 1. Stretch it out, right click it and select: Add effect/crop and transform/pan and zoom. The effect will appear in the effect stack monitor. 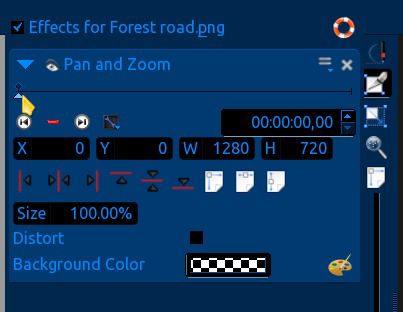 At the top, we see the keyframe timeline with marker and mouse cursor preparing to move the timeline marker to the right. Over a little farther towards the top we find the "save stack" etc. icon and the "delete effect" button. Below that we see the "go to previous keyframe" button, the "add/delete keyframe" button (green + = add, red - = delete), the "go to next keyframe" button, the "options" button and the timeline "time" readout. Below those we have the "align image" buttons, the "adjust to original size" icon, "fit to width" icon and the "fit to height" icon. Moving on, we have the "size indicator readout" (hereafter referred to as zoom), the distort checkbox, the background color indicator and the color pallette. On the right hand vertical column, starting at the bottom, the zoom slider (this does not alter the project as far as I have experienced but is an extremely helpful tool, you'll see later), "fit zoom to monitor size" icon, "origional size" icon, "update parameters" icon, "show previous keyframe" icon, and finally the "show path" icon. As we progress through the tutorial, we will be visiting most of these controls. The ones we do not use, I will leave to you to play with and discover what they do. The pan and zoom effect defaults with the first keyframe queued into the timeline, as indicated by a small black diamond above the keyframe timeline. We may begin to manipulate the image at the very start of the clip. First, lets take a look at my beginning image (I have stretched it out to about 30 seconds long in the project timeline).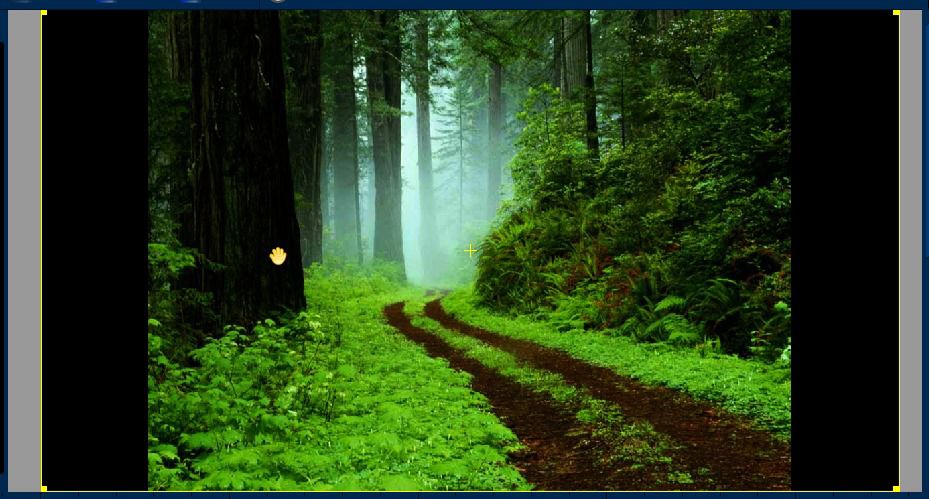 As you can see the image does not fit the monitor. The color on the sides is the color as shown in the "background color indicator," which indicates transparency (checkerboard pattern, default). The black color you are seeing is actually the back of the monitor screen. To change the background color, you can a) click on the background color indicator, which will bring up a color selection screen, or b) click on the color palette, move the palette cursor over to the image and click it on any color in the image you choose to change the background to that color. In this instance I will select the "fit to width" option, as this particular image is of high enough quality and will not suffer from resizing. However, the top and bottom will not show until we start panning up/down and/or zooming in/out. 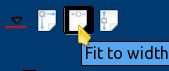 The cursor in the monitor (in the shape of a hand) means that you have the option to grab the image and position it manually, much like you would do in Google Earth or Google Maps. The yellow "+" in the monitor indicates the center of the image, and this center target is what is referenced in the "X" (left and right) and "Y" (up and down) position readouts. Now that we have the image fit to the monitor width, lets synchronize the project timeline marker with the keyframe timeline marker. Click the "options" button, and from the dropdown menu, select synchronize with timeline cursor. Now both markers will move in unison with each other. 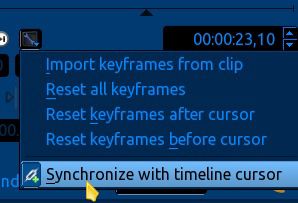 Lets add a keyframe. I will move the keyframe timeline marker over about 5 seconds (the time readout shows 5.16 seconds in the example). Click the "add keyframe" button (green +), and zoom in to about 135% or thereabouts (size indicator readout or "zoom"). Note: To add a keyframe you can also just double click anywhere on the keyframe timeline or to delete, just double click on the little black diamond keyframe indicator. 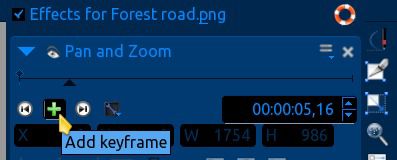 When using the zoom feature, you can either type in the desired size (I generally highlight the value I want to edit), or initiate a slider action by holding the cursor on the "size" text until it shows as a pointing hand. At that point you may click and hold while "sliding" the cursor left and right to zoom in or out. 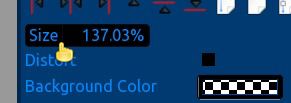 If you use the keyboard method you must hit the enter key on the keyboard to view the newly resized image in the monitor. After the image is resized, I will recenter it in the monitor using the "align image" control buttons. I will center the image vertically and horizontally. 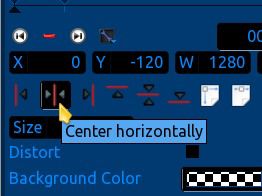 This sequence of keyframes instructs the camera to zoom in on the center of the image, from the first keyframe size (100.00%) to the next keyframe size (137.03%), over a period of 5.16 seconds (actually addresses but we covered that in last months article). Now lets add another keyframe about 8 seconds or so into the timeline and zoom in again to 300.00%. Recenter the image. Add another keyframe of about 2 seconds. For this short duration between keyframes, we just want the camera to hold steady for the 2 seconds, basically a pause, so we add no effects. Next, add another keyframe about 6 seconds further down the timeline. Zoom out to 200.00%, and then, grabbing the image in the monitor with the cursor, move it to your desired position for that keyframe. This time I am instructing the camera to zoom out a little, and at the same time, pan to the left side of the image and hold on the face I see in the tree trunk. I will add another pause here with a new keyframe. Next, I will add another keyframe of 4 seconds or so and zoom in on the perceived "face". Note: The longer the duration between keyframes, the slower the zoom/pan action will be, and visa versa.  Do you see the face?.... Yes?... No?... Hmmm, must be the beverages. Why don't we give the audience another 2 second pause here to examine the image and see if they discover the face looking at them (add each keyframe as you go) and then a 4 second zoom out to 75%. Note: It is much easier to add the zoom first to the keyframe and then the desired "pan to" position. Another 2 second pause. Now play the clip in the monitor (click rewind then the pause button to reset the player) and decide if you like the effects so far. Note: The playback will appear very choppy in the monitor until the project is rendered and viewed in an appropriate video player. Using the go to next/previous keyframe buttons will speed up the editing process, allowing you to switch from one keyframe to the other very quickly. Go ahead and click on them, toggle back and forth between keyframes, get comfortable with them; they will become your buddies later. If you decide that a keyframe needs to be added, all keyframes beyond this should be deleted (reset) and done over. In my experience, the effects sometimes get messed up if you do not do this. That's why it's important to review the project often in the monitor as you create it. If, on the other hand, you decide to remove a keyframe, just navigate to it and click the red "delete keyframe" button. After reviewing the video, I have decided to add a keyframe partway through, so I will reset all keyframes from that point on (all keyframes including the one the marker is on will be deleted/reset). To do this, I will select which keyframe I want the reset to start with. Then, using the options icon again and from the dropdown menu select, reset keyframes After cursor. 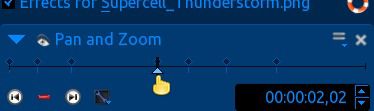 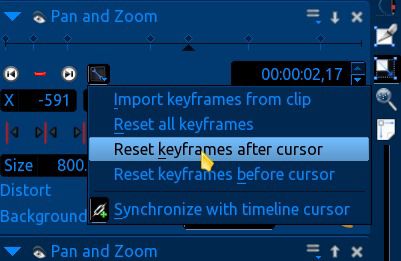 Now that I have added the extra keyframe I wanted, and recreated the deleted ones, lets have a quick look at our selected camera pan path. First rewind the player. Next, click the "show path" icon. You will see the established path show up in the monitor. As the camera pans to the left, the center target moves to the right. When panning up, the target moves down. This center target's path is what is represented by the red line. Play the clip and watch the image center target follow the path. 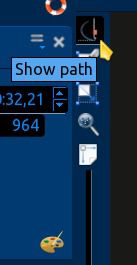 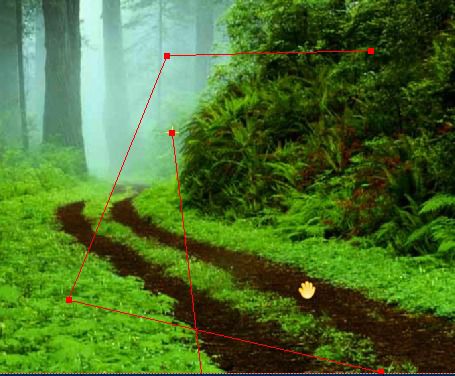 Now it's time to prepare for the transition to the next image. I will zoom in to 850%, over a period of three seconds (I want the zoom in to be very quick), and then I will position the white foggy part of the image in the monitor. I have decided on a rather ominous looking thunderstorm for my next image. The white foggy part of this image will transition nicely to the light part of the thunderstorm clouds in the next image. For the last keyframe, I will need a 10 second pause to allow more than enough time for the transition effect to be edited in effectively. Since I don't have enough time left in the clip on the project timeline, I will simply stretch the clip out a little more. After reviewing the video one last time and being happy with the way the effects look, it's time to render this "project". I will be using these settings. Since the project does not contain any audio yet the audio bitrate is ignored by default, even though the readout says 384. 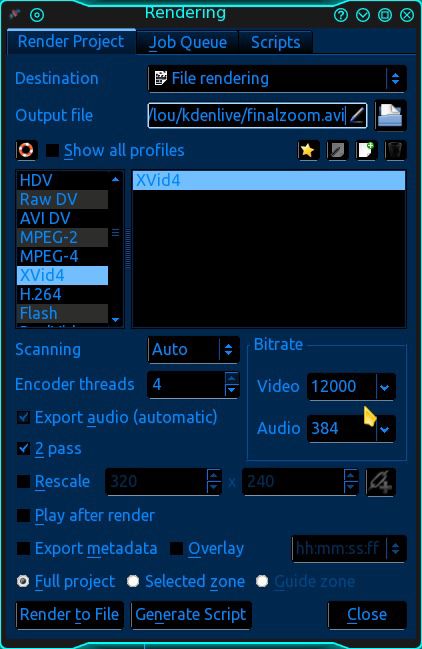 I have named the output file, and it will be saved as an .avi video. What? Not again! Yes again, review the rendered .avi file in your favorite video player and look for errors before moving on. Note: Never delete your project or clear the project timeline until rendering has finished and you have reviewed it in your video player, so if need be, you can make small edits to the existing project instead of rebuilding the whole thing from scratch. Now that we are happy with the first clip, lets clear out the project timeline, drag our next image into the project (our ending image in this tutorial), stretch it out and add the pan and zoom effect. Note: It can be quite helpful to have the audio file in the audio track timeline so you can get an idea on how long you need to stretch out the last image to match the audio length. This image does not fit the screen either, much like the first one, but instead of using the "fit to width" option this time, we will click the distort checkbox. Uhhh huh, something new. 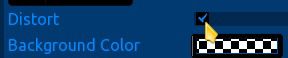 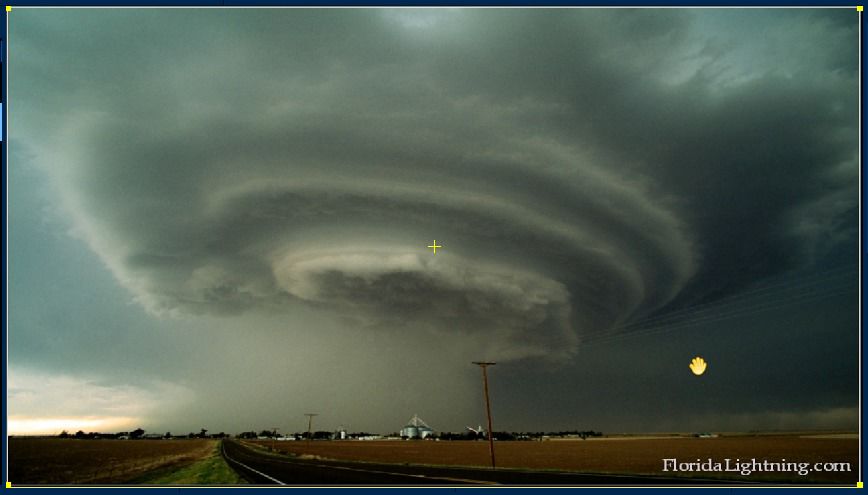 This effect will fit the image to the screen, but because of the stretch/compress qualities involved, it does not work well with all images. Some images may end up looking "overly distorted." Since I desire a rather large blurry white background to transition to, I will start by zooming in on the image to about 800%. Now, instead of grabbing the image and manually positioning it this time, or using the centering tools and groping around from there to find my whitish spot, I will use the zoom slider at the right hand side of the screen to find my sweet spot. Yep, video editing is a game you learn as you go.  When I zoom out from the image with this tool, a small box with a red border appears in the monitor. This small box is what will show in the monitor when it is "actual size." You probably already recognize the center target and diagonal center line, as well as the grabber hand. 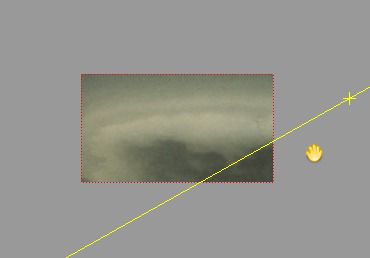 If you zoom out even more?....... Yessss,,,, you gettin all this? 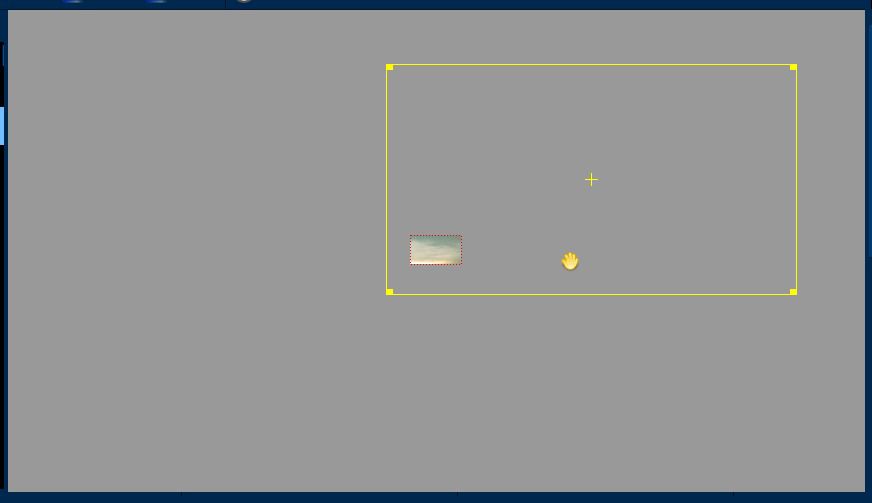 The box with the yellow border is the full image. While you drag around the yellow box the red box updates the selected section. With this tool you can quickly move to any part of the image and have a good idea of what will be displayed when it is zoomed back to the proper size. This slider is invaluable for time saving edits on pan positioning and zoom. Play with it, discover all that it can do to help you speed up the creation process. Note: The editing options on the side of the effect stack window are designed to be complementary tools, to be used in conjunction with the zoom slider, experiment with them. Now that I have quickly found my whitish transition section, its time to move on. Setting the next keyframe for a four second pause, I will then zoom out to 100% with the next keyframe. I want the image centered and I also want the zoom out to be very slow, so I allot 15 to 20 seconds between keyframes. The closing effect will be a fairly quick zoom out to 1% (about 3 seconds) giving the "poof," bye-bye, all gone ending. After the traditional review, I render the file and again, review the rendered file. Okay, things are going well and we are happy with the rendered file so lets clear the project timeline. Import the two .avi files, place the first one in track 1 and the second in track two. Overlap the videos a little, and place the cursor at the bottom right corner of the top clip. When the cursor changes to a pointer hand and the corner starts to blink green, click to add the default effect. 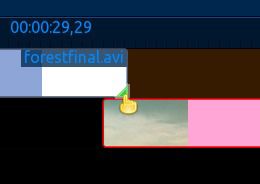 The default effect using this method is dissolve. The first track dissolves away while the second track materializes. After the effect is set, review it and make adjustments as necessary for a fluid transition. I have discovered that the static ending of my first video is too long for a smooth transition, so I will need to cut it. To do this, I will first move the bottom clip over to the right so it is out of the way, then position the project timeline marker at the point I want the cut, right click on the clip and select cut clip from the menu. Note: Any tracks that are covered by the project timeline marker will be cut.
After the clip is cut, its a simple matter of selecting the unwanted part, and deleting it from the timeline. The effect may have to be shortened. 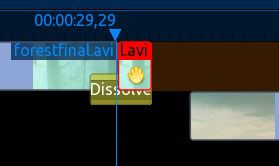 Now I will reposition the clips to overlap again, and adjust things to my particular tastes. After the review, I will add the audio (and my standard intro clip), render the file, review the rendered file, and then send it to friends. At this point, you can imagine all the possibilities with this single effect. Give it a try, create, have fun, and enjoy the toys the the open source community has gifted you. Any questions you may have can be posted to the software section in the forum. To view the video we created in this tutorial, go here. The YouTube player is not near the quality you will get in house. So Alice, you ain't seen nothin yet. If you want me to show you just how deep the rabbit hole goes ... then I suggest you do your homework. Next months article will be as much, if not more, fun and informative as this month, if you read these two articles featured in previous issues of the PCLinuxOS magazine. (Lesson 1) (Lesson 2). Until next month, later tater. |