| Previous
Page |
PCLinuxOS
Magazine |
PCLinuxOS |
Article List |
Disclaimer |
Next Page |
Inkscape Tutorial: Decorative Patterns |
|
by Meemaw Sometimes when you are creating a project in Inkscape, you have a need for some little repeating pattern to use. You can create those yourself. Next month we will start a project that will use some of these patterns. Let's make them now. In this project we will be moving nodes to make the shapes we want from the ones we can draw. Starting a new drawing in Inkscape, use the toolbox at left to draw some basic shapes: square, triangle and circle. Also, draw an 8-pointed star and a pentagon. We'll edit these and develop some more designs. 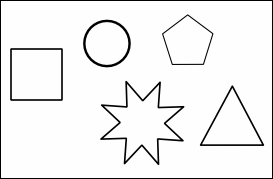 We can make many other shapes and designs with just these five basics.Let's start with the circle. Just by duplicating, resizing and filling with different colors we can make several different "beads". Choose the circle and make the stroke about 10 and change it to another color. Then fill it with a different color. They can be similar colors or contrasting colors, and whatever colors you want. 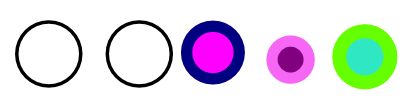 The triangle can be manipulated the same way, increasing the stroke and filling with something different. Remember, the beauty of saving this as an Inkscape svg file is that you can go back next year and change all of these… changing color, size, combination and how they are grouped. One of my combinations has been to duplicate the triangle, change the stroke to none and the fill to red, and place a white circle inside.  You can reshape these as well, by manipulating the nodes. We used the nodes to reshape our object on the holiday tree a while back. One thing I did using an 8-pointed star was to pull out some of the nodes and create a cross. The first thing you do after selecting your star is to click Path > Object to Path, then select the Nodes tool. Pull 3 nodes out of the center to about the same distance, then pull the fourth node out even with the two next to it. Those three nodes we will select together and lengthen for the bottom of the cross. Select one node, then, holding down the shift key, select each of the others. (You can also use your mouse to draw a rectangle around only those three nodes and they will be selected as well.) Placing your mouse pointer (with the nodes tool activated, it will be a long arrowhead) on the center node, pull down. All three nodes should move down together. 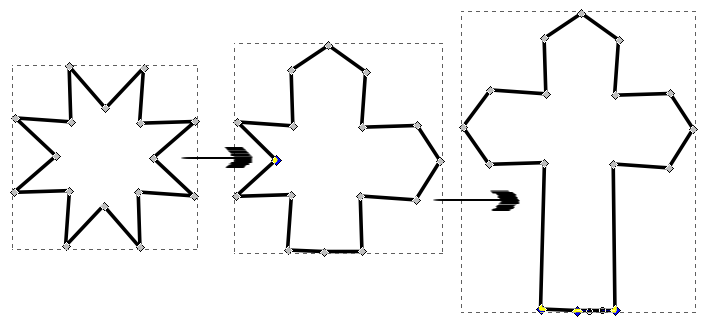 Leave it as it is, fill it with color or black, or whatever you want. If you haven't saved any of this yet, you probably should. I just named mine BasicShapes.svg. One of the good things about nodes is that they can be manipulated in many ways. Besides grabbing the handle and pulling it somewhere else, the lines themselves can be stretched or rounded. Let's use the pentagon to make something like a leaf. Duplicate your pentagon and move it over to an open spot. Click on Path > Object to Path, then click on the Nodes tool, and select the top three nodes but using your mouse to "draw" a rectangle around them. 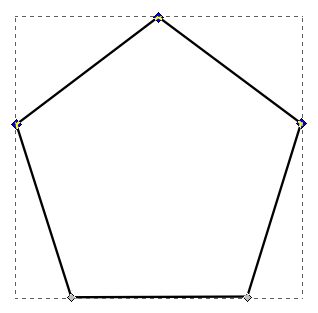
In the Nodes toolbar just above your page, two of the tools look
like this: 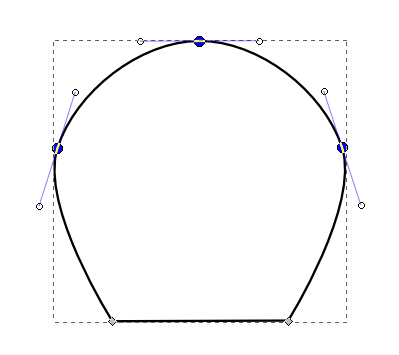 I don't know about you, but my hand is occasionally shaky, so this is a really handy tool to have when you are trying to smooth out a curve you have made. Select the nodes around it and click the Auto-Smooth tool. Clicking outside your object will deselect all the nodes, and we can then pull it a little differently. Some leaves are longer and have more of a point where they connect to the stem, so select the bottom two nodes, and click the Add Node tool. 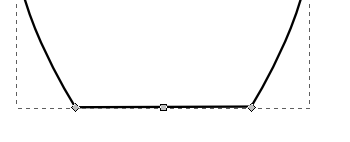 Grab the center node and pull down until your leaf looks right to you.  Clicking back on the selection tool, you can resize and change the width or length. You can also stay with the Nodes tool and pull nodes (or the line segments in between) until it looks the way you want it to look. If you want it to look more like an actual leaf, lines can be drawn inside to represent the veins. Those can be curved as well. 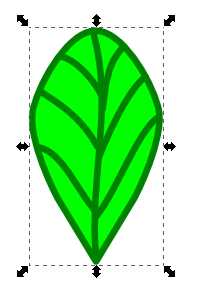 Experiment with your lines: curves will be different depending on where you grab the line. If you grab it in the center, the curve will be fairly symmetrical from the center to the outside, but if you grab closer to one of the ends, it will look a bit different. Play with them until you get what you want. Remember that as long as the file is an svg, you can always change it, and if you move something and don't like it, you can always undo it with <CTRL> + Z. Yes, I realize I could have started with a hexagon instead of a pentagon and wouldn't have had to add a node, but the more tools we know about, the better, right? Another combination is something that may look familiar, appearing on the cover of the February 2014 PCLinuxOS Magazine. Using three circles, I combined them with a triangle that I altered with the settings Spoke Ratio 0.300 and Rounded -0.360. I then made the stroke red and size 3 and arranged them this way: 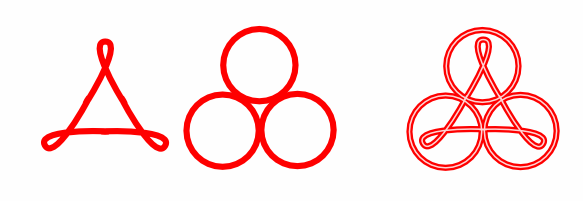 The white lines in the third figure resulted from duplicating the combination figure, changing the stroke to 1 and changing the color to white. All objects were then grouped. Play with these shapes yourself. I'm sure you can come up with other useful patterns. Next month we'll put them to work. |
 When you hover your mouse, one tooltip should say "Make selected
nodes smooth" and the other should say "Make selected nodes
Auto-Smooth". Clicking on the auto-smooth tool will change your
pentagon so the top three lines are now curved.
When you hover your mouse, one tooltip should say "Make selected
nodes smooth" and the other should say "Make selected nodes
Auto-Smooth". Clicking on the auto-smooth tool will change your
pentagon so the top three lines are now curved.