| Previous
Page |
PCLinuxOS
Magazine |
PCLinuxOS |
Article List |
Disclaimer |
Next Page |
Kdenlive, Part 4 |
|
by loudog Hello again friends, and welcome to another tutorial on Kdenlive. Happy winter ay, (Uhhggg) for those of you residing in the northern hemisphere at least. If you recall, in last month's tutorial I had recommended a little homework so that you could utilise the lesson right away and a fun little lesson it shall be. If you took the time to watch last month's finished video you may have noticed the final see ya later wave from the door window.  This was shot outside of the house with my video camera. This is what the front door actually looks like in real life. 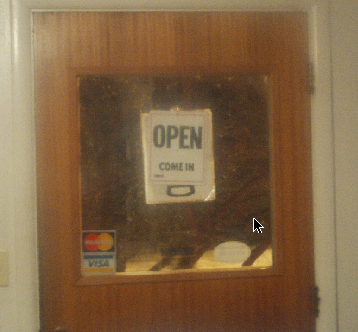 To insert a video into the window we must first cut it out in Gimp, add the transparency layer and fill it with the proper blue screen key color. Alternately you could buy some green paper and fill the window with it. Industry standard for this effect is bright green. Although the effect is called blue screen, any color can be the "key" color It's just some colors work better than others. You can cut any part of an image out and use this effect with it. Here is the door after I have made the proper edits to it in Gimp. 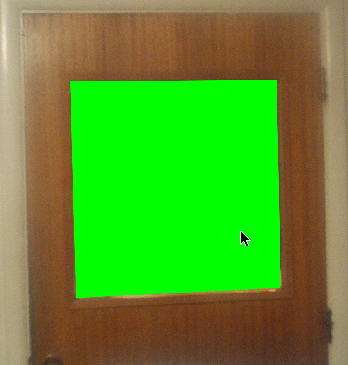 We will now drop this image into video track 1, stretch it out quite long (40 sec or so) as we will just cut it down later if need be. When using this effect, the video that is going to be in the foreground must be in track 1, the clip that will be in the background will be in track 2, doing a multi-layer project, 3,4,5 respectively. This is how Kdenlive layers the files together much like the layers in Gimp. I can now add the background image or video clip into the track 2 position. We will align both clips to the starting point of the timeline instead of the staggering technique we learned in earlier lessons. I will again use the thunderstorm image for this lesson as the see ya later clip is to short for our needs and hey, it's my exit clip after all. 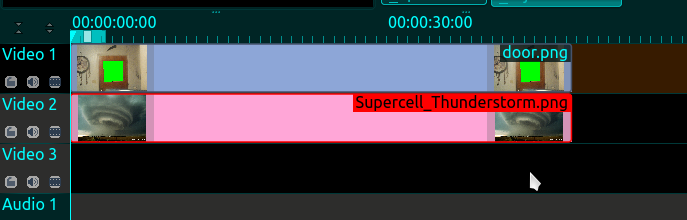 Next, we will select the top video, right click and from the menu select, add transition/composite. Stretch the effect out to cover the videos. The effect will show up in the transitions window, with many controls that are familiar to us and many that are not. Leave all controls at default: a deeper investigation into this effect will be covered in an upcoming article. 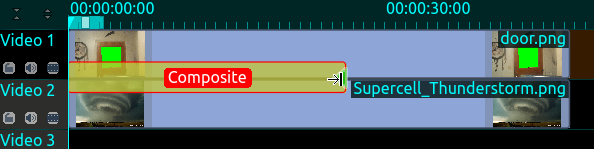 Next selecting the top video again, right click and select Add effect/alpha manipulation/blue screen. This will bring up the effect in the effect stack window. I have my effect, transition and audio windows set up in a tabbed arrangement as you see here. 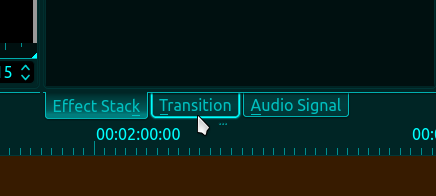 Looking at the effect settings, we see a very simple layout that is fairly intuitive. We also notice the title subheader informing us that this effect is for the door.png clip. It can sometimes get fairly intensive when the effect stack window starts to fill up with effects, so a quick glance at this will ensure you're not editing the wrong clip. 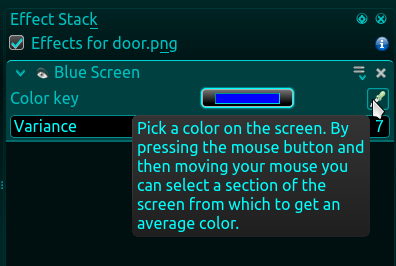 The keyed color is set to "true" blue by default. By "true" I am saying the color contains full blue hue (255), no red or green hue. If you click on the color key selector, it will open a color selection window, but for a quick key color match we will use the eyedropper tool at the right. We simply select the tool, move it over and click on the green in the window. This will change the selected key color to the exact color we are wanting to become transparent. Now we can see the background clip in the door window. If I chose the color of the doorframe that would become transparent, I could even choose both colors. One fun prank to pull with this setup is to get an image of a friend watching tv. Then, cutting out the television screen add your own video on the set. What? I can't believe you were watching that dude. 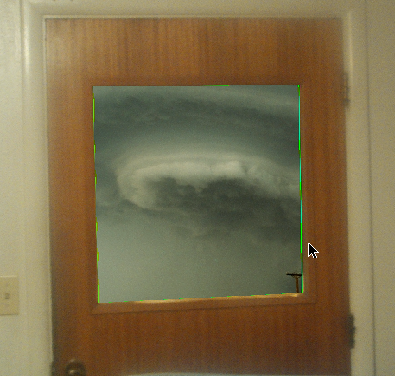 As you can see, some of the green is still visible around the edges. There are two things you can do to help remove this. The first is by using the variance slider. When the mouse is on the word variance in the effect stack, it turns into a slider and varies the amount the key color is spread out over the color spectrum for removal. I have found that 35 is about maximum for this type of blue screen effect and satisfactory for my needs. The second is generally used for a moving figure or object that has been video taped using the standard green screen background Where only the moving object is desired. This technique involves adding another blue screen effect below the first (yes you can add as many as you need to the stack) except to choose the color from the color chart that is the exact opposite of the previous key color and adjust the variance also. 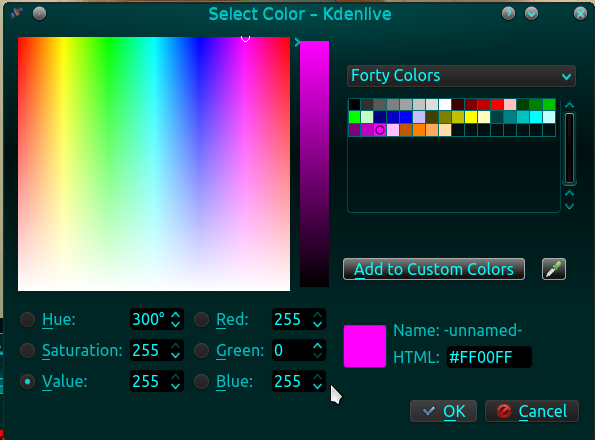 Notice how magenta has full red and full blue but zero green, the exact opposite as green has full green but 0 red and 0 blue. This will not be used here but is very helpful for the moving type of blue screen effect. Now a few tips on this effect. Full green is used mainly for the background of moving objects, called chroma keying and the desired object can easily be voided from having any green on it, if it did these areas would also become transparent when the effect was implemented. The same is true for the still image of the door and window, if there was any green elsewhere in the image this would show as transparent. If you have an image that has some green in it try another key color that is an exact color like blue or red or their respective opposites until you find one that works well. I have worn a bright orange shirt while walking around a green lawn being taped. upon making the shirt transparent with this effect, as I walk around, the background image or video shows through the shirt area. A lightning storm background looked very eerie in this video. With a moving video, the key color is transparent throughout the clip even though it is moving around. The final tip is when you are using these combined effects, it is best to use less processing threads for rendering. If your final rendered file is choppy or jerky this is usually the cause. It does take much longer to render but if you looked at the processing thread's number selection in settings/configure kdenlive/environment you would have noticed it says >1 is experimental. Okay moving on, we will now select the bottom image, add the pan and zoom effect and pan up and left over 5 seconds or so while zooming out to 40%. Hitting enter will present you with something like this: 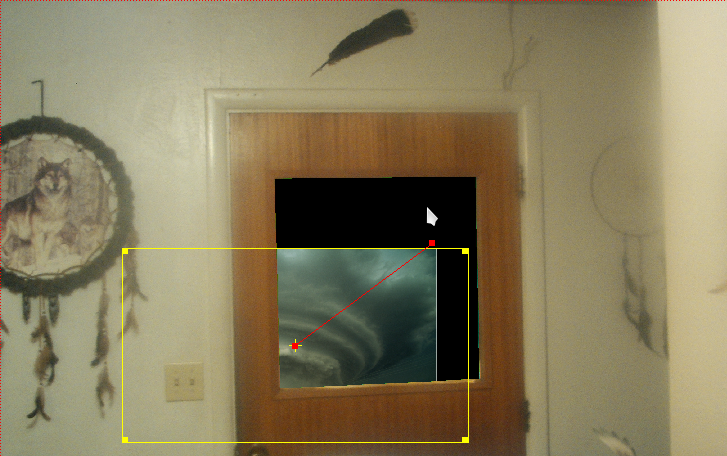 You should be fairly familiar with the things that the pan and zoom effect can do and coupled with this effect, it makes things even more versatile and interesting, to say the least. The yellow box is the background image. Now selecting the top image I will also add the pan and zoom effect and over a 30 second span will zoom out to 50% and pan up and to the right. Upon hitting enter I see this. 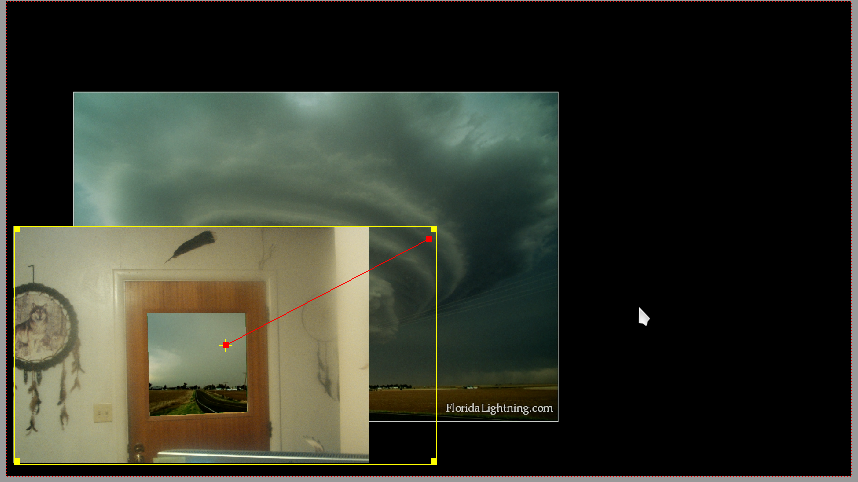 Remember, these two examples were still images, but they could have just as easily been videos. I could have just as easily selected the white walls as the key color, leaving the door intact. Using the zoom, you can also get the proper perspective, making the image in the window look more natural. So let's see just what we can do here with two still image clips and these effects to make them look interesting to the viewer. I know, one fun thing to do is Zoom in on the window until only the storm is showing and then slowly zoom back out on the background image leaving only the storm image remaining. Let's do that. Warning: this can be tedious and time consuming until you have more practice but will eventually become simple. First I have decided that the houses and treeline look fairly natural at this zoom, with the road having the telltale curve away from the view. I will start with the door at 100%, and using the crop and zoom effect on the thunderstorm clip, place the desired section in the window on the first keyframe. Yes, that looks nice. 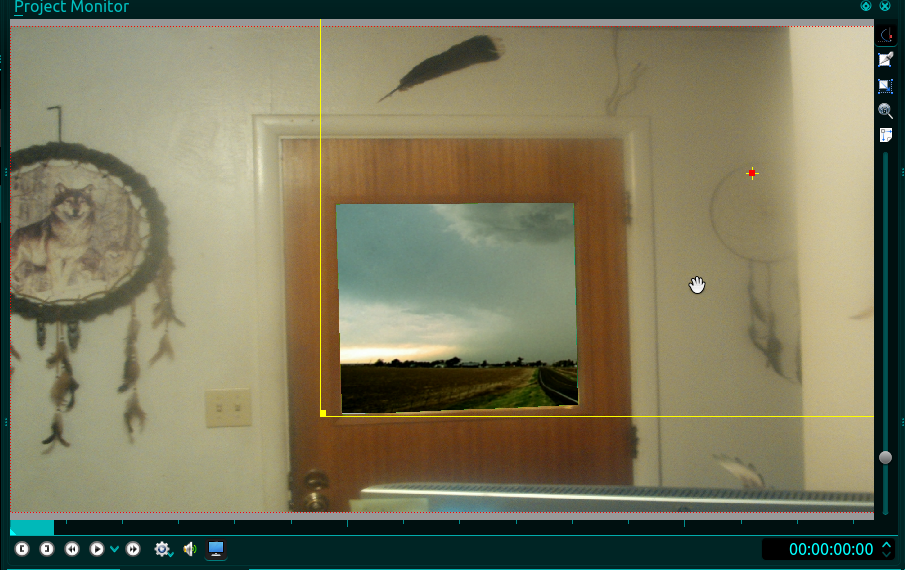 Notice the similar section of background image in the door window except in full monitor view. Next, I will slowly zoom in on the window until it just fills the screen, ignoring the background image for now because it will not change. It looks good in the review so let's start to manipulate the background clip. Now it becomes a little tedious and tricky. What we are striving for here is the background to look natural in the window as we zoom in. To do that we must decide how much more of the background image will be showing as we get closer and closer and how much zoom to add because things naturally get bigger the closer we get to them. First, in the door effect, set the keyframe cursor on the last keyframe we created, the one that has the window completely zoomed in. Remember to check what clip you are in (effects for door2.png). Doing this will match the timeline together so that when we switch to the thunderstorm effect stack it will be perfectly matched with the door keyframe. Look at the time readout and title in each image. 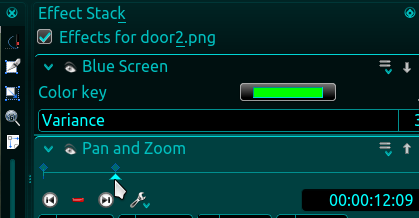 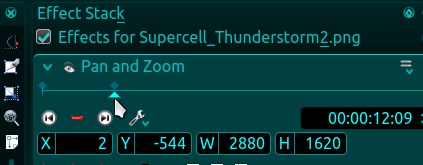 I will add this keyframe to the thunderstorm clip, zoom in to 150%, and try to get the image set as closely as it was in the beginning. As the camera zooms in on the window, the background image is also zooming in at a much slower rate giving the appearance or reality of walking to the window to look out. This may take a few tries to get right, just keep reviewing and editing it until you have something you like. While reviewing keep an eye on the yellow border making adjustments to keep it just outside the window border. Now that I am happy with that part, I can now zoom out on the background clip only filling the screen with the full thunderstorm image. Now I will render this and review it before deleting the project, add my intro, exit, audio and render the final project for review. You can view the final video here. Using a window from the outside looking in you can place a person inside the dwelling that was never really there. Now you may begin to understand why I am sceptical about any videos or images on the internet. Well, there ya go, the blue screen; another effect that can be used in conjunction with the others for hours of editing fun. Next month's lesson will not require homework but will add a little twist to things. All of us that are KdenLive fans are eagerly awaiting the newest release due out soon. Enjoy yourself and good days to all, spring's coming. Until next month, see ya'll. |