| Previous
Page |
PCLinuxOS
Magazine |
PCLinuxOS |
Article List |
Disclaimer |
Next Page |
Programming With Gtkdialog: Part One |
|
by Pete Kelly (critter) With a standard installation of PCLinuxOS, you get hundreds of applications. With access to the repositories, you have access to thousands more. This is nice, but I actually only use about a couple dozen on a regular basis, despite having very many more installed. To get at any of my favourite applications meant opening a menu and clicking through several sub-menus to find it, or to create keyboard shortcuts, which I could never remember. I could, of course, have put shortcuts on the desktop, but I prefer an uncluttered desktop. Plus, the desktop is usually covered by the current application, anyways. To solve the problem I wrote a little utility using a program called gtkdialog. This utility pops up a little dialog box with one button for each application. Each button has a suitable icon, and will display a tooltip describing the application when you hover the mouse over it. As an added advantage, the dialog can be made to appear centred around wherever the mouse happens to be. Clicking one of the buttons closes the utility and launches the chosen application. 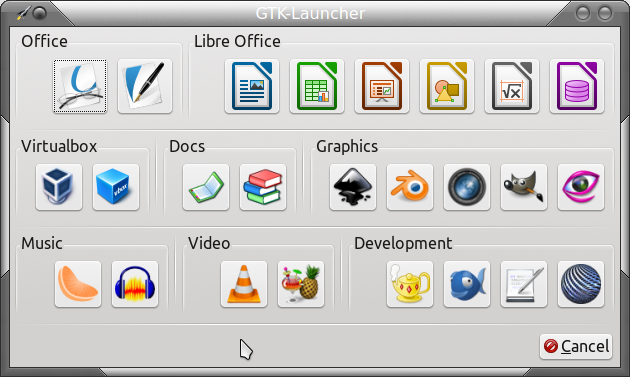 All of the items in this dialog, that's buttons, titles, dividers etc., are known as widgets. To make this program, you need a bash script, which you don't need to understand -- although it would be helpful if you did, along with some plain text which describes, in a series of stanzas (groups of lines), each of the widgets that you want to display. The text in the stanzas uses markup tags to communicate with gtkdialog. Once you have seen a few examples of this, these tags are pretty much self-explanatory. To get the layout correct, you also need to understand the structure of the text in the script. Let's start with a simpler, 2x2 button dialog with a cancel button. The process is the same, no matter what size you want. The contents of the dialog are a series of horizontal and vertical boxes, which you join together like Legos. Into the boxes you put widgets, such as buttons. Your text stanzas then describe the appearance and actions of the widgets.  In the dialog window, we start with a vertical box (blue Lego brick), add 3 horizontal boxes (red bricks), separated by 2 horizontal separators (cyan bricks, only one is highlighted in the image). In the top 2 horizontal boxes we add frames (green bricks), which help to describe and group the contents. In these frames we add our user-defined buttons (brown bricks), and then finally, in the bottom horizontal box, we add a gtkdialog predefined button which enables us to abort without actually selecting anything. The code to display a gtkdialog can be as simple as this: #!/bin/bash export MY_DIALOG='<vbox><button cancel></button></vbox>' gtkdialog --program MY_DIALOG 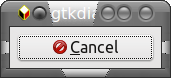 The simple script displays the simple dialog shown above. Clicking the button makes it go away. What did you expect? You can write the text in any plain text editor, but a programmers editor such a kate, SciTE or vim might be more suitable. After saving the text, the file needs to be made executable. Right click on the file in your file manager, select properties, permissions and check the 'is executable' box. Alternatively, in a terminal, type chmod u+x my_dialog, or whatever you called it. Having a closer look at this short script we find that: Line 1 tells the system that we want bash to interpret the script. Line 2 puts the text that is our program into a variable, or container, called MY_DIALOG, and exports it to make it available to the gtkdialog application. This could actually be called anything you like.The text tells gtkdialog to put a vertical box (that's done by the <vbox> tag) into the dialog, and to put a cancel button into the vbox (this is done with the <button> tag). The cancel button is one of several pre-defined gtkdialog buttons. The others are yes, no, ok and help. The </button> and </vbox> tags terminate the button and vbox definitions, respectively. Line 3 finally calls the gtkdialog application, telling it to use as its program instructions the text we put in the variable MY_DIALOG. Note the two dashes before the word program. You could simply put more and more text into line 2 between the quotes to make a much more complex script, but this has two disadvantages. First, it would be very difficult to maintain or change, and second, the shell script part is just a little too basic. Below is the same script rewritten to address these issues. You don't need to understand the shell script part, in grey text, as this is simply used as a 'wrapper' for gtkdialog. Only the text between the quotes is important to us here, and this we can keep simple.
#!/bin/bash
DISPLAY=":0"
exec 9>/tmp/pid
if ! flock -n 9  ; then
    zenity --warning --text="GTK-Launcher is already running";
    exit 1
fi
export MY_DIALOG='
<vbox>
    <button cancel>
    </button>
</vbox>'
gtkdialog --program=MY_DIALOG
rm -f /tmp/pid
Exec 9>&-
I have included indentation in the text to separate the different widgets, this makes following the code a little easier. An even better idea is to use a text editor that supports syntax highlighting. Most modern text editors such as kate, scite or gvim do support this, although I have yet to find one that natively supports gtkdialog type code. As a work-around, I usually change the highlighting support to a language such as HTML or XML. This is not perfect, but it does help.
Okay, looking at the code to produce the 2x2 launcher utility, ignoring the grey bits, we have this (I have changed the MY_DIALOG variable name to LAUNCHER). The text colors correspond to the colors in the dialog diagram. 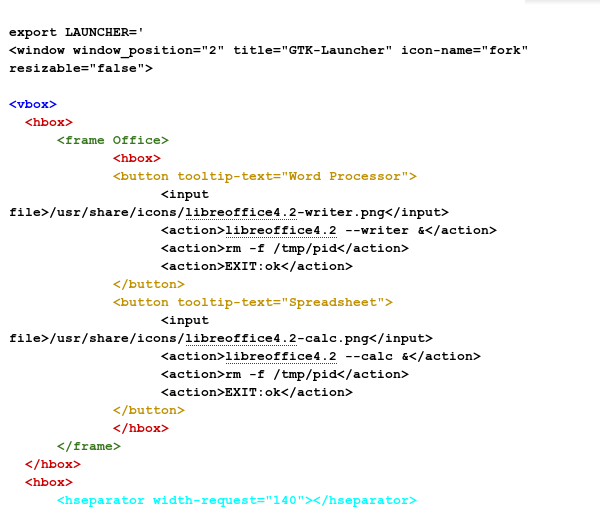 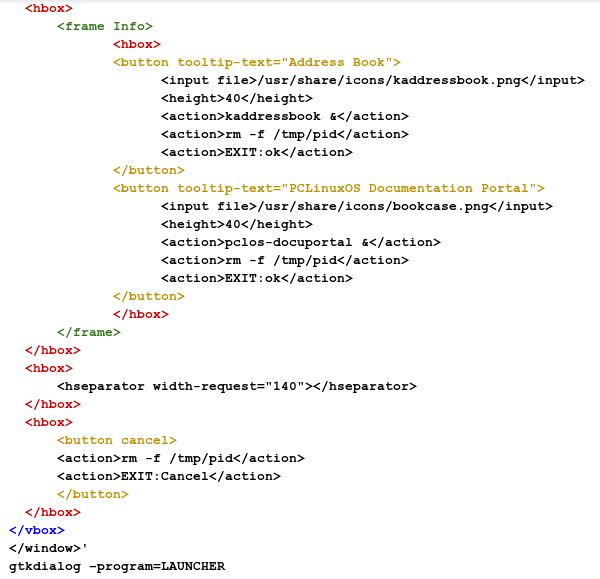
You can see in the code listing how strict indentation and syntax highlighting help to make the code easier to read. Using the Lego analogy again we have red <hbox> bricks, brown <button> bricks, green <frame> bricks and so forth. We just click them together to assemble our script.
At the top we have a line that starts <window...
window_position="2" Position 2 means start centred wherever the cursor is.* *Window_position 1 is centred in the (current) screen. Position 0 is bottom right of the default screen but this can be adjusted by passing X and Y offsets if you need an absolute position. The window widget can contain only one child widget. For this reason you will generally want to start with a vbox or hbox widget, each of which can hold multiple child widgets. Next we have a vbox containing a hbox which contains a frame with the title 'Office'. Inside that is another hbox containing two buttons. I have highlighted the stanza that completely describes the first button. Hovering the mouse over this button raises the tooltip "Word Processor." The icon used on this button is /usr/share/icons/libreoffice4.2-writer.png. Clicking on the button will initiate three actions:
1. Launch LibreOffice writer The ampersand (&) tells the script to continue this script after launching writer, not wait until writer is terminated which would prevent any further use of the launcher. Once you have your script complete, you will want an easy method to launch it. On my Thinkpad laptop, I have a large blue button which is only used by the system at boot up (it was originally also used in windows before I exorcised it). This is an ideal candidate. I simply hit the button, and the utility appears where the mouse is. My desktop keyboard has a similarly useless key - the calculator key. With a bit of imagination, the calculator logo on the key-top looks a little like the launcher utility, so I use that. Most desktop environments have a way of associating a key press with starting an application, or you could set it up using xbindkeys, see here. You can increase the complexity of the utility by simply adding similar stanzas, vboxes, frames, hboxes and dividers as required. Add them one by one, from the outside in and test after each addition, as any imbalance, such as a missing tag, will cause the script not to run. Want another row of icons? Click in a red brick, a green brick inside that then another red containing some brown ones goes into the green one, edit the text stanzas and you're done. Why the extra hbox inside the frame? Try removing it and see what difference it makes. The size of items is, for the most part, taken care of automatically by gtkdialog but you may override this as I have done in the 'Info' frame to make the buttons better fit with their allotted icons, and also with the horizontal separators to control the overall aspect of the utility.
Of course you also need to know what to put in the stanzas, although you could just copy these and change the tool tip, icon and the application you want to execute. That would work, but there are other options you could use to personalize your dialogs. The documentation for gtkdialog is rather fragmented. There are examples of code to demonstrate all of the widgets in /usr/share/doc/gtkdialog/examples, although to access it, you may need to re-install gtkdialog from the repository. By far the most complete reference I have found is online at http://code.google.com/p/gtkdialog/w/list. There is also some excellent documentation in the Puppy Linux forums at http://murga-linux.com/puppy/viewtopic.php?t=38608. You may also find these additional documentation and examples particularly useful and helpful. This little utility demonstrates just some of the power and functionality that you can achieve by using what is, for the most part, plain text and common sense. While it is unlikely that you will replace any of the major applications such as Gimp or LibreOffice, there is a whole lot more that can be achieved to make life easier using utilities such as gtkdialog. This short demonstration has only scratched the surface. There is so much more, but then you knew that. This is, after all, Linux. |