| Previous
Page |
PCLinuxOS
Magazine |
PCLinuxOS |
Article List |
Disclaimer |
Next Page |
Inkscape Tutorial: Create a Candle |
|
by Meemaw Some of us like to make wallpapers for the holidays. I saw a tutorial about creating a candle, and I thought it would be a great project to do before the holiday season starts, so we might use it in one of our wallpapers. Opening Inkscape, use whatever size page you want. The default is A4, Portrait oriented, so I'll probably open Document Properties from the File menu, and change it to Letter, Landscape oriented. The choice is up to you. To draw the basic candle, you can use the pen tool, or you can create a rectangle and an ellipse and choose Path > Union to combine them. If you do that you will have to create extra nodes across the top and pull them out to make the part of the candle that is melted down. It's just a decision between making the separate items, merging them and pulling nodes ... or drawing the whole thing by hand with the pen tool. 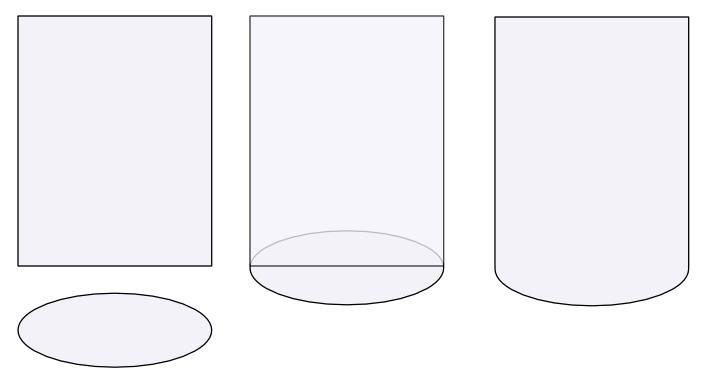 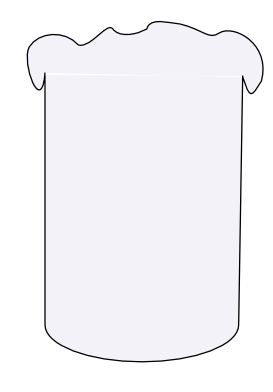 Let's fill it with color. Open your fill and stroke window, and fill your object with your desired color. Mine will be an orange shade. Set the stroke to None. I'm going to add a linear gradient in the center to look like a highlight. Using the Pen tool, draw an irregular elliptical shape. This will be the top of the candle. Fill the shape with a radial gradient, lighter in the center. When the candle is lit, the center is the brightest, so make it very close to white. 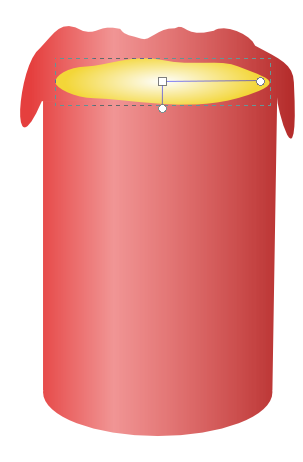 Let's highlight the top so it looks more like the wax has melted down and fallen over. At the top-front, draw an elongated irregular ellipse shape, just below the edge. Blur it, then apply a white to transparent radial gradient. Do several around the edges. 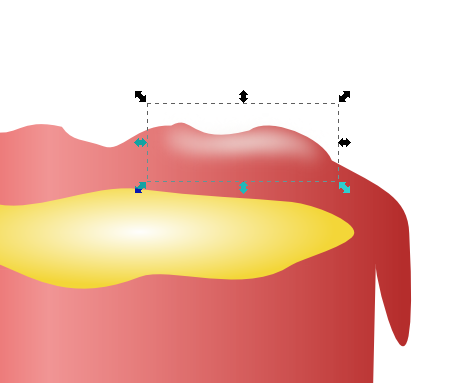 Let's add a highlight to help define the shape of the lip. We will add one highlight going all the way around. Draw a ring, and then draw an inner ring on top of it. Select both rings and choose Path > Difference. Set it to a semi-transparent white and Blur it. 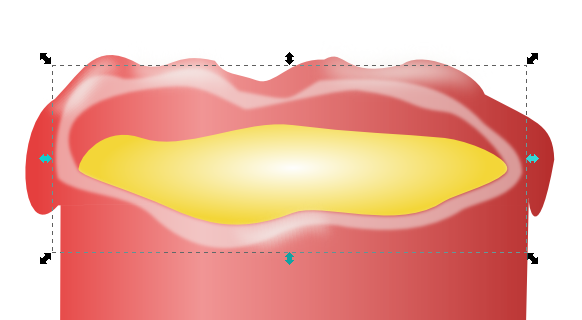 Now we want to show the inside of the candle as brighter because it is lit, so we'll add a highlight on the inside of the lip. Draw a shape that looks as if it curves around the back of the candle. Slide it under the inside ellipse that we drew first, then blur the inner highlight. 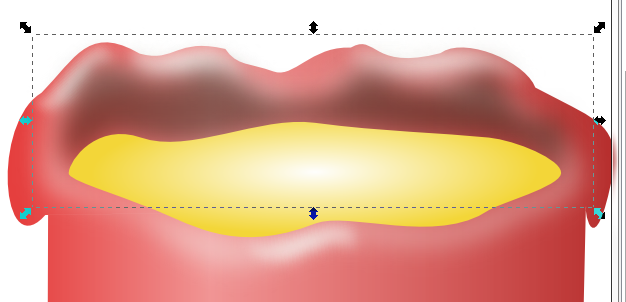 Apply a radial gradient going from a bit lighter than your candle to transparent. Extend the gradient handles beyond the bounds of the object. So far, mine looks like this: 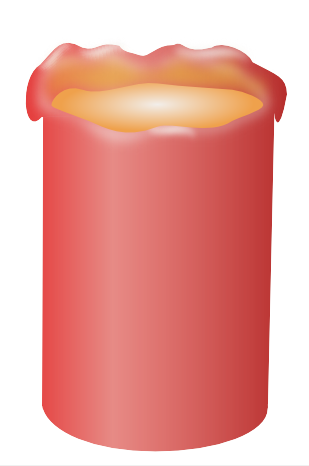 I'm sure you can see other edits I have made in my progress.... changing the color of the center to a little darker one, and shortening the amount that the wax has dripped. Most of that is personal preference, so you draw yours however you wish. Now we can work on the flame. Every lit candle has a pool of wax at the bottom of the wick, so let's do that first. Draw an ellipse in the top-center, color it yellow-orange, and give it some blur. Draw the wick. You can start with a black rectangle, but flare the edges a bit to make it look uneven. Change the fill to a black to yellow gradient, top to bottom.  The flame will take a bit of work. Start off drawing a sort of ellipse with a dent in the bottom (looks kind of like a fingernail to me). Make the fill a solid, fleshy color (left). Draw a little different shape on top of it, leaving the bottom of the first shape visible. Fill the top shape with white and blur it (center). Draw a flat arrowhead-like shape at the bottom of the flame. Fill it with yellow and blur it. Draw a circle at the bottom of the flame and blur it. Apply a peach to transparent gradient, running top to bottom (right). Select all parts and group them.  Place it on top of your wick. Now, mine looks like this: 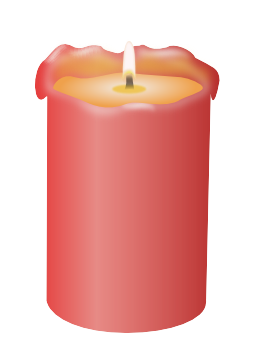 I did a couple of things to mine after this. I am going to put a dark background behind my candle. However, many of the gradients I have been using have been transparent in places. I'm sure there is a professional way to keep the background from showing through, but the easiest way I have found is to duplicate the candle base, change the fill to solid white or something close, and send it to the bottom of the drawing. I also added tiny a bit of shade on the front of my candle to simulate a shadow from the wax that is dripping over the front. Now we will add a background. Draw a rectangle on your page and send it to the bottom of the drawing. Mine will be a dark blue to transparent linear gradient, top to bottom. I made it mostly dark blue with the transparent showing only toward the bottom. Then I added a shadow at the bottom of the candle. Since it's your drawing, you can do as much or as little of this as you desire. Mine now looks like this: 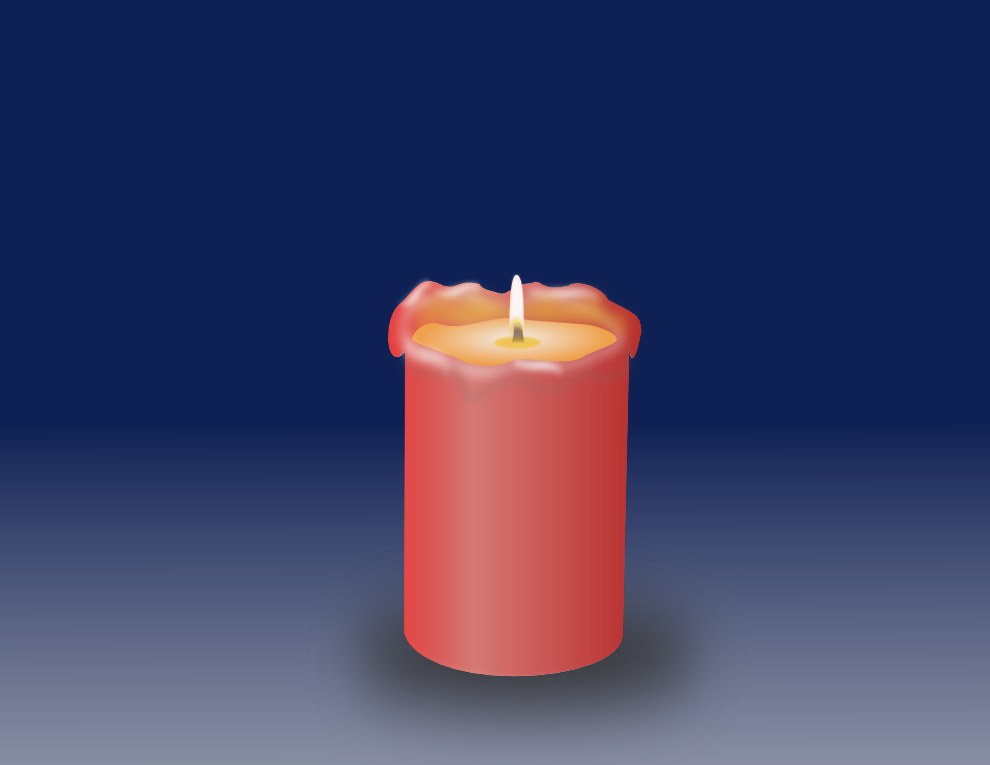 You can always dress up your candle by designing a base or platter to put it on, or putting some sort of floral design around the bottom. I remember ms_meme making a candle like this and drawing poinsettia leaves around the bottom for a Christmas wallpaper. It's your project -- do what you want, and personalize your creation! |