| Previous
Page |
PCLinuxOS
Magazine |
PCLinuxOS |
Article List |
Disclaimer |
Next Page |
GIMP Tutorial: Frozen Text |
|
by Meemaw This tutorial was sent to me a year or so ago, and I thought it was fun. We have done text in GIMP before but this one is a different effect and uses a combination of some skills you already have. 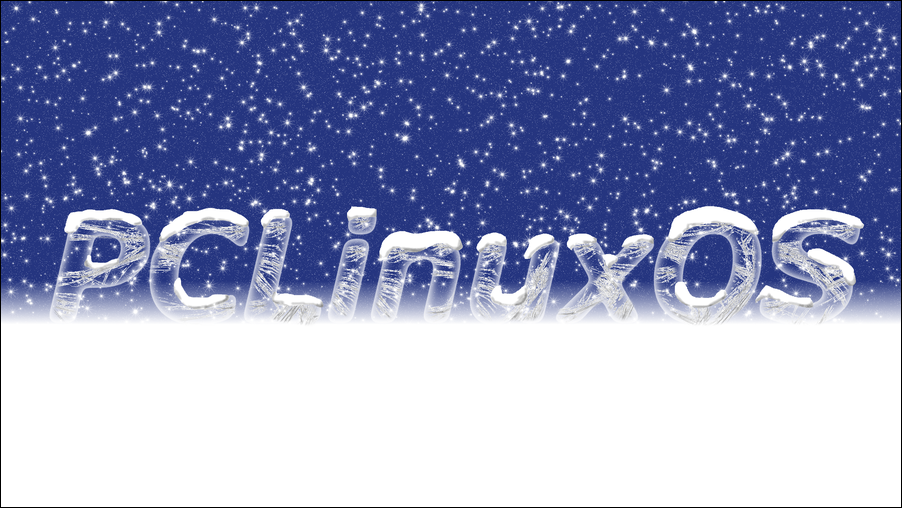 Opening GIMP, create a new 1600 x 1200 canvas with a black background. Click on the text tool, change the foreground color to white, change the text size to 400 px, and type your text. I wrote PCLinuxOS the first time on a bigger canvas, as you see above, but I wrote Linux this time. Choose the Move tool, and move your text to the center of the canvas. Now, right click the text layer, and choose Alpha to Selection to select the text only. Choose Select > Feather. In the window that appears, change the number to 10% of your font size, in this case, 40 points. What we are trying to do is make the text look like ice with the inside clear and the outside frosty. It will be rounded text rather than having sharp corners.  "Turn off" text layer by clicking on the little eye to the left of it in the layers window. Create a new transparent layer on top. Using the bucket fill tool, check Fill Whole Selection in the tool settings and fill the text with white.  Now use the Select by Color tool. Click in the background. Notice that the selection lines are farther out from the letters now.  The background is selected now, so go to Select > Invert to select the text. Using the bucket fill again, fill this text with white.  Duplicate this layer, then turn off the original. Select the text layer, and choose Alpha to Selection. Then go to Select > Feather again. If the feather box is still set to 40 px, click OK. Select the top layer (mine says "Layer copy") and press Delete. Go to Select > None to deselect everything.  If you haven't saved your file, you should do it now. We have the text now, so let's put some ice crystals into it. Create a new transparent layer, check that your foreground color is still white and then select Filters > Render > Nature > Flame. In the window that opens, slide the brightness clear to the right. Click the Edit button at the top, then choose Bent from the dropdown in the edit window. Click on the randomize button several times to find a pattern you like. then click OK. (This filter takes a few seconds.) Now click on Filters > Edge-Detect > Sobel, then click OK. You'll notice your nice white pattern has changed to black so go to Colors > Invert.  We don't want all of that but we are going to clone part of it to make our text look frozen. Find a spot you want to use, then click on the clone tool. Make it the same size as your text with a soft brush. <CTRL> + click on the pattern that you want to clone. Turn off that layer and choose the Layer copy. Using smooth strokes, paint your pattern into your letters. It seems to look best if you start in the middle of the letter and stroke up and down without making many short strokes. Make sure you have saved your work.  Let's add some snow! Add a new, transparent layer on the top. Using the Lasso tool, draw an irregular shape on the top of a letter, then bucket fill the shape with white. While your shape is selected, change the foreground color to black, and change to the Airbrush tool. Set the opacity of the tool to around 50%, and use a little bigger brush, even bigger than the one you see in the photo below. Put some shading at the bottom of your snow shape. 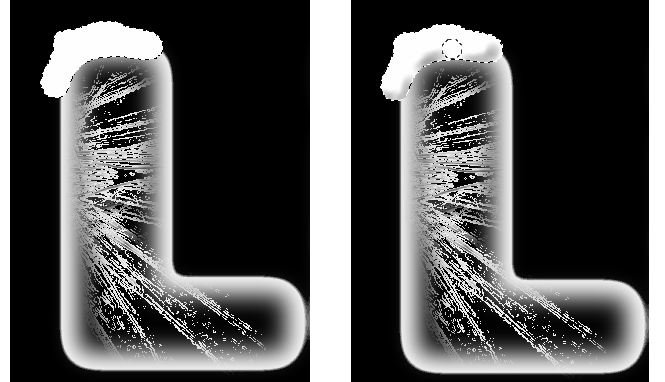 Repeat your snow shapes on each letter. We are to this point now. Make sure to save your work. 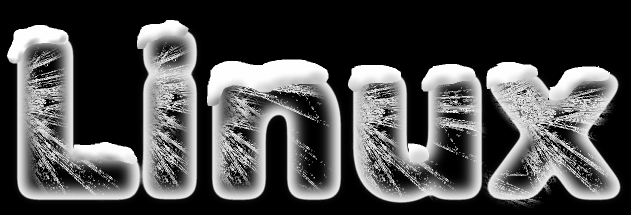 While it looks cool this way, it needs a different background. Click on the black background, most likely the bottom layer. In the toolbox, choose the Gradient tool. In the tool settings, make sure the FG to BG gradient is set, and that your background is set again to white. Change the foreground to a nice blue. The color I used was 485bbc, but you should use whatever looks good to you. (As you saw, the one at the beginning of the article used a darker blue.) Click and drag your mouse straight down from the approximate center of the letter to the bottom.  This illustrates the path of the gradient tool. When you get finished, the text looks like it is sitting on a surface of ice or snow. I added the border to clarify the edges of the drawing, but that's up to you.  We need snowflakes as well. Add a new layer at the top filled with black. Go to Filters > Noise > HSV Noise. In the window that appears, slide the Value slider clear to the right, and click OK. Now, choose Filters > Light and Shadow > Sparkle. In that window, change the Spike Points slider to 10. Then, in your Layers window, change the Mode from Normal to Screen. Wow!  Save your work and export your creation. |