
| Previous
Page |
PCLinuxOS
Magazine |
PCLinuxOS |
Article List |
Disclaimer |
Next Page |
Create A Great Video With OpenShot |
|
by Meemaw My brother goes on vacation every year. When he returned recently, he posted a video slideshow (with music!) to showcase his best vacation photos. When I asked him what he used to make the video presentation, he told me it was OpenShot. (My brother uses Linux, too.) OpenShot 1.4.3 is in our repo. I installed it the same day he told me about it. It will most likely be listed under the Video section of your menu. When you first open it, the following window appears: 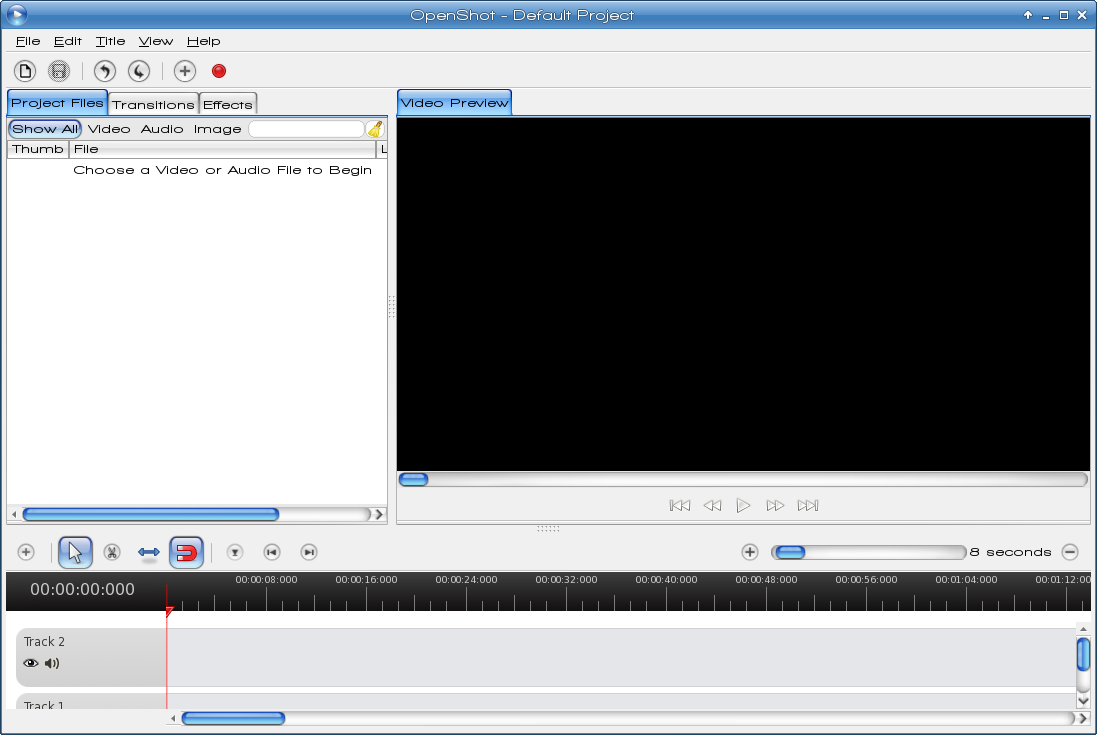 You will see three sections. The top left section is where you view the files you have imported for your project. The top right section is your preview window, and the bottom section is your timeline. This is where you will place your files in the order you want them, and generally build your show.The sections can be resized, if you wish, by grabbing and moving the dotted line at the center of each section border (see arrows below). 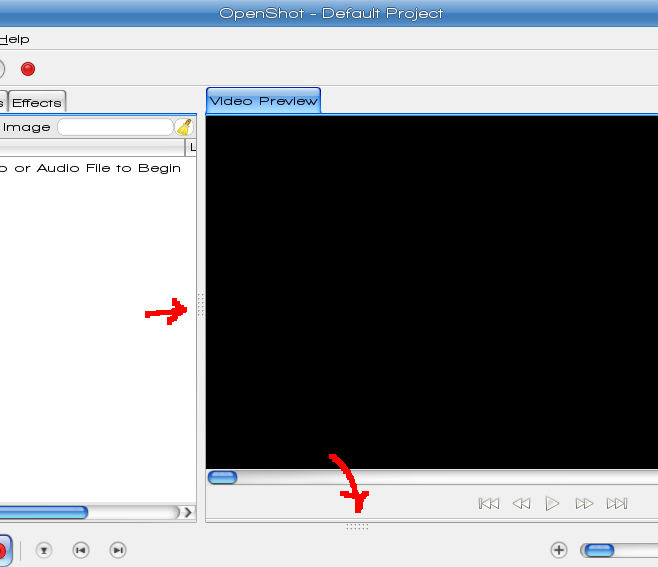 OpenShot is easy to use! Your first step is to import the photos you want to use. You can choose File > Import Images, or open your file manager, choose the images you want, then drag & drop them into the upper left part of the window under the tab that says "Project Files". If you already have music planned, you can also import an audio file at the same time. This will give you an audio track for your slideshow. 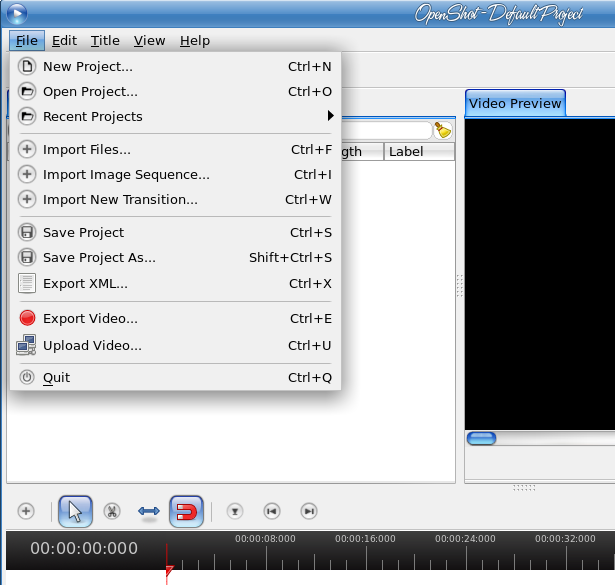 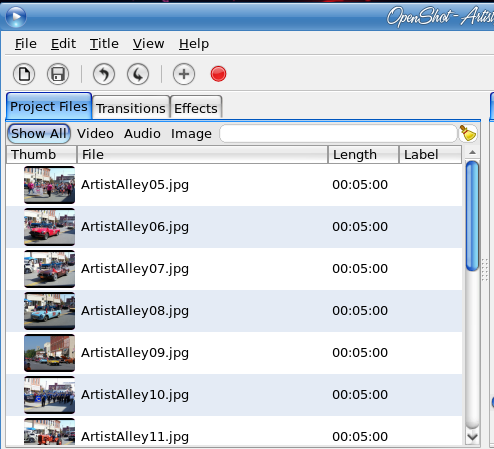 You will notice in the window that there are already two tracks down in your timeline. Tracks are kind of like layers. If you place two images in the same position on the timeline, but in different tracks, you will essentially be placing them on top of each other, and you will see them both at the same time. While that can have its benefits, you will not do it all the time. Rather, you will want to space them out along the timeline so each one is seen alone. This is easier with more than one track. I imported several images from one of my vacations, along with an audio file, then I placed the audio file on track 1 (at the bottom) and added another track. Now I have two tracks in which to arrange my images. My plan is to fade from one to the other, so I am going to overlap the ends of the images. It can be done on one track, but it's easier if you use two. Beneath your project file window is an editing toolbar.  Hovering your mouse over them will tell you what each one is. From left to right, the tools are: Add Track - You can click the plus sign to add a track to your project. Alternately, you can right click one of the existing tracks, and a menu will appear letting you add or remove a track from your project or move that track up or down. Selection - The selection arrow is your main tool, used to move your files around. Razor Tool - If you are inserting a video clip and only want to use part of it, you can use the scissors to trim it down to the piece you want. Resize Tool - The default viewing time for each slideshow clip is 5 seconds, but if you want it to last longer, you can use the resize tool (double-headed arrow) and increase the length of the clip on the timeline. Snapping Tool - This is the magnet you see in the toolbar, and it is a button that is clicked on or off. In the image above it is on. When your clips are in one track and you move one close to another, they will snap together end to end. This eliminates any gap in your slideshow. Add Marker - During your editing, you might want to view from a specific place. This tool allows you to place a marker at that spot so you can get to it easily. You can add as many markers as you wish. Previous Marker and Next Marker - If you have more than one marker, these tools will help you navigate through them. Zoom In and Out with Slider - On the right side of the window is a slider with a plus on one end and minus on the other end. This affects the time gradient at the top of your timeline. The default is eight seconds, but if you want to look closer you can zoom in and the number increments at the top will change, allowing you to be more accurate. 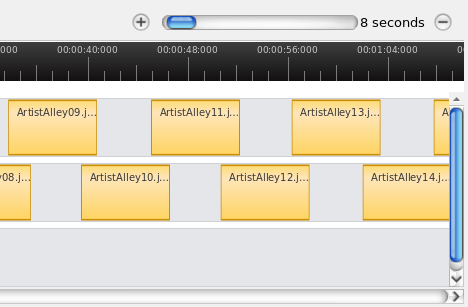  Files/images can be added one at a time, or you can add many files together. Select the files you want to add by holding the CTRL key and clicking on them, or choose a series by clicking the first file, holding the SHIFT key and clicking the last. Right click on the chosen files and select Add to Timeline. The following window will appear: 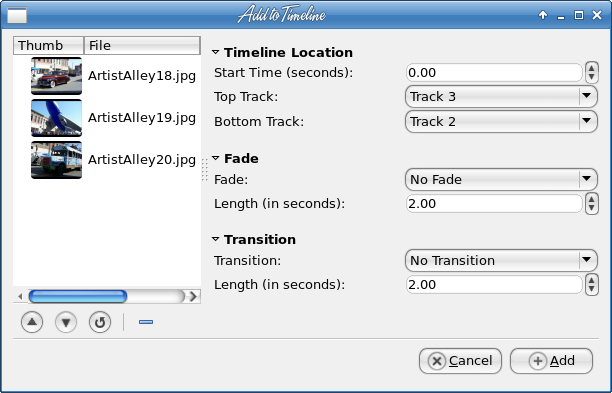 The timeline has time in minutes and seconds, but to tell this window a start time where you want the files added, you must convert it to seconds. Also notice that the window has choices for the top and bottom track, but when I added the three files you see, they were all added to the same track (Track 3). It's easier than dragging them one at-a-time, however, and you can arrange them from there. This window also has choices for Fade and Transition, so let's talk about those. Fade is just what it sounds like: the photo fades from view or, as it's coming into view, changes from transparent to a normal photo. If you have your project set to fade in and out, the progression of images will look similar to this:  In the Add to Timeline window, you will have choices to have no fade, fade in, fade out or both, and with the time setting, you can choose the speed at which it fades. If you chose to add each image separately, you can right-click each one and designate fade in, fade out, or both, and whether it is fast or slow. All of my images in this project were set (individually) to fade in and out fast. Transitions are another way to change from one slide image to the next, and even add a bit more drama to your video. At the top of your project image list, you will see two more tabs: Transitions and Effects. There are 55 transitions in the window. Many are similar to the transitions you use in LibreOffice Impress, if you create presentations. You can assign any of them to individual slides, or from the Add to Timeline window, you can assign the same one to as many slides as you want. As with presentations, it's usually a good idea to stick with only one or two transitions, so your presentation has continuity. The following example is the Star2 transition. When you get your slides arranged and your fade and/or transitions set, you can do two more things to make your video special. One is Effects (the third tab at the top of the image window), which allows you to assign a specific look to one or all of your images. For example, say you want to show one of your slides as a black & white photo instead of color. Instead of going into GIMP and changing it to a black & white photo, just add the greyscale effect to that slide and it will be done. A sepia effect is also included in the 55 effects in that tab. This is the distort effect. 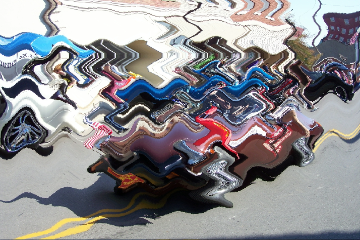 If you haven't saved your project yet, you need to save it. OpenShot saves the files with the extension .osp. Before I saved mine, I deleted the third track, as I decided against an audio track. Wow! I have my slides arranged, transitions and effects set… what else can I do? How about a title? One of the menu items at the top is Title. When you click on it and choose New Title, the following window appears:  The top right dropdown has the title effects you can use (there are 34). Choose the title you want to use, then click on Create New Title. You can use the window to design your title, putting in the text you want, changing the font, font color and background. If you want something fancier, you can click Use Advanced Editor and Inkscape, if installed, will open and allow you to edit further. Your title will be placed into your image list and you can place it just like you have all other images. The aim of this program is to let you export your slideshow as a movie. When you are finished editing and transitioning, save your work again, and click the red dot at the top of your program window to export your video file. You will see the following window: 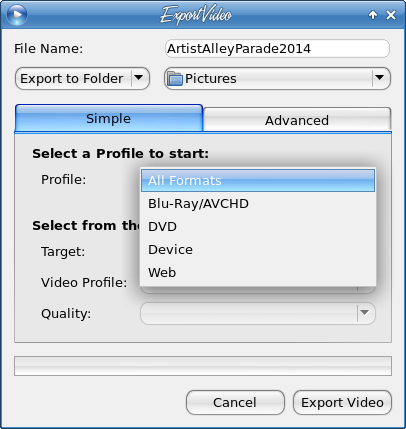 Depending on the profile you pick (I chose All Formats), you will have a great many choices. I chose to export to MP4 and accept the defaults that appeared (DV/DVD NTSC in Video Profile, and Medium in Image Quality). I didn't do anything with the Advanced Settings tab, but if you know more about video creation than I do, you can probably tweak your video even more. Please Note: As usual, the size of your images will have an effect on the size of your finished file. One of my slideshows has images straight from my camera (which takes photos at 3072 x 2048 px) and the finished file is over 125 MB! Resizing my images to 1200 x 900 made a big difference, and the files are still big enough that the picture quality remains good. This time, my finished video was 40 MB. You can view it here: http://youtu.be/VXIsgew6EDo OpenShot has an online help file, located at http://www.openshotusers.com/help/1.3/en/. It gives much more detail than I have, and has a handy list of keyboard shortcuts for the various operations. I'm sure you can make an awesome video! |