| Previous
Page |
PCLinuxOS
Magazine |
PCLinuxOS |
Article List |
Disclaimer |
Next Page |
GIMP Tutorial: Pop-Up Text |
|
by Meemaw I found a fun tutorial the other day that shows how to make your text look like it is pushed up out of the background.  Create a new page. It can be any size you want, but mine is 640 x 400. You can use the Pattern choice on your Bucket Fill or just open some sort of pattern. The one I did above was the pattern Paper. The rest of this tutorial will use a wood background. Add your text as usual, setting the characteristics to your liking. 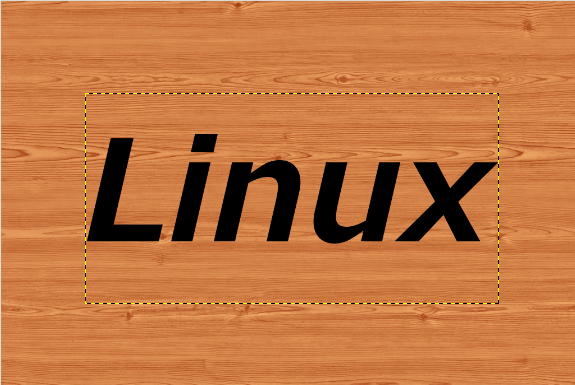 Now we will copy the background texture onto the text. With the text layer chosen, right click it in the layers dialog and choose Alpha to selection. This will outline your text. Now click on the background layer, then click Edit > Copy. Then, click the text layer, and choose Edit > Paste. 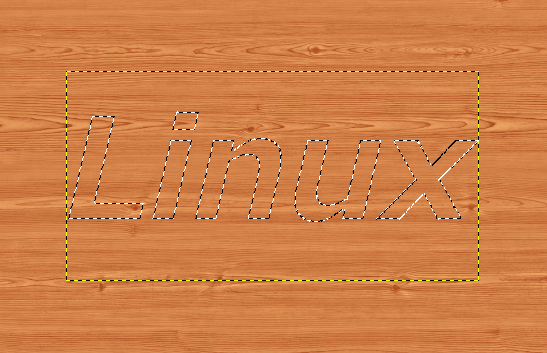 There is a floating layer above your text layer. Choose that layer and click the anchor in the layers dialog to anchor it to the text layer. Create a new, transparent layer, then click back on your text layer. Right click the text layer and choose Alpha to selection. You will be able to see your text again by the moving dotted lines. Click on the new layer again, then go to Select > Grow. A box will appear asking how much you want it to grow. You can set it from 5 to 8 px, depending on the size of your text, then click OK. Now choose your bucket fill tool and change it to FG black, then click inside the letters.  Now choose Select > All to select the whole layer, then go to Filters > Blur > Gaussian Blur and change the vertical and horizontal settings to 20 px, then click OK.  This layer should be behind the text, so in the Layers dialog, choose the text layer and move it to the top.  Now we are going to add another effect to help our text along. Right-click on the text layer on top and choose Alpha to Selection. Then go to Filters > Decor > Add Bevel. Change the setting to 5 px and uncheck the two boxes in the Bevel window. Click OK. You should see a tiny bit of a bevel on the edges of the letters. Change to the Move tool and move text layer up and left a tiny bit, then anchor it. Now it looks as if it is popping out of the background.  If you are happy with the results, you can go ahead and merge your layers and export your project.  I have found several tutorials about text, so we will do more in coming issues. |