| Previous
Page |
PCLinuxOS
Magazine |
PCLinuxOS |
Article List |
Disclaimer |
Next Page |
GIMP Tutorial: Fancy Text |
|
by Meemaw  I thought we'd make some fancy text for the magazine's 10th birthday. Open your GIMP and create a new project at least 800 x 600 px. Using the text tool, enter your text and edit it to your liking (font and size). Now click on Layer > Text to path, which will outline your text with a path. However, we can't see the path yet. Go to the paths tab, choose the path and make it visible by clicking the eye next to it. Click on the path tool in the toolbox and click on the text (within the outline somewhere). You now will see nodes on your path, and you can move nodes or part of the path to alter your text. 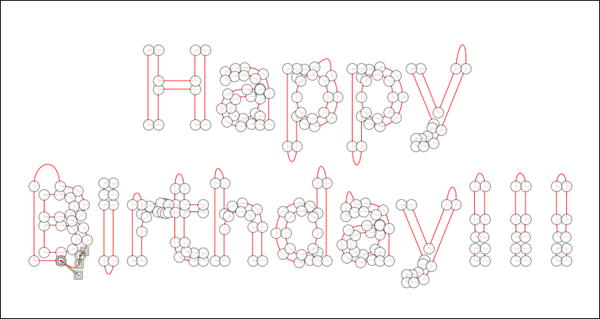 When you have your nodes edited, add a transparent layer above your text. With the path tool still selected, click on the new layer. Below your path tool (on the bottom left of your window, probably) are the settings for the path tool. Click on Stroke path, and in the window that appears, change the line width to 8 px, then click Stroke. 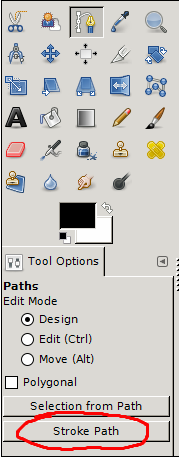 You have your text on a new layer now, so you can go back to the paths tab and “turn off” the visibility of the path. Save your work. Making sure your new layer is selected, click on your ellipse select tool, and draw a small ellipse over one of the places you edited in your text. Click on Filters > Distorts > Whirl & Pinch, and set the Whirl to about 300. You can see that the path inside your ellipse with twist around into a curly shape. You can do that to each of the paths that you created simply by grabbing the ellipse (don't change tools) and moving it to the new spot, then choosing Filters > Repeat Whirl & Pinch, which is now at the top of the menu. 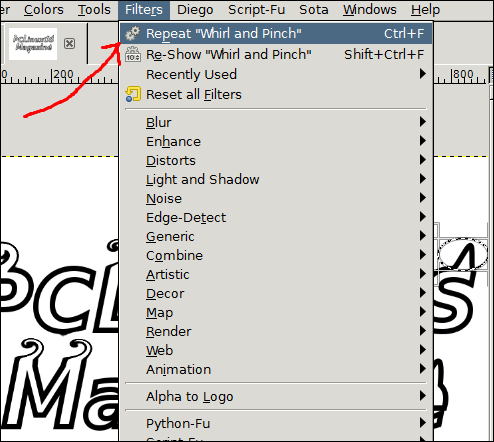 When you are finished changing your text, choose Filters > Alpha to Logo > Glossy. From the window that appears, choose the two gradients you want to use, then apply. You might have to experiment to get the look that you want, but remember, you can go to Edit > Undo, then start over on your gradients as many times as it takes to get what you want. To finish, one option is to click on the layer Background 1 and put a gradient on it with the Blend tool. I used a background to foreground gradient. Now choose Filters > Artistic > Clothify or Filters > Artistic > Apply Canvas. Color it in a manner that will blend with your text. One way to do that is to choose Colors > Colorize. The Hue slider will change the color however you want, then move the Lightness and Saturation sliders until it looks good to you.  
|