
| Previous
Page |
PCLinuxOS
Magazine |
PCLinuxOS |
Article List |
Disclaimer |
Next Page |
GIMP Tutorial: Make A Simple Animation |
|
By Meemaw Suppose you're giving a speech and have something you want to emphasize. You could make a simple animation to help you out. I'm going to use a graphic to help emphasize my point, so I'll open it in GIMP. 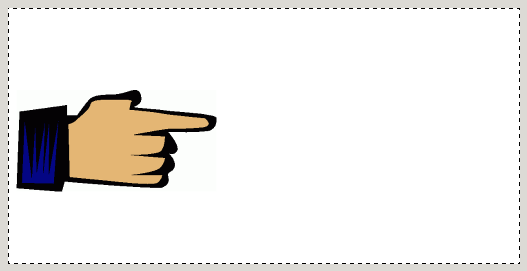 What you didn't see is me adding this clipart to a larger page with a white background. I needed room on the right for the words I'm going to add. An animation is simply a multi-layered graphic, saved as a .gif file, and configured to make each layer visible for a certain length of time as decided by you, the artist. It can have as few as two layers, or as many layers as you want to make your design. On this animation, let's do four layers. We'll start by duplicating this layer three times, so the pointing finger will be constant throughout the animation. In the Layers dialog, click on the Duplicate layer button three times. The only place you'll be able to see the copies so far will be in the Layers dialog. 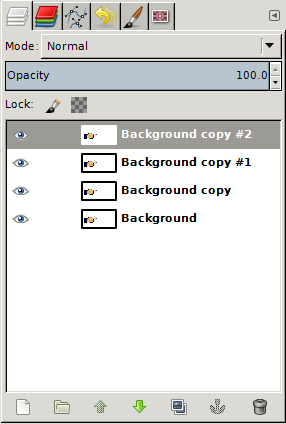 Now to create our text. My text will say "WOW! GIMP animation is easy! Have Fun!", but it will be split into four text frames, one for each layer. I'm sure you can think of some text you'd like to use. Choosing the first layer, create your text frame and enter your text. Just as you normally do, format the font and size of your text. When it appears as you wish, choose the Move tool and position it. You can see that the text layer is "floating" at the moment 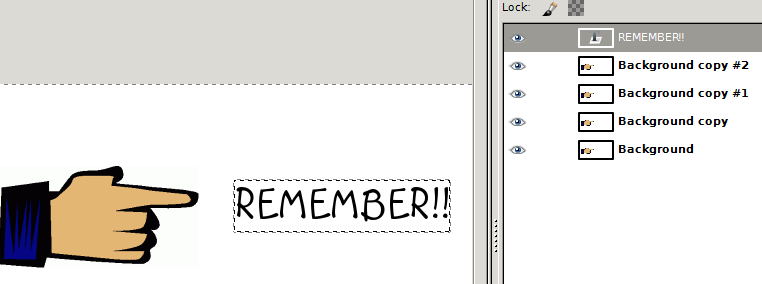 To position your successive text frames, you can set the layer transparency on the finished ones to a lower value, so you can see the layer below it. You can also move the text frame you're working on to the top so you can compare it to the top text, then move it back down when you have it positioned. Something I have learned while doing this animation is that your text has to be in order from last to first (my "Have Fun!!" is at the top of the layer stack and my "REMEMBER!!" is at the bottom for it to play correctly). If you have trouble knowing which layer has which text, you can always rename each layer by double-clicking it in the Layers dialog and typing in the title you want. This might be a good time to save your work, if you haven't already. 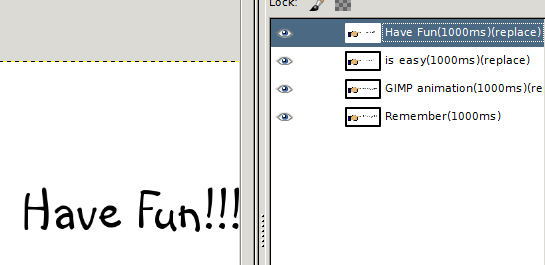
While you are changing the layer names, you can also put in the frame delay. Simply type an expression similar to the following after your layer name: (1000ms). You can see I have that above in my layer names. With this in each "layer comment", the animation will change frames every second. If you want it longer, just increase the time in ms. You can make it change every two seconds by using (2000ms) rather than (1000ms). At the last minute, I added another frame to mine. It has a GIMP logo, and I made its delay 3000ms. To check if it looks good to you, click on Filters > Animation > Playback. You will see a new window with your creation, and can press the play button to see how it looks. 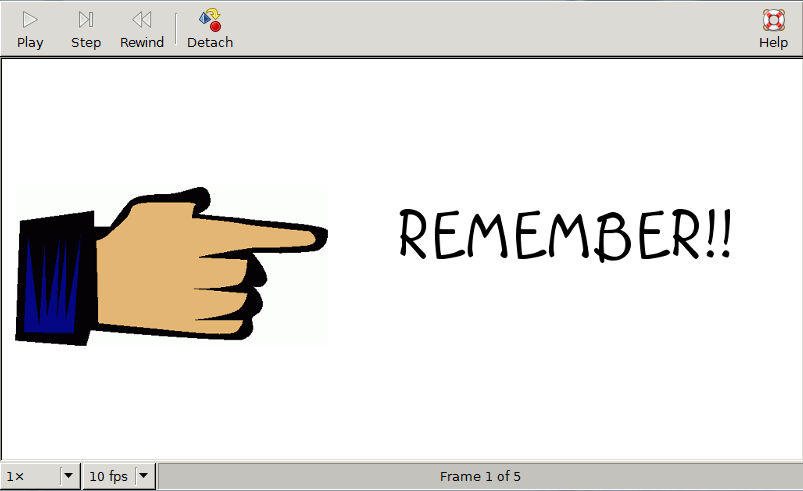 You now need to save your animation as a GIF. You can go in and optimize your file first, if you want to. There are two ways listed in GIMP: Optimize (Difference) or Optimize (for GIF). Difference works by using the background on the bottom layer for all frames, and removing the rest, leaving the text boxes and other additions intact. Optimize for GIF works much the same way but includes a size reduction. However, if your gif isn't very big in the first place (mine is only 800 x 400 px) file size won't be too serious. The biggest mine turned out was 66.4KB, and that was with no optimization. The optimized ones were around 36KB. If you start a bigger canvas, it will probably make a big difference. There is also a choice for no optimization. Now you can choose File > Export, and name your animation using the file format gif. When you do that, you will get a new window asking if it should save the image as an animation. This is exactly what we need. In the window, you have some checkboxes to specify what you want. 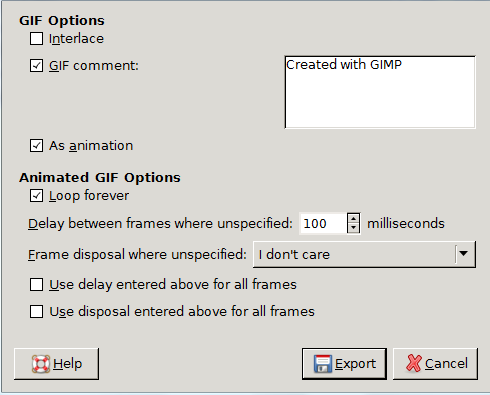 The box "As animation" HAS to be checked, of course. The frame delay was set in your Layers Dialog, but if you hadn't done it there, you can do it here. Loop forever means play over and over, so if you only want it to play once, you can uncheck that. "Frames disposal where unspecified" choices are combined or repeat or I don't care. If you had optimized your file, that should be covered already. You can change your frame delay if you set it above and click the box that says "Use delay entered above for all frames". However, we already set ours, so we won't check that either, or the frame disposal box at the bottom. You can do a lot from this window if you need to change something at the last minute before you export. My animation turned out well! You can view it here. 
|