| Previous
Page |
PCLinuxOS
Magazine |
PCLinuxOS |
Article List |
Disclaimer |
Next Page |
How To Customize The Firefox 57 User Interface |
|
by M. Hanny Sabbagh The new Firefox Quantum browser from Mozilla brought tons of new features and updates. It is now faster, lighter and more organized than ever it was before. However, with the new Firefox Quantum technologies which detached the older APIs used for complete themes and other add-ons, users were having a hard time customizing the browser's interface. Fortunately, you can easily customize Firefox 57 interface by modifying the default “skin.” You can simply create a bunch of CSS rules which change the Firefox interface however you like. We'll learn together how to do it in this tutorial. Step 1: Locate your userChrome.css File userChrome.css is the file which you'll be using to store your CSS rules related to Firefox skin. This file should be inside a folder called chrome in your default Firefox profile. Usually, both the folder and the file don't exist by default, but we can create them. To make it easy on you, open the Firefox main menu and go to Help –> Troubleshooting Information. Under Profile Directory click the “Open Directory” button. Which should open the folder of your current Firefox profile: 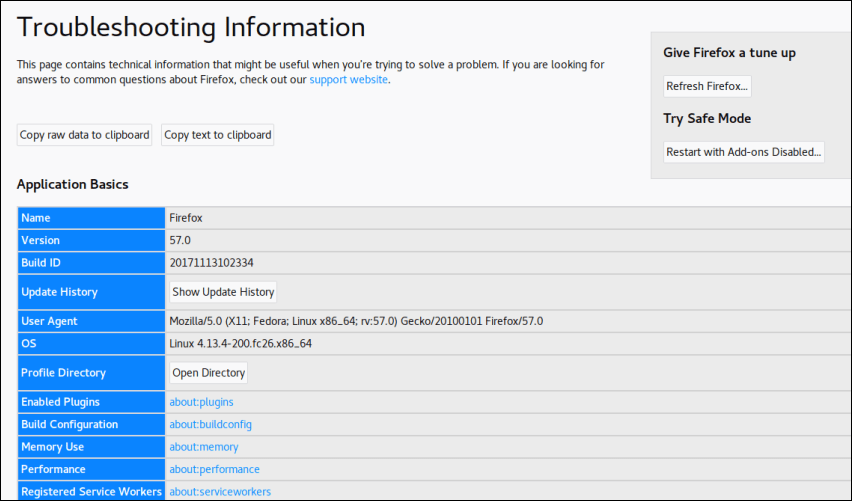 Now, create a folder called chrome, and inside that folder, create an empty file called userChrome. You can now start putting all the CSS rules you want in that file and they will be automatically loaded by Firefox when it starts (if you modify the file, you have to restart Firefox). Step 2: Enable Browser Toolbox In order to write CSS rules related to Firefox interface, you need to know the available CSS selectors that you can use. For example, can we use #tab-bar to modify the CSS of the Firefox tab bar? What possible selectors are there? That's why you need to enable an option called “Browser Toolbox”. To do this, open the “Inspect Element” option from the context menu (right click anywhere on any opened web page), and open settings like the following: 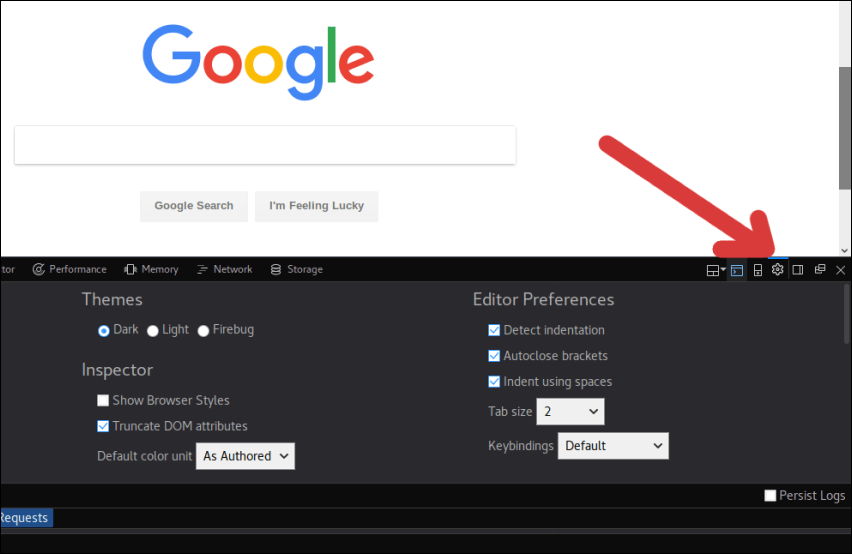 Scroll down to “Advanced options” and check both the “Enable browser chrome and add-on debugging toolboxes” and “Enable remote debugging” options as you can see in the picture: 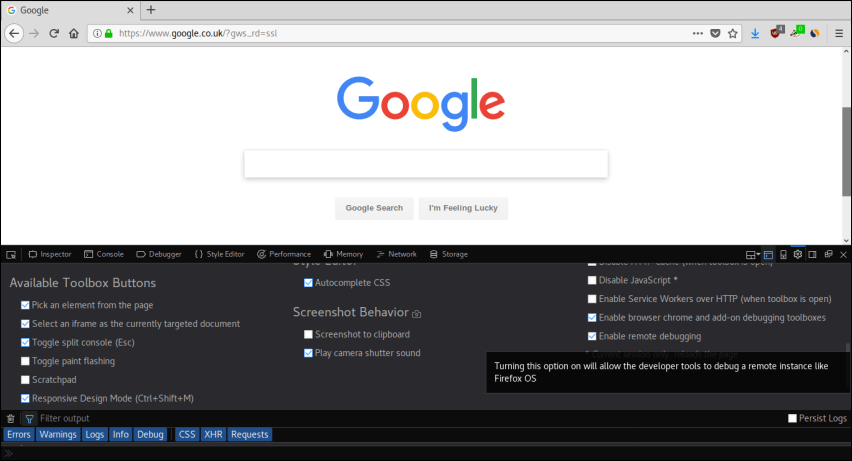 Now open the browser toolbox from Web Developer –> Browser Toolbox. A confirmation message like this will appear, then hit OK: 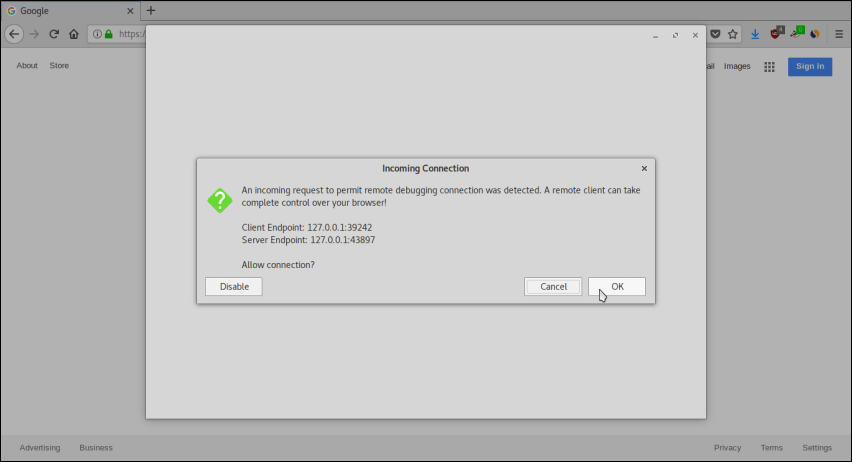 Finally, the browser toolbox window should appear, which you can use to analyze the structure of Firefox interface: 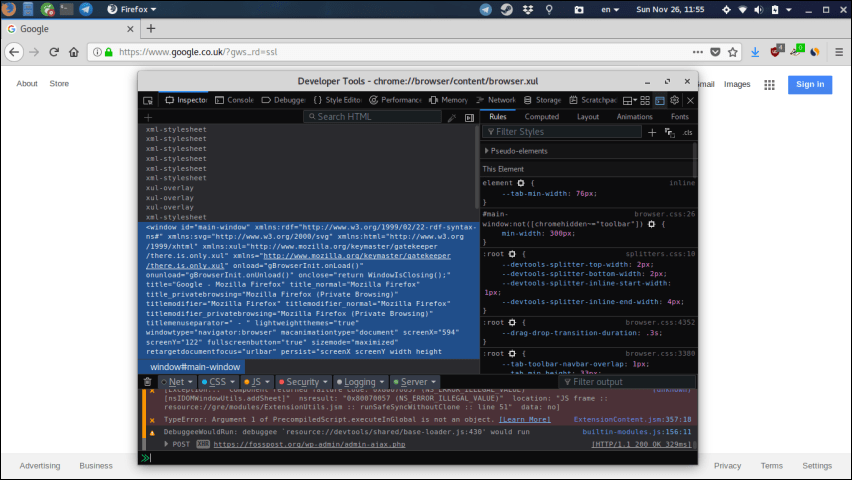 Click on the inspector button (the first button on the left) in order to be able to inspect elements by your mouse:  After that, you can put your mouse pointer on any place in your browser window in order to learn its unique ID. For example, if you put it on the navigation bar, you'll see a red dotted line around it: 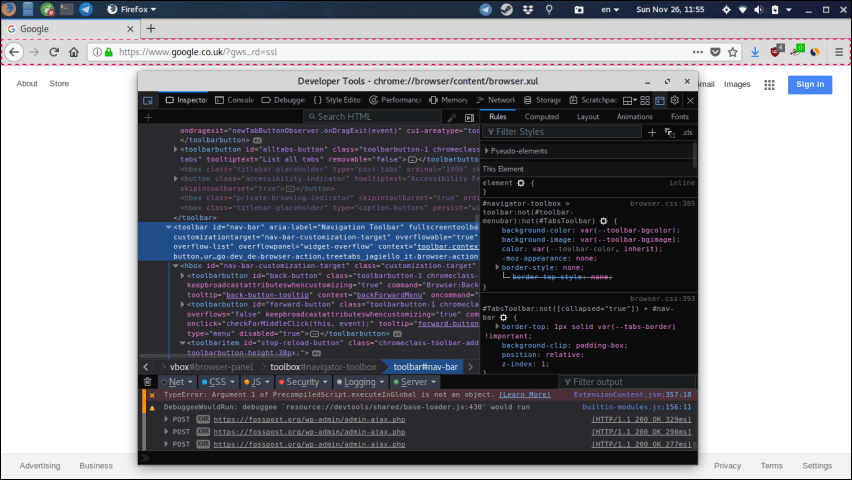 Notice the id=”nav-bar” CSS selector in the code. It means that you can use #nav-bar in your userChrome.css file to modify the look of the navigation bar. For example, say that I want to change the background of the navigation bar into complete white, what I'll add in my userChrome.css file is the following:
#nav-bar {
  background: #fff !important;
}
Remember always to use !important in each CSS rule you create in order to overwrite the default Firefox skin rules. Otherwise, you may go crazy about why your CSS is not being applied. Also don't forget to restart Firefox after each modification you do. After restarting Firefox, this is what I'll get: 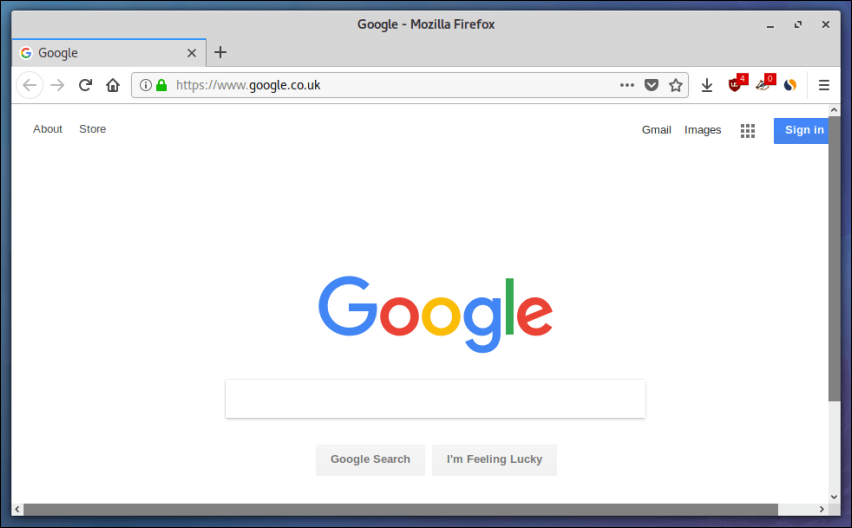 Step 3: Start Playing You now know how to create the CSS rules you need to customize any part of your browser. You can change the default skin, or modify the structure of your browser's interface however you like. I would recommend installing the Tab Center Redux extension which creates a sidebar for your opened tabs. After that, you can apply the following CSS rules in userChrome.css:
#tabbrowser-tabs {
    visibility: collapse !important;
}

#sidebar-box {
    overflow: hidden;
    min-width: 0px;
    max-width: 0px;
    position: fixed;
    border-right: 1px solid #eee;
    transition: all 0.2s ease;
    z-index: 2;
}

#sidebar-box:hover,
#sidebar-box #sidebar {
    min-width: 200px !important;
    max-width: 200px !important;
}

#sidebar-box #sidebar-header, #sidebar-box ~ #sidebar-splitter {
    display: none;
}

#sidebar-box #sidebar {
    height: 100vh;
}

#urlbar {
    border-radius: 0px !important;
}
And here's how your browser will look like:  Your tabs will be auto-hidden on the left side: 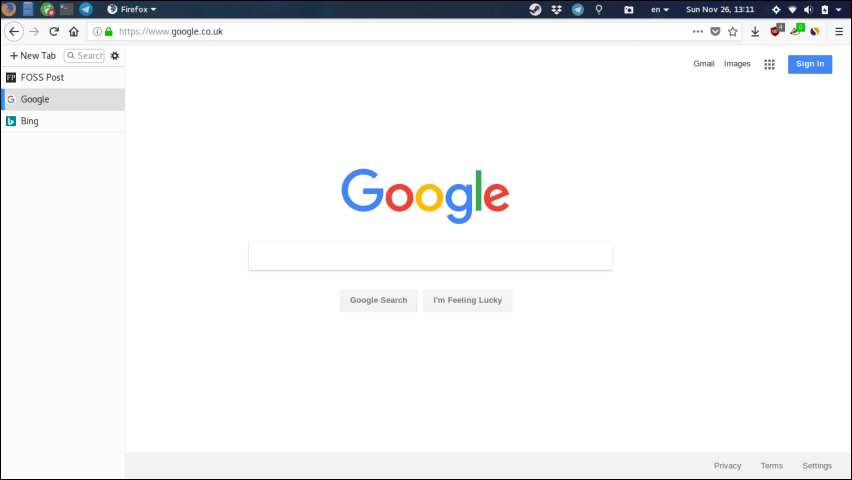 If you want always to see the tab bar on the left, then just replace the #sidebar-box part of the code with following code snippet:
#sidebar-box {
    overflow: hidden;
    min-width: 32px;
    max-width: 32px;
    position: fixed;
    border-right: 1px solid #eee;
    transition: all 0.2s ease;
    z-index: 2;
}

#appcontent {
    margin-left: 32px;
}
And you'll get a better view: 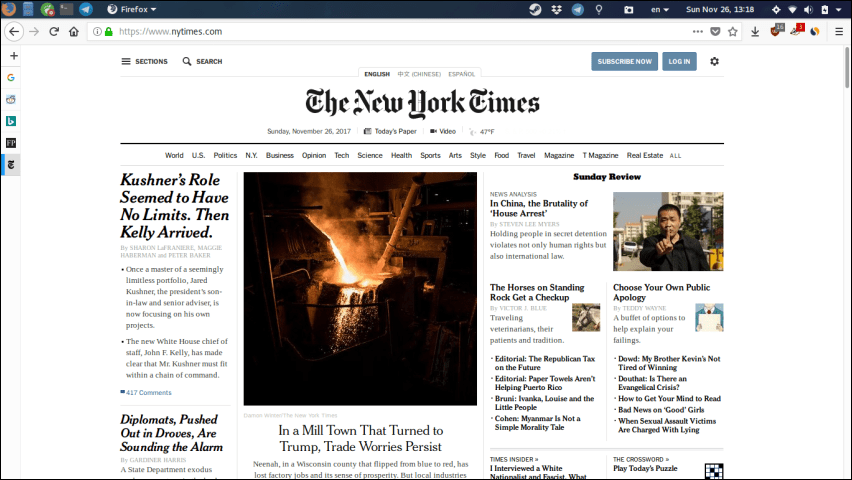 The following list of selectors for Firefox CSS should get you going:
#appcontent: The web view of Firefox (the web page itself). You can explore the rest of available selectors from the way we explained in the first step. Feel free to apply whatever CSS styles you want to get the look & feel you enjoy the most. Conclusion Although we lost the complete Firefox themes in Firefox 57, we still can customize the UI of Firefox to a very good level. In the future, we may be able to install ready themes which include ready userChrome.css modifications to customize Firefox in many different ways and combinations. If you have any specific tip or skin you made related to that, feel free to share them with us. |


