
| Previous
Page |
PCLinuxOS
Magazine |
PCLinuxOS |
Article List |
Disclaimer |
Next Page |
DigiKam: Photo Management Basics |
|
by phorneker In the last issue, I presented an introduction to DigiKam and its basic interface (as well as a small sample of my photo collection). For this issue, let us discuss the basics of photo management in DigiKam. As with many Linux applications, you should (theoretically) be able to launch DigiKam from any desktop. Because DigiKam was designed for the KDE (Plasma) desktop, it is best to launch DigiKam from the KDE (Plasma) desktop as many required libraries the application uses have already been loaded when KDE (Plasma) desktop was launched. If you were to load DigiKam from, say, the MATE desktop, the basic KDE libraries would have to be loaded first, increasing the time needed to launch the application, not to mention that the full functionality of DigiKam cannot be guaranteed when running on non-KDE desktops. (In fact, this is one reason why Shotwell was included in the repository.) Now back to DigiKam. Each time DigiKam is loaded, DigiKam checks the directory (or directories) where your photo collection is stored for newly added (or deleted) photographs and updates its database accordingly. This could take some time if you have a large collection of photographs. 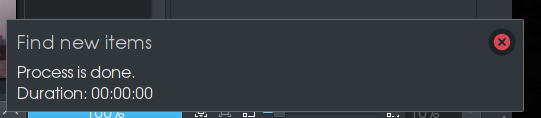 In this example, the process was immediate as no new photographs have been added or deleted. 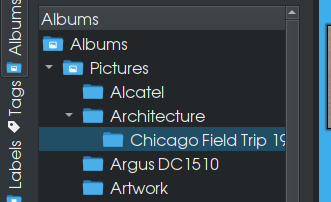 The left panel in DigiKam is where Albums are managed. Here, we have a (partial) structure of how photographs on my laptop are organized. (As we can see, this is quite a mess).
The root level entry named Albums is the root level of the database where DIgiKam stores information on each photograph. The entry Pictures refers to the ~/Pictures directory on the hard drive. These two entries are created when DigiKam is2 first launched. You can right click on any entry in this panel except for the root level entry Albums. What pops up depends on which entry you right click on. 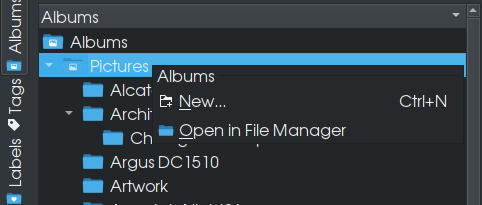 For the Pictures entry, only two items appear in the popup menu, one to create a subdirectory in ~/Pictures, and one to open the Pictures directory in Dolphin (the KDE file manager). 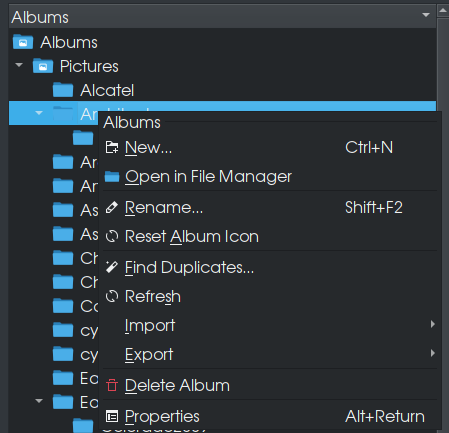 In this example, I right clicked on the Architecture folder. Here, in addition to the two items that we just discussed in the first example, we have options to rename the folder, reset the icon of the folder (icons for folders can be changed within Dolphin), find image duplicates, refresh the contents of the folder, import and export photographs in the folder, delete the folder, or show information about the folder.
Selecting Properties here will allow you to edit information about the selected folder. 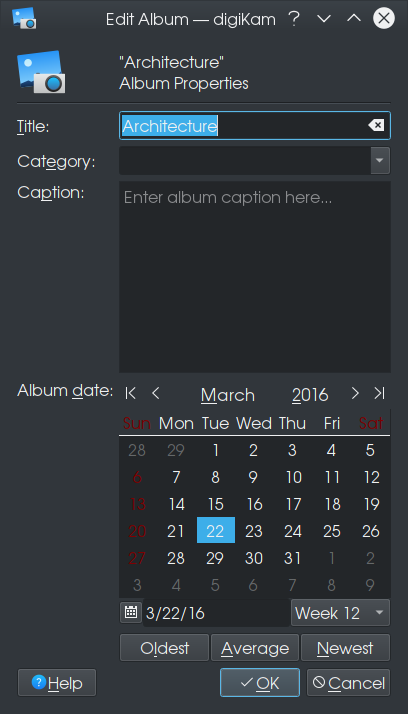 Here, Albums in DigiKam are titled. As titles are derived from subdirectories, changing the title here also changes the name of the subdirectory where the folder (or subfolder) resides within ~/Pictures. 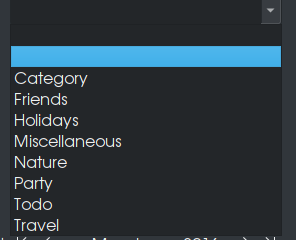 Clicking on Category allows you to assign a category to the album. Categories are searchable from the search function found elsewhere in DigiKam. Here2, there are predefined categories that can be assigned to folders (as well as individual images). As one could guess, you can add categories by simply typing them in the category box. 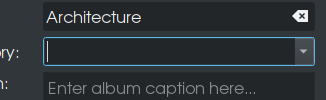 Likewise, Captions are typed in a freeform box just below Category. Information here is stored in DigiKam's internal database. Below that is a calendar where you can assign a date for the Album. This date could be any arbitrary date, but it is suggested that the date could be the date the album was created, either in DigiKam, or the date the album of photographs were originally taken (which could well predate computers). 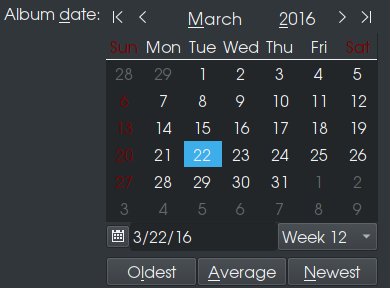 The button Oldest refers to the oldest date assigned to the photograph in this Album. The same is true for the Newest. The button Average “calculates” the date based on the dates of all photographs in the album.
Let us now choose a folder, such as Artwork. (I scrolled down the directory so nothing is highlighted for the moment.) One of the items that appeared in the popup menu is called Find Duplicates. Here, I want to show an example of what DigiKam considers to be a duplicate image.  In this instance, I have two different versions of the same image. One reason for this is to preserve the original image while I work on the other image (as a copy). That way, if something gets messed up in the process, I have an original to start over with, saving significant amounts of time trying to recreate the original image. Another reason for having two different versions of an image is that one version can have a watermark embedded on the image (this can be done in DigiKam) to identify photographs as being yours. What we see here is a Thumbnail view of the ~/Pictures/Artwork directory. We can change the view to a Table view by clicking on Table. 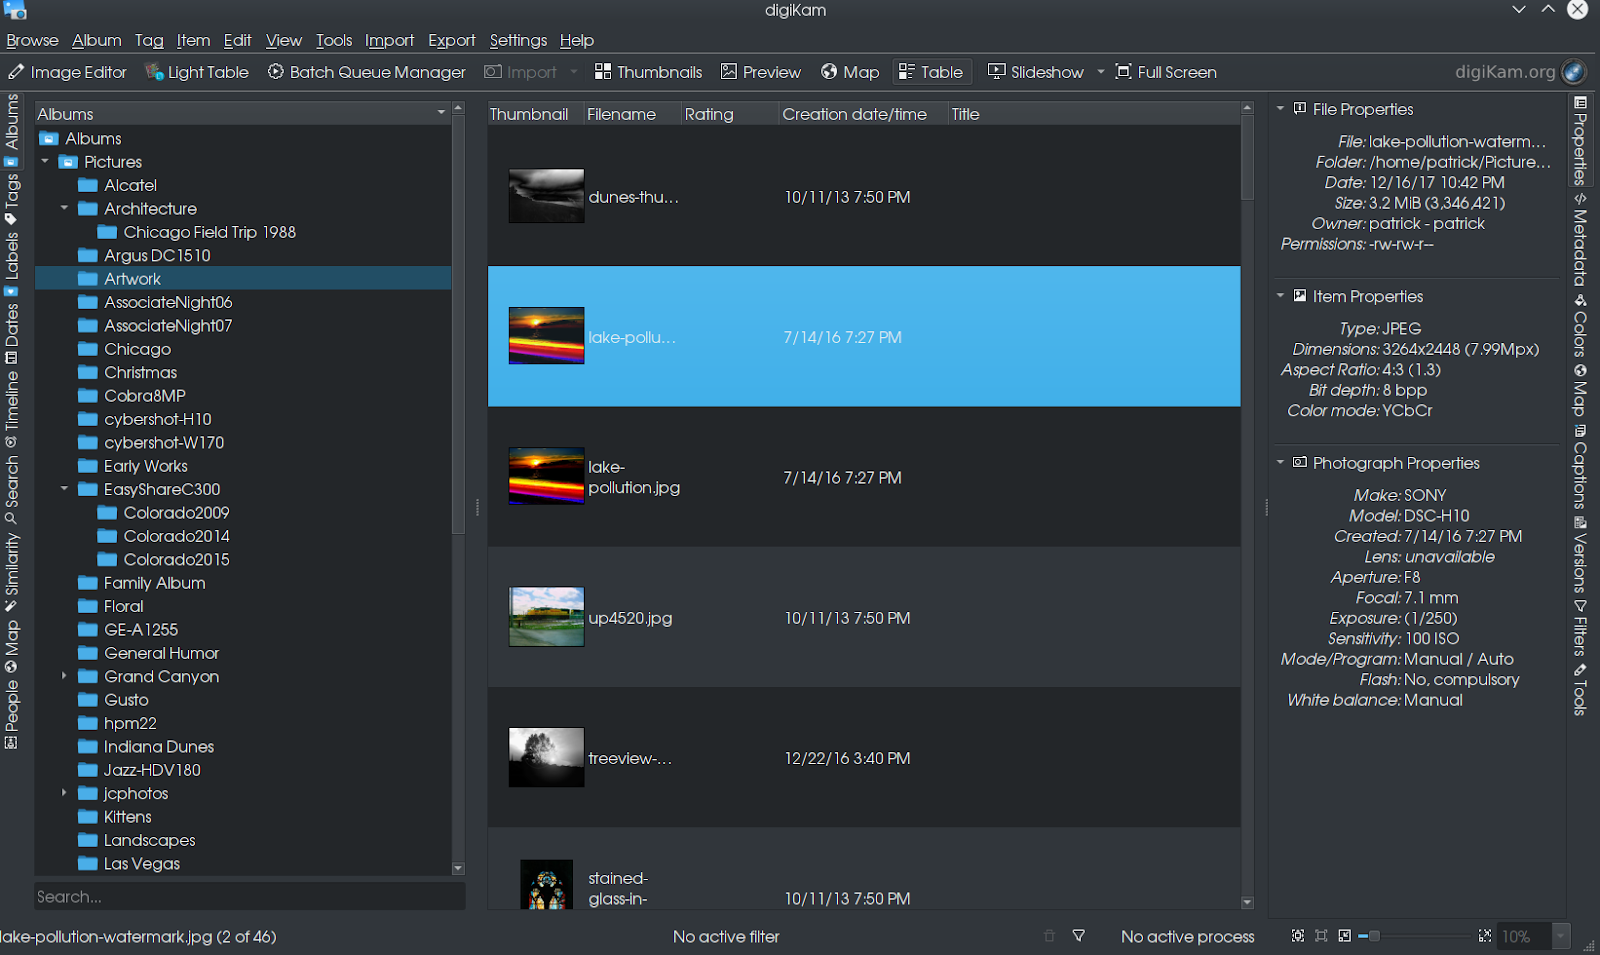 Now we have a view of the photographs with a thumbnail, filename, rating (if there is one), creation date and time (the UNIX timestamp), and title (if assigned). Here, there are two versions of the same artwork I have created, one has a watermark, and the other does not. If photographs have been geotagged, the Map button would show you a map of where the photograph was taken. If images have not been geotagged, this is what the Map button will get you. 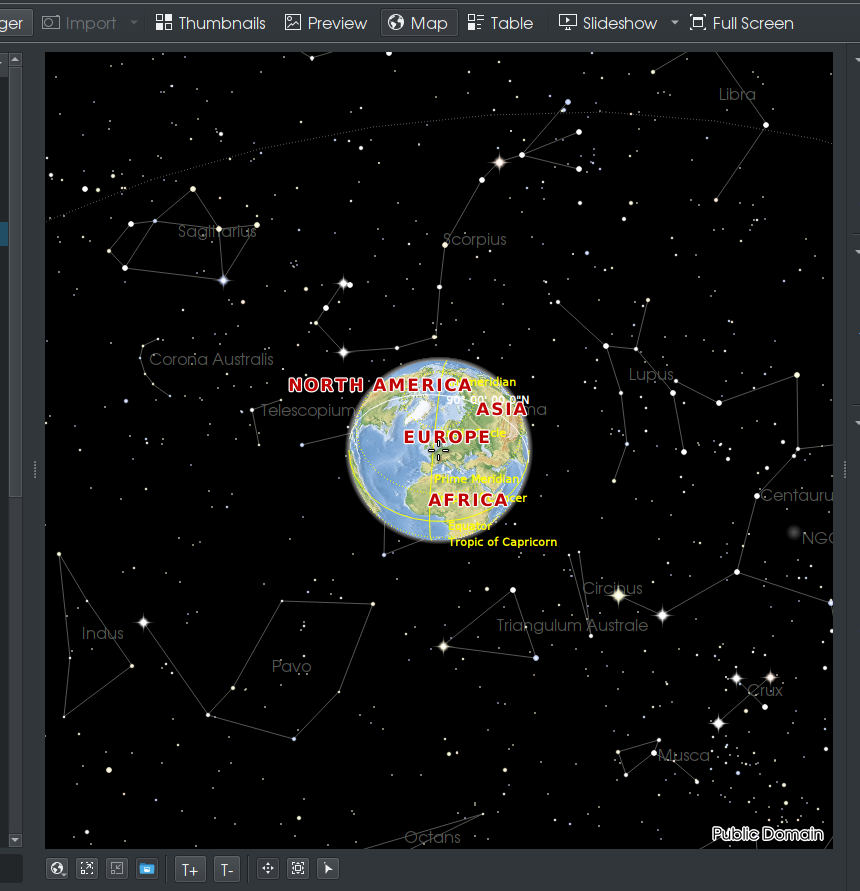 This is what you would want to see if you are into astronomy as the names of the star clusters are shown here. Now, let us click on Preview. 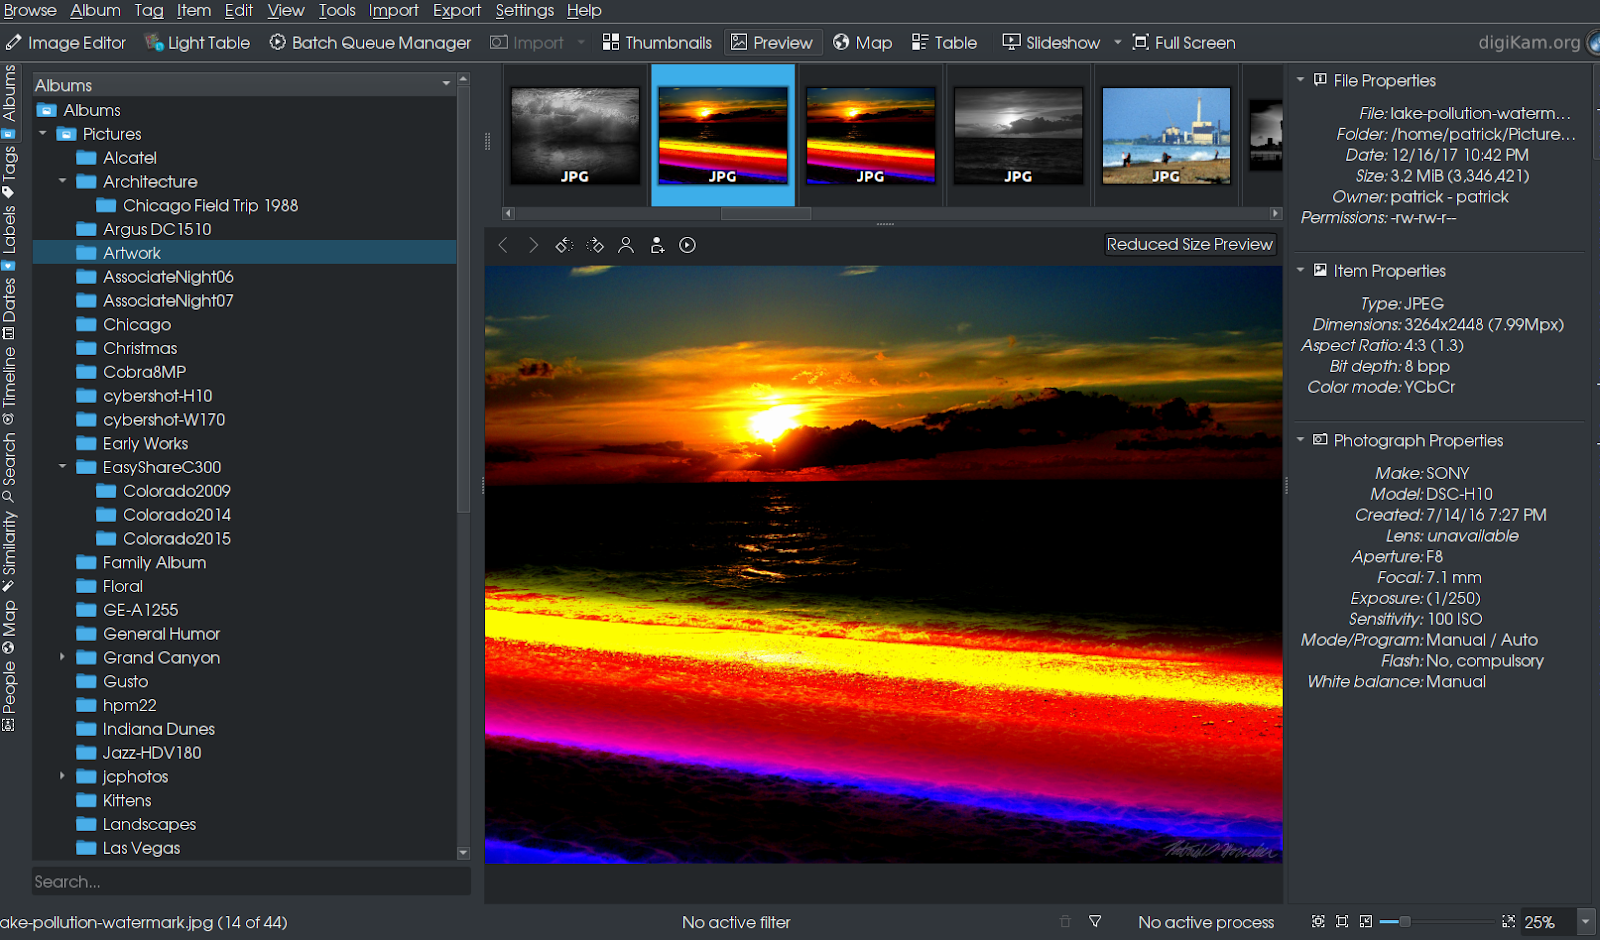 From the last issue, this is what we got when we clicked on the highlighted photograph in the center panel. We get the full view of the selected image, as well as a filmstrip of adjacent images in the directory. Here, we have the watermarked version of this artwork.  ...with the watermark being my signature. The Full Screen button allows DigiKam to take up the entire screen. Slideshow allows you to present a slideshow on your screen made up of directories of photographs, or selected photographs within a directory.
On the left side of the left panel are a set of tabs providing other functions DigiKam has to offer for photo management. Below Albums are Tags, Labels, Dates, Timeline, Search, Similarity, Map, and People. 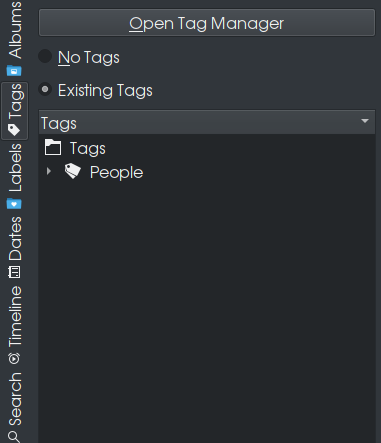 The Tags tab allows you to assign tags to photographs or videos that is primarily used to organize for easier search and retrieval. This type of tagging is not the same as the EXIF tagging used to supply information to photographs taken with a digital camera, though their purposes are similar. 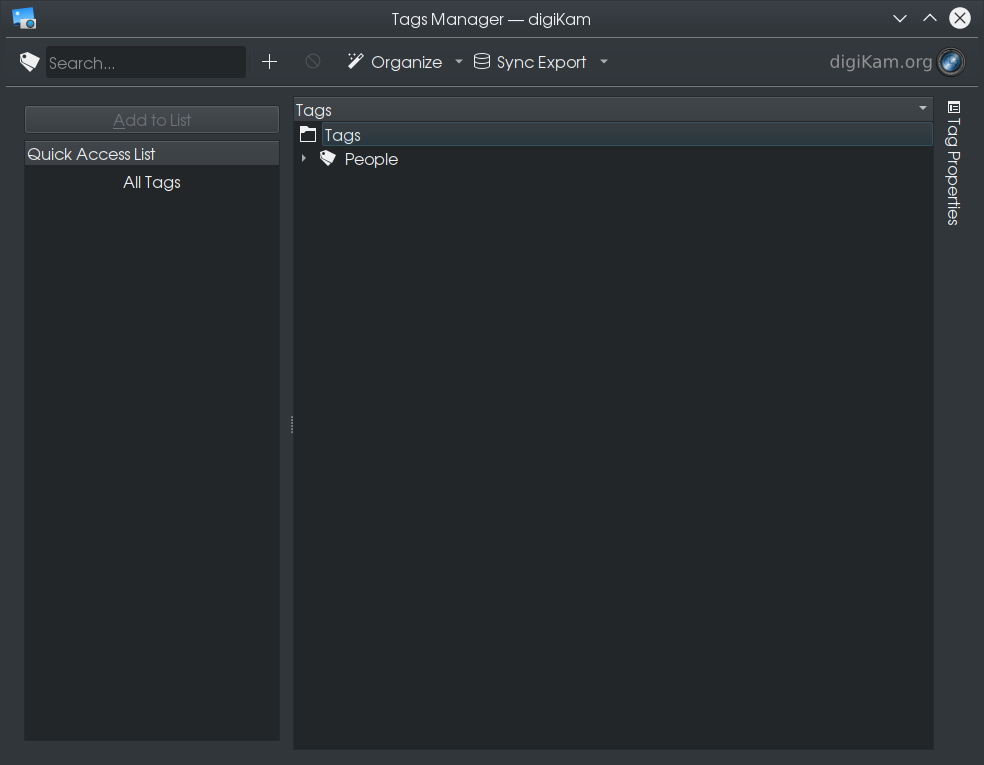 DigiKam comes with a Tag Manager. As with Albums, tags are organized in a similar fashion. The developers of DigiKam supplied a predefined tag called People with a single subcategory named Undefined. I have expanded the People tag to show the full tag. 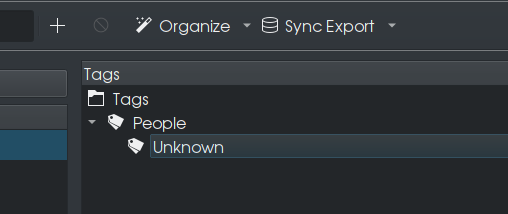 The Tag Manager has three functions, Organize, Sync Export and Tag Properties. 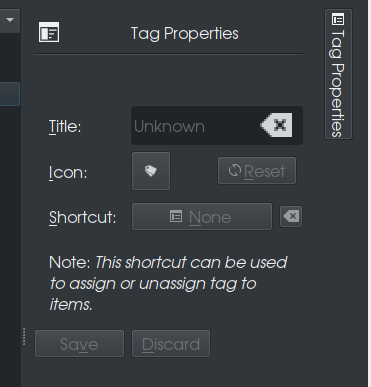 Tag Properties allows you to edit tags for use on photographs. There are only three properties that can be assigned to a tag. Only the Title is required as that is the name assigned to the tag itself. 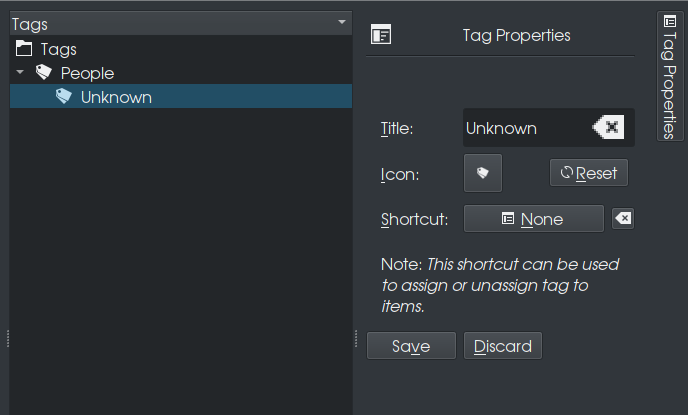 To edit Tags, the tag must be selected in the Tag Manager. The icon assigned to the tag can be changed as well making it easier to identify specific Tags. When you click on Icon, DigiKam opens a dialog box for selecting icons. This is the same dialog box used to select icons in other parts of KDE, such as the launcher items on your Plasma desktop, and hence the dialog box takes some time to load. Keyboard shortcuts can be assigned to tags for faster application of tags. Simply click on the button next to Shortcut, and type the key you wish to2 assign to that particular tag. When finished, click on Save to confirm changes, or Discard to cancel changes made to the tags. Clicking on Organize brings up this menu. 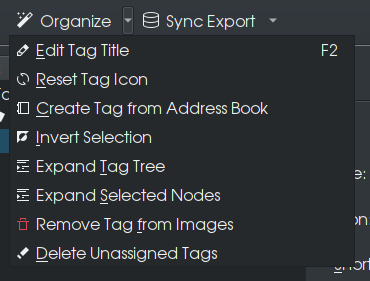 Edit Tag Title (or pressing the F2 key) is the same as clicking on the Title in Tag Properties and typing in the name of the tag. Reset Tag Icon resets the icon assigned to the tag to its default, namely the price tag shown in Tag Properties. Create Tag from Address Book only works if you use the address book that comes with the Plasma desktop. If you have selected a number of tags in Tag Manager, you can select the remaining tags that have not been selected, at the same time deselect the tags that have been selected by choosing Invert Selection from the menu. Expand Tag Trees and Expand Selected Nodes allows you to see the full contents of your tags. Remove Tag from Images does just that with images that have the selected tag assigned. Delete Unassigned Tags does just that removing the clutter in Tag Manager created by having tags where no pictures have been assigned. 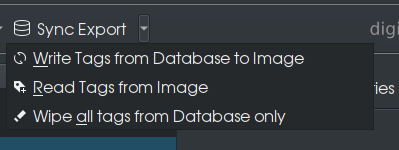 This menu takes care of some housekeeping details of tagging photographs. Here, tags from the database maintained in DigiKam are written to photographs, read from photographs, or the database can be cleared of all tags assigned to photographs. 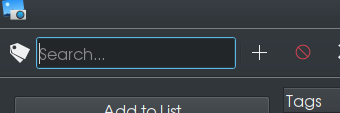 ...and finally, you can add tags to the list by simply typing the tag into the search box and clicking on +. Tags are added to the currently selected tag. 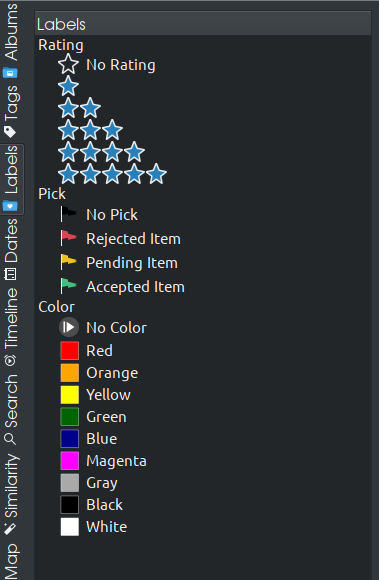 Labels are different from Tags in the sense that they are tracked within DigiKam's database only as opposed to assigning directly to photographs. (Shotwell, also in the PCLinuxOS repository, has this feature as well for the same purpose.) Labels are used mainly for grouping of photographs for easier selection and processing. In DigiKam (and Shotwell) there are three types of labels, namely Rating (from one to five stars), Pick, and Color. For this panel, clicking anything here shows images and video with the selected label assigned. 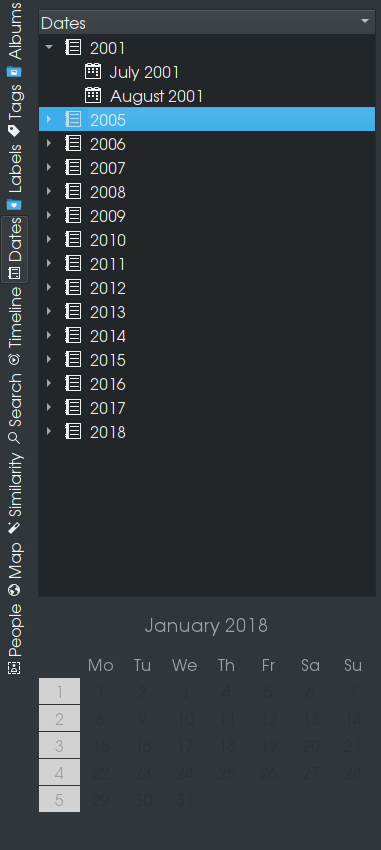 Photographs can also be viewed by date (this feature is also available in Shotwell), though this is not an accurate way to select photographs as this feature depends upon the UNIX timestamp assigned to photographs, which as we know is not necessarily the date the photographs were actually taken, but the dates the photographs were stored and/or retrieved from hard drives, backup discs, or wherever the data is stored. 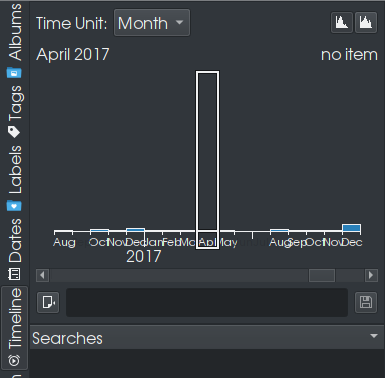 Likewise, the Timeline feature is another graphical way to view photographs. This feature is not very useful unless the dates on each of the photographs of the entire collection are correct as to when the pictures were taken. The Search function is quite straightforward, and works best when photographs are tagged. Before we get to Search, I would like to show you the Similarity tab. When clicking on this for the first time, we get this message: 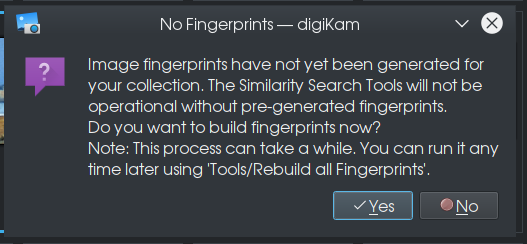 Click Yes here to have DigiKam create digital fingerprints of your photo collection. This will take some time for the fingerprint to build, especially if you have a large collection of photographs.  When finished, DigiKam will display a notification to that effect (works best when running the KDE Plasma desktop).
The Similarity tool is a powerful search tool for photographs. Its effectiveness depends upon keeping the database of image fingerprints up to date. Duplicate photographs are detected by examining the differences in the image fingerprints. The Update Fingerprints button updates the database of image fingerprints. To search for what DigiKam considers to be Duplicates, click on Find Duplicates. 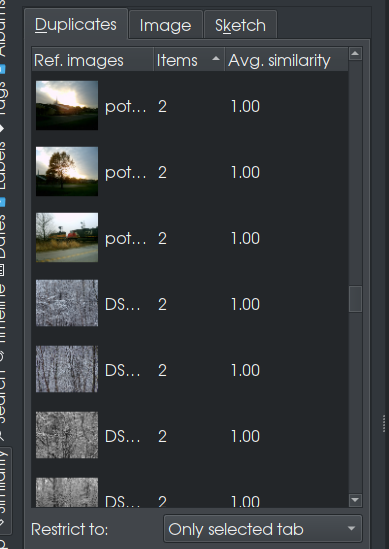 Here, DigiKam has found a number of duplicate images in the photo collection. How do these duplicates happen in the first place?
There are two other tabs within Similarity, namely Image and Sketch. 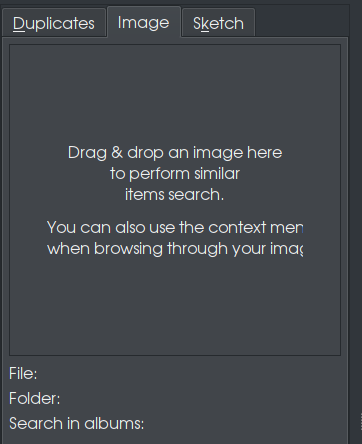 When Image is selected, simply drag and drop a photograph onto this panel so DigiKam can search your collection for duplicate images. 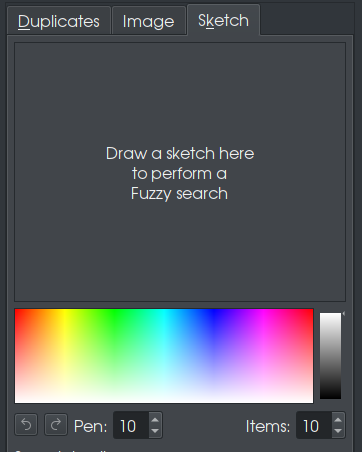 Finally, Sketch allows you to search your collection by drawing a color sketch that approximates what the image you are looking for looks like. (Unless you can sketch your image well enough for DigiKam to recognize the image, I would recommend tagging your photographs for searching instead.) 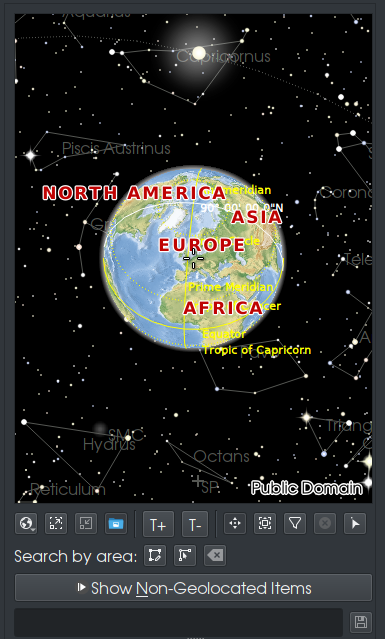 The Map tab is used to search for photograph that have been geotagged, that is, photographs that have been tagged with geographic information such as country, city, state or province. 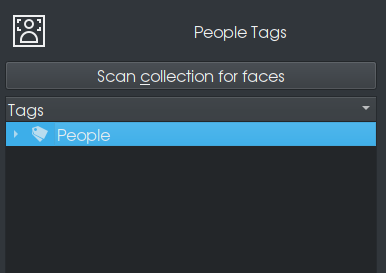 ...and finally, the People tag is used for a face search. This is why the developers of DigiKam included a People category with a Unknown tag in the Tag Manager by default. Now that we have seen the photo management capabilities of DigiKam, the next thing that comes to mind is this: How do we get photographs into DigiKam in the first place? The answer to that question is that there are four ways to do this. The first way is to copy photographs to the Pictures directory within your home directory (hopefully organized in some way as DigiKam creates subalbums out of subdirectories in the Pictures directory), then launch DigiKam. DigiKam will scan that directory against its database for changes to the collection. The second way is to upload photographs from your digital camera(s), USB flash drives or card readers. The third way is to digitize photographs with a scanner (or all-in-one device such as an Epson Stylus NX-415). The fourth way is to retrieve them from one of the photo sharing services available on the Internet such as Google Photos or Smugmug (or simply import them from a file server containing photographs). Many digital cameras connect to PCLinuxOS as a USB Mass Storage device or as a PTP device (PTP stands for Picture Transfer Protocol and is the basis for the PictBridge protocol used for direct communication between digital cameras and printers). Most likely, this is how you will be able to connect your camera to transfer photographs to DigiKam. The gphoto2 package was developed long before the USB mass storage protocol became the standard for digital cameras (including those attached to phones). This package continued to be actively developed, especially for cameras that transfer images in RAW mode, that is uncompressed color and image data generated by the digital camera (mainly digital SLRs) itself where the processing is done by software such as DigiKam and GIMP rather than the camera itself. 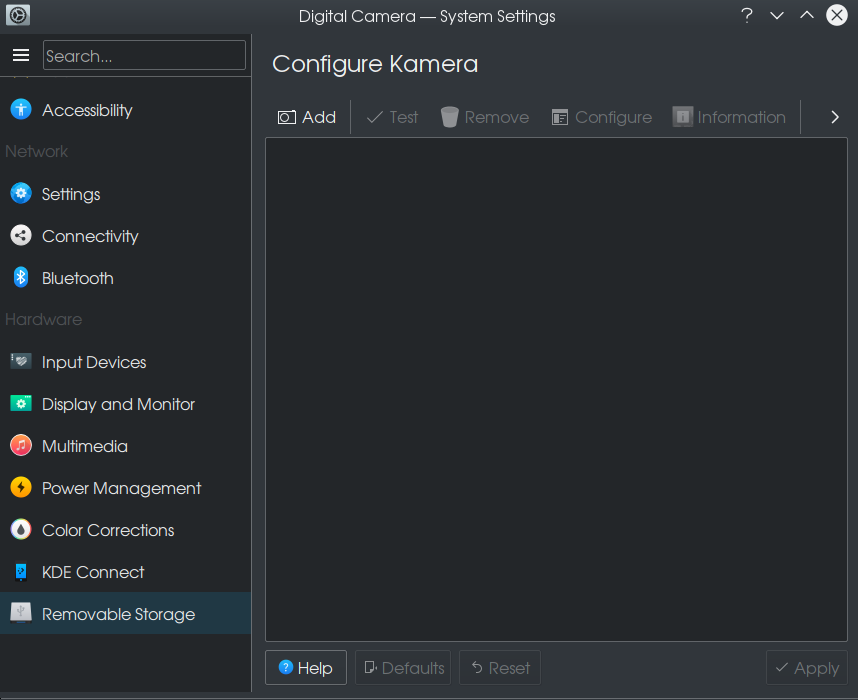 The package kamera is part of the Plasma desktop that allows KDE to manage digital cameras through the gphoto2 package. The setting is found under Removable Storage in System Settings. Use this only if you have a real need to use it, such as a digital camera that connects through gphoto2, but not as a USB mass storage device or as a PTP camera. One example of this is a first generation digital camera that connects to a serial port (or through a serial port to USB adapter), which will obviously not be detected by DigiKam or the Plasma Desktop as that is a serial device. 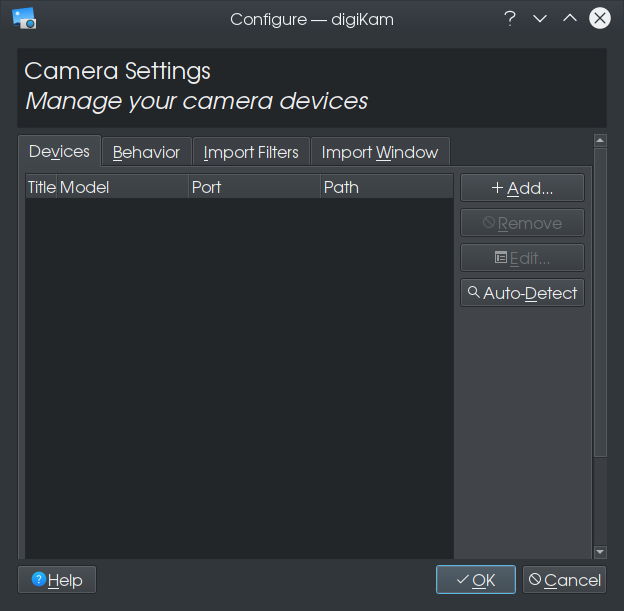 DigiKam has its own gphoto2 configuration dialog box. This dialog box is launched by selecting Import -> Cameras... -> Add Camera Manually from the main menu. If your camera connects to a USB port, you should be able to Auto-Detect the camera by clicking on the appropriately named button. 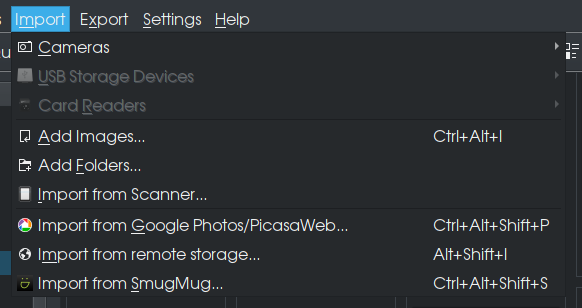 As of version 5.8, DigiKam can import photographs from SmugMug and Google Photos. Here, the USB storage device and card reader options are greyed out. If you have a camera attached that supports the USB mass storage protocol, that camera will appear under USB Storage Devices. The same is true of USB flash drives (or external CD/DVD reader/writers that have a CD or DVD inserted) that contain photographs. The Card Reader option is available if you have a memory card inserted in the card reader (internal or external to your system).
On my laptop, a HP Compaq 8510p, there is a built-in card reader that supports SD/MMC, SD-HC and PCMCIA cards. The latter is an old-school mechanism used not only for memory storage, but also for network adapters, USB adapters, memory card readers (for Compact Flash, SD/MMC, Sony's MemoryStick and the obsolete SmartMedia), and (dare I say it) 56k modems.
Import from remote storage, Add Images and add folders all do basically the same thing. Import from remote storage, however, allows you to import photographs and videos from servers connected to the UNIX filesystem. This function uses the standard KDE file dialog rather than a customized version for local importing of files. Import from Scanner launches DigiKam's built in scanner tool. As with xsane or another utility such as Epson's iScan utility for Linux, the scanner tool first searches for a usable scanner device. 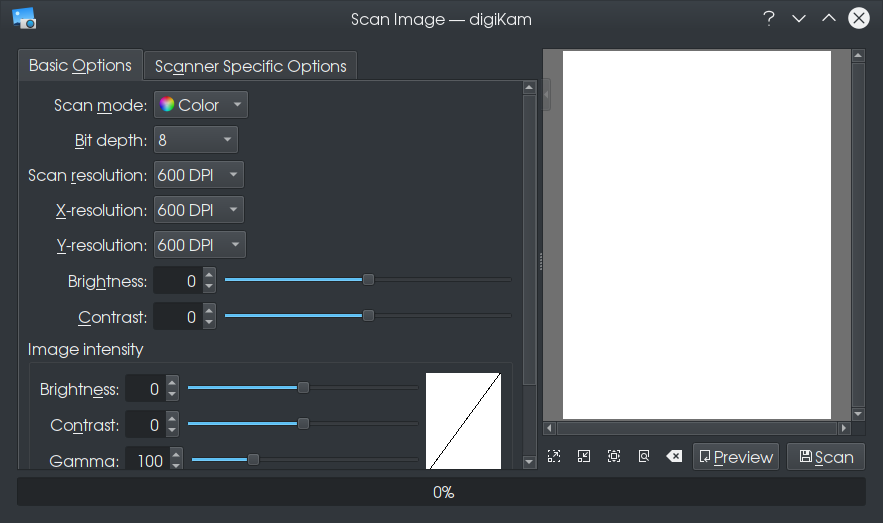 Here, DigiKam detected the Epson Stylus NX-415 and shown here are the basic options for scanning photographs. For the NX-415, DigiKam selected a 600dpi scan resolution (which happens to be what I use most the time when scanning images). As with xsane, you can preview the scan (at 300dpi) before performing the actual scan. For the NX-415, DigiKam used the epson2 driver rather than the epkowa driver developed by Epson (which also happens to be open source). 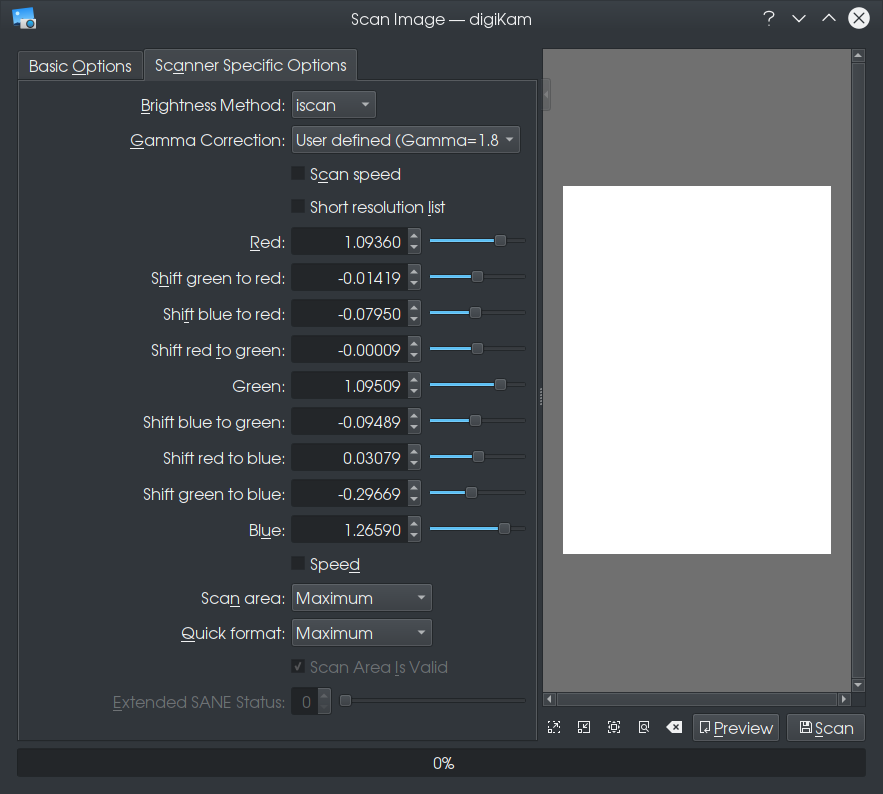 Selecting Scanner Specific Options yields the same controls found in Epson's iScan utility for Linux. DigiKam can be setup to import and export photographs from Google Photos (also known as PicasaWeb). Selecting Import from Google Photos/PicasaWeb will open Firefox to allow permission for kipi-plugins to access Google services. 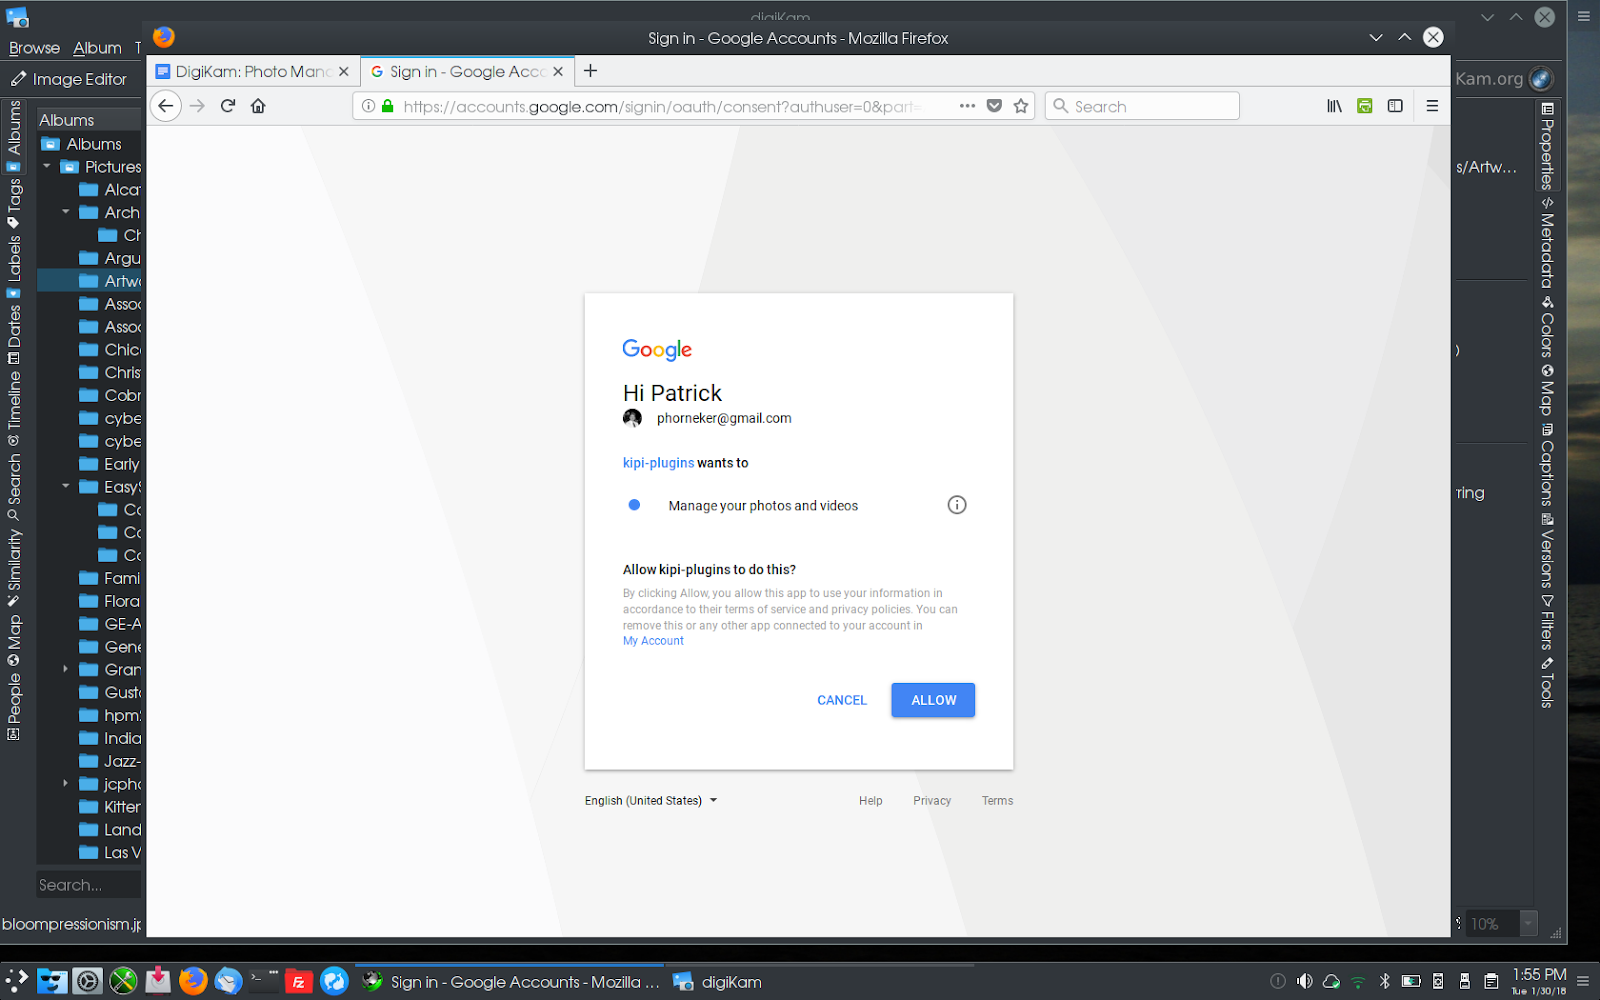 After clicking on Allow, you will get a six digit code to enter into DigiKam to confirm permission to access Google services. 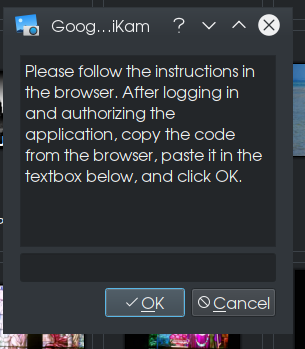 At that point, you should have access to photographs stored in Google's cloud. If you have a smartphone or tablet with a recent version of Android, those photographs should import to DigiKam. Likewise, import and export to cloud services supported by DigiKam are setup the same way. This was just the basics of photo management. There is a lot more you can do with DigiKam that makes this a powerful application for PCLinuxOS and digital photography. Next issue, I will discuss DigiKam's ShowFoto, the photo editor that rivals that of the GIMP in terms of functionality. |
