| Previous
Page |
PCLinuxOS
Magazine |
PCLinuxOS |
Article List |
Disclaimer |
Next Page |
Using Virtual Box To Play Games With DirectX, Easily |
|
by Agent Smith (Alessandro Ebersol)  Well, you can use VirtualBox to play games. Not that it is common, since usually one chooses Vmware player to play games. However, the advances of VirtualBox can not be ignored: if correctly configured, VirtualBox can perform very well, rivaling in certain cases with Vmware player. Also, VirtualBox has one advantage: it can work with recent Linux kernels, while Vmware player does not (it does not support kernels 4.14 and higher). But how do you configure VirtualBox to play with 3D effects and with DirectX? In fact, the DirectX to be used is the 9C version, from 2010, which is supported by VirtualBox. DirectX 10 and 11 are not supported. So how to do it? Easy, just follow this recipe. To begin, you need to understand some concepts. Para-virtualization interfaces. Starting with version 5.0 of VirtualBox, there was the introduction of para-virtualization support, bringing increased performance and time accuracy for supported guest operating systems (Hyper-V on Windows and KVM on Linux). Support is now included for the NDIS6 driver API, which is used by default in Windows, starting with Vista. In addition, VirtualBox has a new audio back-end for better support. But what do these para-virtualization (Hyper-V and KVM) interfaces mean? Hyper-V is the Windows Server para-virtualization interface. With this interface enabled, it improves the speed of execution of Windows guests on Linux hosts. KVM is the interface for Linux kernel virtualization. With this interface enabled, it improves the speed of execution of Linux guests on Windows hosts. That is, do not enable the Hyper-V interface if you are emulating a Linux guest on a Linux host. But if you are emulating a Windows guest, it is this interface that you should enable. The instructions, step by step. Install the latest version of VirtualBox in PCLinuxOS (5.2.18), doing the normal installation with the GetVirtualBox script. The Hyper-V interface is recognized by Windows 7 and above. In Windows XP it may work, but 7 is currently more supported. If you already have a virtual machine, remove the guest additions. 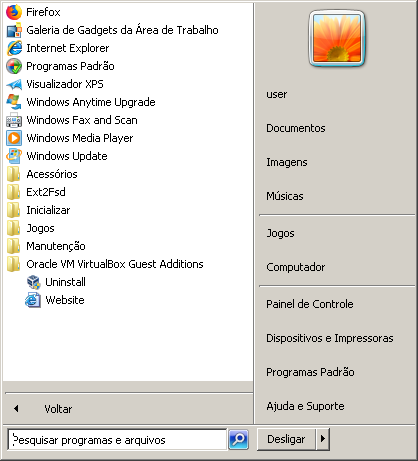 After the guest additions have been removed, shut down the virtual machine. Now go to the Settings and in the System section, Acceleration tab, configure Hyper-V Interface, enable VT-x/AMD-V. 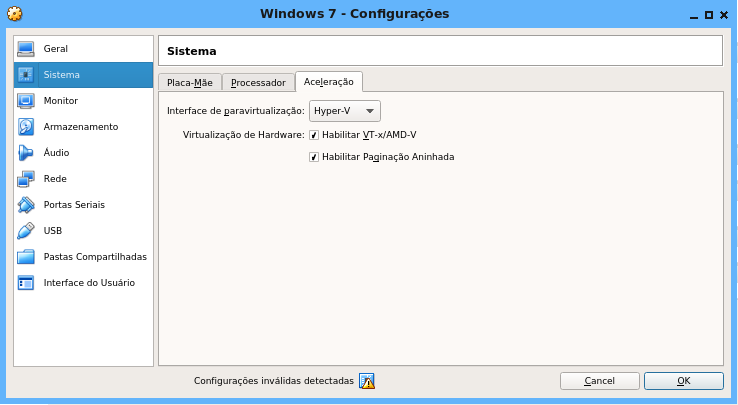 The next step is to set up the video card for the Windows guest. Do as shown in the figure below with 256 MB (the maximum that VBox currently supports). 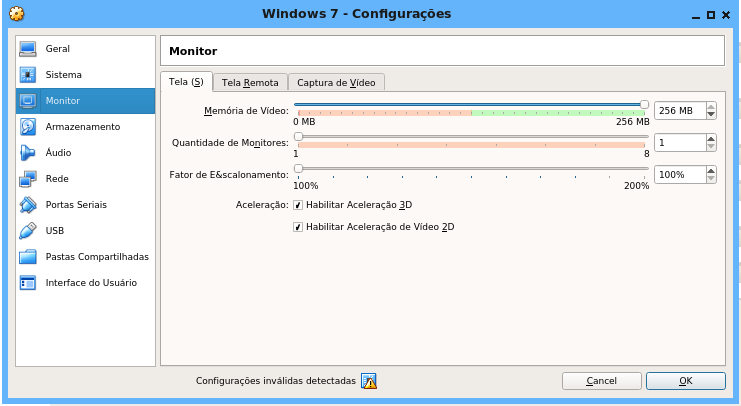 Once these settings have been done, turn on the virtual machine and press F8 to enter safe mode.  After the machine has booted, in the VirtualBox devices bar, click "insert guest additions disk" and start installing guest additions. 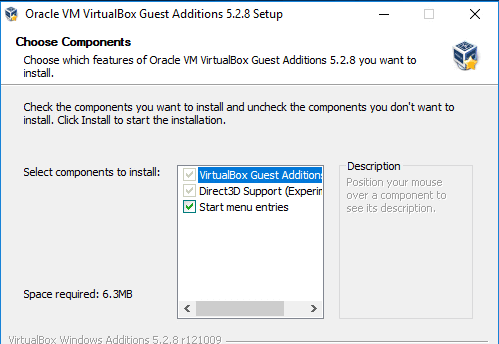 During installation, check the [] Direct3D Support (Experimental) and [] Start Menu boxes Entries. 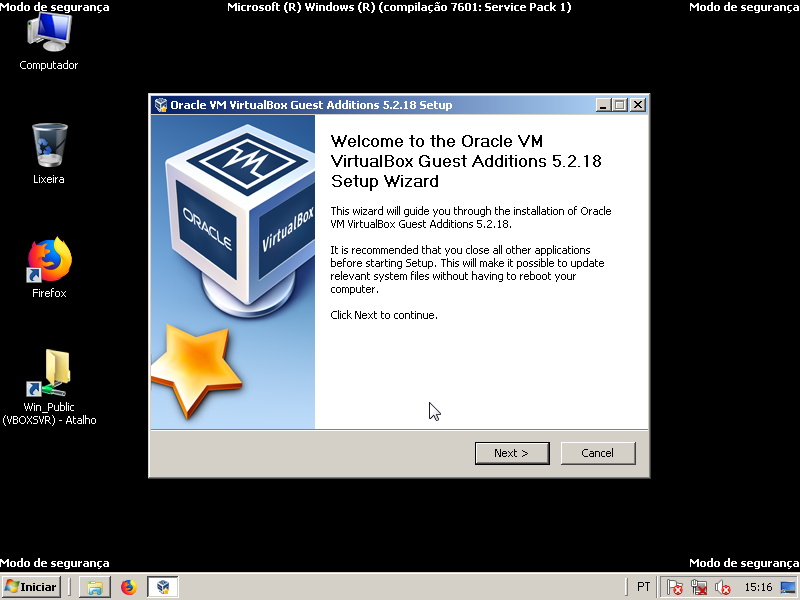 Now, look at the figure below and proceed accordingly. 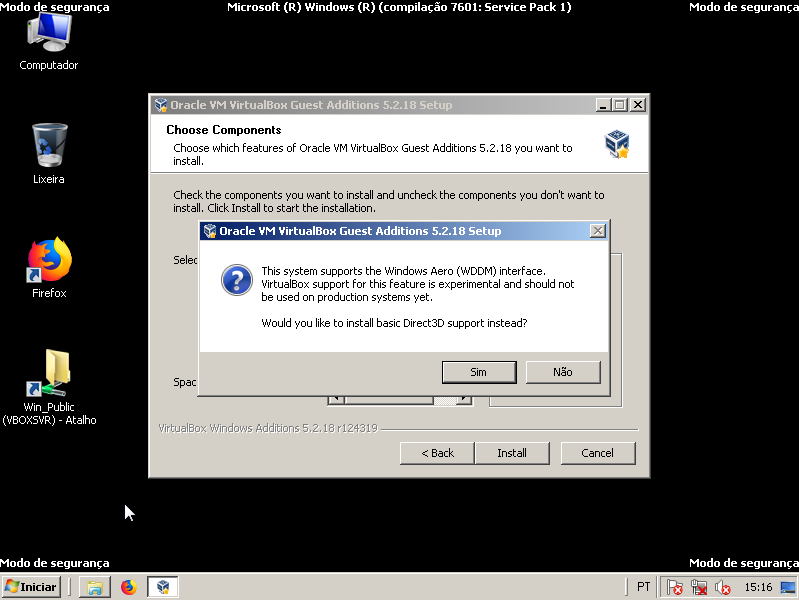 When the installer asks if you would like to install Direct3D Basic support, click NO. The installer will then display the following message. 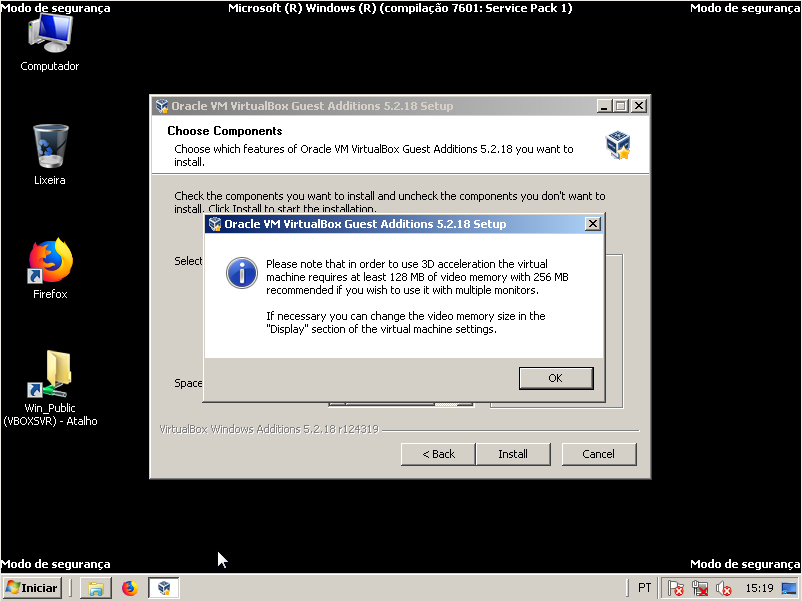 Just click Ok and continue the installation. If all went well, you can now install DirectX9C and enjoy good accelerated games on the Windows virtual machine you own. I was able to play Need For Speed III without problems, with the Modern Patch applied, with sound, the in-game movies and songs, without major problems, in a Windows XP VM. There are reports that League Of Legends also runs with good performance in virtual machine in this case, saving the pains and tribulations of WINE. Programs such as AutoCAD and Photoshop can run fine with pre-activated 2D and 3D acceleration, of course, depending on the amount of video memory, CPU cores, and RAM allocated to the virtual machine. But, note: If you have an old computer (Core2Duo and alike), do not run Windows 7 on the virtual machine. The performance is very poor. I prefer Windows XP, which was the one I did the tests with and everything went well. If you have a more powerful machine, both in terms of processors and memory, then you can use heavier Windows systems. I hope you have enjoyed, and have good games on your Windows virtual machines, inside your PCLinuxOS! Until next month! |

