| Previous
Page |
PCLinuxOS
Magazine |
PCLinuxOS |
Article List |
Disclaimer |
Next Page |
Inkscape Tutorial: Create A Website Background |
|
by Meemaw I saw this the other day. This tutorial uses Inkscape to create a simple website background using repeating stripes.  We're going to make it 200px by 200px. In Document Properties, on the Page tab, choose the custom size and enter 200px in height and width. Select the Grids tabs and create a grid with the following settings. If you haven't done this before, you select Rectangular grid (it's the default) and click New. These settings must be default, because I didn't have to change anything. 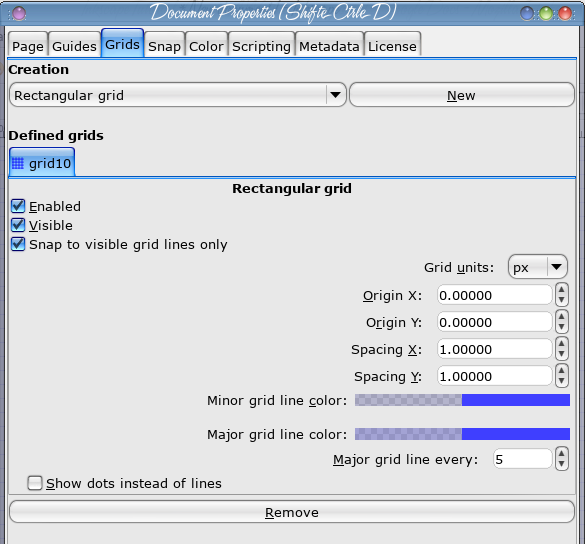 We also need to activate the Snapping toolbar (View > Show/Hide > Snap Controls Bar) and enable snapping, snap nodes/handles, and snap to grids as shown below. 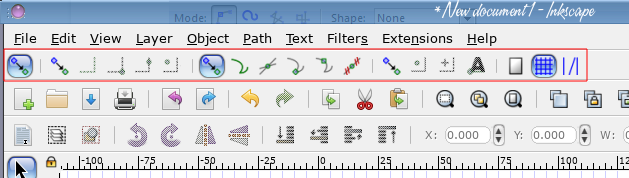 Now we'll use the Pen tool to draw some boxes. The snapping should make this much easier.  Continue the boxes as shown below. These have to be exact for the pattern to match up.   When you finish drawing all of your sections, select them all and remove the Stroke, but add a black fill with 6.0 Opacity. 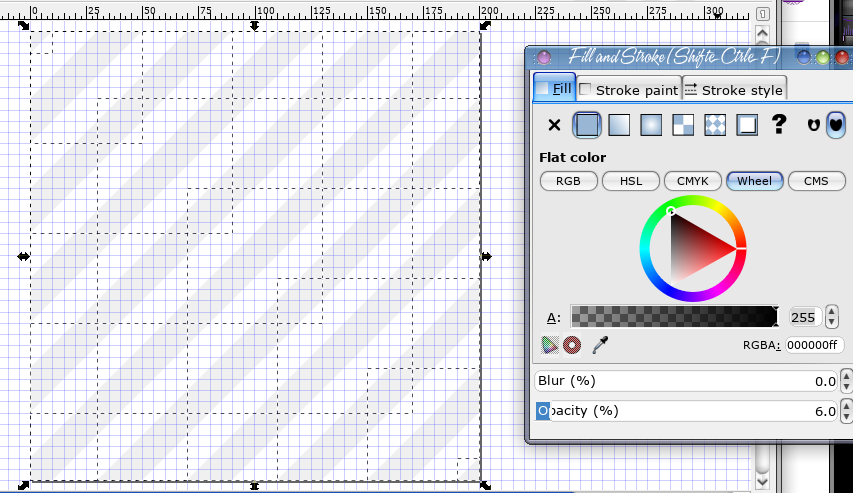 That's it! You are finished, but for adding the color you want to use for your webpage background.  To see how it looked, I went to my seldom-used blog and chose the blue one as a new background. While it doesn't exactly match another item, I can see that the pattern is good and matches up wonderfully.  Hope this helps you design an awesome website! |