| Previous
Page |
PCLinuxOS
Magazine |
PCLinuxOS |
Article List |
Disclaimer |
Next Page |
Inkscape Tutorial: Valentine's Hearts & Background |
|
by Meemaw Valentine's Day is coming up, and sometimes I wish I could make something completely different for a card for a loved one. The cards we get at the store are always beautiful, but sometimes home-made is the best. I saw this tutorial that looked really fun so I thought we could try it. This has a sun-ray sort of background that I wanted to create, so we'll do that first. Open Inkscape, and start by drawing a long triangle. Duplicate it, flip it, and position the two triangles with their points touching. Group them together. 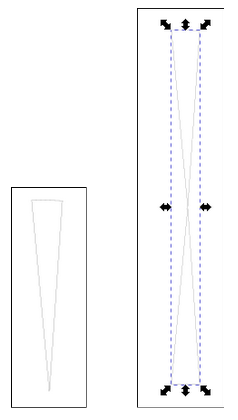 To create all of the ones we want to create, we'll use Edit > Clone > Create Tiled Clones. With the Symmetry setting as Simple Translation, use the settings below. 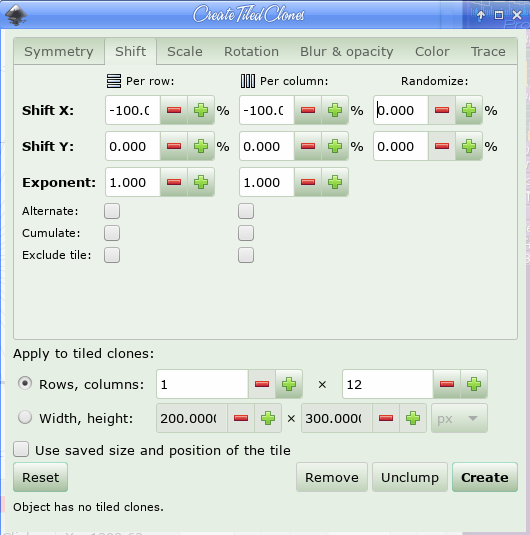 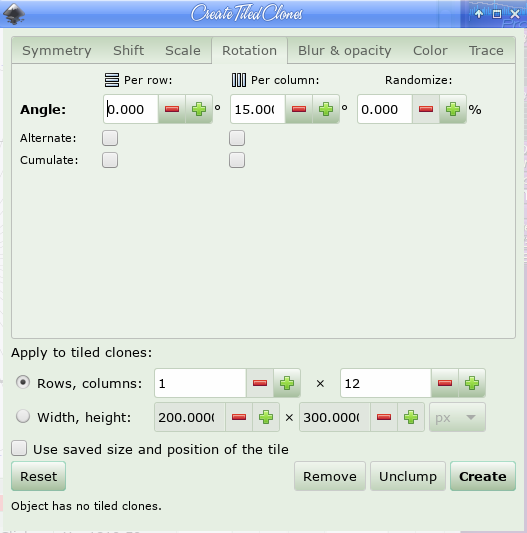 This should make a circular pattern like below. I can see that mine wasn't lined up perfectly, but we'll use it. 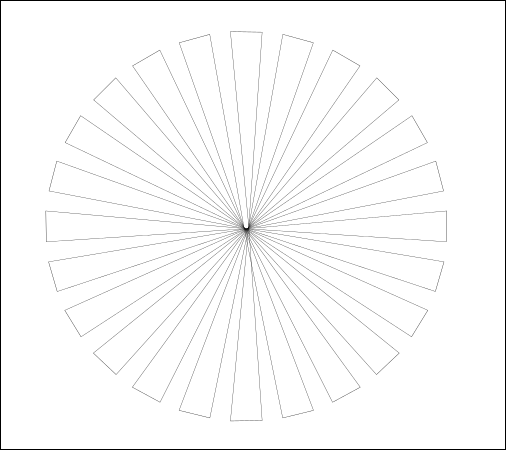 Now choose your radial gradient and choose two shades of your desired color to use in the gradient. Apply to the sun-ray pattern. Then, draw a rectangle the same size as your page and add a linear gradient to it. (My Inkscape was acting a bit funny so the shades of blue in my radial gradient look alike.) You should get something like this: 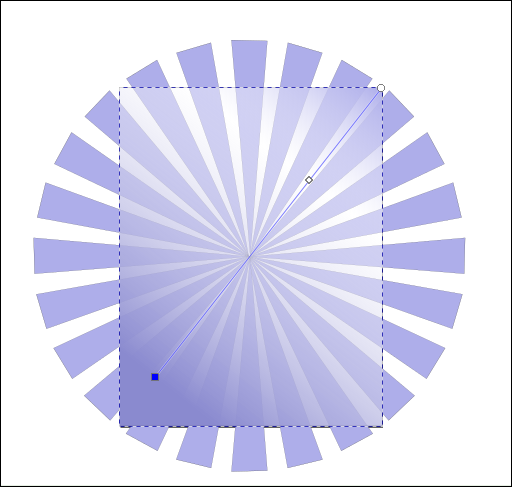 Lock the layer that all these are on, and create a new layer for your hearts and flowers. The hearts and flowers are your design and your decision as to how many you want to do, but let's make a main Valentine's heart. Using your Bezier tool, you can make "half" of a heart, pulling those nodes (as ms_meme has said) until you have it the shape you want. 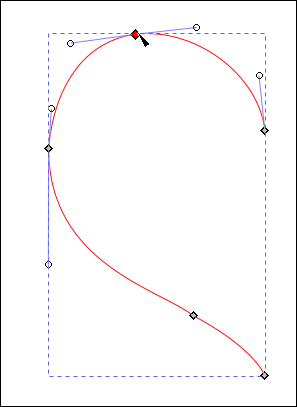 Duplicate it and flip it horizontally, then align the two halves together using Align and Distribute. With them both selected, go to Path > Combine and put them together. You also need to choose the nodes at each point (there are two in each place where the halves come together) and click on Join Selected Nodes. Change the Stroke to your desired color and use Linear Gradient on the fill. 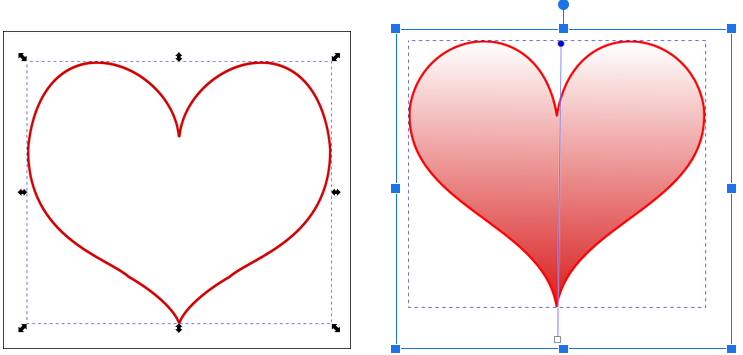 OK, now duplicate this heart, size it down a bit, change the color a bit and stack them.  My heart above has a bit darker reds and pinks on the bottom than on the top. The border of the bottom heart is dark red, 4 px, and the border on the top heart is grey, 2 px. You may do it differently. From this heart, you can duplicate, recolor, and add flowers, shadows or whatever. The original tutorial that I read had a couple of flourishes that could be added for decoration as well. Here is one of the flourishes.  I duplicated the heart several times, filled them with different colored gradients and positioned them in my drawing. Using one of the hearts, I went back to Create Tiled Clones, set the rows and columns to 1 and 6 (for the sun-ray it was 1 and 12), and set the rotation to 60 rather than 15. This makes a cute flower!  I can add something to the center to make it more colorful. 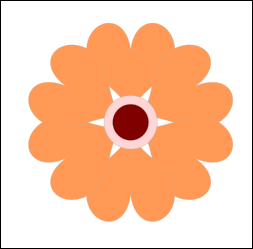 I imported that flourish, and with it selected, I did Path > Trace Bitmap. That will make a tracing of the flourish without the white background (which would be hard to insert into this project!) Choosing the trace, I duplicated it a couple of times, changed it to while, and inserted it into the project in different spots. When I had everything arranged as I desired, I added a Valentine's wish at the bottom. I'll remind you that when you export this, be sure to export the PAGE. If you export the drawing, and you have any extras at the side that you didn't use, they will be included in your export. That's also how you get the sun-ray object squared off even with the page edge. I also put a 1 px border around it, but that is your choice.  We used Create Tiled Clones, Gradients, and Duplicate an awful lot, and even did a Trace Bitmap. I'm sure your creation will be awesome! Have fun! |