| Previous
Page |
PCLinuxOS
Magazine |
PCLinuxOS |
Article List |
Disclaimer |
Next Page |
Inkscape Tutorial: Create An Abstract Background |
|
by Meemaw  I've been back to YouTube, watching tutorials! I found one from the channel Logos by Nick which has one called Vector Abstract Background. I thought I'd share it. Create a rectangle for the background in your desired size. The tutorial used 1280 x 720 px. Choose Path > Object to path. For fill, choose Mesh Gradient. Click each corner and set the fill on each a different color. 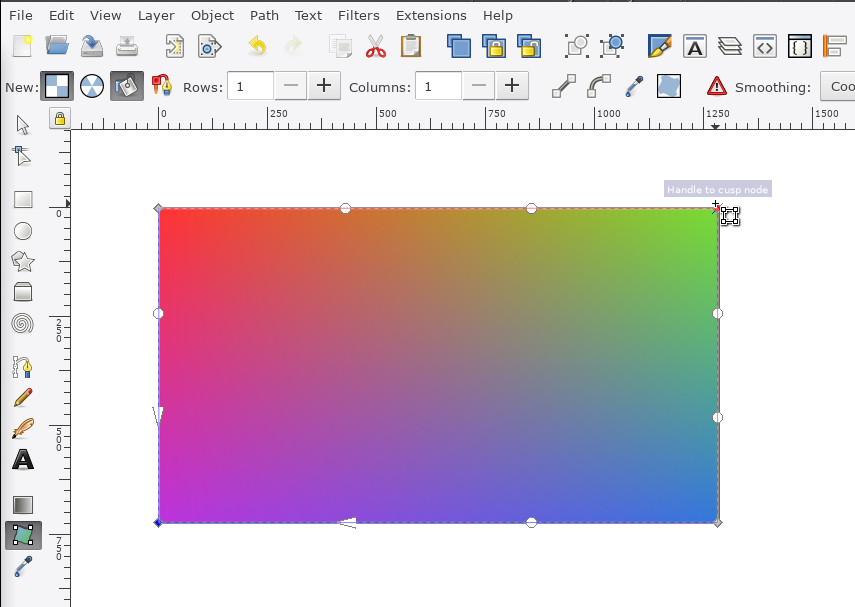 Create a new layer above the one you have. On this layer, create a little circle, fill it with a color you can see over the ones you have and place it in the upper left corner of your background. Choose Path > Object to path. Align the dot with the top and left edge using the Align and Distribute dialog. Duplicate the circle for each corner and make sure they are aligned vertically and horizontally in the corners. While you are duplicating, put several across the top and bottom and down each side, all aligned with the border they are along (top to top, etc). An easy way to do this is to duplicate one, and while you are dragging it to a new location, press the <SPACE> bar several times. Each time you press the <SPACE> bar, a new circle will appear. 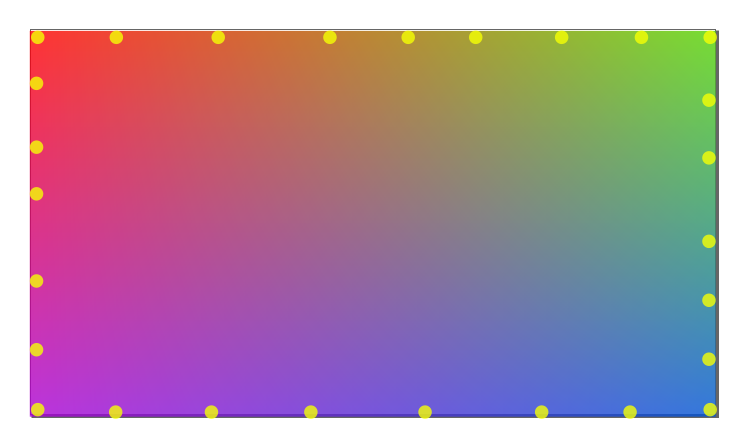 After you get them all aligned, duplicate one again, and pressing the <SPACE> bar several times, arrange the circles randomly inside the rectangle. 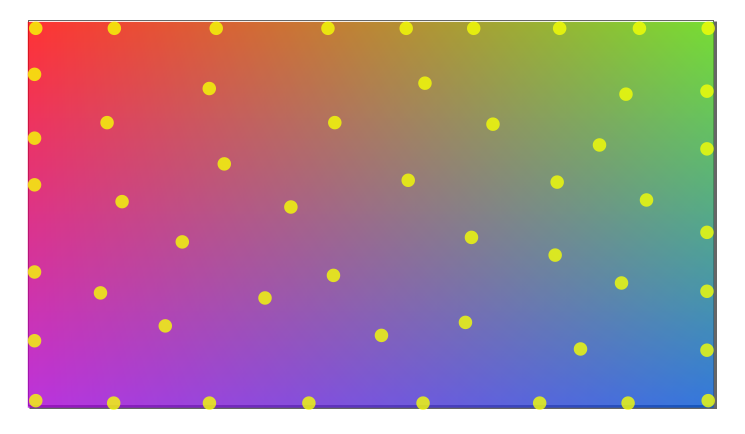 At this point, you want to lock Layer 1 so it can't be selected. Select everything else, and go to Extensions > Generate from path > Voronoi Diagram. When the window appears, choose Delaunay Triangulation for the type, and Automatic from selected objects under Bounding Box. Make the colors Black stroke and no fill. Press Apply. It should look similar to this: 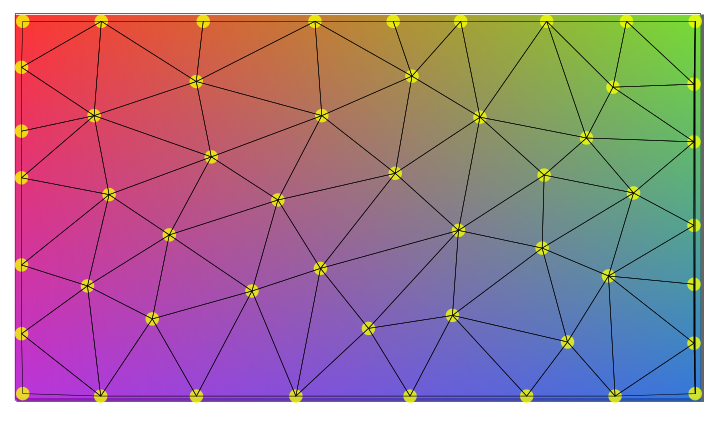 Now, select everything on Layer 2, then hold the <SHIFT> key, and deselect the lines. Press <DELETE> to delete the circles, which you no longer need. 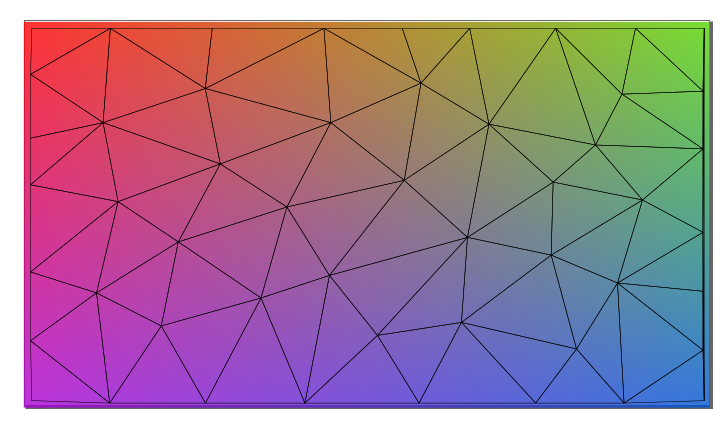 With the wire frame as it is, we can't color it the way we want. Choose your wire frame and click on Un-Group selected groups. 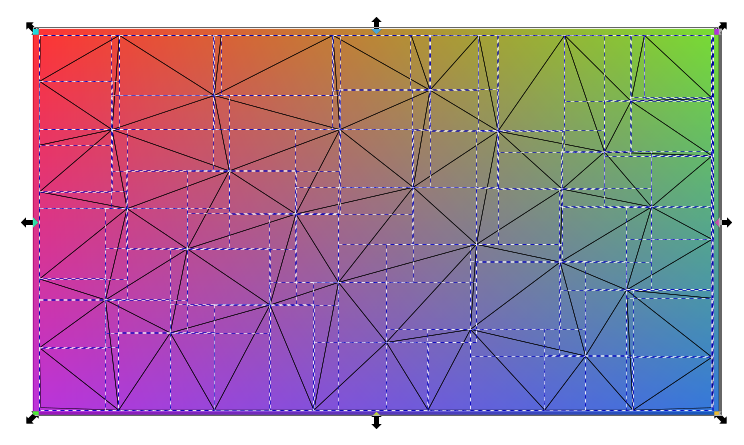 Deselect all, then select only one triangle. Using your color picker tool (the eye dropper) click inside the triangle. It will fill in with a shade from the background that is under that particular triangle. We'll want to do that with each triangle. There are a couple of ways to do this. In the YouTube video, he said you can use the function keys to toggle back & forth between the select tool (F1) and the color picker (F7), but that doesn't work for me. You can choose each triangle and then choose the color picker to color it. You can choose one triangle, color it, and then press <TAB>, which will move your selection to another triangle. It might jump around a lot, but you'll get there. Anyway, you want to select and color each triangle. If you aren't sure if you got them, turn off the visibility on layer 1. See, I missed a couple. 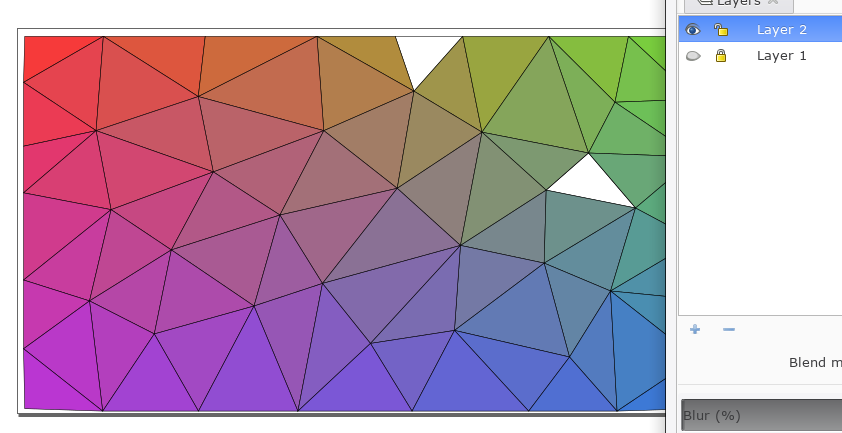 When you get them all filled, you can actually delete Layer 1 as you no longer need it. 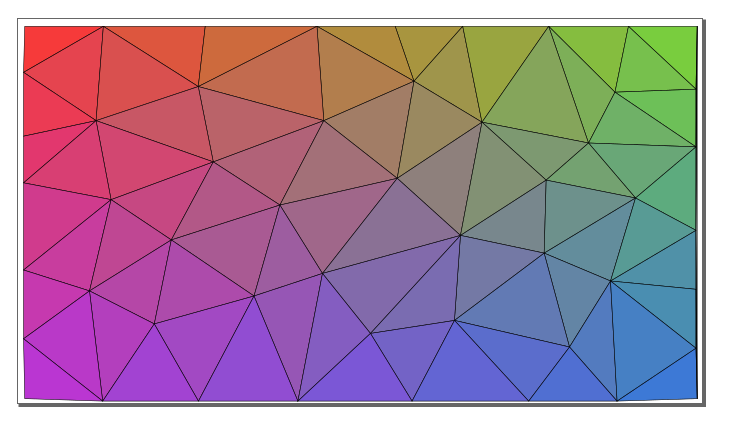 Now, select all, and in the Fill & Stroke dialog, or at the bottom of the main window, set the Stroke to none, then group them all. You might see some white spaces between your triangles. If you do, duplicate your drawing a time or two, and it seems to take care of them. Export your drawing and you're finished.  You can use bright colors or pastels. It looks pretty cool, I think. |