| Previous
Page |
PCLinuxOS
Magazine |
PCLinuxOS |
Article List |
Disclaimer |
Next Page |
Exploring LXQt: A Basic Guide, Part 1 |
|
by kalwisti (David Pardue) Last year, I dabbled with LXQt on our old laptop (a secondary machine) but I had not taken an in-depth look at it until recently. I read the announcement about the release of LXQt version 1.2.0 -- on Nov. 5, 2022. Shortly thereafter, forum member daniel (Daniel Meiß-Wilhelm) created a Community LXQt 2022.11 .iso which incorporates the newest LXQt release. My curiosity was piqued, so I downloaded it, made a Live USB flash drive and installed the .iso on a spare partition of our Lenovo ThinkCentre M800 desktop computer. I would like to thank Daniel for sharing his remastering skills with the PCLinuxOS community. My knowledge has expanded since I have been using LXQt almost exclusively for the past month. Thus far, I am impressed by LXQt; I find it comfortable enough that it could become my sole daily driver. It is a lightweight desktop environment that is useful for older PCs with limited resources. LXQt is visually appealing, feels responsive and strikes a balance between lightness and usability. Another advantage for "set-it-and-forget-it" users is that LXQt lacks the sometimes confusing multitude of configuration options in KDE Plasma. If you are just starting with LXQt, I hope you will find these tips helpful and that they will save you some time as you explore the desktop environment. Historical Background Although LXDE coexists with LXQt and is technically still being maintained, it is living on borrowed time because it has a GTK2 codebase. LXDE's most recent stable release dates from 2016. LXDE's founder, Hong Jen Yee (aka "PCMan"), found it impractical to base LXDE on GTK3. GTK3 broke backward compatibility and caused components to slow down and become more memory-hungry. So Dr. Hong1 began experimenting with Qt as a base; eventually, his LXDE-Qt project merged with the Razor-qt project (in July 2013). LXQt is now the successor to LXDE. LXQt has developed into a mature project which will continue to improve over time. The DE's primary goals are simplicity and being light on resources, with sensible default settings that meet most users' needs. (In addition to his work in computer programming, Hong Jen Yee is a physician -- specializing in rheumatology -- at Taipei Veterans General Hospital, Taiwan. He temporarily stopped development of PCManFM in 2008, to focus exclusively on his medical studies.) LXDE still exists but receives only infrequent updates. (I have read comments referring to it as "abandoned" or "quiet but not dead"). Lubuntu's last supported release using LXDE was 18.04 LTS which reached EOL in April 2021. The distribution switched to using LXQt exclusively with release 18.10 (in October 2018). Debian still offers a Live LXDE .iso and Fedora produces an LXDE Spin. Raspberry Pi OS uses a modified LXDE as its desktop environment. (Raspbian "PIXEL"[Pi Improved Xwindows Environment, Lightweight] was first released in 2016 and continues to be actively developed in a 32-bit version).
However, if you are unfazed by LXDE's deprecated status on PCLinuxOS, a forum thread discusses installing Alie's Openbox remaster as a base, then installing the task-lxde metapackage via Synaptic. You can reference this thread:"[Solved]. Anyone Else Running LXDE on Top of LXQt?" PCLinuxOS Forums, 6 Dec. 2021. If you need help, just be aware that a mere handful of forum members would be able to assist you. There is also an LXDE community edition from PCLinuxOS Brasil (with Portuguese-language localization), created by Agent Smith (Alessandro Ebersol). List of Qt Desktop Applications In theory, the lightest DE is usually one that shares resources with applications chosen from the same ecosystem. It is desirable to use Qt-based applications in an LXQt environment -- if possible. If you are running GTK-based programs in LXQt, you lose some of the lightness of a Qt5 desktop because you will be using extra resources to have both GTK3 libraries in RAM for your applications, and Qt5 for your desktop. In practice, it can be difficult to follow this advice. Some of the programs I use regularly -- such as GIMP, GnuCash, HomeBank, Geany -- are based on GTK. In my experience, mixing applications from different "families" does not impact performance drastically, provided there is enough RAM. The 2022.11 .iso resembles a PCLinuxOS Mini release, insofar as it does not include a large collection of applications by default. If you are new to LXQt, below are some suggestions for Qt-based desktop programs. (All of these are available in the PCLinuxOS repositories at the time I wrote this article). Accessories
Office
Graphics
Web Browser
Internet
FTP
Text Editor
Multimedia
Education
Miscellaneous
If you would like a more detailed list, visit the Gentoo (Gentoo Linux Wiki. "Qt Desktop Applications." Last edited 30 Oct. 2022) and Manjaro ("List of Qt Applications: From Manjaro." Last edited 18 Dec. 2021) wikis. Add Trash Can to Your Desktop From the main menu, go to Preferences > LXQt Settings > Desktop. From the Desktop Preferences dialog window, click on the "Advanced" tab to bring it forward. Select (tick) the box next to "Trash".  Click the "Apply" button. Close the Desktop Preferences dialog window. A trash can icon should appear on your desktop: 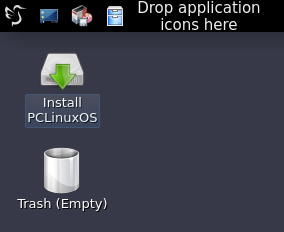 Change Your Desktop Wallpaper Right-click on an empty area of your desktop. A dialog window will appear. Select the "Desktop Preferences" option. Click on the "Background" tab to bring it forward. Locate the "Wallpaper image file" box. Click on the "Browse" button next to that field. 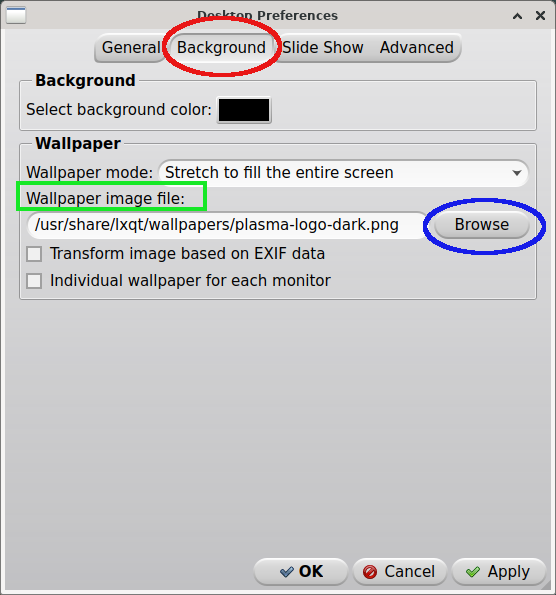 Using the PCManFM-Qt file manager, navigate to the directory: /usr/share/lxqt/wallpapers directory. 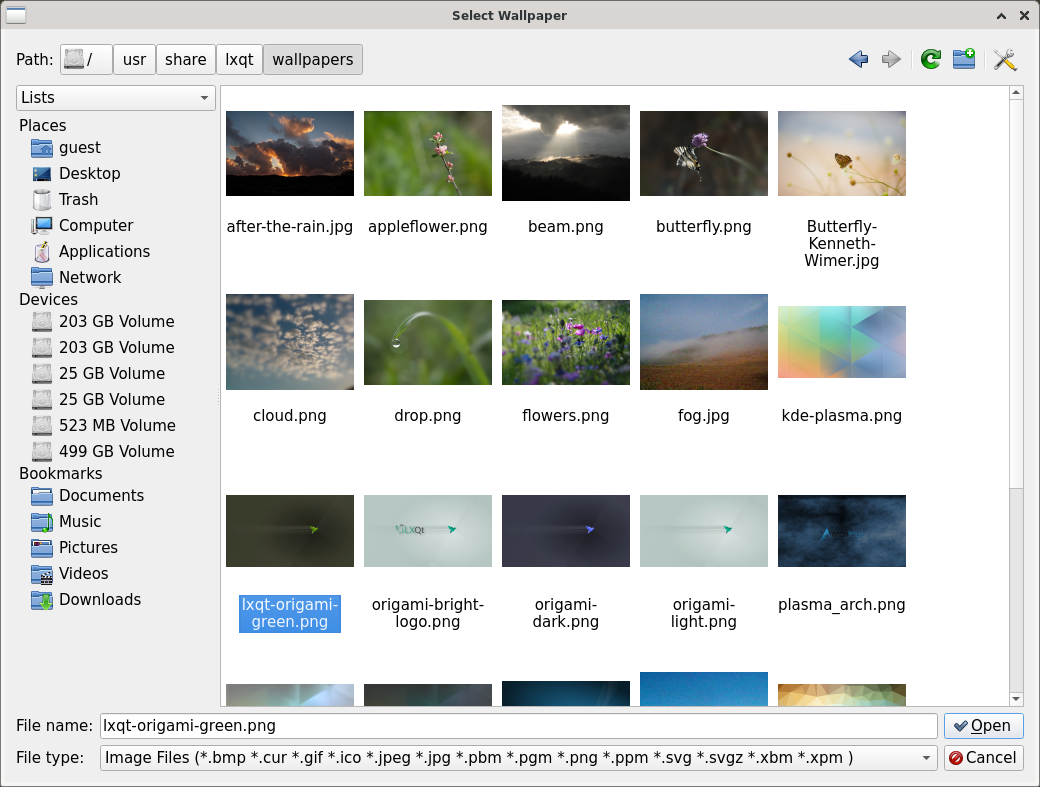 You will see some attractive (in my opinion) wallpapers to choose from. There are several wallpapers featuring Helix, the hummingbird mascot of LXQt.  As an alternative, you can of course choose your own personal wallpaper. In that case, navigate to /home/yourusername/Pictures. When you have chosen your desired wallpaper, click on the "Open" button. Then, click on the "Apply" button. Close the Desktop Preferences dialog window.
How to Add Quick Launchers When you first start the LXQt desktop, you will notice the prominent "Drop application icons here" message on the top panel / taskbar. This allows you to drop-and-drag an application icon to create a Quick Launcher.  From the Main menu, select the program you wish to add a Quick Launcher for. Drag it up to the panel. The "Drop application icons here" message will disappear from the panel after you successfully add your first app's Quick Launcher. Note: The panel is finicky about where it will allow you to drop the shortcut. It might require several attempts to add subsequent Quick Launchers. I had more success by dropping the shortcut on top of the File Manager's icon (PCManFM-Qt). However, once the Quick Launcher is there, I found it frustrating to move the Launcher exactly where I wanted it -- especially when there are multiple Launchers on the panel. Once you have the Quick Launcher on the panel, Right-click on the icon and select "Move left" or "Move right" to position it to your liking: 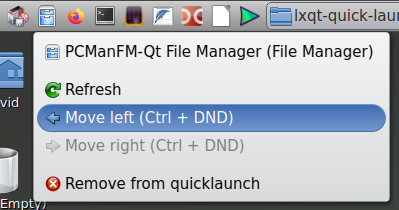 Method B Although this procedure involves more mouse clicks than Method A, I prefer it because it offers finer control over the placement of the Quick Launcher. Right-click on the main menu. Choose "Manage Widgets": 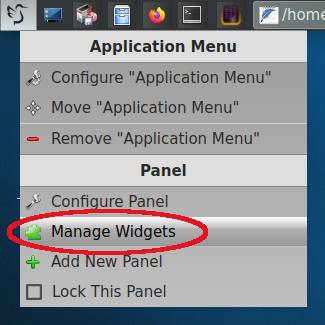 The Configure Panel pop-up window appears. Click the green + [plus] button: 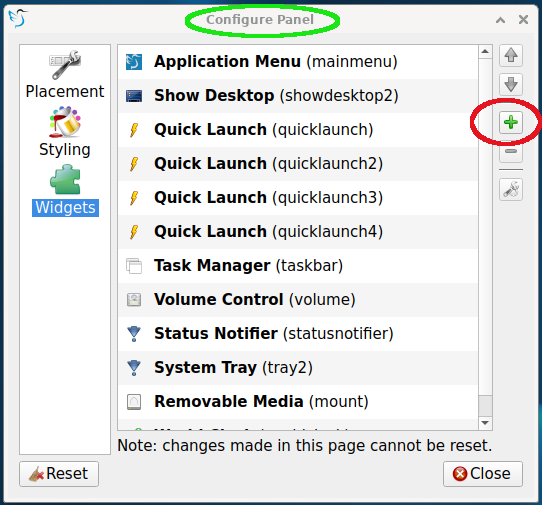 The Add Plugins pop-up window appears: 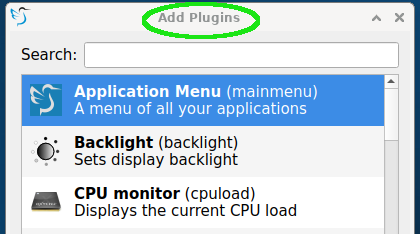 Scroll down and select the "Quick Launch" plugin. Click the "Add Widget" button 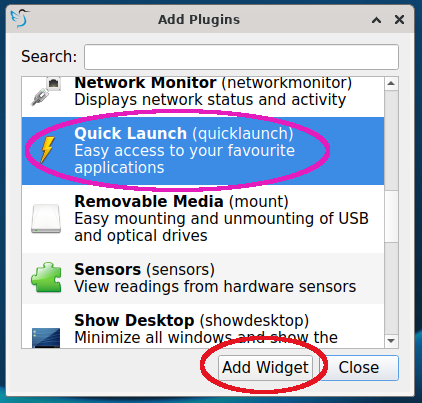 A new button labeled "Drop application icons here" will be added at the extreme right of the top panel.  Right-click and choose the "Move Quick Launch" option.  Drag it to the desired area on the panel, or, Use the blue "Up" arrow to incrementally move it to your desired position: 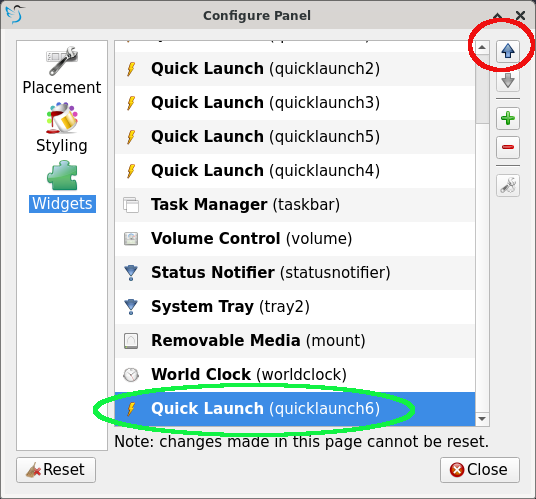 Click on the Main menu, select your desired program, then drag-and-drop it on the newly created button. 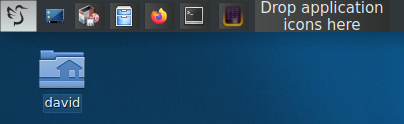 A Quick Launcher (icon) will be added. In this example, it is the FeatherPad plain-text editor. 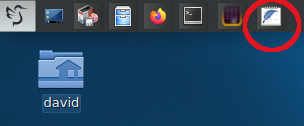 If you change your mind and would like to remove a Quick Launcher from the panel, right-click on its icon. Choose the option "Remove from quicklaunch". 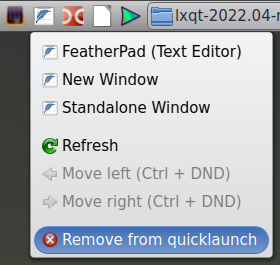
I prefer having an uncluttered desktop, so I generally avoid using desktop shortcuts. However, if you would like to add them,follow these steps outlined here. From the Main menu, select the program you wish to create a shortcut for. Right-click on it. Choose "Add to desktop". 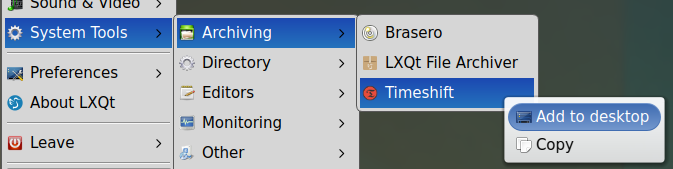 Notice that there is a red exclamation mark superimposed on the new shortcut. 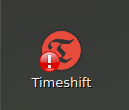 To eliminate the exclamation mark, right-click on the shortcut. Check (tick) "Trust this executable". 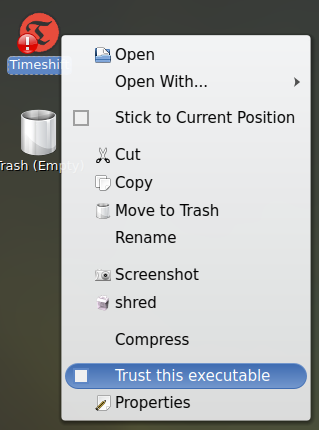 Now, the red exclamation mark will be removed. Change the Display Manager from GDM to SDDM Although the 2022.11 .iso ships with GDM (GNOME Display Manager) as the login manager, SDDM (Simple Desktop Display Manager) is the recommended Display Manager for LXQt, so I encourage you to switch. The procedure is not difficult. Here's how to accomplish that. From the Main menu, go to Preferences > Admin > Configure Your Computer > Configure Login Manager: 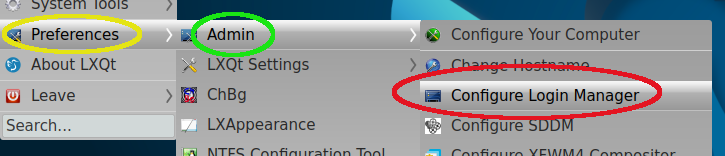 Type in the root user's password and click the OK button. Change GDM to SDDM by clicking its radio button. Click the OK button. 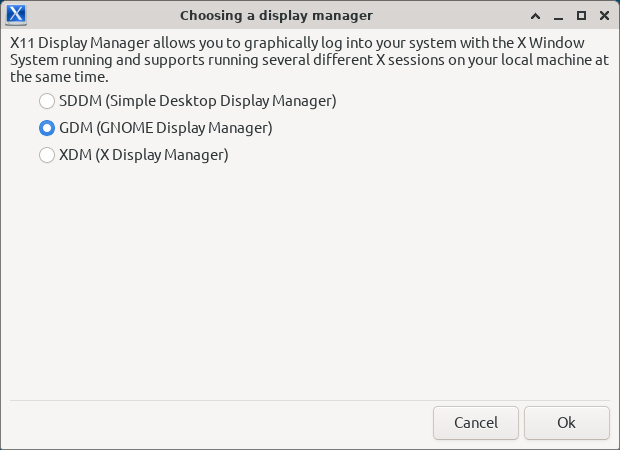 Reboot your PC for this change to take effect. Elarun, Maldives and Maya SDDM Themes The easiest SDDM themes to use are Elarun, Maldives and Maya. They are the default themes provided by SDDM and require minimal configuration because they do not support avatars. Daniel wrote a utility program, called "Configure SDDM," with a simple GUI to manage your /etc/sddm.conf file. For demonstration purposes, let's change the theme to Maya: From the Main menu, go to Preferences > Admin > Configure SDDM. 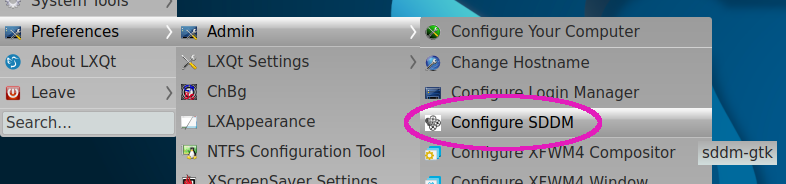 Type the root password, and click the OK button: 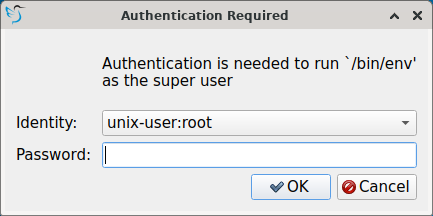 From the "Current" drop-down menu, choose "maya". Uncheck / deselect the "Enable Avatars" option: 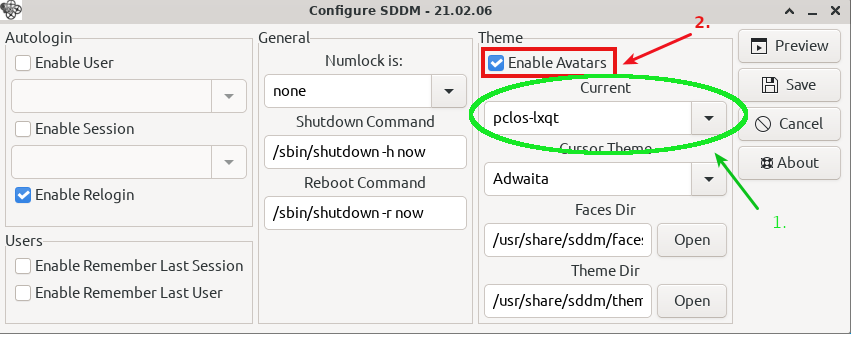 Click on the Save button. To apply your changes, a pop-up window will appear. Click on its "Run" button: 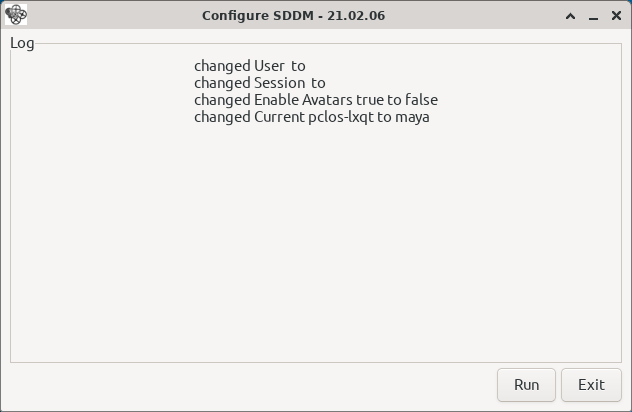 Close the confirmation pop-up window ("All settings are done") by clicking on the OK button.  Log out of your session to see the theme change. 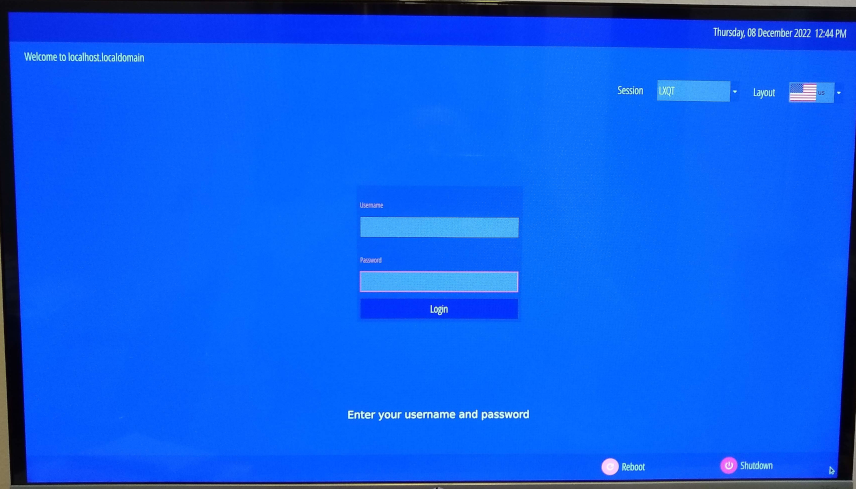 The above procedure is identical for using the Elarun and Maldives themes. I included screenshots of them below. (I apologize for the poor image quality; these photos were taken with my smartphone camera). Elarun SDDM theme: 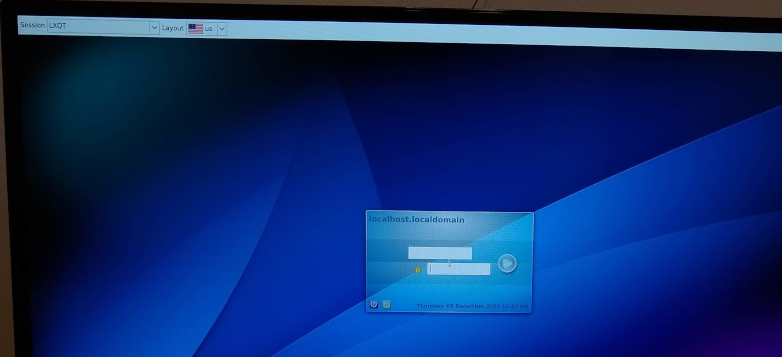 Maldives SDDM theme: 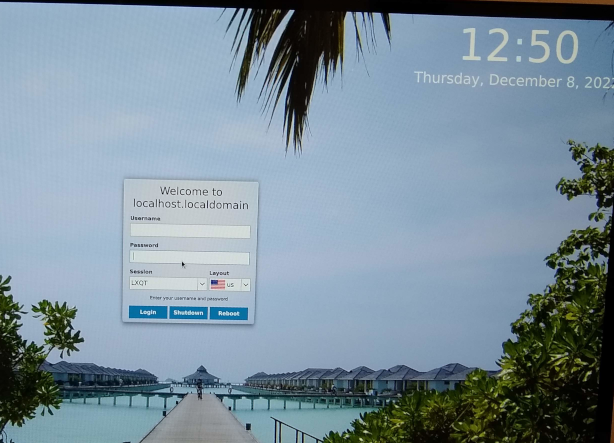 PCLOS-LXQt SDDM Theme The pclos-lxqt theme allows you to have an avatar; it looks nicer, in my opinion, but requires a few extra configuration steps. Before beginning, your avatar / icon must be placed in the /usr/share/sddm/faces directory and must follow the naming convention " username.face.icon ." If you wish to use one of the "stock" PCLinuxOS avatars, they are found in the /usr/share/faces directory. In my case, I chose a CrystalXP Tux-as-Wizard icon which I had saved in my Downloads folder. I first renamed the file, using the command $ mv tux-wizard-icon.jpg david.face.icon Next, I became root user, changed directory to my Downloads folder and copied the avatar to the appropriate sddm folder: [root@localhost ~]# cd /home/david/Downloads [root@localhost Downloads]# cp david.face.icon /usr/share/sddm/faces After these preliminary steps have been completed, Start the Configure SDDM utility program by typing the root password, and clicking the OK button. Check (tick) the "Enable Avatars" option, the from the "Current" drop-down menu, choose "pclos-lxqt" as the theme. 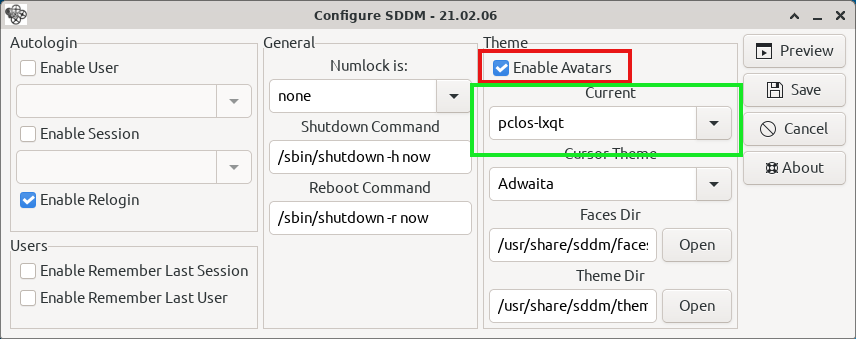 Click on the Save button. Click on the Run button in the pop-up window to execute your proposed changes:  Close the confirmation pop-up window ("All settings are done") by clicking on the OK button.  Log out of your session to view the new pclos-lxqt theme. 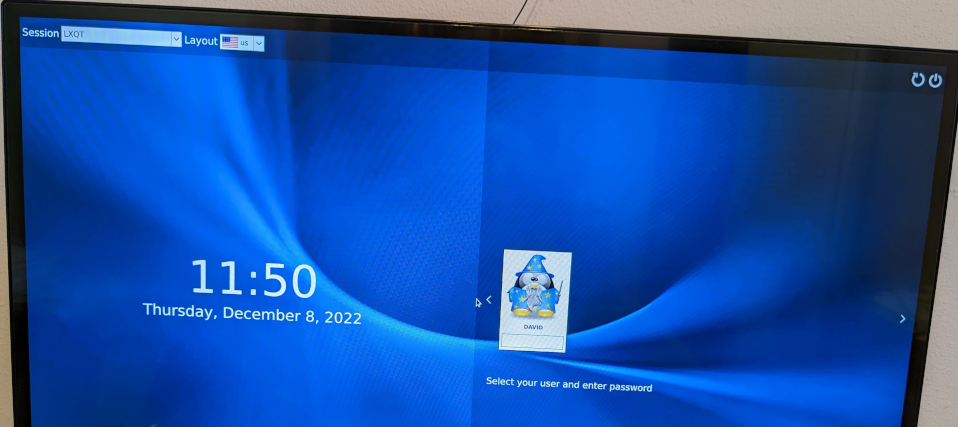 Note: The Configure SDDM utility has a welcome feature: a Preview button. Clicking on it will trigger a preview of the SDDM screen. After several seconds, a pop-up window appears with a button to exit the preview mode. 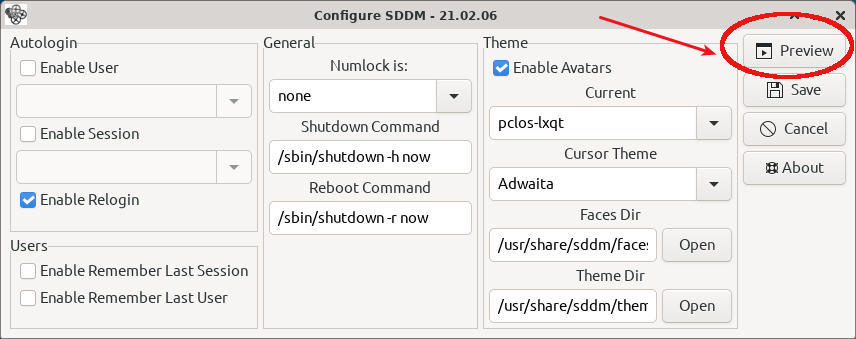 Editor's Note: This article will be continued in Part 2 next month. |