| Previous
Page |
PCLinuxOS
Magazine |
PCLinuxOS |
Article List |
Disclaimer |
Next Page |
Inkscape Tutorial: Create A Celtic Knot |
|
by Meemaw As I'm looking on YouTube for interesting things to do with Inkscape, I found one from IronEchoDesign on how to make a Celtic Knot. It's fairly easy and very fun! In this tutorial, we're going to use the Path Effect called Knot. I'm going to use some rectangles the first time to illustrate what this effect does. If I draw three rectangles and overlap them I get something like this: 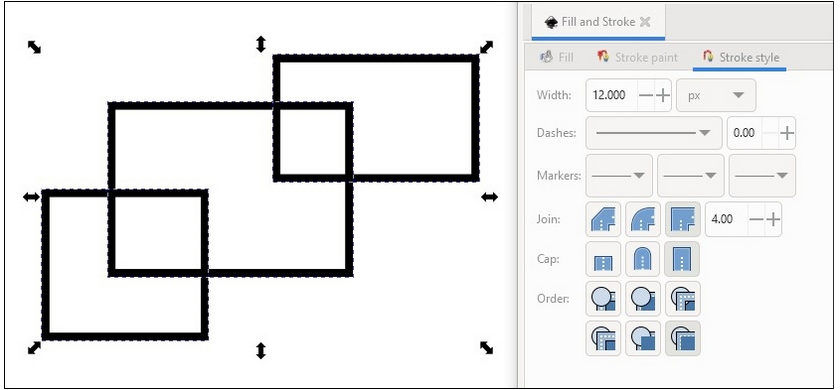 Make sure you have them all selected, and choose Path > Object to path. Showing the settings, I did these with a 12 px stroke, and no fill. I also want to choose Square Cap in the stroke settings. We'll get to that soon. Also make sure you group your objects, because the path effect only works on one object. Now choose Path > Path Effects. You'll get a window like this:  Add a path effect by clicking on the plus sign at bottom left. You'll get another window: 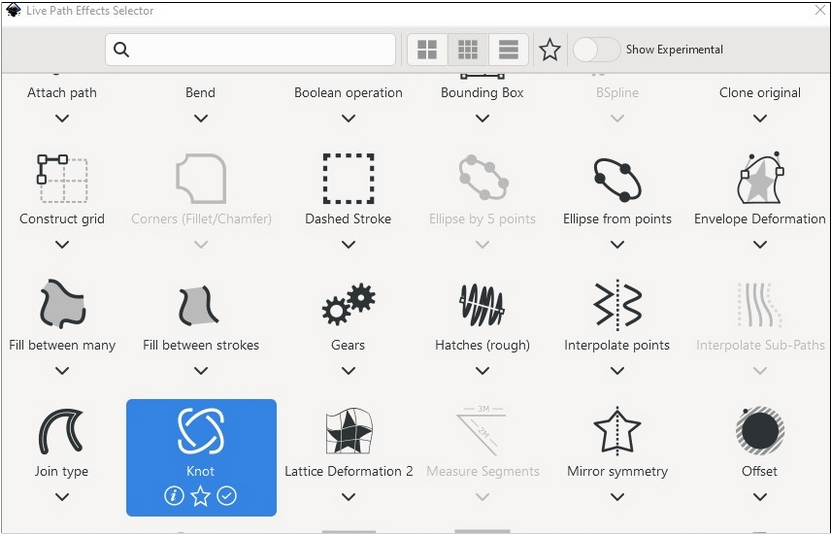 Since I've already done this, the Knot effect was already chosen. However, you can find it by searching, but the effects are listed in alphabetical order, so you should find it easily. As soon as you click Knot, the effect will be applied. 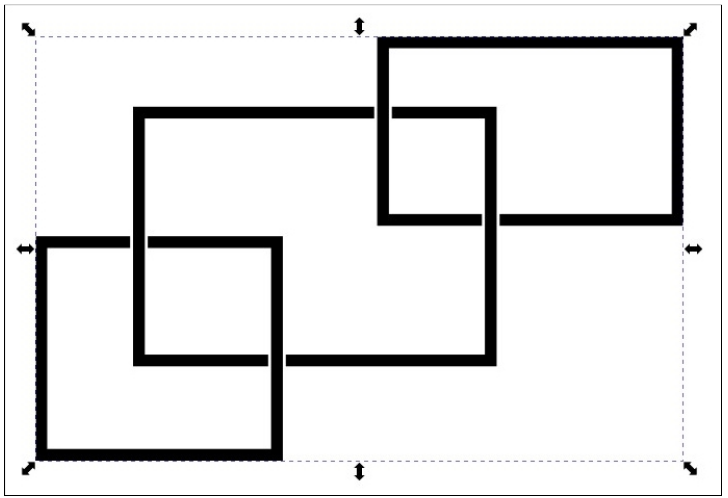 Notice it now looks like they are interlinked. From the path effects settings window you can choose the gap between the lines to make it a smaller gap or a larger gap. The default is set at 3 and "In units of stroke width" is checked. This means that if you set your stroke in pixels, your gap will be pixels, and if your stroke is millimeters, your gap will be as well. Above the gap is a setting called the Switcher. This is a tool for making sure your strokes are truly interlinked, so if you are looking at which strokes go over or under the strokes they cross, and want to switch them, you can do that. Change your tool to Edit Paths by Nodes and you will see a handle with a circle around it. That's the switcher. Click on it once, and it will reverse the lines so the other looks like it's on top. Click it again and it will remove the gaps entirely. As shown below, the first on the left is what it looks like when you first see it. The middle image is after it's clicked once and the right image is after a second click. 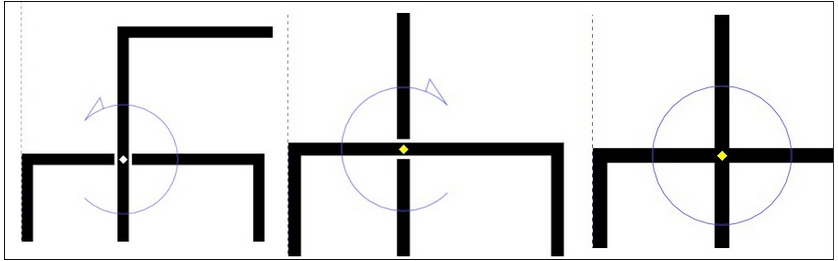 Want to change another intersection? Drag the switcher to the one you want. Be careful that you don't click outside your object, because sometimes when you click back, your switcher is gone. You can get it back if you click on your stroke while the path effects settings window is open. Now that we have most of what we need, let's make an actual celtic knot. We'll use circles instead of rectangles this time, so draw a circle. Instead of duplicating it, use Copy & Paste to make another circle the same size (Iron Echo Design's tutorial mentioned that duplicating sometimes causes problems). Make sure you choose Path > Object to path. 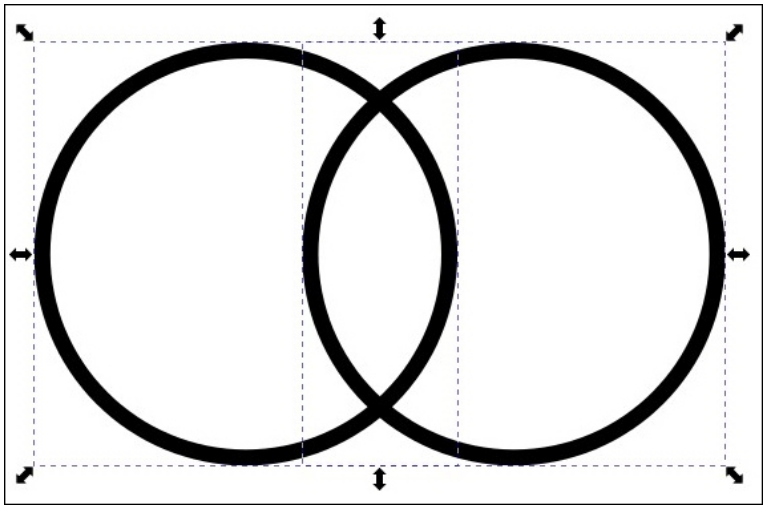 Select them both and use your Align & Distribute tool to align the bottoms of the circles, then choose Path > Intersection. It should look like this: 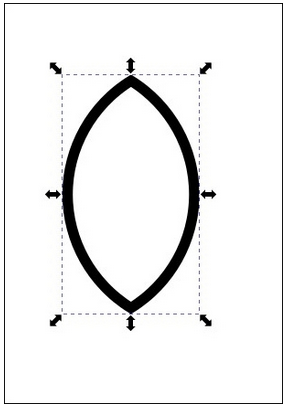 You can make this a bit longer if you wish. Click on the arrows again so you get your rotation arrows, then hold down (CTRL) and drag the object until it is rotated about 45 degrees. Holding the (CTRL) down will allow it to move about 15 degrees and then stop until you drag more. Now copy & paste to create another object just like the one you have. Reverse the direction of the new one (flip horizontally) and center them together. Also, create another circle. 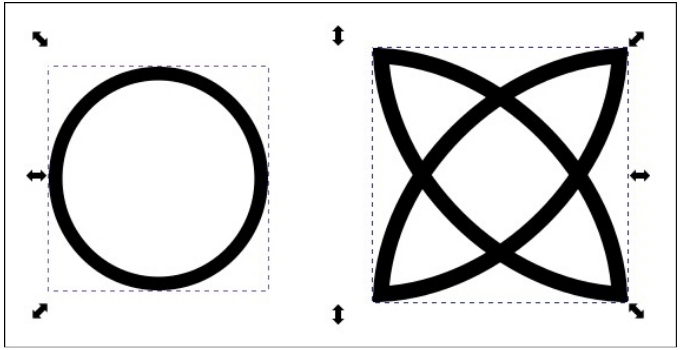 Make sure they are all selected, then center them horizontally and vertically. Now group them, then choose Path > Path Effects and choose Knot. 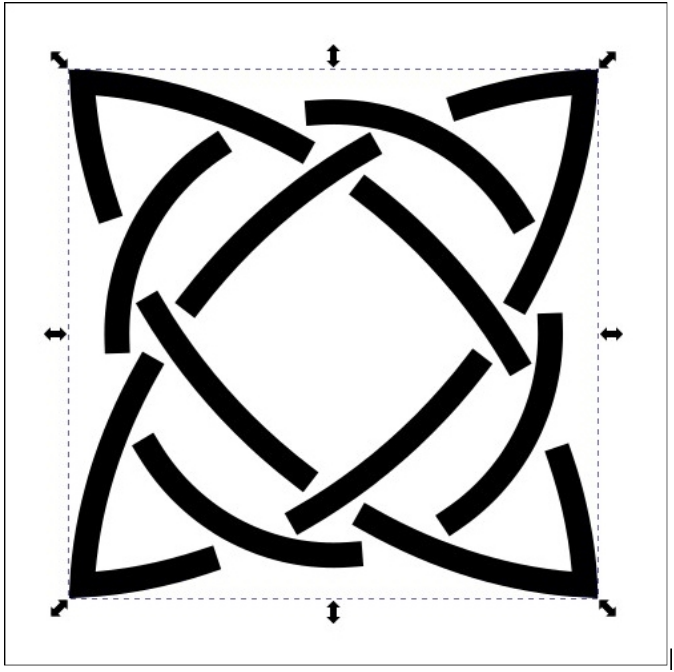 You should check first to see that your gaps alternate (like I discussed above). Wow, that still doesn't look as good as I had hoped! Good thing we set our stroke settings for square cap, and I'll show you what to do to fix this. First, click on Path > Stroke to path, then change your tool to Edit path by nodes. You'll now see four handles near each of the ends of the square paths. You can drag the nodes until the gap looks the way it should. 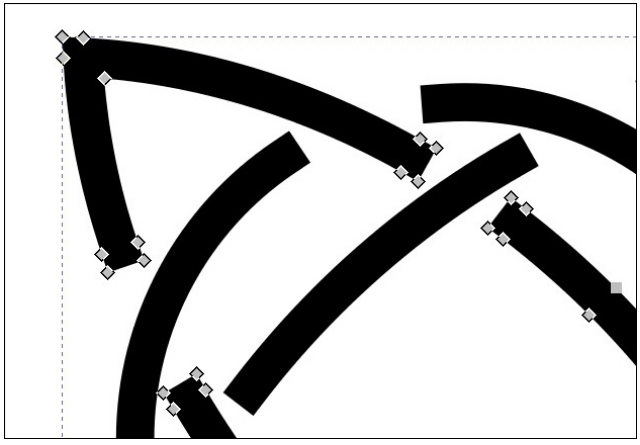 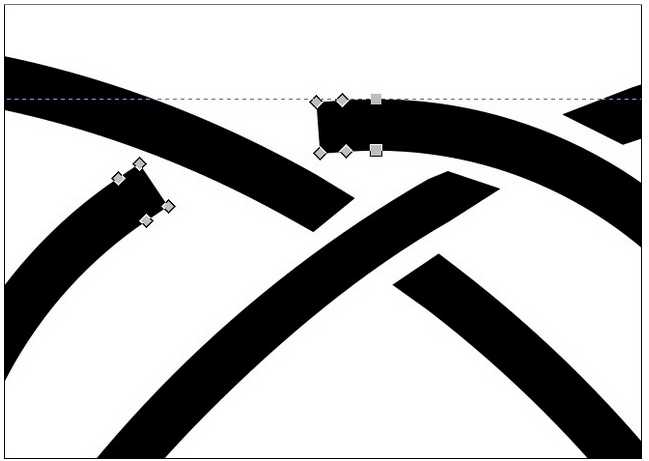 You can use another trick to help. Since you added Stroke to path, you can add a stroke to the outside of your line temporarily, and that will help you line up your gaps at an equal distance. You can always remove it later if you wish. I put a 3px stroke on this to help me edit the gaps, but took it off afterwards.  While I've gotten a little shaky in my old age, I have managed to fix the gaps. I know you can do it, too. Have fun! 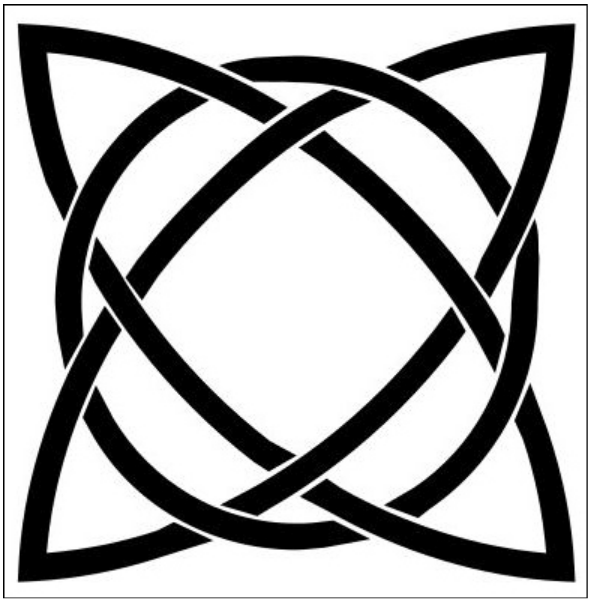 |