| Previous
Page |
PCLinuxOS
Magazine |
PCLinuxOS |
Article List |
Disclaimer |
Next Page |
A Lightweight Countdown Timer For All Occasions, Desktops |
|
by Paul Arnote (parnote) When I was putting the finishing touches on my standalone graphic file resizing utility/script that appeared in the February 2024 issue of The PCLinuxOS Magazine, I stumbled across an intriguing “sample” script in the replies on the StackExchange website, by StackExchange user ilkkachu. To be honest, when I'm writing scripts, I pretty much wear out the StackExchange and StackOverflow websites. Not only have they gotten me out of jams with my fledgling bash knowledge, but I also sometimes run across things that give me ideas. ilkkachu had posted a sample script showing how to execute another command after a command reaches a predefined “timeout” period. It got me thinking that I could turn his example into an excellent and lightweight countdown timer. I don't know about you, but having a simple countdown timer on my computer is something that I can use frequently. Let's say you put some beer battered fish filets in the oven, and you have to turn them in eight minutes, and then cook them another seven minutes on the other side. Hey, I'm dealing with “real life” here. My kids love the beer battered fish filets we buy in a box from the grocery store. So after putting the beer battered fish filets in the oven, I set the timer on the oven, which isn't nearly loud enough. I then come to check my email on my computer, two rooms away in the living room. There's a good chance I *won't* hear the feeble timer alert on the stove. So, I could just set a timer on my computer that goes off shortly before the one on the oven (I just subtract a minute). When the timer on the computer goes off, I know it's time to head into the kitchen, where the stove timer will be going off very soon. Or, let's say I need to leave the house to be somewhere else in four hours and 45 minutes. I can set a timer to remind me, so I don't arrive late. Or, you can set a timer to remind yourself to take a break after a certain amount of time has elapsed. I think you get the idea. The possibilities are endless. Sure, I know there are “other” timers available on PCLinuxOS, but what's the fun in that? Plus, I set out to create a countdown timer that works reliably, with a minimum of fuss, and that has a very small footprint. It's probably NOT the smallest in the world, but at only 1.5KiB in size, it is feature packed, easy to use, not a resource/memory hog, and is quite small. I also can't grow my bash skills by running other people's programs, either. When I saw ilkkachu's script sample, I just knew I could “enhance” it WAY beyond his intended use. To be honest, it was fairly easy to add Zenity dialog boxes to it to expand its capabilities, and I got to learn how to convert from seconds to hours, minutes and seconds … and even days. Yes! More chances to work with “if then else” loops. Yes! More chances to expand my bash scripting skills! Countdown Timer Script Unlike many of my other scripts that I've written about in the pages of The PCLinuxOS Magazine over the years, this one is NOT intended to be run from a Thunar Custom Action on Xfce. Instead, this script is meant to be run from a launcher on your desktop, from a launcher on one of your panels, or launched from the command line. And, since it's a bash script that uses Zenity dialog boxes, it should have no problems running on any desktop environment. Save the script where you normally save your bash scripts. As usual, strip the “.txt” file extension off of the file, and mark the script file as being executable. I've called the script “countdown-timer.sh,” and as usual, you can download it from the magazine's website. Or, you can type it in, if that's what you choose. Before we get into how to run it, below is the script. I'm showing it here as an image, so you can also see the line numbers in my text editor. 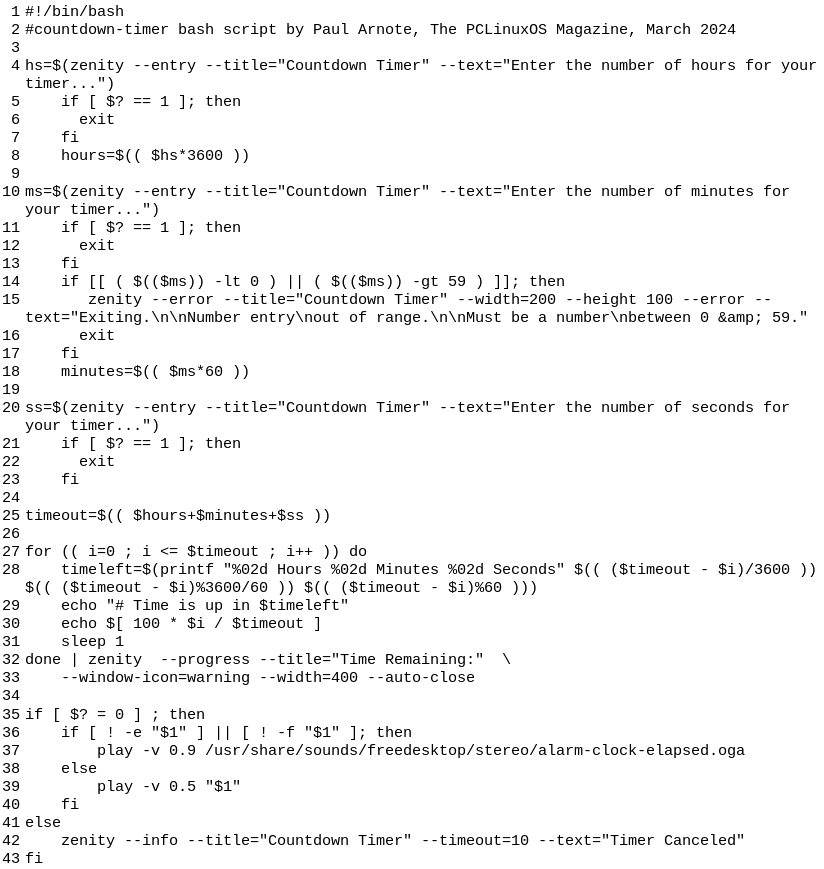 So, let's talk about the script.  In Lines 4 through 8, the user is given the opportunity to enter the number of hours they want to set for the countdown timer. You can put whatever number you want here, but keep in mind it makes no sense to (nor can you) go backwards in time … at least yet. The number you enter is converted to seconds. 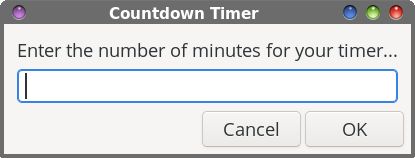
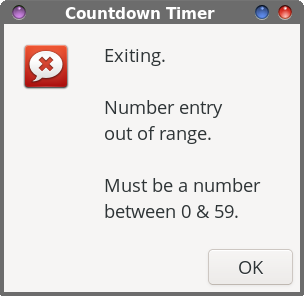
Lines 10 through 18 allows the user to enter the number of minutes they want to set for the countdown timer. You can put whatever number you want here, as long as it's between 0 and 59. If you try to put in a number outside that range, you will be presented with a warning dialog box, and the script will exit without setting up the countdown timer. Again, the number you enter is converted to seconds.  Then, Lines 20 through 23 allow the user to enter the number of seconds they want to set for the countdown timer. You literally can put whatever number you want in here, since everything else is getting converted to seconds, anyway. Entering 75 as the number of seconds would be the same as entering 1 minute and 15 seconds. In Line 25, the value of the number of seconds from the hours, minutes and seconds dialog entry boxes is added together, and stored in the variable named “timeout.” Next, starting in Line 27, I set up a “for” loop. That loop uses the variable “i,” and is initialized to start counting at zero. Each time through the loop, the “i” variable is incremented by one, and continues as long as “i” is less than or equal to “timeout.” 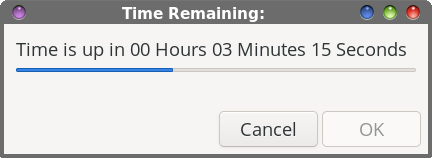 With Line 28, I use the “printf” command to store the formatting for the text that shows how much time is remaining in the variable named “timeleft,” and convert the number of seconds back into hours, minutes and seconds. The “printf” command has far more options for formatting text than a plain “echo” command has. Plus, it's just easier to relate to the remaining amount of time in that format (hh:mm:ss), without having to do mental acrobatics to convert, for example, 347 seconds back into minutes (which is five minutes and 47 seconds). Line 29 uses the “echo” command to update the text displayed in the progress dialog box, while Line 30 sets up the incremental display of the progress dialog box, which serves as a visual indicator for the timer. Finally, Line 31 tells the bash script to sleep for one second, and then loops back through the “for” loop again, until the conditions are met to exit the “for” loop. Lines 32 and 33 display the progress dialog box. Lines 35 through 43 set up an “if then else” loop, with another “if then else” loop nested within it. If the timer reaches zero, the progress dialog box is automatically closed, and then an “alarm” is sounded, via the “play” command. The “play” command, as used here, has the volume set to 50% volume (the –v 0.50 parameter) for the user's chosen sound file. If you want it louder or quieter, change the value after the “–v.” Think of the volume level as a percentage, so 50% volume is 0.5, 70% volume is 0.7, and 100% volume is 1.0. For my use, 50% volume is perfect to get my attention, and avoids the distortion and clipping of the sound file by playing it at grotesque volumes that will blast you out of your chair. What good is a timer of any sort that doesn't alert you when the time has elapsed? If the user either forgets to supply a sound file as a command line argument, or if the user has mistyped the path and file name in the command line argument, the script defaults to a sound file that all users should already have installed on their system. This is what the nested “if then else” statement from Lines 36 through 40 does. The “inside” (or nested) “if then else” statement checks to see if the specified file exists. If the file exists, the user's chosen sound file is played. If not, the “fall back” sound file is played. So, instead of just quietly going away, a fall back/backup sound file is played at a volume of 90% (the -v 0.9 parameter). I did this “change” to the volume for the fall back sound file, since, in my opinion, it is a rather “quiet” sound file, and I want to be sure to get the user's attention. For what it's worth, the “fall back” sound file is located at /usr/share/sounds/freedesktop/stereo/alarm-clock-elapsed.oga. 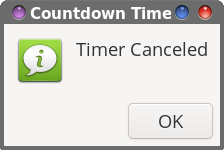 However, if the user presses the “Cancel” button, a message box is displayed (Lines 41 through 43), telling the user “Timer Canceled.” That dialog box will automatically disappear after a 10–second delay. Of course, the user can dismiss it earlier just by pressing the “OK” button. Running The Script Actually, running the script is pretty straightforward. The script only takes ONE command line argument, and that is the full path and filename of the sound file you want to use as your alarm sound. You will only have to do this once if you're setting up the script to run from a launcher, unless you decide to change the sound file that is used for your alarm. And, your chosen sound file can be stored anywhere on your computer. You just have to provide a full path and filename to that sound file. So, let's say you store your collection of sound files in a directory in your /home directory called “sounds.” So, that means your command line argument will be something like “/home/this-user/sounds/some-sound-file.mp3.” You can use WAV, OGG, FLAC, MP3, AIFF files, or any other sound file playable on your system. It doesn't have to be MP3 files. I just chose MP3 files because of all of the options available to keep the file sizes smaller. IF you specify an improper path and filename to the sound file you want to use as your alarm sound (or if you “forget” to specify a full path and filename to a sound file altogether), the script will still work, but at the end, the “fall back” sound file will be played. And, I guess you CAN just use that “fall back” sound file, if you want. But you'll be giving up the ability to customize the sound file that is played when the timer reaches zero. If you're hearing the “fall back” sound, then you either didn't provide a qualified full path and file name to the sound file, or you mistyped that path and/or filename. 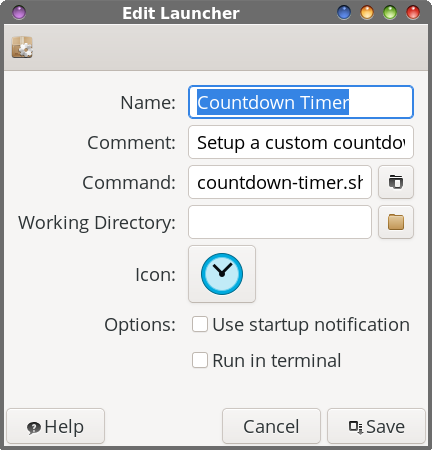 I suspect that many of you will choose to run this from a launcher, either on your desktop or on your panel. You may notice from the command line shown above that I don't have a path statement preceding the command to launch the script. That is because I save my scripts in my ~/bin directory, which is in my PATH statement for my computer. The image above shows the properties for the launcher that resides on my top panel in my Xfce desktop. Do you need some files to use for your alarm? Never fear, because I've collected 14 sound files to use for the alarm. I've tried to keep them very small and short. Most of these sound files are six seconds or less in length, and all of them each weigh in at under 50KiB. I've shortened many of them myself, and reduced the sample rate to 22,500 KHz, at 48kbps. It's adequate in sound fidelity to serve as an alarm sound file that you're going to listen to for less than six seconds. You can download the collection, “Alarms.tar.gz,” from the magazine website. The sound files are compressed into a single tar.gz file, and the download is 366KiB in file size. For most users with a broadband connection to the internet, the download will/should take less than 10 seconds. Sound files specified as the command line parameter that have spaces in the file name are just fine, even though you really shouldn't be using spaces in filenames, anyway. I've “fixed” the script to accommodate those who insist on using spaces in filenames. Personally, I avoid spaces in filenames like the bubonic plague, and routinely run a Thunar Custom Action to convert spaces to either dashes or periods (for what it's worth, I really hate replacing spaces with an underscore … but that's just me and my personal preferences). SummaryI hope you enjoy using this countdown timer as much as I had fun creating it. Sometimes, it's the “simple” things that make life easier and sweeter. Now, excuse me while I go flip those beer battered fish filets. |