| Previous
Page |
PCLinuxOS
Magazine |
PCLinuxOS |
Article List |
Disclaimer |
Next Page |
GNU TeXmacs: How to Create a Bibliography and Add Citations |
|
by David Pardue (kalwisti)
While writing last month's article, I realized that certain tasks in TeXmacs might be a bit intimidating for users who are unfamiliar with the (La)TeX ecosystem. Although TeXmacs does not use (La)TeX directly, its method of creating bibliographies and handling citations / references follows “the LaTeX way”. If you decided to explore TeXmacs but have little or no prior LaTeX experience, and are wondering how to create a bibliography and add citations to your document, I will attempt to demystify the process. It is not complicated once you acquire some basic knowledge of two programs: BibTeX and JabRef.
The GNU TeXmacs editor uses BibTeX to compile bibliographies. BibTeX is a software program that is used in conjunction with LaTeX to help organize your bibliographic references and create a bibliography. BibTeX automates most of the work in managing references. The program formats your citations and reference list consistently, in a style of your choosing. BibTeX references are stored in a plain-text database with a simple format (with a file extension of .bib). Every reference in this bibliography file is formatted according to a certain structure and is given a “key” (also known as a “citation key”) which uniquely identifies that item. The “key” is the first item in a BibTeX entry. The citation key is something that you create yourself. You may use any naming convention that you wish; a common pattern is “AuthorsurnameYearofpublication”, e.g., Knuth84, Lamport94, etc. An author with multiple publications in the same year could have a letter appended to the key, e.g., Dijkstra69, Dijkstra69a, Dijkstra69b. Below is an example of a BibTeX entry for Donald E. Knuth's famous book, The Art of Computer Programming. It illustrates the general structure of the file format: 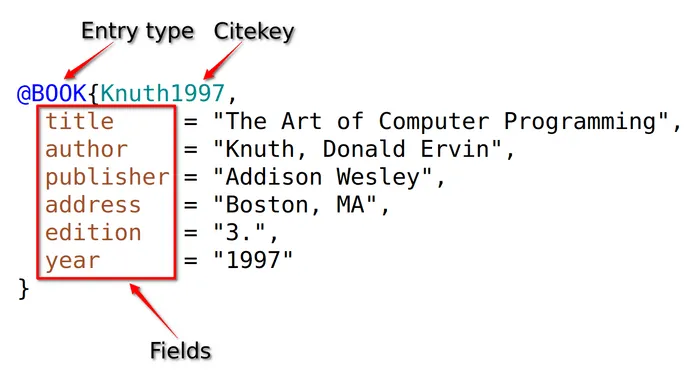 BibTeX was developed by computer scientist Oren Patashnik in the 1980s, while he was a graduate student at Stanford University (working under the supervision of Donald Knuth and Leslie Lamport). The program's first public release was in March 1985, so it has been in existence for almost forty years. BibTeX is tried and true; it has proven itself to be an invaluable tool. As you might imagine, with such a long history, there is a large corpus of literature published on BibTeX. If you have specific questions about how to accomplish something in BibTeX, a quick web search will lead you to answers. Andrew Roberts, the author of some popular LaTeX tutorials, provides a good introduction to BibTeX with a helpful cheat sheet (in PDF format) that summarizes all the BibTeX entry types and fields. If you would like to delve more deeply into BibTeX, Dr. Nelson Beebe (Dept. of Mathematics, University of Utah) wrote an excellent tutorial. A few other points to consider about BibTeX:
• The order of the BibTeX fields is unimportant
Although you can create and edit BibTeX files in any text editor — such as Kate, Emacs, Geany, etc. — using a reference manager app is a more comfortable experience. I recommend that you consider JabRef as your primary citation management software because it uses BibTeX (.bib) as its native file format. 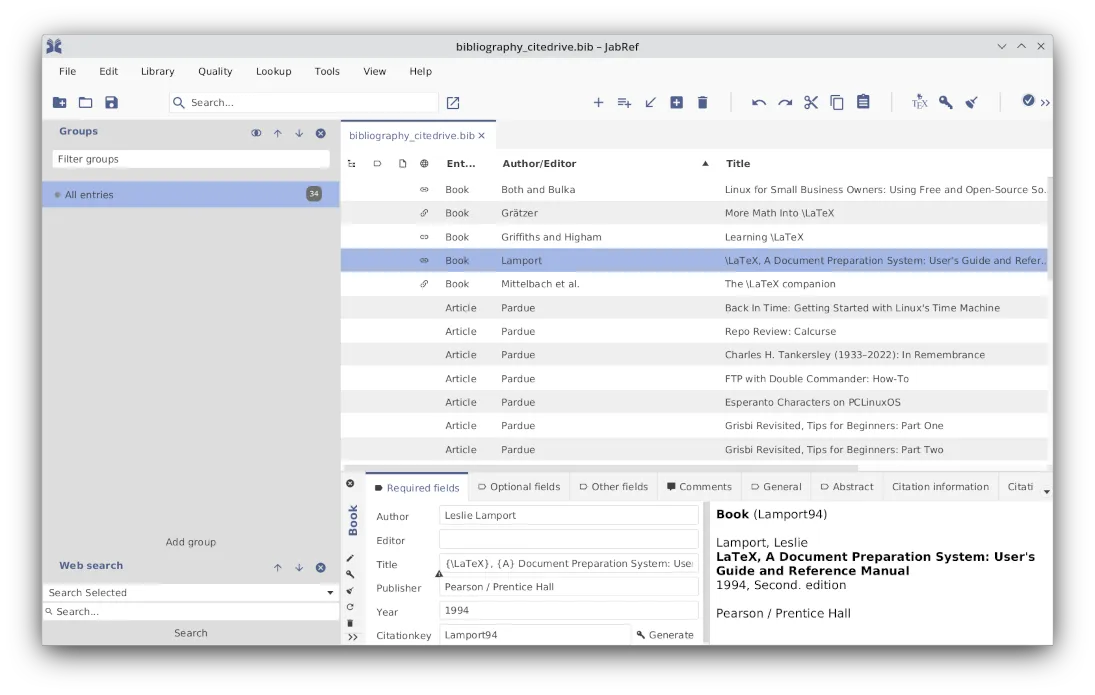 JabRef is a reference manager that acts as an interface to BibTeX. JabRef is FOSS, cross-platform (Linux, macOS, Windows) and is freely downloadable. The GUI allows the user to easily import, edit, search, and group citations in the BibTeX format. It also offers automatic citation key generation. JabRef does not offer any citation styles of its own; instead, the citation is generated from the BibTeX style setting. A complete JabRef tutorial is outside the scope of this article. However, the video tutorials below can help you quickly become familiar with JabRef's features:
• The presentation by Dr. James Azam, “JabRef for Beginners (Part 1): JabRef Interface and Creating a Library” [3 Apr. 2021 (13 min., 55 sec.)], is an excellent starting point. It provides a clear overview and is well paced
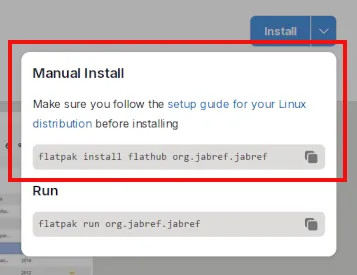
Although JabRef is not currently in the PCLinuxOS repositories, it can be installed easily as a Flatpak (ver. 5.15).
• First, install the Flatpak utility via Synaptic from the official PCLinuxOS repository.
The current version (at the time this article was written) is flatpak 1.15.6.
 (In case you are curious, here is a partial gloss of the command's syntax:
• The third element (“flathub”) is the remote repository, i.e., flathub[.org].
There are several methods of creating a BibTeX (.bib) file:
• You may convert your existing references from text format using the online tool text2bib. You can copy and paste your bibliography from LibreOffice Writer (or another word processor) into text2bib, which will convert your references into a BibTeX file. 
• Makino Takaki provides an (experimental) online converter here. Google Scholar is a web search engine that indexes the full text or metadata of publications from a variety of scholarly disciplines. After conducting your search, identify the source(s) that you wish to cite. Then, it is a simple three-step process to export the BibTeX reference: click on the “Cite” hyperlink; then click on the “BibTeX [format]” hyperlink; copy and paste the displayed BibTeX entry into JabRef or your favorite text editor. 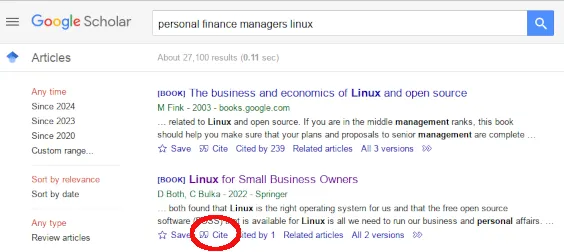

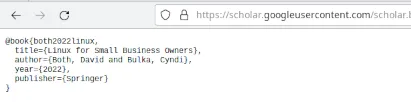 Below is the citation, in BibTeX format, for the book Linux for Small Business Owners (as downloaded from Google Scholar):
@book{both2022linux, The sample item above, although it is bare-bones, contains mistakes. It omits the book's subtitle; it omits the edition statement and lists the publisher incorrectly (it should be “Apress” [which is an imprint of parent company Springer Verlag]. The book's ISBN was not included in the Google Scholar metadata. I edited the entry to include additional bibliographic data. My modifications are in blue boldface type:
@book{Both22,
The screenshot below shows a small sample of the databases available at my local library (via the Texas State Library). 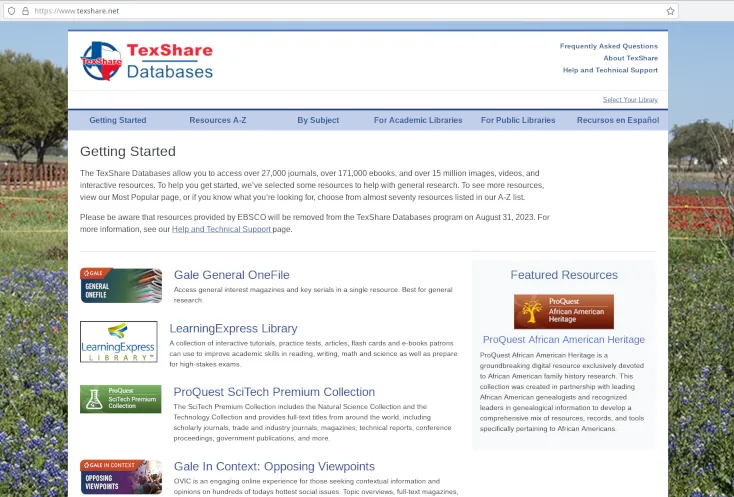 • A more labor-intensive option is to type your BibTeX database from scratch — either directly as a plain text file, or by using a BibTeX reference management program such as JabRef.
We have covered background information on BibTeX and the role it plays in compiling bibliographies. Now let's walk through the process of citing reference sources within GNU TeXmacs and actually compiling a bibliography.
• To begin, you should have already created a (separate) bibliography file, in BibTeX format (.bib). (As an alternative, you can insert the bibliography file via the menu on the second-tier toolbar. Look for the last icon in the left group [“Insert automatically generated content”] > then choose the Bibliography option.) 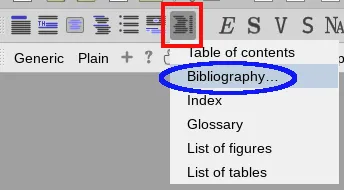 Navigate to the folder with your .bib file, select it and click on the Open button. 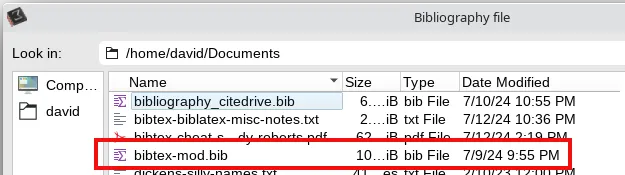 Notice that an unnumbered section called “Bibliography” will be added at the bottom of your document. 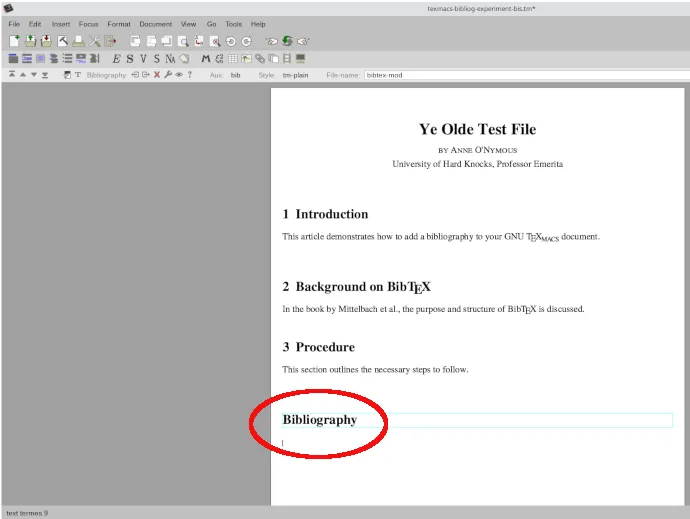
At this point, you may begin entering your relevant citations. For example, to add a citation after the phrase:
“In the book by Mittelbach et al.”: After “et al.” press the Spacebar then Tab: 
• A faint blue hyphen will appear (as shown above).  (The purple-colored angle brackets appear automatically in the TeXmacs editor while you are typing out this command.)
• Next, press the Enter/Return key. A pipe symbol (“ | ”) will automatically appear: 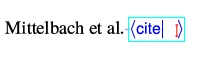 • Type in (or paste) your BibTeX citation key for this book. In this example, I used the citation key “Mittelbach04”: 
• Press the Enter/Return key. Notice that the argument you were typing as part of the “cite” command disappears, and changes to a red question mark: 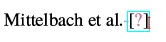 The question mark appears because TeXmacs is unaware — for now — of this newly added citation. In order for TeXmacs to “look up” this new information, you must first update / refresh your TeXmacs file. • To refresh your file, click on the Hammer icon two or three times. 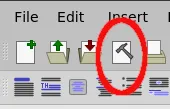
• Afterwards, all changes should be reflected, and the citation will become active / hyperlinked.  • An entry for the Mittelbach book will be generated in the “Bibliography” list: 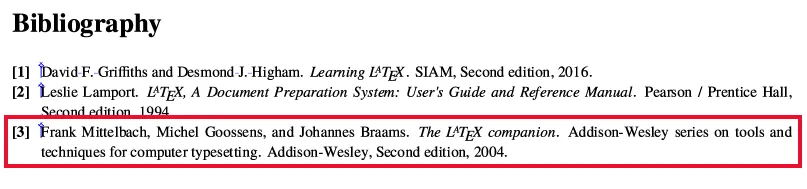 The reference list shown in the screenshot above is one of the seven standard BibTeX bibliography styles; it is called “plain”. (TeXmacs refers to it as “tm-plain”). A brief overview of BibTeX styles is available in the library guide at https://www.reed.edu/it/help/LaTeX/bibtexstyles.html • You may optionally change the style by going to the Focus bar (the smaller, third-tier toolbar). Look for the property labeled “Style” and use its menu to change the style to “tm-alpha”: 
 • After applying the change, results will look like this in the text body and reference list:  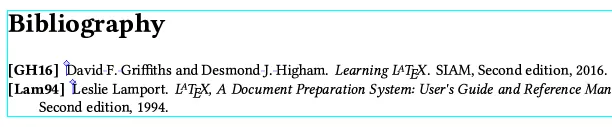
I hope this article has clarified how BibTeX and TeXmacs interact, and perhaps saved you some frustration. You might find it helpful to watch two real-time video demonstrations of the bibliography / citation procedure:
• Useful Knowledge. “How to Easily Type Your (Scientific) Notes with TeXmacs.” 1 Apr. 2022. |