| Previous
Page |
PCLinuxOS
Magazine |
PCLinuxOS |
Article List |
Disclaimer |
Next Page |
How To Install Typst Compiler Locally On PCLinuxOS |
|
by David Pardue (kalwisti)
Before proceeding, I must mention this violates one of the standard rules of PCLinuxOS system maintenance: to only install programs from the official PCLinuxOS repository. However, in this case, I can assure you that installing the Typst compiler is safe and will not bork your PCLinuxOS installation. I have followed the procedure below on two different PCLinuxOS computers; I have not experienced any glitches or breakage during the several weeks that I have been using Typst locally.
You should first download the Typst pre-built binary. Look for Release ver. 0.12.0 (Oct. 18, 2024) Download the file: typst-x86_64-unknown-linux-musl.tar.xz. 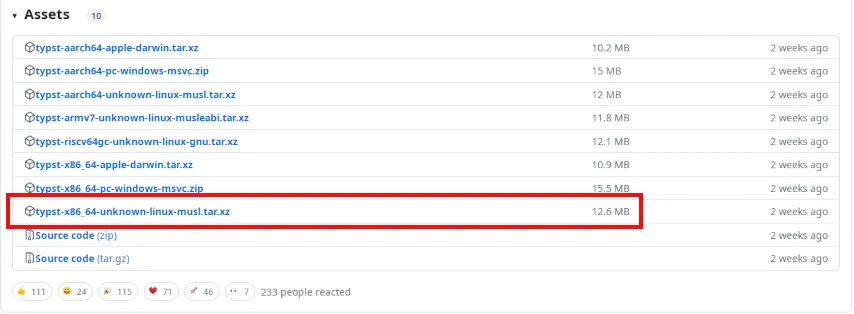 This contains the Typst compiler and its CLI, which is everything you need to compile Typst documents locally.
Move the tarball from your Downloads folder to your /home folder. Extract/unzip the tarball. It is a modest 39.8 MB in size. To simplify the naming convention, I renamed the unpacked directory from “typst-x86_64-unknown-linux-musl” to just “typst”.  Within the typst directory, use your DE's file manager (Dolphin, Thunar, Caja, PCManFM-Qt, etc.) to double-check that the typst binary is set as executable: 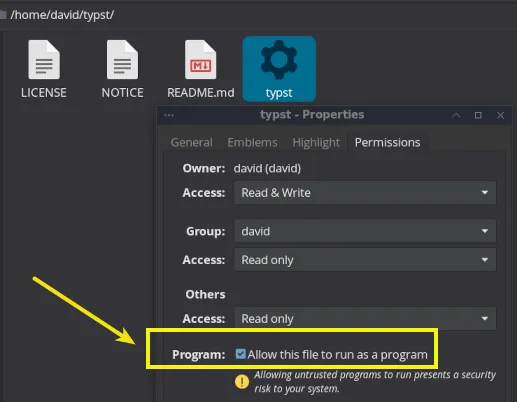 Place the Typst Binary in Your $PATH You must now place the typst directory in your $PATH. A path — or the search path — is the list of directories that will be searched for anything you type on the command line. After editing your path, when you call/invoke Typst, the system will look for [and find] the typst binary in your /home directory. Your default $PATH in PCLinuxOS probably looks something like this:  To (permanently) add the typst directory to your PATH. Open a Terminal and issue the command below in your /home directory to edit the .bashrc file: (I chose the nano editor but you may use whatever your preferred text editor is — vim, Emacs, etc.)
Type the command: Do not forget to type the initial period/full stop (“.”) before bashrc.
Add the line at the bottom of the existing .bashrc file: (Change “david” to whatever the username is on your system.) 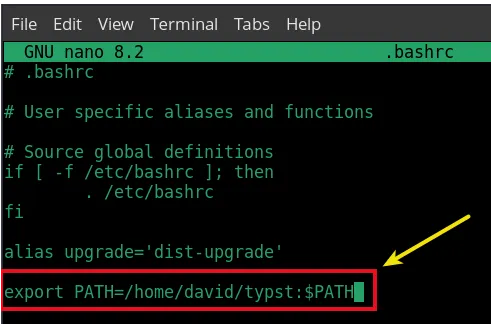 Save the file. I logged out of my current session, then logged back in to make sure the change took effect. To double-check the results, type:
Your results should look something like the screenshot below:  I did not have to make any changes/edits to my ~/.bash_profile file.
Although Typst can be used exclusively from the command line (as described on the GitHub page), in my experience it is more comfortable to use the app within a code editor. The two commonly recommended choices are Visual Studio Code (often abbreviated as “VS Code”) and VSCodium. I experimented with both applications. Each works with Typst. VS Code is a Microsoft product licensed under a non-FLOSS license, and it has telemetry reporting enabled (although the telemetry can be disabled). VS Code is a cross-platform code editor that straddles the line between a text editor and an integrated development environment (IDE). I prefer VSCodium because it is a free/libre binary distribution, licensed under the MIT license (open-source) without Microsoft's proprietary additions. Both packages are available in the PCLinuxOS repository and can be installed via Synaptic. VSCode has the package name “VSCode 1.82.1-1pclos2023.” VSCodium's package is named “VSCodium 1.93.1.24256-1pclos2024.”
Extensions (or plugins) are third-party software packages which extend the code editor's functionality and improve your workflow. You download and install these extensions from the so-called “Extension Marketplace.” Due to licensing restrictions, Microsoft's official extensions for VS Code are not available in the VSCodium extension marketplace (which instead uses the open-source registry open-vsx.org). However, that does not pose a problem because the Typst extensions we need are available through open-vsx.org. First, find the Extensions icon in the Activity Bar of the left-hand panel:  Next, type “typst” in the Search box to filter the available extension offerings: 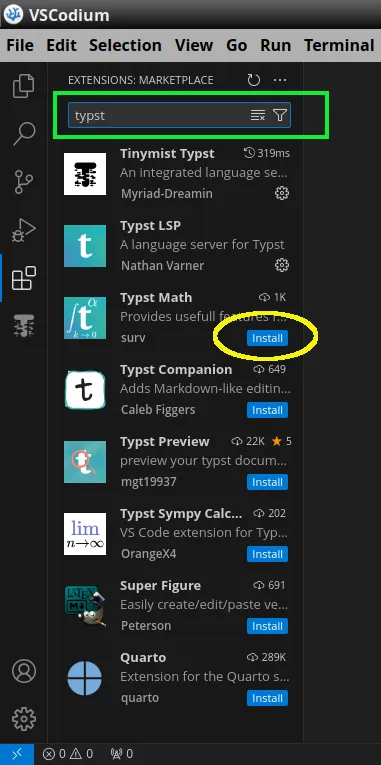
 The two extensions I am using with Typst are Tinymist Typst (shown above) An integrated language service for Typst, and Vscode-pdf (shown below) Display PDF file in VSCode (or VSCodium). 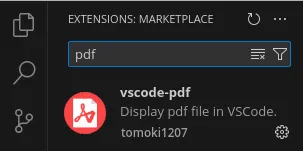 An advisory on the Typst LSP extension: This community-provided extension is no longer recommended. The author did not it update it beyond Typst ver. 0.11.0 (Typst's current version is 0.12.0) and he has recently archived its project repository. All functionality provided by Typst LSP in the past is available in the Tinymist Typst extension. (I would like to thank Martin Haug, the co-founder of Typst, for clarifying this point.) 


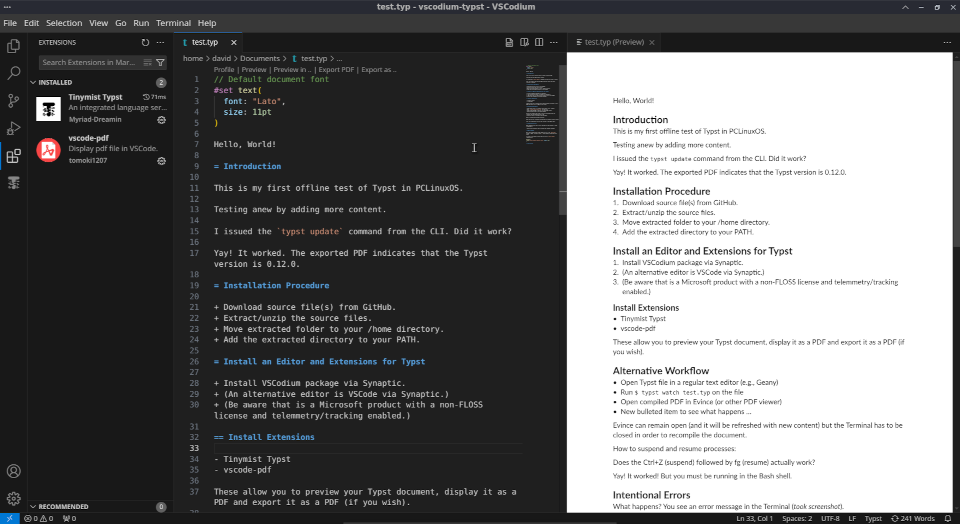
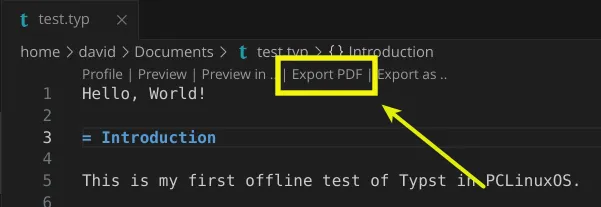
Error messages display differently in the VSCodium editor than in Typst's web app. The Tinymist Typst extension which I installed earlier handles the function of error reporting. In the screenshot below, I was using Typst's “term list” function and intentionally omitted the mandatory colon following the term. (It should be: / Thylacine: “test.typ”): 


By default, Typst uses fonts embedded in the CLI: Libertinus Serif, New Computer Modern, New Computer Modern Math, and DejaVu Sans Mono. 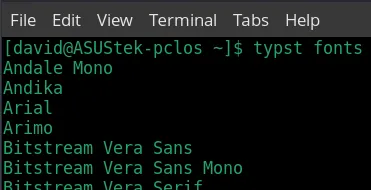

It was not immediately obvious where to store image files that I wanted to add to my project, so I experimented with a few different methods. I created my example file (“test.typ” [pictured above]) in my Documents folder. VSCodium expects to find both your Typst file and any image files in the same folder. If your Typst file contains numerous images, you will find that your Documents folder quickly becomes cluttered — something you probably want to avoid. I learned that it is possible to create subfolders within the Documents folder, which store your image files. In the screenshot below, you can see that I have one image file (circled in blue) in my Documents folder, as well as three image test subfolders (circled in red, green and purple): 
The screenshot below illustrates that VSCodium will detect image files in the Documents folder, in addition to the typst-images, typst-images-bis, and typst-images-tertius subfolders. The code completion autofill should begin working when you type the image(“ ” portion of the code snippet: 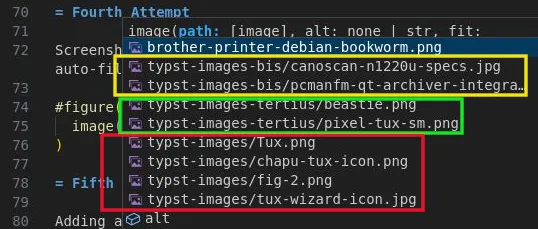
After skimming through the Visual Studio Code documentation and watching a couple of video tutorials, I realized that the recommended approach of using a folder (also known as a workspace) results in a cleaner workflow. Follow the procedure below to benefit from a more organized workflow:
1. Create a new (empty) project folder in your Documents folder. (I called this example “typst-project-2”) This feature lets you decide whether code in your project folder can be executed by VSCodium and extensions without your approval. 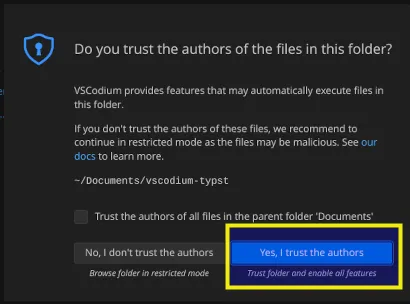
Your new folder (aka workspace) will display in the Explorer tab [the stacked sheets of paper icon] of the Activity Bar in the editor. The Explorer view lets you view and manage the files and folders in your workspace: 


9. The image files and the Typst file will be listed under the Explorer tab: 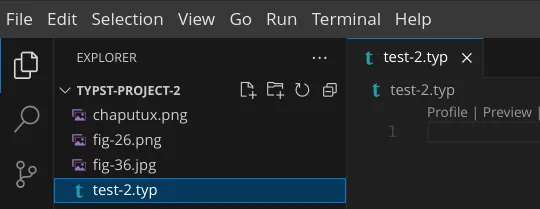
Once you have installed Typst locally using this procedure, you can stay up to date with future releases by opening a Terminal and issuing the command:
I tried this recently when the Typst developers released the new version 0.12.0 on Oct. 18, 2024. (I had previously installed ver. 0.11.1.) The update process worked smoothly. I hope these instructions will allow you to successfully install Typst on your local PCLinuxOS system and use it productively with VSCodium.
Although the resources mentioned below focus on Visual Studio Code, they are also helpful explaining the basics of VSCodium because VSCodium maintains feature parity with VS Code. https://code.visualstudio.com/docs/ Visual Studio Code Documentation (official) The tutorial on getting started with VS Code provides a succinct overview. https://www.youtube.com/watch?v=ORrELERGIHs Ruscica, Tim. Tech with Tim. “VSCode Tutorial for Beginners: Getting Started with VSCode.” YouTube, 13 Feb. 2021. (22 min., 56 sec.) https://www.youtube.com/watch?v=yjeHLSrhPao Coding with Estefanía. “Learn Visual Studio Code: Course for Beginners” YouTube, 20 Jan. 2022. (43 min., 15 sec.) If you are interested in seeing a Typst-generated replica of this article, I uploaded the PDF [12 p., 976 kB] to my PCLOS Cloud account and publicly shared it from there. The document's body typeface is Source Serif Pro, and the headings use Source Sans Pro. Good luck and have fun with Typst! |


