| Previous
Page |
PCLinuxOS
Magazine |
PCLinuxOS |
Article List |
Disclaimer |
Next Page |
Inkscape Tutorial: The New LPE Tool |
|
by Meemaw
Enable the experimental tools by clicking Preferences > Behavior > Live Path Effects (LPE) and check the box that says “Show experimental effects”. Close the Preferences window and restart Inkscape. 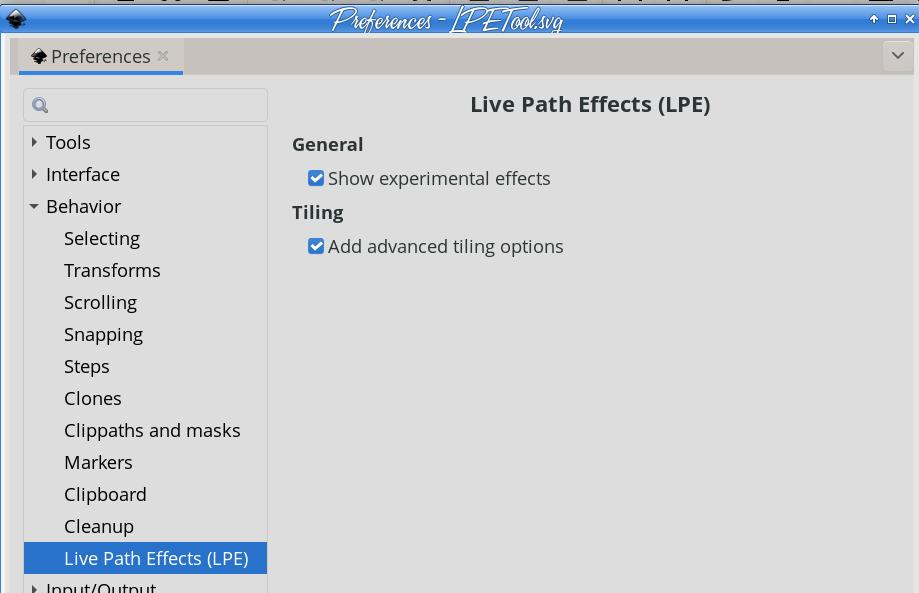 Now if you have an object and want to use the Path Effects tool, you can see more of them and the ones at the bottom are “Experimental”. 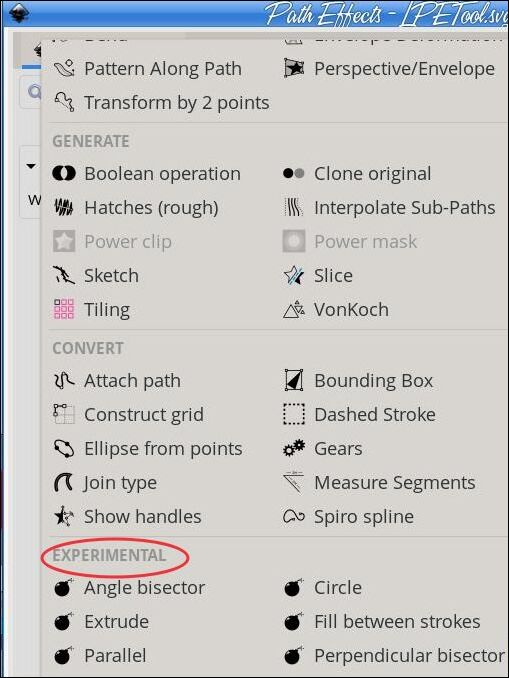 The new tool, however, is located in your toolbox at the left of your window, just above the measuring tool, and the tool and toolbar look like this: 
 It allows you to draw objects that might be more difficult with the tools you already have. The tools we will use are the first seven. From left to right, they are: Draw segment, Circle from 3 points, Circle from 2 points, Parallel line, Perpendicular line, Angle bisect, and Mirror symmetry.
Suppose you have a figure, and you want to draw a line along one side of it. You can draw a segment along that line using the pen tool, but it’s probably only going to be as long as the line you’re drawing it along. This allows you to make another editable segment. Open the figure you’re going to use, and enable snapping. Choose your LPE tool and choose the Draw Segment tool. Click along your figure and place a point, then place another. In this image I have placed one point and am placing the other. If you have trouble, it may help to lock your figure to the canvas before you start with your LPE tool. Just right click and choose Lock selected objects. 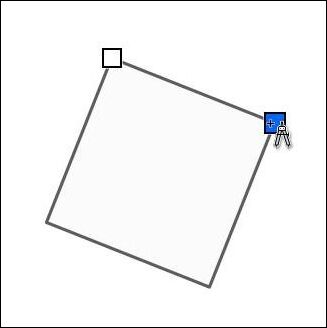 You won’t see anything at first because no stroke color has been set. Press Shift and click on your desired stroke color. 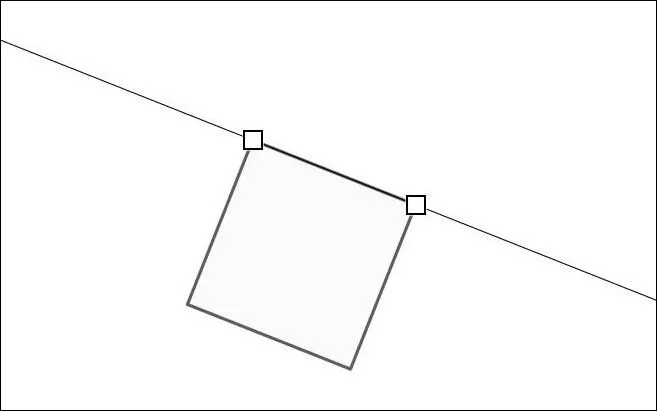 To finish the process, click Path > Object to path. Now, if you want to move it, you only need to click on your Nodes tool and grab a node.
Working on a project, I thought I might draw a circle around a star. Drawing the star and the circle separately, and trying to fit them together precisely would be a pain. This tool helps a lot. I drew the star and edited it to get my desired object. Then I changed to my LPE tool, and chose Circle from 3 points. (Again, make sure Snapping is enabled.) I then clicked on three points of my star. I then changed my fill to None and my stroke to red. 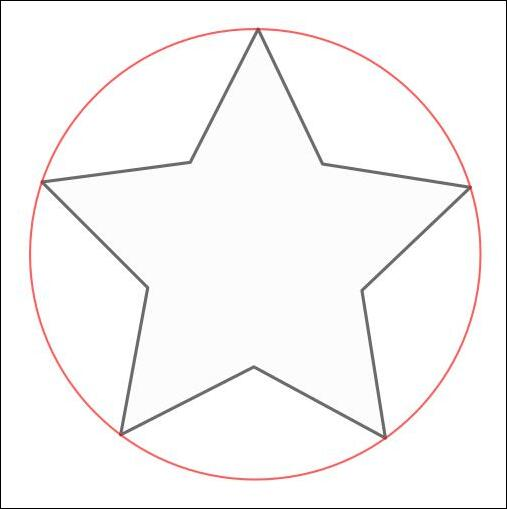 Circle from 2 points I don’t always measure my creations, but if you are creating something that has to be precise, or something with a definite center to measure from, this should help as well. In Nick’s video, he had a group of triangles that he wanted a circle around, just like the previous creation. He knew exactly where the center was, and used it. However, if you know exactly how big you need your circle, this tool will help. The circle tool forms the circle from where you click (one side of the circle) to wherever you drag your cursor (the other side of the circle). Circle from 2 points allows you to click in one spot, which will be your circle’s center, to the spot which will be the outside of the circle, using the radius instead of the diameter. 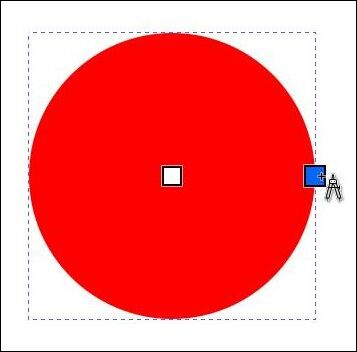 Parallel line If you are trying to get things precise, the parallel line tool helps too. If you want it parallel to another object, just use points on that object to determine your line. I had a square that was rotated, but I wanted my line parallel to one edge. I locked the square to the canvas and chose the corners as my line. Here, when you get your line defined, press the enter key, and you will see another node appear. You’ll have to choose your stroke color, like you did before. 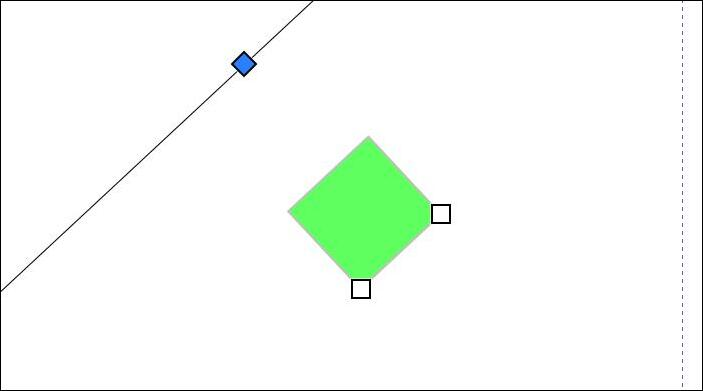 You can grab your Nodes tool, and notice that if you move the nodes on your figure, your parallel line will stay parallel to the alignment of the nodes. 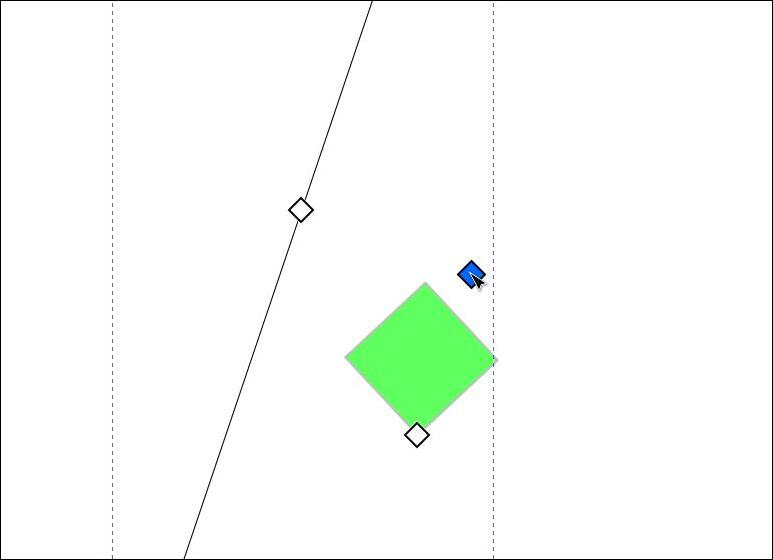 Perpendicular line This works pretty much the same as the parallel line tool works, except the line you get is perpendicular (of course) to your two nodes. The second image is after I moved a node.  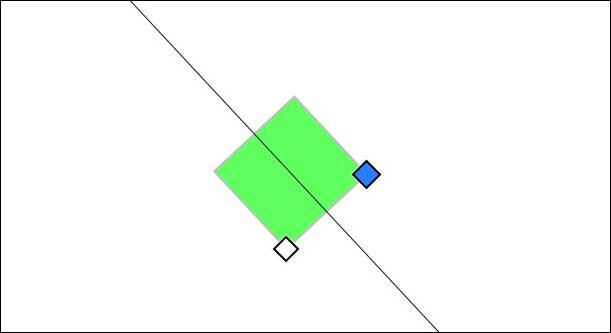
This tool allows you to set three nodes and have an angle with a bisecting line. Unless you draw an angle and use that, you’ll get 2 nodes and a line. I used one side of a four-pointed star for my angle, and with this one as well, you’ll have to set your stroke color. Also, the nodes are moveable with the Nodes tool, and the angle they make will be bisected. 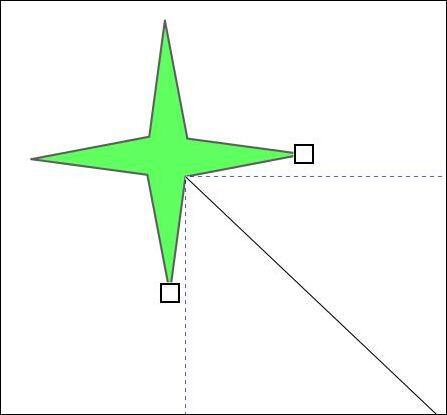 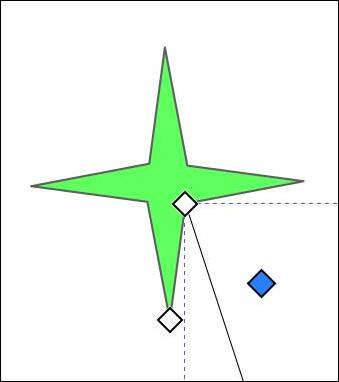 Mirror symmetry I think we’ve done mirror symmetry, so this is a shortcut. It’s really easy, though. For this one, I created a square and placed a triangle inside with the right sides aligned. You HAVE to group these objects because the tool will only work on one object. 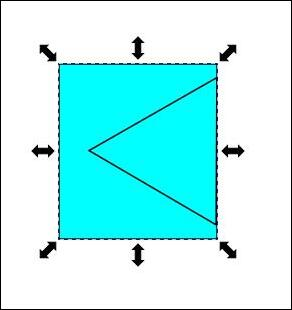 With it selected, I chose the LPE tool and chose Mirror Symmetry. The tool immediately added the new square. 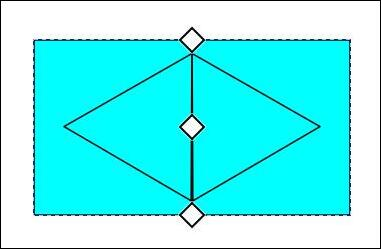 Notice the sides are touching, with three nodes in the center. Grab the Nodes tool and move the center node. It controls how far apart you can move the items. The top and bottom nodes let you rotate the added item (your original probably won’t move). 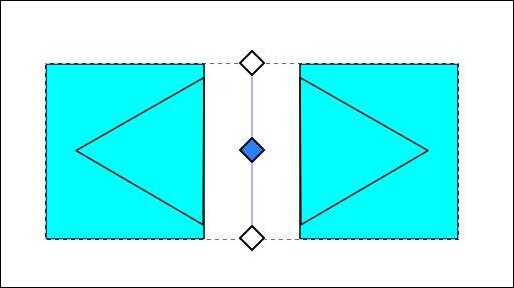 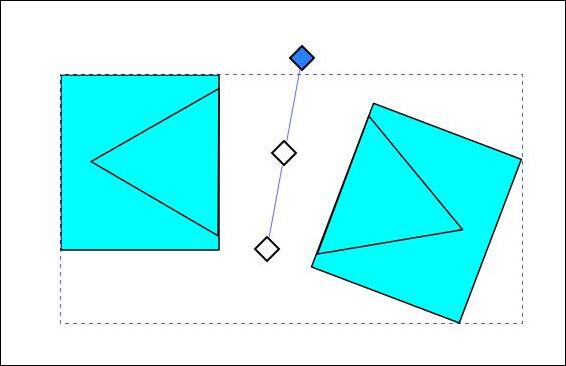 This tool is going to be great! I’m sure you can find many things to use it on, and with a little practice, your projects will be easier to create! Oh, while watching this video, I had a look at some of the comments. I believe this was from an Inkscape developer: “This has existed for many releases, but we kept it disabled because it was deemed too unstable and not effective. It looks like we forgot to disable it in 1.4. Which is why no one has mentioned it in the release notes. It's not new, and it wasn't intended to be released. Welp, too late now!” However, many comments after this one praised the new tool, saying it would be very useful in CAD drawings. Some said it made Inkscape into a CAD tool. “These tools mimic the constrained drawing tools in Computer Aided Design workflows, in essence, making Inkscape a CAD platform. This will be important in situations where the graphics have to be translated with precision to real objects, such as laser cutting or 3d printing.” |