| Previous Page |
PCLinuxOS Magazine |
PCLinuxOS |
Article List |
Disclaimer |
Next Page |
Creating A Memorial Booklet With Typst |
|
by David Pardue (kalwisti)
Since the memorial booklet is more text-oriented than graphics-heavy, I thought LaTeX and Typst would be good candidates. I knew that LaTeX could handle this task, based on previous experience, but I wanted to try and replicate it with Typst. Typst ably produced two attractive booklets, so I would like to share my work, in case you need to create similar documents.
I am neither a graphic designer nor a trained typographer. However, based on my research, the (typographic) goal for these booklets is to aim for crisp, clean and conservative design. Avoid using fonts with too much personality, and stay away from unconventional text alignments. Avoid the temptation to “overdesign”: limit your use of graphics and color(s). Avoid excessive fonts; a common tip is to use one serif font in tandem with a simple, readable sans-serif font. Avoid too much clutter. The key advice is that you should not get overly creative with something as serious as a funeral program.
Let's begin with an (anonymized) Celebration of Life booklet. I have publicly shared my project from the Typst web app; it is a read-only link, which means that you can view the files within the project and can download the PDF which it generates. https://typst.app/project/rZq9RCkcAWCazxHveFjySh 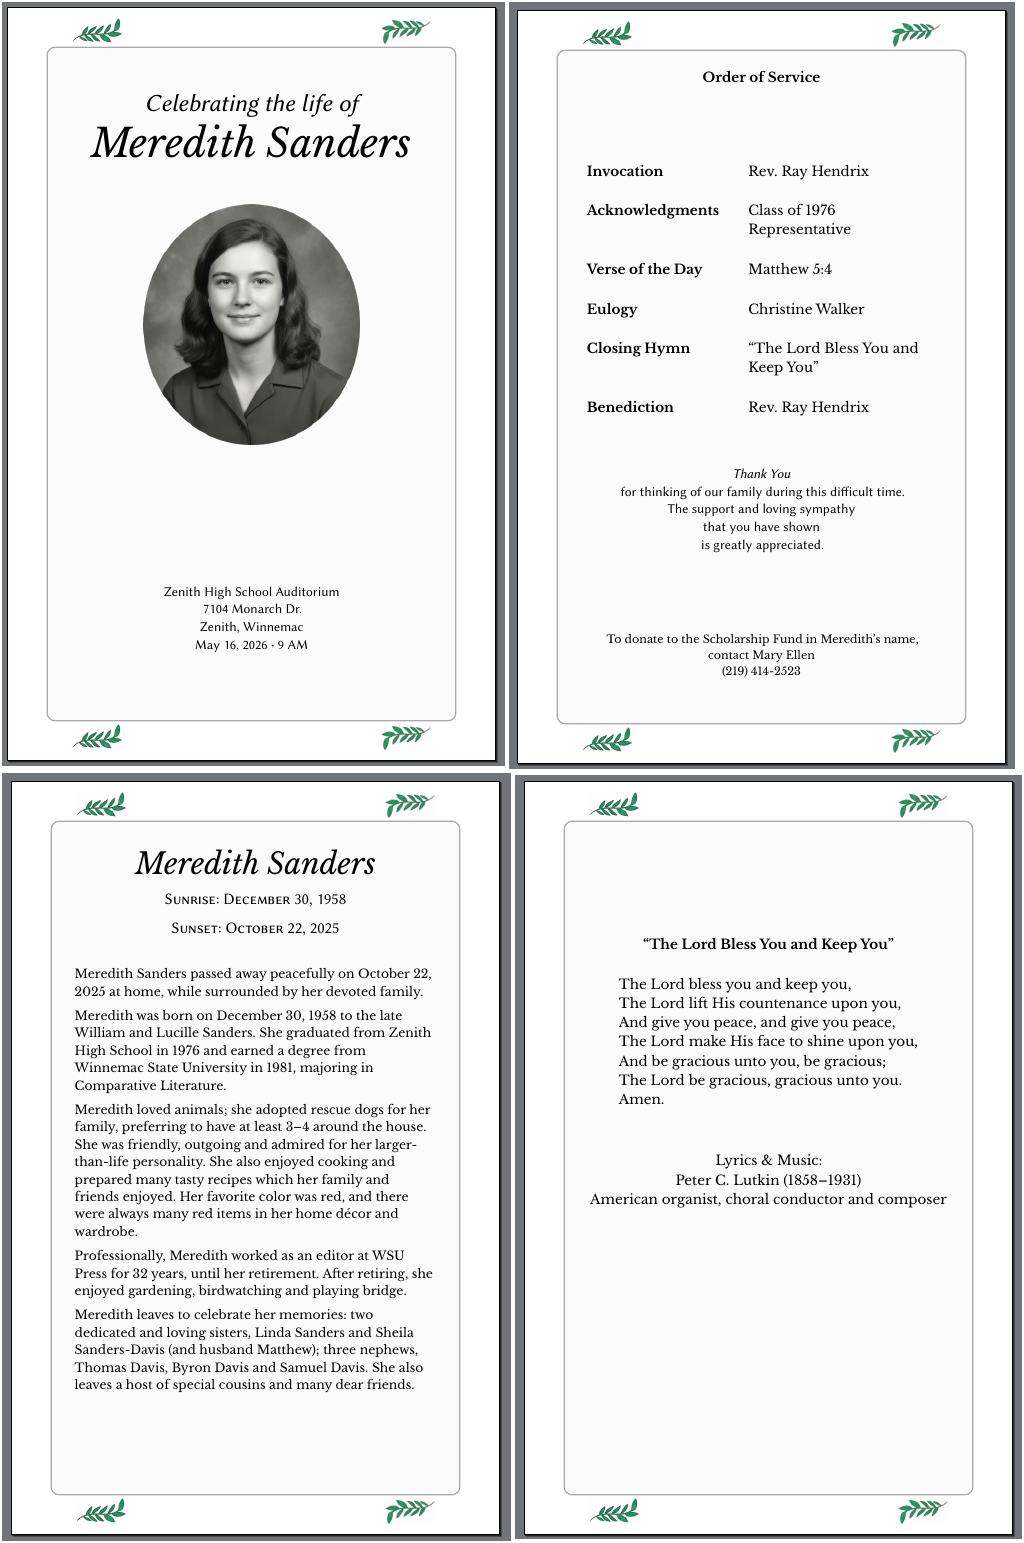 The task of creating a funeral program falls during a time of grief, extreme stress, and it often has to be completed on fairly short notice. Please remember that there is no “one size fits all” solution; the booklet should be as unique as the honoree. For instance, the amount of religious content will vary from person to person, as will the number of photos included and the quantity of text. The Order of Service can be whatever works best for the family of the deceased. Among the points to consider: Is the service religious or secular? Will there be prayers, a minister, special poem(s), different speakers, a video tribute, or music selections? This four-page booklet is patterned after a free Canva template called “Beige Simple Memorial Services Program.” I like its tasteful, restrained design. If you want to explore other possibilities, under Templates, type the search terms “memorial booklets” or “funeral program.” I will explain some elements of the Typst code that you might wonder about. First, the paper size is “us-statement” (aka half letter size [5.5“ x 8.5“ or 140 mm x 216 mm]). This will be discussed further in the “Page Geometry and Imposition” section of my article. Second, the floral ornaments were produced by using Typst's box function to include the leaf image (.png), then placing the boxes inside the header and footer area. The spacing function (“ #h(1fr) ”) fractionally spaces/separates the leaves to each end of the header and footer:
footer: [#box(image(“orn-leaves-green.png”, width: 15%)) #h(1fr) #box(image(“orn-leaves-green-rotated.png”, width: 15%))], I used GIMP to rotate the leaves on the right half of the page, for a bit of asymmetrical contrast. I also found a free online tool to easily change the color of the original .png icon from black to green.  Feel free to search for different printers' ornaments or fleurons, and customize the design to suit your taste. The page frame/border is done with the ” background ” parameter and Typst's rectangle function. The “ 100% - 2.25cm ” discounts the margin given in the width and height values. The “ radius ” parameter controls how rounded the corners are. The “ stroke ” color can be changed as you wish. The “fill” color can be switched, and you can experiment with the ”transparentize” parameter (which makes a color more transparent by a given factor). background: rect(width: 100% - 2.25cm, height: 100% - 2.25cm, stroke: gray, radius: 7pt, fill: gray.transparentize(95%)),  This sample uses Libre Baskerville as the primary font [serif] with a smidgen of Linux Biolinum [sans serif] for contrast. However, I encourage you to change the font(s) to suit your needs.
Below is a montage of the (anonymized) eight-page memorial booklet that I created for my class reunion. I have publicly shared the project from the Typst web app with a read-only link: https://typst.app/project/rIIICiwoISlKFwhKOMj5Hx 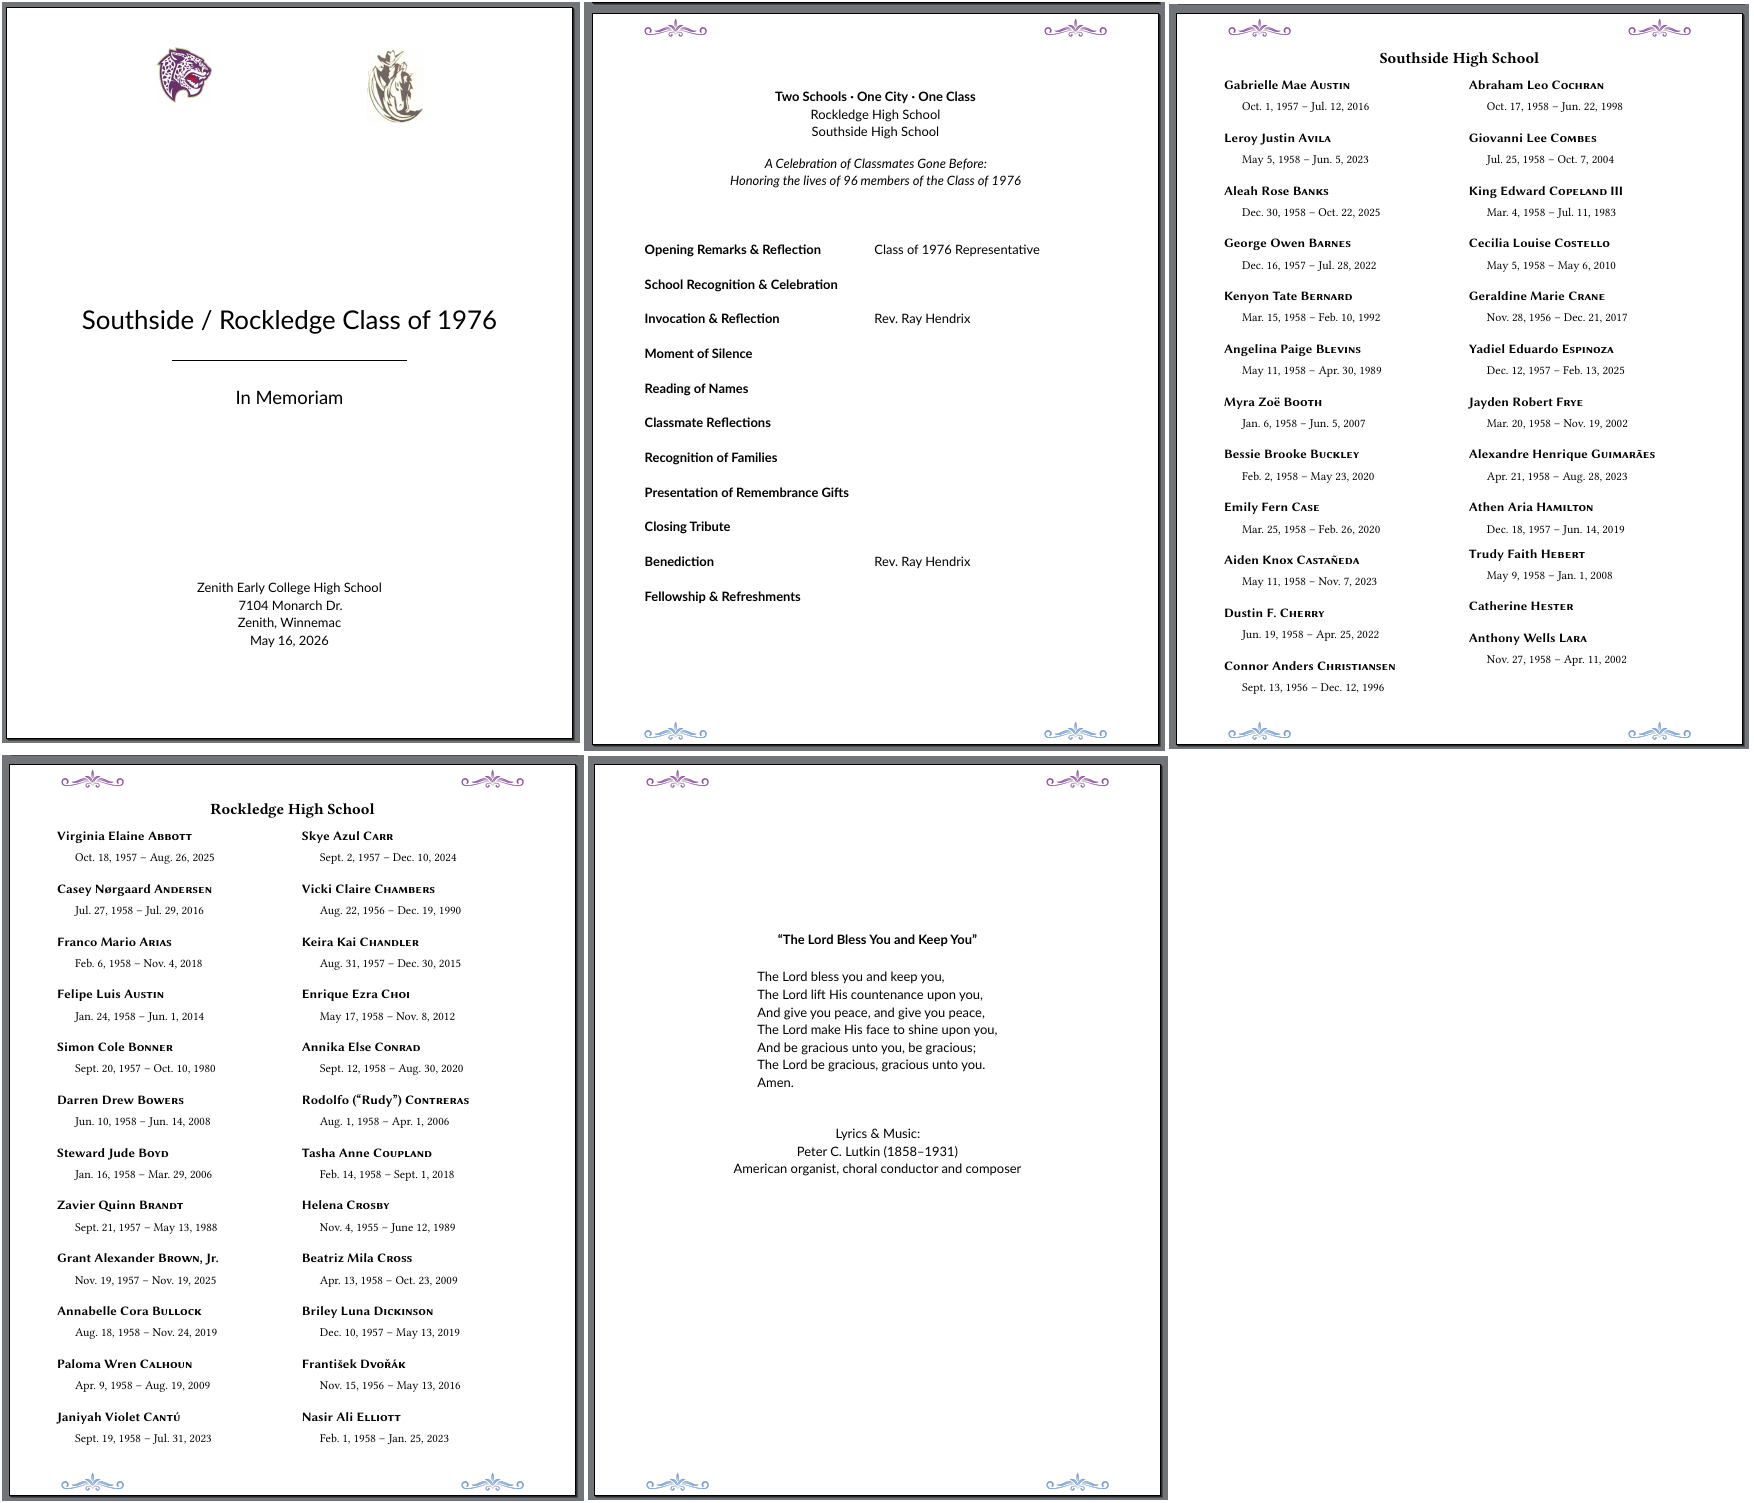 Note: Three interior pages were omitted from the screenshot to save space. The paper size is “us-statement” (aka half letter size [5.5“ x 8.5“ or 140 mm x 216 mm]). This will be discussed further in the “Page Geometry and Imposition” section of my article. As with the Celebration of Life booklet, the ornaments were added by using Typst's box function to include the fleuron image (.png), then placing the boxes inside the header and footer area. The spacing function ("#h(1fr)") fractionally spaces/separates the fleurons to each end of the header and footer:
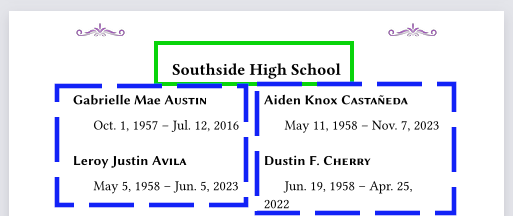
footer: [#box(image("fleuron-3-col-blue.png", width: 15%)) #h(1fr) #box(image("fleuron-3-col-blue.png", width: 15%))], The ornaments in the header are purple to match Southside's school color. The footer ornaments are columbia blue, to echo Rockledge's school color. I used a free online tool to change the original fleuron color (black) to purple and columbia blue. This is a jointly held reunion, so we decided that for better readability, the list of deceased classmates should be separated by school. For each high school, the list is organized alphabetically by surname. I decided to use Typst's small capitals function to add some contrast to the surnames, e.g., "#smallcaps[Smith]". The place function allowed me to place the School Name in the center of the page, without having to exit from the two-column environment (thus avoiding unwanted extra vertical space):
#set page(columns: 2) Oct. 1, 1957 -- Jul. 12, 2016
 To indent the dates after each name (which is a top-level heading), I set the “first-line-indent ”parameter of Typst's par[agraph] function to “all: true ”with 1.5 em as the amount of indentation. This helps make each classmate's name and life dates more of a discrete visual “block."
// Use 'all: true' to indent the first paragraph after I was impressed that Typst's algorithm for balancing text in the two-column layout worked well. Nevertheless, I checked carefully for awkward column/page breaks and found a few. If you need to manually trigger a break within a column, use the colbreak command “#colbreak()”.
A challenge with this project was that I had never created a folded, saddle-stitched booklet before. I did not grasp the principle of page imposition until I actually made a physical mockup of the booklet(s). I wasted numerous printouts, Scotch tape and spent time cutting paper sheets. Hopefully my trial and error will save you some headaches. As mentioned earlier, the projects' page size is half letter (5.5“ x 8.5“ or 140 mm x 216 mm) because each printed sheet will be laid out in a 1x2 grid, duplex printed — or duplex photocopied. Then the sheets are folded in half and nested one inside the other, and stapled through the fold line with wire staples. To clarify, the 1x2 grid mode (which is standard for booklets) will be laid out on standard US letter size paper: 8.5” x 11” or 216 mm x 279 mm. When the letter-size paper is printed out and folded in half, it will produce a booklet with 5.5” x 8.5” pages. All bound booklets must have a page count that is a multiple of 4, for example: 4, 8, 12, 16, 20, 24, etc. Pages of a booklet are created by printing four pages (2 in the front and 2 in the back) on one sheet of paper and then folding that sheet in half. You can try this “multiple of 4” rule yourself with some blank sheets of paper. When you fold a sheet in half, you get 4 pages. If you fold another sheet and nest it inside the first, you have 8 pages. And so on ...
Imposition means “to rearrange pages so they will come in correct order when you print, fold and nest.” For a clear video demonstration of imposing an eight-page booklet, I recommend that you watch the first 10 minutes of a tutorial produced by Eric Forest. It is well worth your time. Below are simple graphics illustrating how the eight-page memorial booklet would be imposed: 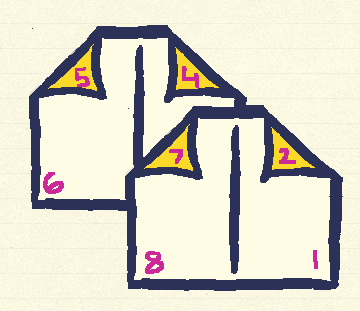
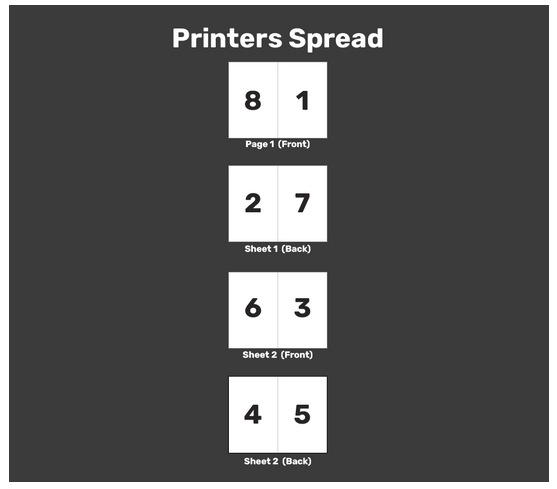 The correct page imposition order for the Celebration of Life booklet is:
Before printing the booklet, we must impose its pages. Fortunately, there is an excellent Web-based tool to accomplish this. Bookbinder JS is a Javascript-based app for formatting PDF files for bookbinding, i.e., imposition. Bookbinder JS works well and it is free. Annesi Bindings created a video tutorial which covers the basics of using this app (from minute 4:26 until minute 5:59). 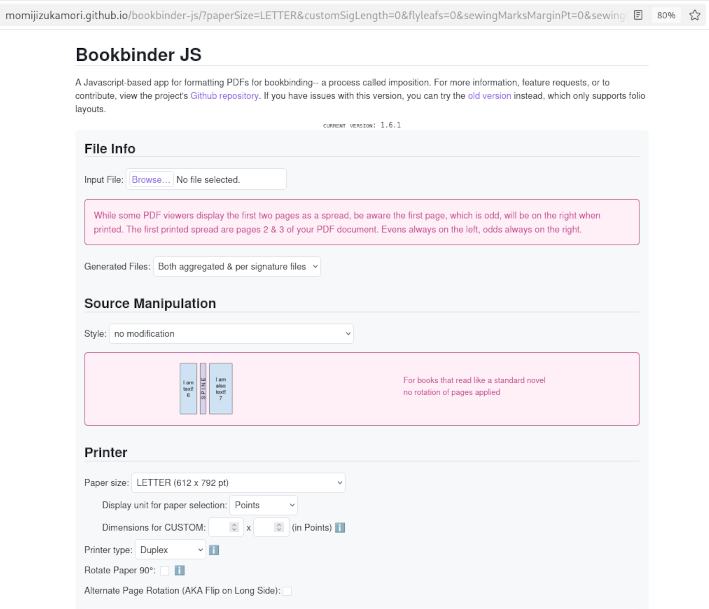
Once the PDF file has been imposed, it can be printed. Based on my experience, printing the booklet may be quirky and involve some trial and error. This may depend on the model of printer that you are using. (My tests were done with our trusty Brother HL-2070N, a monochrome laser printer, that is around 18 years old.) I encountered an issue where the ornaments/fleurons look fine on screen in my PDF file, but were partially cut off when I printed the document. Online searches indicated that the most likely causes were either (a.) page-scaling options or (b.) the printer's non-printable margins. As regards Scaling options: Printing at “Actual size” with a header very near the edge can push it into the non-printable border. Using the “Fit” or “Shrink oversized pages” option usually keeps the header visible. Regarding the printer's non-printable margins: Most desktop printers cannot print to the very edge of a page, so any header designed too close to the top can be cut off even when settings seem correct. I resolved the problem by adjusting the Page Scaling option in my PDF viewer/reader. With Evince (see screenshot below) and Atril: Under the Page Handling tab > look for the Page Scaling option and choose “Fit to Printable Area”. 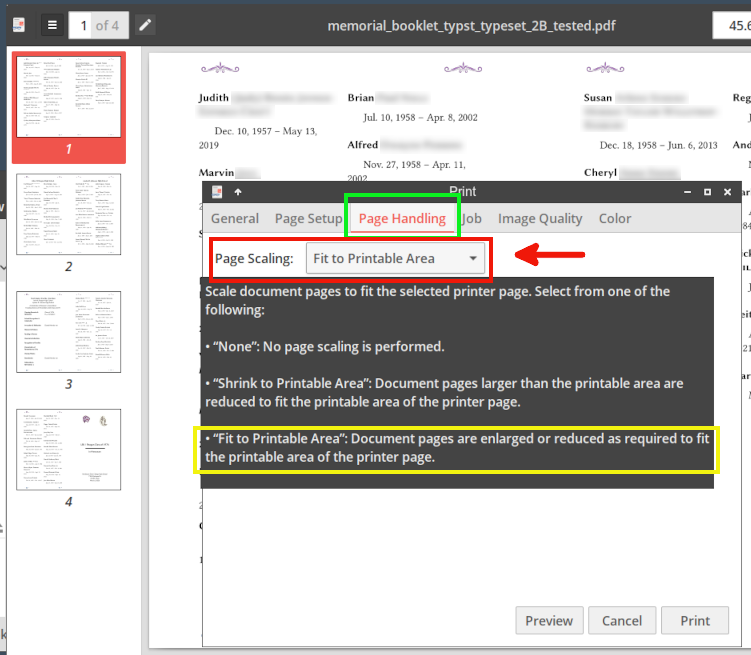
I sincerely hope that you do not experience the loss of a loved one anytime soon, but if you do, these Typst projects can perhaps serve as the foundation for creating an attractive memorial booklet. Although Typst is not intended to be a graphic design tool, it has demonstrated its versatility in producing different types of documents with high-quality typesetting.
Annesi Bindings, “How I Arrange and Print Pages for Bookbinding” YouTube, 26 Nov. 2024 (9 min., 37 sec.) This video covers the basics of using the Bookbinder JS web app (4:26 – 5:59). Forest, Eric, “Preparing Booklets for Printing, 3 Ways” YouTube, 12 Oct. 2022 (55 min., 53 sec.) The presenter clearly explains/demonstrates how to impose an 8-page booklet, as well as the possible different workflows involved [with Adobe InDesign] (0:00 – 10:15). Schaefer, Ingo, (“Seitenreihenfolge-Rechner” (‘Page Order Calculator’) This handy tool calculates the page imposition order for booklets. (Unlike Bookbinder JS, it does not actually perform the imposition.) The calculated page order is based on duplex printing.
|