| Previous Page |
PCLinuxOS Magazine |
PCLinuxOS |
Article List |
Disclaimer |
Next Page |
GIMP Tutorial: Making Custom Brushes |
|
by Meemaw
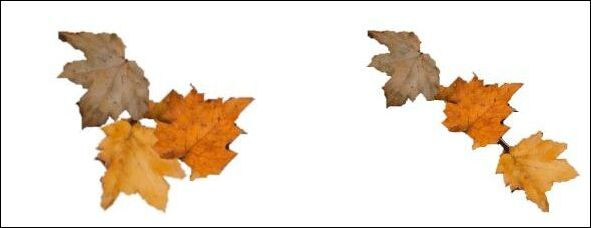 If you don’t know how to make a custom brush for your GIMP, we should do it, so it will help you in one of your future projects. I searched for tutorials on how to do brushes. Davies Media Design had a tutorial on how to do them. HOWEVER, his tutorial used GIMP version 2.10, and GIMP has changed the method for version 3.2. GIMP does update their manual when there are changes, so I was able to refer to the manual as well. There are a couple of ways to do custom brushes. Most of the brushes you already have in GIMP are designed to be able to paint in whatever foreground color you have. In addition, you can make brushes that will stay the same, like the leaves I used. Let’s get started! There are 4 kinds of brushes: Ordinary - You can create it in the GIMP window. This is probably the way you will create most of them. Parametric - Created in the Brush Editor. It is also an ordinary brush but its creation and export is faster from the Brush Editor. The downside is that the variety is limited. The above two can take on your desired foreground color. Color - Uses an image to serve as a brush. In some instances (like my leaves), you can use the brush to put them anywhere you want. Animated - It uses layers to make a ‘variable’ brush, so when you click, it cycles through the brushes/layers available. Just in case you didn’t know, you will see tiny icons in the corner of a brush. A red triangle in the corner of the brush means it’s animated, and if you click and hold, it will cycle through the available brushes. If there is an “+”, it means that the brush is actually larger than the icon you’re seeing. In the image below, the “vines” brush has a red triangle and a “+”. That brush is animated with 3 different designs. 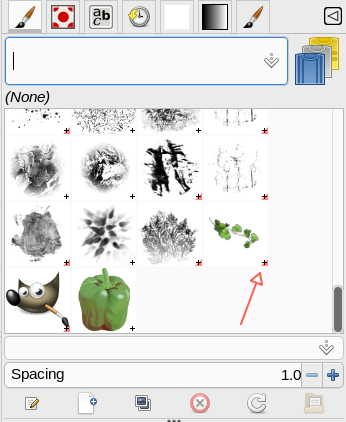 Also, you can increase the preview size of your brushes by right-clicking the triangle in the upper right of that window and choosing “Preview size”. You’ll see nine choices. I’ve changed mine, but I believe the default is Large. 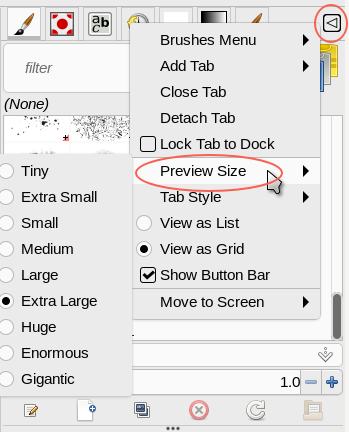 Creating an ordinary brush
The easiest thing you can do is simply copy your creation to the clipboard (<CTRL> + C). GIMP puts your copy into the brushes dialog for your use while you are working on your creation. To make a brush, choose File > New. In that window, put the size you want. I used 180 x 180 px (the maximum size is 1024 x 1024). Now, under Advanced Options, change Color Space to Grayscale, and Fill with white. Mine says Background color, because my background color is white. You can also change it to white in the window. 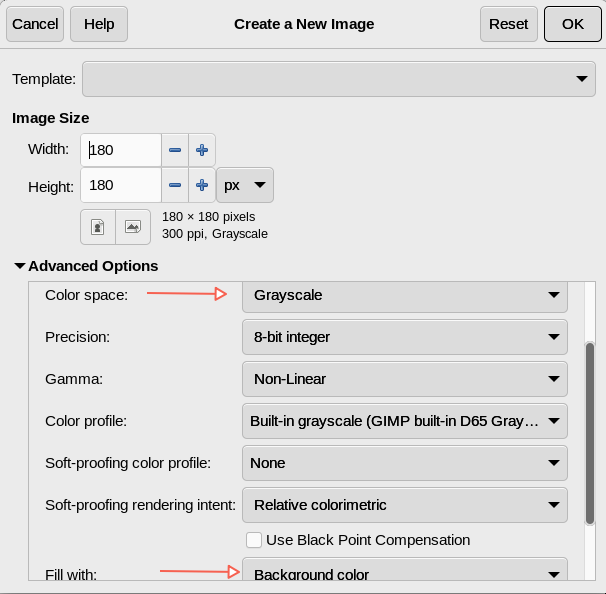 With your new file open, create the brush you want. I used the star brush already in GIMP to make a group, but your brush could be lots more intricate. 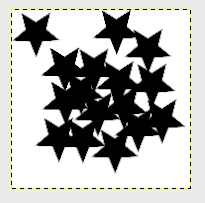 If you want to edit this later, you should save it to GIMP’s native .xcf format so you can open it again. To export it as a brush, choose File > Export as… Choose a name for your brush, and save it with the .gbr extension. You will get another window, asking for a description and the spacing between brush strokes. If you’re holding the mouse button down, the brush will continue to draw. The distance is how far apart the brush strokes are. The description will always say “GIMP Brush” in the brushes dialog unless you change it, so if you want to put your brush name in this window, it will help you distinguish them in the brushes dialog. I have the brushes dialog open in GIMP as well as tool options, because the brushes dialog has some other tools. 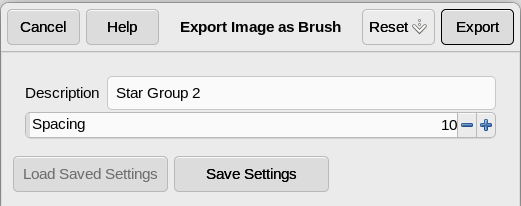 Now before you can use these brushes, they have to be in the GIMP brush directory rather than one of your folders. In Linux, it should be Home/(YourUserName)/.config/GIMP/3.2/brushes. (We have version 3.2 now.)
The brush editor is very useful, but limited in what you can design, which is why you’ll most likely design your brushes directly in GIMP. To use the editor, open your brushes dialog (separate from the brush toolbox). At the bottom of the brushes dialog you’ll see some tools. From left to right, Edit brush, New brush, Duplicate brush, Delete brush, Refresh brushes and Open brush as image. 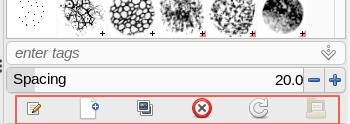 To create a new brush, simply click New brush. The Brush editor will open with a single dot in the center. From there you can edit that single circle according to shape, size, hardness, angle and a couple of other aspects. You can also give it a name. As you can see below, you can choose a circle, square or diamond to work with. I chose a diamond.
Radius decides how big the brush is. 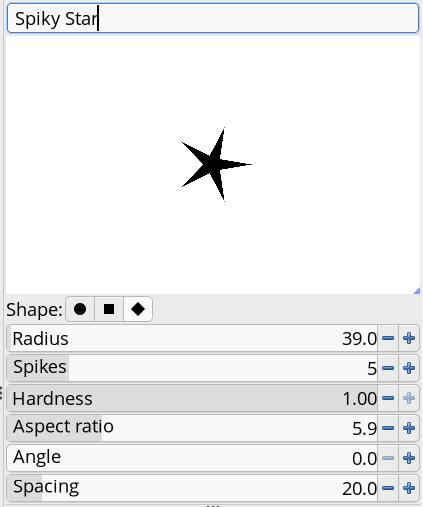 When you get it the way you want it, all you have to do is close the Brushes editor tab in GIMP. The program will save a file in your designated brushes folder. This one will be a text file with a .vbr extension. Mine said Untitled.vbr, but opening the text file has the settings I chose, including the name Spiky Star, so I changed the file name to Spiky Star.vbr. When I open GIMP tomorrow, it will be in my brushes dialog. However, I can always go to the brushes dialog and click Refresh brushes. And there it is… 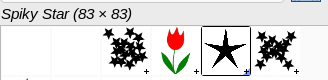 Creating color brushes Creating color brushes is a little bit different, because you want to keep the color of the image you’re using for the brush. This time, you’ll load your image into a new file, but filled with transparency. I had created a simple tulip graphic in Inkscape for another project, and saved it. Now I’ll open it in GIMP, along with another file the same size, filled with transparency. This one’s 175 x 287 px, so I’ll open a new file that is the same size. You’ll want to copy the colored image to the new transparent file. Remember, in the new version of GIMP, the paste will be on a different layer, so you should merge the layers. Now, all that is left is to export it and put it in the GIMP brushes folder, and refresh your GIMP brushes. I’ve made a red one and a pink one and just clicked in the window. 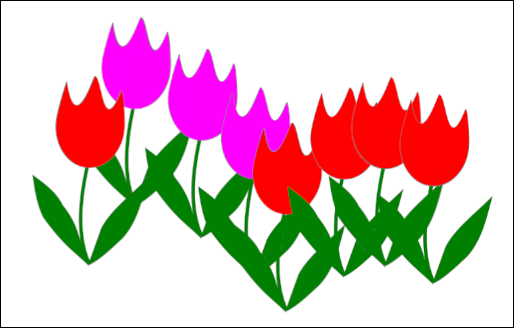 Creating animated brushes When I created the single brushes, I saved each of them as a GIMP .xcf file, just in case I wanted to edit them later. This has been a very good practice for me since I use GIMP a lot. I opened one of them to start an animated brush. For this, you need to make a separate layer for each brush you want to include. I not only had a red and a pink tulip, I also had a yellow one, so I’ll have 3 layers. I copied each color tulip to a transparent layer. 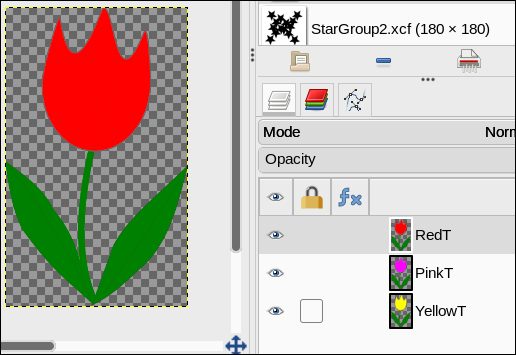 Each tulip is exactly the same as the others, except for the color. Since the red one is on the top layer, it is visible while the others are only visible in the layers dialog. Again, get your layers the way you want them, then export as a brush. This time, however, the extension is .gih. Also, this time, your export window will be larger. 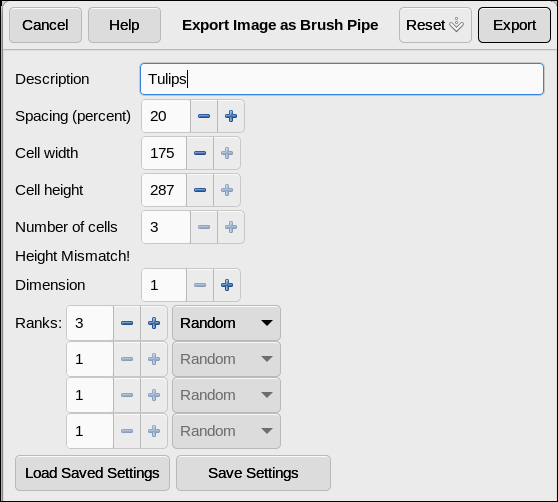 The settings are more complex:
Spacing is still how far apart you want your strikes when you hold the mouse button down. 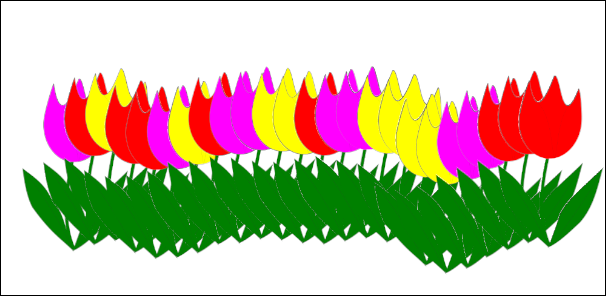 For some reason it says Height Mismatch! I thought that was if your image is on a different-sized background, but all my layers are the same size as the tulips I used. I’ll need to research that. Make sure you send your brush to the brushes folder, and refresh your brushes. I hope you have fun creating any brush you might want to use. |