| Previous Page |
PCLinuxOS Magazine |
PCLinuxOS |
Article List |
Disclaimer |
Next Page |
Wiki Pick: How To Change Your DNS In PCLinuxOS |
|
Relevant to all versions of PCLinuxOS. Changing your DNS numbers is as simple as editing a file. In your favorite text editor, open the file /etc/resolvconf/resolv.conf.d/base. In this example, we will use the text editor called nano. In the terminal window as the root user, enter:
Once open, you can add the following lines. NOTE: These are google open nameserver IP numbers. 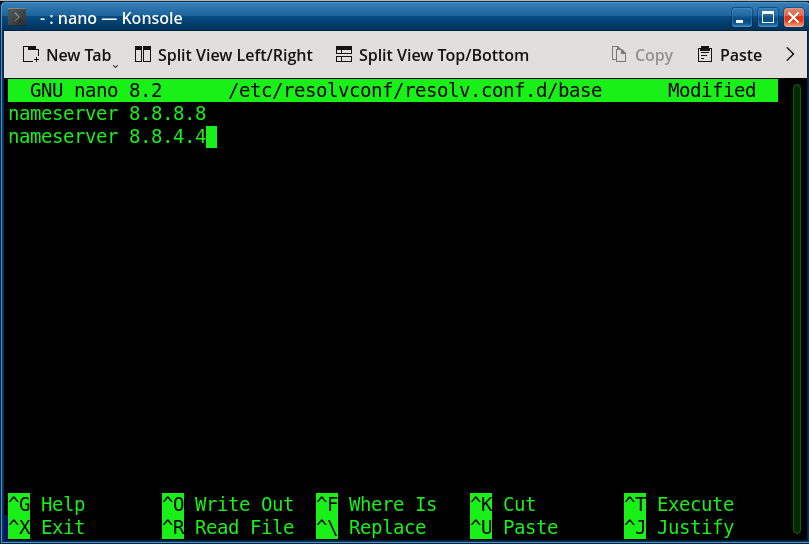 Once you have entered your new nameserver IP's simply press the <CTRL> and the X keys at the same time then enter "y" and press return. You have now added two new nameservers to your system. They will take effect once you restart your computer. There are many other public nameservers available to use. For Example: Cloudflare public DNS nameservers: 1.1.1.1 and 1.0.0.1 OpenDNS public DNS nameservers: 208.67.222.222 and 208.67.220.220 NextDNS public DNS nameservers: 45.90.28.232 and 45.90.30.232 Comodo secure DNS nameservers: 8.26.56.26 and 8.20.247.20 Google public DNS nameservers: 8.8.8.8 and 8.8.4.4 NOTE: By adding the nameserver to the /etc/resolvconf/resolv.conf.d/base file. This will only affect the DNS for that machine. If you have multiple machines on a network that you want to all use the same DNS, then you should change the DNS within your home router. Consult your router manual on how to change the DNS. On my TP Link router, I have to access the admin page at 192.168.1.1 and enter my password. Once logged in, I choose Network and then my DHCP Server (using the Advanced tab). Under settings, I can then add my Primary and Secondary DNS numbers. For example: 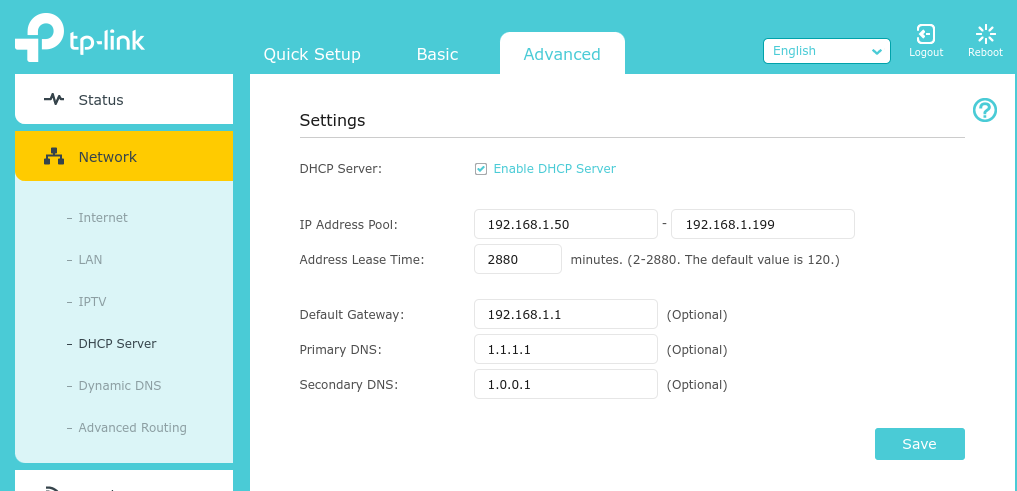 To take effect, I simply reboot my router. To change the DNS in your home router may vary. You can view this PCLinuxOS Knowledgebase Wiki article here. |