| Previous Page |
PCLinuxOS Magazine |
PCLinuxOS |
Article List |
Disclaimer |
Next Page |
Alternative “Fixes” For The NLUUG Repo Path Problem |
|
by David Pardue (kalwisti)
If you have not yet made the manual change to your system configuration, I will present additional options for you to consider. This proves the truism that there are multiple ways to accomplish a task on Linux. Texstar has released new, fully updated ISOs — KDE 2026.05.27, KDE Darkstar 2026.05.31, MATE 2026.05.29 and Xfce 2026.05.30 — which fix the software repository links and removed conflicting libraries (i.e., the "lib64pangomm" issue). If you want to start fresh with a new installation, this is the most expeditious option. (You should safely back up your personal files before proceeding, of course.) If you prefer a manual fix, there are two variant methods to accomplish this task. I have tested each method several times in VirtualBox and they both work as expected. I can (hopefully) encourage you by stating that both procedures are straightforward. It takes longer to describe and read through them, than it does to actually apply the fixes.
Both procedures described here assume that you have dnf and/or the DNF Package Manager GUI installed on your system. To check whether these tools are installed, issue the command below from a Terminal/Konsole:
If dnf is installed, you will see something like this:
If dnf is not installed, you will see the output below:
If your system is outdated and only has apt / Synaptic installed, please refer to the instructions in my June 2026 article. Remember that Synaptic is no longer supported in PCLinuxOS; therefore, updating via Synaptic is trickier and you may encounter issues. In this situation, Synaptic should be used as a temporary bridge to update your system — and to install dnf. Afterwards, you should immediately switch to DNF. If you run into trouble, it may be easier to perform a fresh installation (personal opinion).
Each method requires light use of the Terminal/Konsole. They are about equal in terms of difficulty (in my estimation). If you carefully follow the instructions, you will succeed at repairing your system. Tip: I recommend reading through the entire procedure before deciding which method to use. If you are a visual problem-solver, there is a flowchart at the end of the article which outlines the major steps of each procedure. Notice that the two methods are identical at their core: a "default.repo" file which contains a correct, updated directory path for the NLUUG repository. Only the delivery/installation method differs between the two approaches.
Download the correct repository configuration file from terryn's GitHub. Click on the Download icon (in the upper right corner): 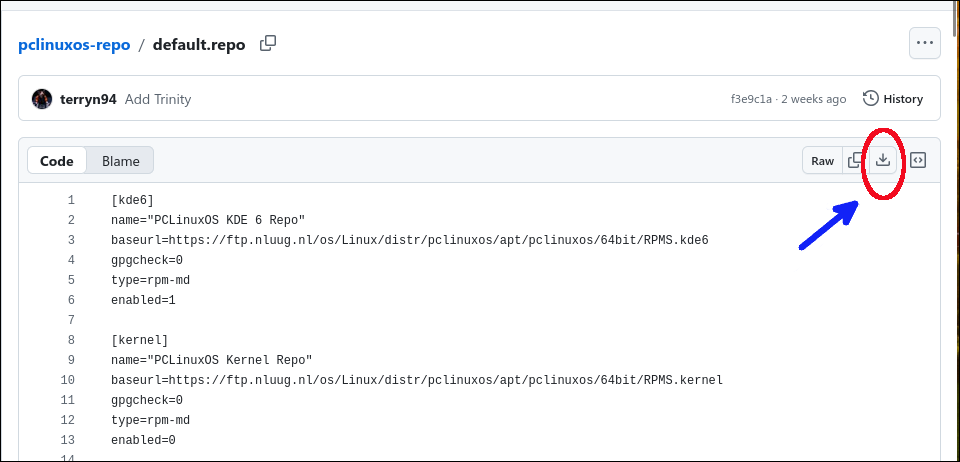 The file will be saved to your Downloads folder: 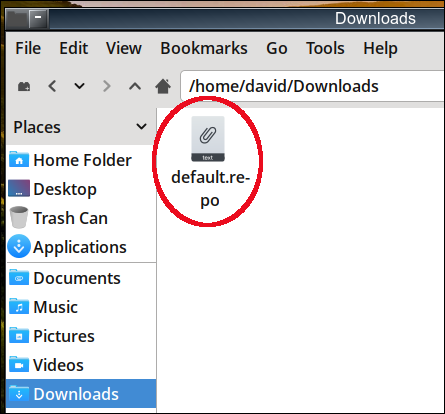 Note: Opening the "default.repo" file with a text editor will show that it contains the correct, updated directory path for the NLUUG repository:  Open a Terminal and type the commands below (separately):
Enter your root password if/when prompted. (The command above will replace your current " /etc/repo.d/default.repo " with the file you just downloaded from GitHub.) Next, jump to Section 2, "Subsequent Steps: Update via DNF PM."
Initial Steps
Download the "dnf-sources-list-2.0-1" .rpm package from the link below: 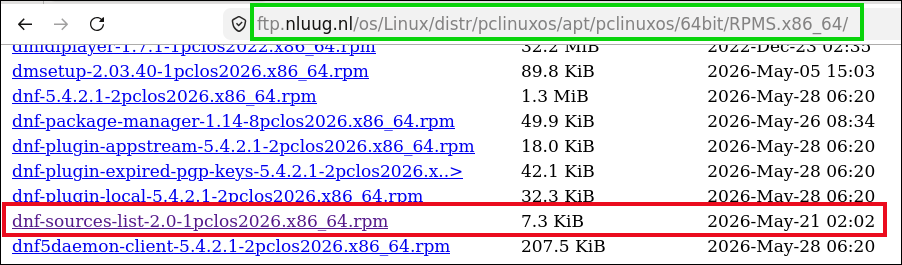 This file will be saved to your Downloads folder: 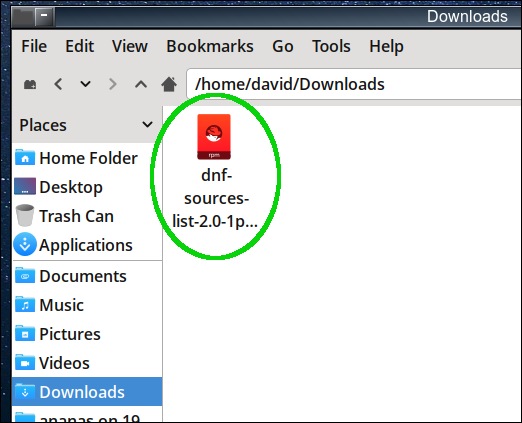 Note: You do not need to extract the contents of this .rpm package. However, for the purpose of demonstration, I would like to show that it contains a "default.repo" file with the correct, updated directory path for the NLUUG repository: 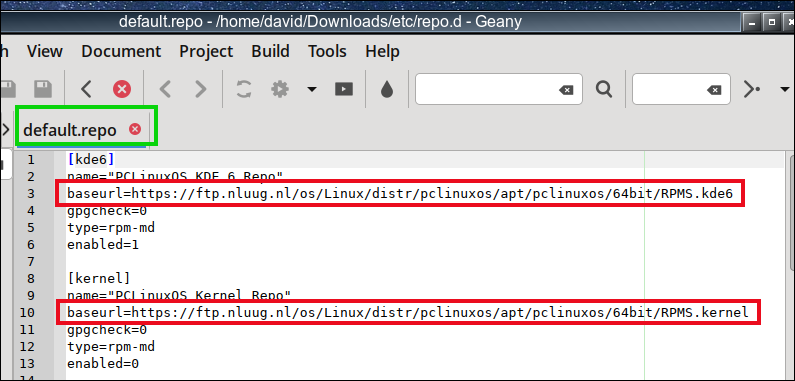 Next, you will install the new “dnf-sources-list” package with this command sequence. Open a Terminal/Konsole and type: (To navigate to your Downloads folder)
(To install that .rpm file, type the following command.)
Enter the root password when prompted. You should see output similar to this:
To close the Terminal/Konsole, type “exit” when the command has run. Next, jump to Section 2, "Subsequent Steps: Update via DNF PM."
Open the DNF Package Manager GUI. Click on the Refresh button and wait a few moments. Click on the Select All button. Then click on the Update button to begin the update process. During the update process, you will probably encounter the so-called "lib64pangomm conflict" that will cause the DNF transaction to fail. Don't worry! There is a fix for it, too. If the update fails, jump to Section 3, "lib64pangomm Error?"
If the update fails, you will be notified via an Error message: 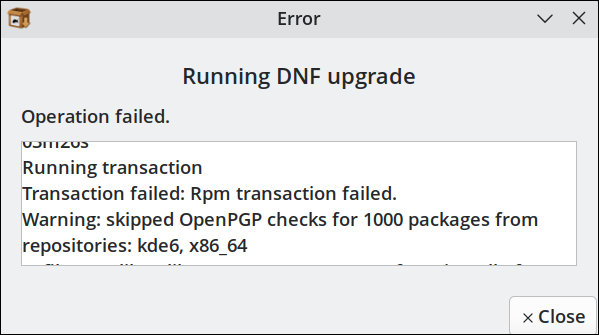  Remain calm because Upgreyed has kindly provided a fix for this situation (below). Close the DNF PM GUI.
Open a Terminal/Konsole and acquire root privileges by typing Enter the root password. Type the command below:
Tip: In the command above, there should be two hyphens preceding the “ You should see something like the output below:
Open the DNF PM GUI again. Press the Refresh button. Click on the Select All button, then click on the Update button. The packages which you previously downloaded are already cached on your system, so you do not have to download them all over again. DNF should begin installing and upgrading packages. Wait patiently for the upgrade to finish. Close/shut down the DNF PM GUI. Log out of your current session and reboot your computer.
At this point, everything should be back to normal. You may change your repo mirror from NLUUG to one that is faster and/or geographically closer to you (if you wish). You can install two small GUI utilities (created by Upgreyed) to help with these tasks: “fastrepo“ and “my-repo-changer“. They both work well. I hope the flowchart below will help you visualize the major steps in each procedure, and help you choose which method to use. I created the flowchart with Typst, using the fletcher package which is designed to draw diagrams with nodes and arrows. (You can download a full-sized version of the flowchart from my Box.com account, if you are interested.) |