| Previous Page |
PCLinuxOS Magazine |
PCLinuxOS |
Article List |
Disclaimer |
Next Page |
A New Script To Create Image Transparency |
|
by Paul Arnote (parnote)
One ability/skill I *wish* I had would be to open up an image in GIMP and remove the background from the image, replacing that background with transparency. Even today, all these years later, if I’m able to perform this task, it happens entirely by accident (and not because I know how to accomplish it). More times than not, I end up sending that image to Meemaw, and have her email the image back to me with the transparent image as an attachment. And, honestly, I’m sure I could “learn” this ability, if I applied myself a little more towards learning it, but I have so many other things to keep track of and that require my attention … both magazine related and non-magazine related things. So, it’s a learning opportunity that I’ve let fall by the wayside because of other commitments that have a higher priority. Hey … at least I admit it and own it.  Image by Julien Tromeur from Pixabay While I’m not a GIMP Super User (I’m happy to let Meemaw take that title … and happy that we have her), I do know quite a bit more than the average bear when it comes to graphics file formats, their capabilities, and their shortcomings. That knowledge was extremely helpful in creating this new script. So many times over my time as the chief editor of The PCLinuxOS Magazine, I can’t even begin to count how many times I’ve needed or wanted an image with a transparent background. In the end, I would always find a way to work around the issue (or I just sent the image to Meemaw to work her magic when I couldn’t find a workaround).
So, you might be wondering why or how this whole situation unfolded and came about. Way back in March 2013, I wrote a couple of scripts, and published them in The PCLinuxOS Magazine. One was called “convert-image.sh” and the other was called “img-resize.sh.” Then, in February 2024, I revisited and updated the img-resize script. In March 2023, I also updated the convert-image script. The truth of the matter is that I’ve made multiple minor updates to these two scripts several times over the years. They are honestly two scripts that Meemaw and I use often when we lay out articles for the magazine’s PDF editions. Like. All. The. Time. Since we’ve already run these scripts twice in the magazine, I haven’t bothered to post or publish updated versions of them. But, somewhere along the line, something in ImageMagick (whose tools perform the heavy lifting in these scripts) changed. One of the things that changed is that sometimes, the scripts will produce an image with a black background, instead of a transparent background as it was expected to do. So, recently, I set out to “fix” the scripts. I discovered that ImageMagick has become quite “picky” about the order of the commands issued, much to my dismay. If you’ve ever read the "usage" “rules” for the ImageMagick commands, you already know how utterly confusing those rules are. They tell you everything you need to know about all of the commands and all of the options … except the order they need to be executed in. If they do divulge that information, I’ve not been able to find it in the literal mountain of information dispensed. I liken finding things on their site to trying to find a single bobby pin in an acre patch of thick weeds. Unable to find an option or sequence of commands that worked like I needed it to, I took a different approach. I created a new script that only works to produce transparency in an image. I call that script remove-bg2.sh (remove-bg.sh, the initial version, was just a “proof of concept” script). While “fixing” the original scripts is still definitely on my radar, this new script fills my needs for now.
Of all the graphics file formats out there, there are only six major formats that support transparency. We’ll immediately eliminate two of them from consideration right from the start: GIF and HEIC. GIF files only support one-bit transparency, so it really isn’t of much use to us (plus it has other significant issues that are beyond the scope of this article). HEIC files are primarily used on Apple devices, and (despite its benefits) it hasn’t gained much traction outside of the Apple Universe. The rest of the other major graphics file formats out there … JPG (along with most of its variants), BMP, and most of the others … do not support transparency. 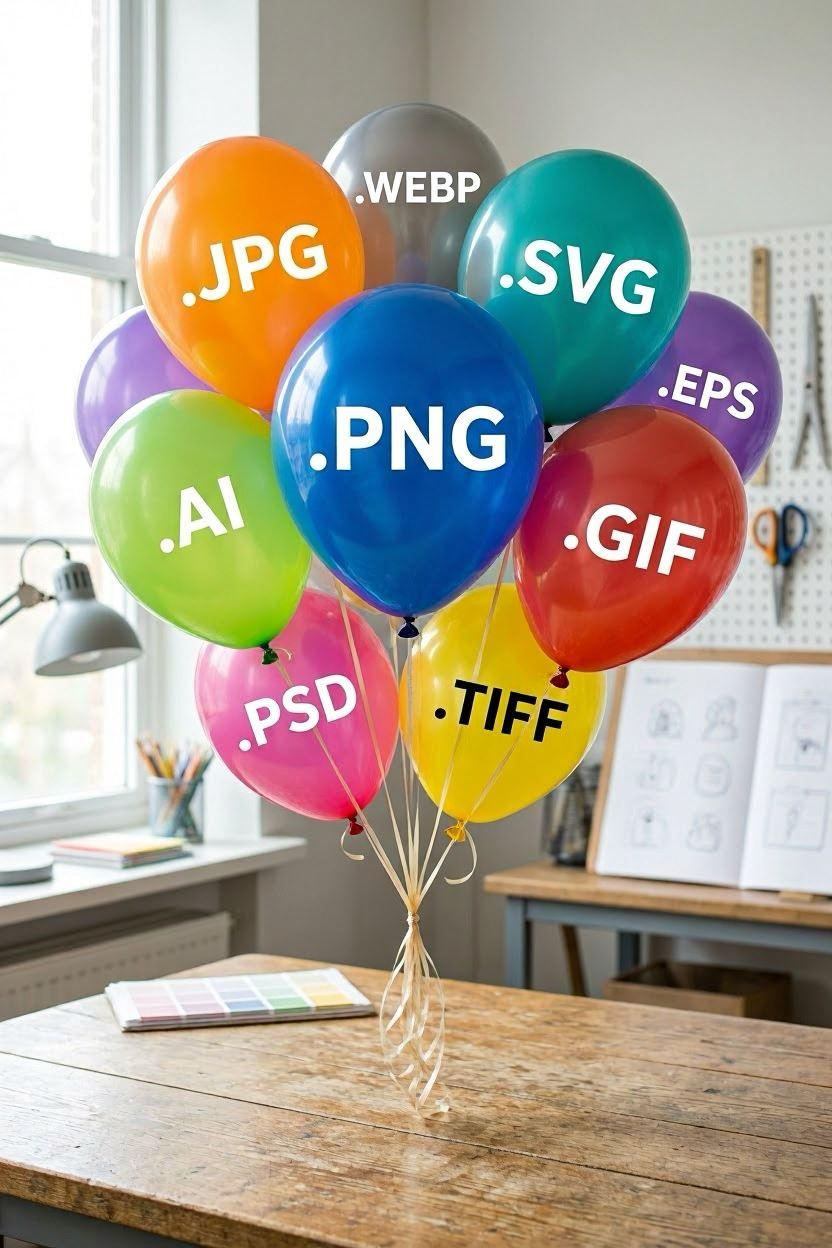 Image by Bing Image Creator That leaves only four graphic formats that we really have to worry about: PNG, WEBP, AVIF, and TIFF. While I’ve included TIFF as one of the output formats, I can’t see that a lot of people will opt to use it, due to the fact that it produces VERY large file sizes. Still, I included it because it supports transparency. We’re all familiar with PNG files, and WEBP graphics are quickly gaining in popularity. In fact, we’ve been using WEBP graphics for the magazine PDF and HTML for more than two years, thanks to its great quality and vastly smaller file sizes. The outlier here is AVIF, which, while a quality graphic format, hasn’t gained as much widespread acceptance as WEBP graphics. AVIF files definitely rival WEBP for producing high quality images with significantly smaller file sizes. The biggest reason we don’t use AVIF graphics here in the magazine is that Scribus (the program we use to produce the magazine’s PDF edition) doesn’t yet support their use. If or when Scribus does include support for AVIF graphics, we’ll be open to using them. All of the “major” web browsers already support AVIF graphics, so we're not averse to using them in the HTML edition. So, for now (and for our uses in The PCLinuxOS Magazine), we’re pretty much relegated to using only PNG and WEBP graphics files when we need images that include transparency.
This script, like several other scripts I’ve written over the years, is designed to be run either from the command line, or as a Thunar Custom Action. I’m certain that users of other file managers can also use this script in a similar manner. However, since I’m strictly a Xfce user, the exact process for doing so is not something I’m intimately familiar with. You can, of course, download the script from the magazine server. The file name is “remove-bg2.sh.txt,” and it’s only 3.2 KiB in size. As I’ve mentioned before with other scripts that I’ve presented in the magazine, store the script in the directory where you normally save your bash scripts. Remove the “.txt” file extension, and make the file executable. Hopefully, the directory where you save your bash scripts is in your computer’s $PATH statement. If it is, all you then have to do is issue the script name (remove-bg2.sh) to start the script. Otherwise, you will have to provide a full path to the script to run it. So, before we talk about the script, let’s take a look at it.
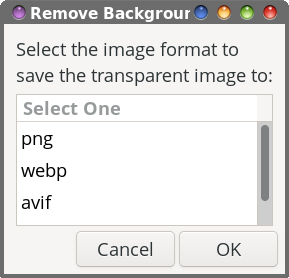 Lines 29 - 36 display the first Zenity dialog box that allows the user to select the output format for our image with transparency. If the “Cancel” button is selected in the Zenity dialog box, the script exits gracefully. To further ensure that things are as we need, we make sure that the output format file extension is all in lowercase lettering. 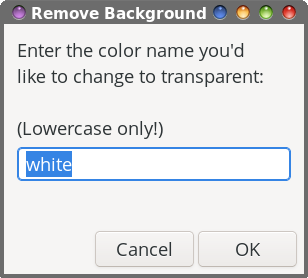 In lines 43 - 47, the second Zenity dialog box allows the user to specify the color that we want to replace with transparency. The default value is “white,” but can be changed to whatever color you want or need. If using the color names, be sure to keep them all lowercase letters. You can also enter the six-digit hexadecimal RGB color designation (e.g., #FFFFFF for white, or #000000 for black), instead of the color name. You can find both the color names and their six-digit hexadecimal RGB color designations at the ImageMagick website. Probably the most common colors you’ll need are either white (the default) or black. As for figuring out what the other colors are, you could just open the image in GIMP and use the eyedropper to copy the color you’re interested in. Then, click on that color in the GIMP foreground/background color control. Pay attention to the six-digit hexadecimal code for that specific color, and use that. So, if you’re opening the image up in GIMP to get the color, you may be asking “why not just use GIMP to change that color to transparency?” Well, if you’re like me, you might not yet have figured out that entire process (I know I haven’t fully figured it out yet). So, instead of stumbling and fumbling around in GIMP trying to figure that entire process out (and maybe accidentally figuring out the necessary steps), just grab the color code and return to the script, which will handle it for you. There’s no doubt that GIMP can handle the task, but the script is quicker. 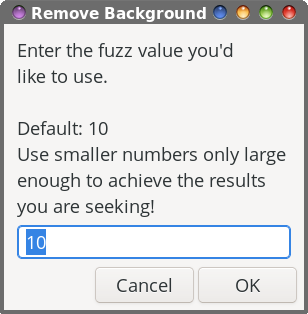 We create another Zenity input dialog in lines 49 - 53 to allow the end user to specify the “fuzz” level (for comparison, it’s called “threshold” in GIMP). The fuzz option allows for a variance in the color you specified, to help make sure there are no stray pixels left in the area you want to be transparent. In the script, we set the default value to 10%. Setting it to 0% means that ONLY the exact color you specified is changed to transparency. With the 10% setting, that means that the color you specified and other colors within 10% of that color are changed to be transparent. I have found that the 10% setting tends to work fairly well for my needs, in most cases, which is why I selected it to be the “default” fuzz level. Don’t be afraid to play around with this setting to achieve the results you are seeking. Resist the “urge” to use big numbers! You most likely won’t like the results. Typical fuzz levels are between 4 and 10 percent. Once you get much above 30 percent, too much of the original image is replaced with transparency to even be recognizable or usable. So, here’s an example of how different fuzz levels affect the image that’s output. I selected a random image with a mostly monochrome background. In fact, that image appears elsewhere in this issue, in the ICYMI article. Original image:  Image by Satheesh Sankaran from Pixabay Now, here’s a composite image showing the effects of different “fuzz” levels: 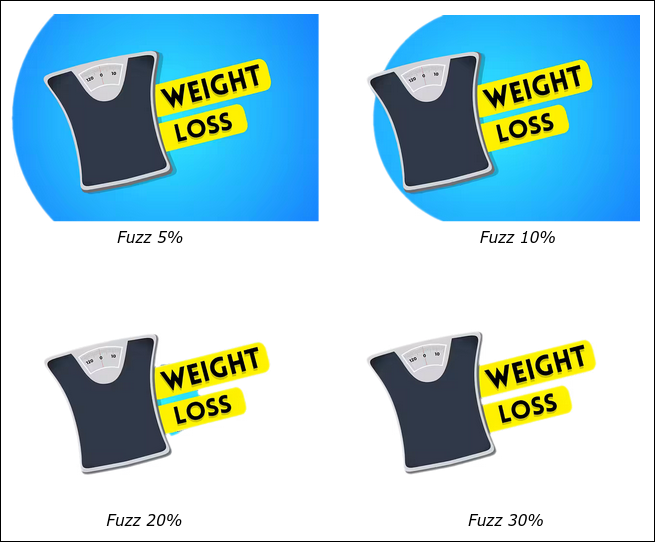 When specifying a color, I just “winged it” (I also call it a WAG … a wild a** guess) and entered “blue” as the color I want to replace with transparency. With a fuzz level of 5% (upper left), you can see some of the blue background being replaced with transparency. A fuzz level of 10% (upper right), even more of the blue background has been replaced with transparency. Using a fuzz level of 20% (lower left), we’ve almost completely converted all of the blue background to transparent, except for the small area under the “weight loss” text and to the right of the scale. With a fuzz level of 30% (lower right), we’ve completely eliminated all of the blue background, replacing it with transparency. Just to demonstrate how you should keep the fuzz level as small as you need to achieve the results you need, here’s the same image with a 50% fuzz level:  As you can see, we surpassed the threshold of where only the specified background color is converted to transparency. Some of the yellow text banners have also been converted to transparency, along with the shadow area along the right side of the scale. So, it’s important to use as small of a number in the fuzz level to achieve your desired results. If you use too big of a number in the fuzz level, you start, in essence, regressing and producing diminishing returns from what we were seeking. Even a one or two percent change can make a huge difference. Do try multiple fuzz levels to find that level that gives you just what you need. In the examples above, a fuzz level of 30% works, while a fuzz level of 50% does not. Lines 56 - 58 double check to make sure that the input file actually exists. If it does, the script is allowed to continue. Line 62 strips the file extension from the input file, and stores it in the $name variable. The “heavy lifting” in this script is done by lines 70 - 73, invoking the ImageMagick convert command. We use the $FUZZ variable to insert the fuzz level that we literally just talked about. In the rest of the convert command, the color we specified earlier is used (-transparent $COLOR) to set which color we want to change to transparency. Then, we use the input file name (minus its extension) that we saved into the $name variable, append the word “-fuzz-” and the fuzz level ($FUZZ) to the name, append “-transp” to the file name, and give it the new file extension we selected in the first Zenity dialog box. This helps to ensure that your original file is not overwritten (I figure it’s better to be safe than sorry!). It also saves images made with different fuzz levels to separate files so you can monitor and see how well each fuzz level works for your specific image. This ImageMagick “convert” command is based on the solution presented by fmw42 on Stack Overflow, incorporating the alteration offered by mobeen, along with some of my own tweaks. Finally, in line 76 of the script, we allow the script to exit cleanly and gracefully after the image is converted.
So, let’s take a look at some other examples, some of which were created just for this article. 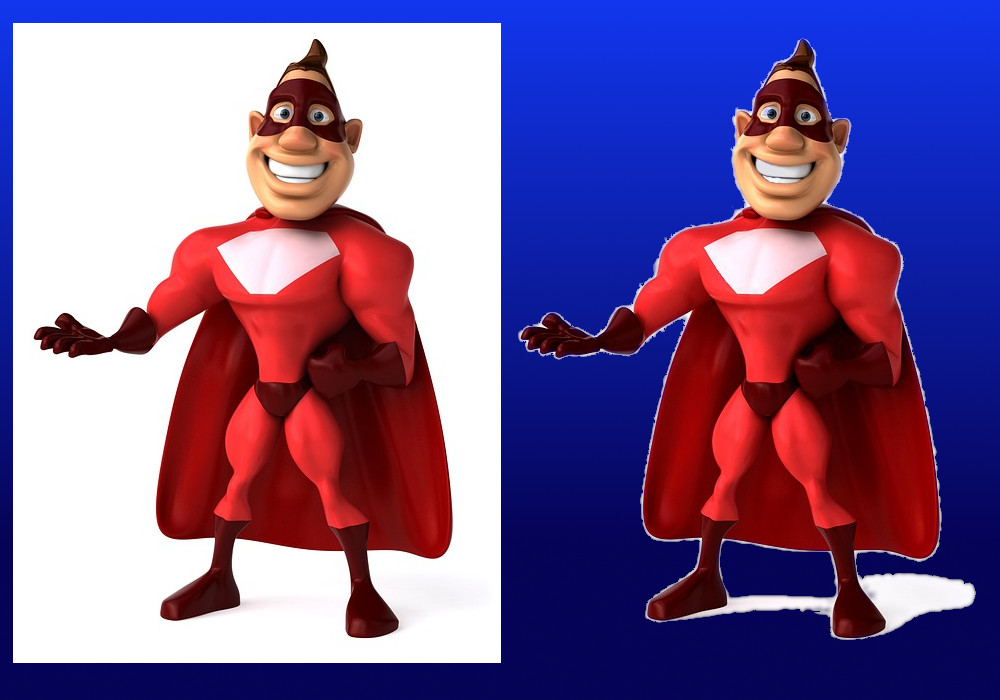 This composite image shows the JPG image downloaded from Pixabay on the left (used earlier in this article), and the PNG with the background converted to transparency on the right. The images were placed on a gradient blue background to assist with displaying the transparency. The image on the left is the JPG (and remember, JPG files do NOT support transparency), while the image on the right is the PNG created after processing with the script. In my opinion, I think the script did a very good job with this image. The original JPG has an all white background, and the PNG file has no background. This image was a little tricky, and required only a fuzz level of only 1%. Anything more would make transparent “holes” in his chest plate, teeth, and the whites of his eyes. Had I been able to use a higher fuzz level, the white surrounding the character would have been eliminated (and it was eliminated in my initial attempts at higher fuzz levels). So, as long as I reproduce the image on something that also uses a white background (like the pages of The PCLinuxOS Magazine), no one will ever notice the white “halo” around the image.  Meemaw contributed this image on one of her first tries using the script. The JPG file is on the left, with a solid white background. The image on the right is the transparent image created by the script. In removing the white background, the “H” letters on the clover leafs were also converted to transparent, but Meemaw went into GIMP and refilled them with white. She used the “default” fuzz level of 10% when creating the transparent image. We're showing it on a blue background, so you can better discern the transparency of the image on the right, versus the solid background of the JPG on the left.
The remove-bg2.sh script takes only one command line argument, and that is the filename of a graphics file you want to add transparency to. It can be any graphics format that ImageMagick supports (meaning, that it can read, and that’s a LOT of different graphic formats!). Look for the ones in the list marked “R” under the Mode column. From the command line, that will look like this:
or
Keep in mind that this script will ONLY work on ONE IMAGE FILE AT A TIME! That remains true whether you're using it from the command line or from a Thunar Custom Action. You should ensure that filenames DO NOT have spaces within them. To keep things simple, I’ve not added anything to the script to strip out spaces in the input filenames (I tried, and wasn't successful … just changing the spaces in a filename is not enough within the script, since options in the convert command rely on the specified image actually existing on your hard drive, and not just the altered name of the file held in the script's memory/variable … and none of my usual “tricks” work). Spaces in filenames WILL cause the script to fail, so you have been warned. And, since it's working so well, I've opted (at this time) to not go in and mess with things to make sure filenames with spaces don't cause a script failure. Spaces in filenames really is a horrific idea anyways, as spaces in the Linux command line (and thus, bash scripts) are overloaded, and are VERY frequently used to separate one set of command line options from another. I tend to avoid spaces in filenames as a hard rule, having been bitten in the backside numerous times from having spaces in filenames. I have special Thunar Custom Actions that change spaces in filenames to either “-”, “.”, or “_” (that’s a dash, period, or underscore), depending on which custom action I choose to use. So, if I download a file that contains spaces in its filename, I immediately strip those spaces from that filename with one of those custom actions. It’s just something that I routinely do.
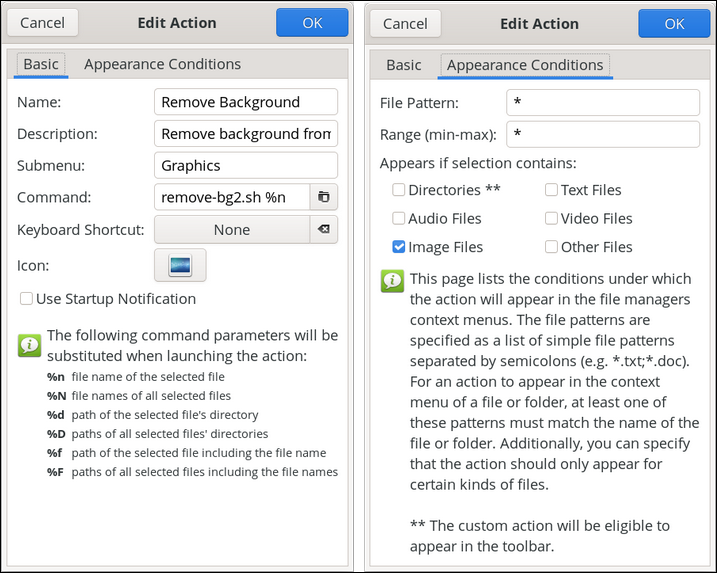 In the “Edit Action” dialog box, under the “Basic” tab, enter “Remove Background” in the name field. In the “Description” field, I’ve entered “Remove background from image.” If you use submenus in your Thunar Custom Actions, enter the name of the submenu you want the custom action to appear under. On my computer, my graphic custom actions are grouped under the “Graphics” submenu. Then, enter “remove-bg2.sh %n” in the “Command” field. I don’t think I’ve ever set a keyboard shortcut for any of my custom actions … ever. But, I do choose and set an icon to be displayed next to my custom action in the menu. Under the “Appearance Conditions” tab, leave the * in the “File Pattern” field, and place a checkmark in front of “Image Files”. Again, keep in mind that the script is designed to work with only one image at a time (hence the use of %n in the command entry line). Now, your custom action will be ready to use on the image of your choice. Find the image, right-click your mouse on it, and select the custom action. Follow the prompts from the script, and you’ll be producing your own images with transparency.
Well, of course you can work in GIMP and try to learn the process there to create images with transparency … if you have the time. I haven’t had that time available thus far. Meemaw, in her bimonthly GIMP tutorials, wrote two separate tutorials on how to get rid of the background in images (that is, create transparent backgrounds) back in 2021. If you have an image that you want to have a transparent background, you could follow along with her well-written tutorials to achieve your desired results. Only one of her tutorials relies on the use of masks. For some reason, I have a real mental block when it comes to the use of masks in GIMP, so I have to tap out on that one. Fortunately, she offers three other ways to create a transparent background. Or, you can also head on over to the https://remove.bg website, upload your image, and then download the image with a transparent background back to your computer. While that whole process takes considerably longer than running this script, you might obtain better results than from the script. See, that website uses either AI or some complex algorithms (that are WAY beyond my abilities to code) to produce the image with a transparent background. As a result, it can handle much more complex images that you might want to have a transparent background in than this script can handle. But then, keep in mind that you’re uploading your files to some distant website, so there’s an ever-present question of security. With the remove-bg2 script, everything is staying right on your computer.
I hope you find this script worthy of gaining a place in your toolbox full of graphics tools. And, I have to admit that creating this script was fun (yeah, I know … I have a warped sense of fun, huh?). But part of the “fun” was discovering how much more capable this script is than I had originally thought. Initially, I wasn’t going to include an option to adjust or specify the fuzz level, and just leave it at the default value of 10% hardcoded into the script. But, once I added the ability to make the fuzz level customizable, it opened up far more capabilities than I could have ever imagined, and made the script work much better than I had hoped. Is this script perfect? Nope. Does this script deliver “perfect” results? Not always. But, the results are close enough to perfect for my use. At the very most, all you should have to do is to open the output image in GIMP and perform some minor tweaks. And THAT process is far faster and more secure than uploading your images to some far off, distant website. |