Mark's Quick Gimp Tip & Double Take
|

|
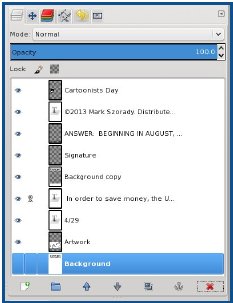
This month's GIMP tip is pretty obvious, but nonetheless, needs to
be
pointed out from time to time. My tip is simply this: when editing a photo/picture.artwork, make each edited element its own separated layer. Too often, new users start in GIMP and make the common mistake of placing all thie edits and changes on the same
|

|
|
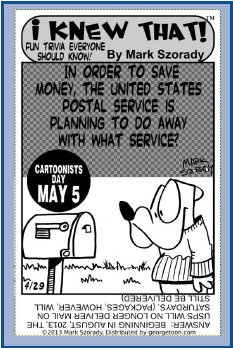
layer. When I was first learninng to use graphics applications, I made this common mistake far too many times.) In my example below, you can see how I edit my feature :I Knew That!" Each element is its own layer. The artwork, question, answer, signature, etc. are each on its own layer. I can then move each layer independently without disturbing the other elements. I can also rearrange the layer order if I want to drop and element in front or behind another.
|
-Mark Szorady is a nationally syndicated cartoonist with georgetoon.com.
He blogs at georgetoon.com/blog.
Email Mark at georgetoon@gmail.com.
Find the answers HERE.
|
Copyright (c) 2013, The PCLinuxOS Magazine. All Rights Reserved.
|
