| Previous
Page |
PCLinuxOS
Magazine |
PCLinuxOS |
Article List |
Disclaimer |
Next Page |
Quick Guide To Running OpenVPN With KeePassX
|
|
by OldGuy The November 2013 issue of "The PCLinuxOS Magazine" had an article about "KeePassX: Not In The Cloud." I had put together a series of text files to help a friend with running his paid VPN under PCLinuxOS. We are both using KDE64. Using the Auto-Type functions of KeePassX, I wanted to make his login simplified. The old way had several cut/paste sequences. He uses iVPN (https://www.ivpn.net/). For my testing, I choose VPNBOOK (http://www.vpnbook.com/freevpn). However, the same setup should relate to both, if not all, VPN services. Please note while reading these samples that my home directory is named /home/alpha, and yours will be different, so you will have to edit any reference to your home directory. Also, the password for VPNBOOK does change periodically, and as of the writing of this article, it may have changed again. Be sure to check the VPNBOOK site for the correct user and password to use their free VPN. I downloaded the US OpenVPN Certificate Bundle from the VPNBOOK site, and installed the unzipped files into a directory called VPNCerts under my home directory. Use TCP if you cannot connect to UDP, due to network restrictions. I also downloaded openvpn from the PCLinuxOS repositories. This article assumes your firewall is set to no firewall, or that you have the tun0, tun1, tun2, along with eth0, checked on the firewall. VPNBOOK has 4 different certificates; vpnbook-us1-tcp443.ovpn, vpnbook-us1-tcp80.ovpn, vpnbook-us1-udp25000.ovpn, vpnbook-us1-udp53.ovpn. You will need to make a KeePassX entry for each one you plan to use. How to setup a KeePass entry, one entry per certificate Title: VPN tcp 443 I chose this to reflect the certificate. You can use any name here. Username: vpnbook Guide to proper entries for url for each certificate. Pick ONE per entry. Note that my home directory has a dedicated directory where the certificates are stored, in /home/alpha/VPNCerts. You will have to edit these entries below to reflect your home directory. Url line for each certificate: note that the use of the semi-colon allows us to do more than one command on the url field.
cd VPNCerts;openvpn --config vpnbook-us1-tcp443.ovpn 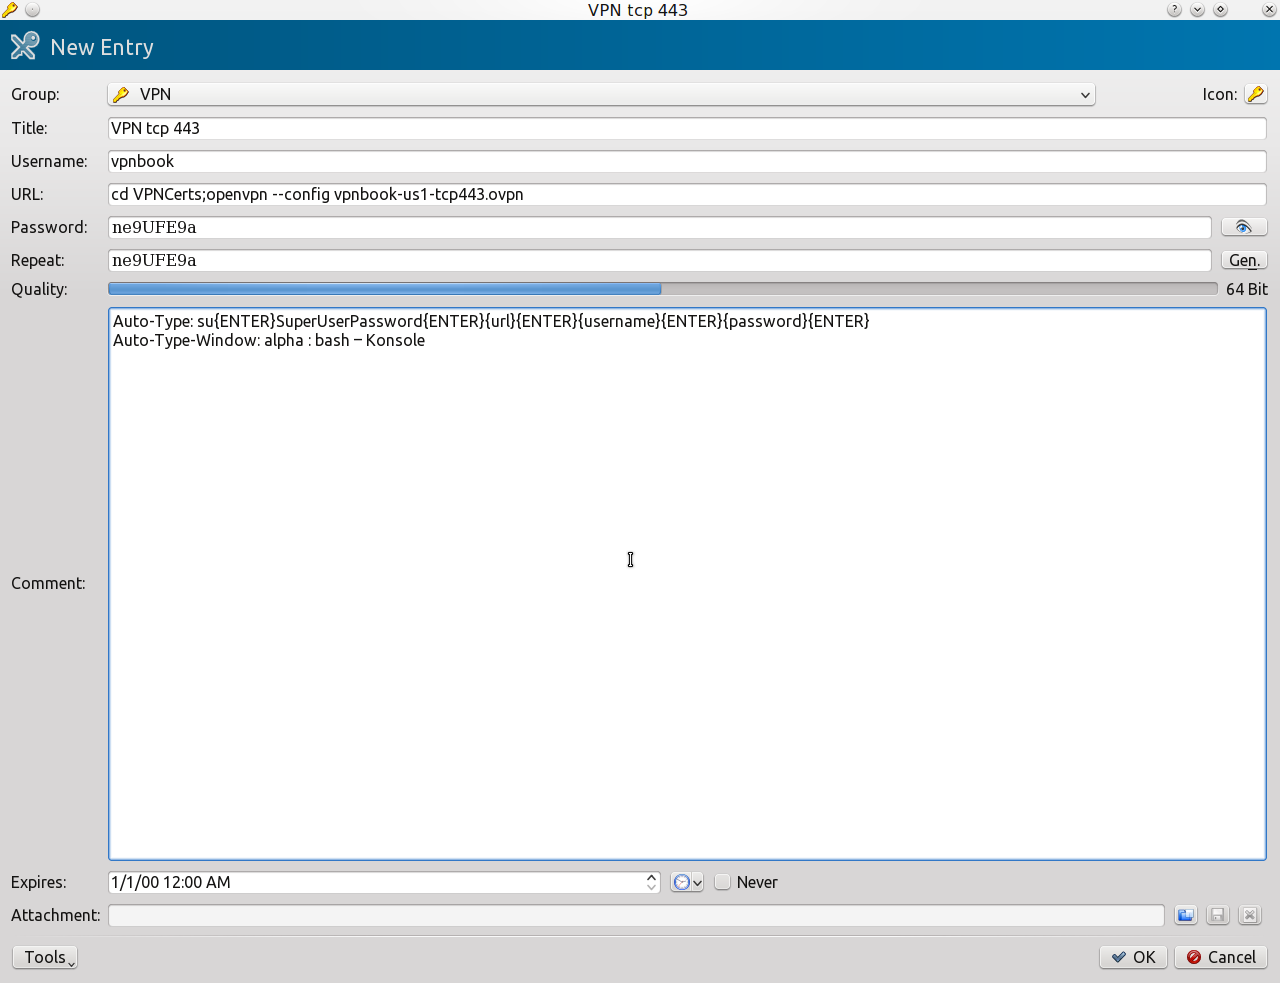 Sample of a filled entry in KeePassX. Suggested run instructions.
When you see "Initialization Sequence Completed" displayed in the terminal window, open your browser and check your ISP to be confident you are on the VPN. To check, you can go to http://www.whatismyip.com/. It will show your ISP location, which should be different from your normal ISP. If you do not see "Initialization Sequence Completed" in Konsole, press CTRL+C, and then exit. Then, select another certificate to try again. I found that vpnbook-us1-udp53.ovpn would not work on my machine, but the other three ran just fine. If you cannot connect check your firewall settings, most likely your tun0, tun1, tun2, or tun3 are not checked. They appear on page three of the firewall setup. They need to be checked to run the VPN. When you are completed with your surfing via the vpn session, follow these next steps.
6. Close browser. 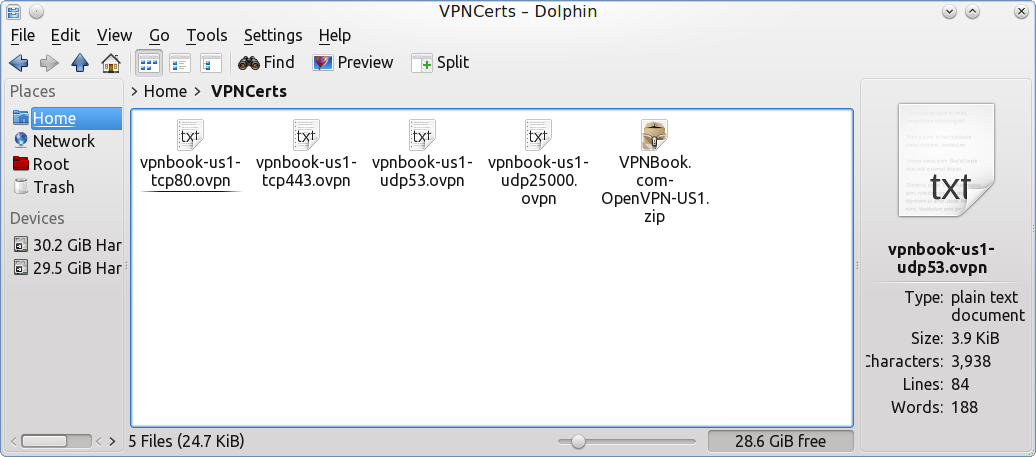 Example directory of certificates. 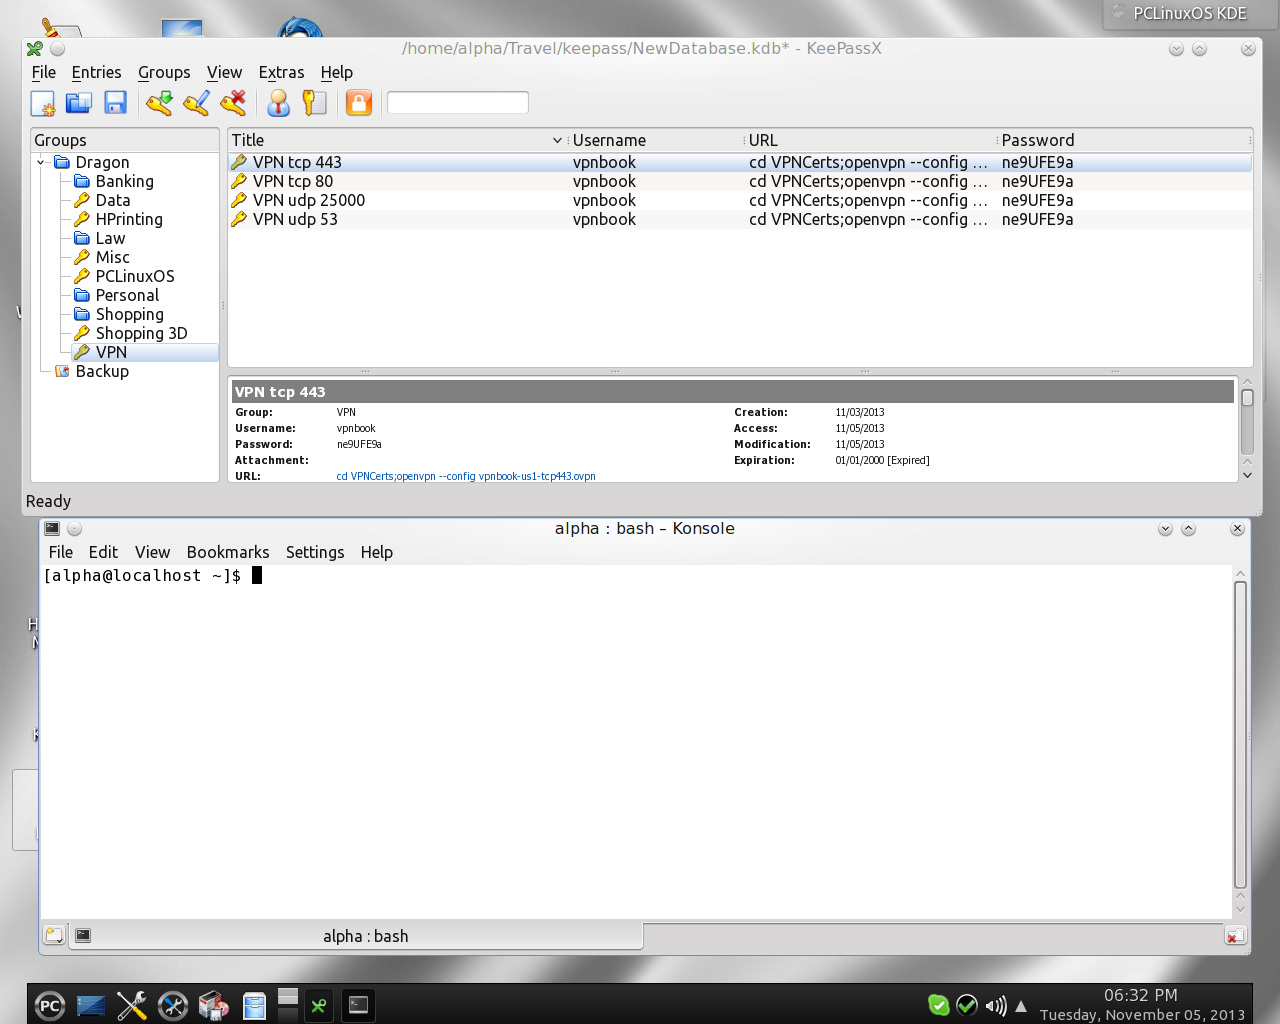 Example showing Konsole open, and selected 443 in KeePass, ready for you to press CTRL+V to initiate the vpn session. 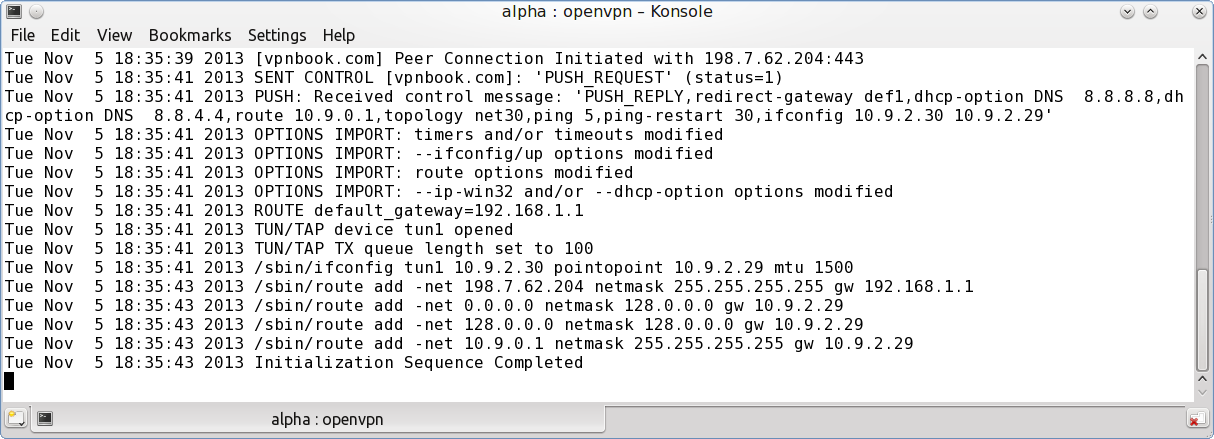 Example showing "Initialization Sequence Completed" we're ready to open our browser and surf on the vpn. 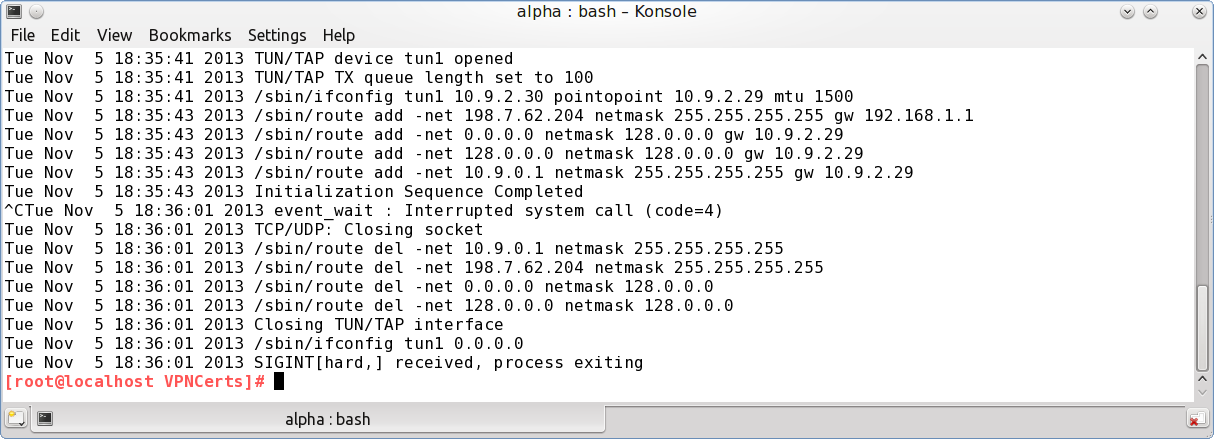 Example after surfing and pressing CTRL+C, you can review your session or use "X" in the right hand corner to exit the Konsole session. |