| Previous
Page |
PCLinuxOS
Magazine |
PCLinuxOS |
Article List |
Disclaimer |
Next Page |
Inkscape Tutorial: Make A Chalkboard |
|
by Meemaw In an earlier article, we made an oval picture frame with ellipses and applied a filter to make it look a little more like a wood frame. This time we're going to make a rectangular wood frame with a chalkboard inside. I used a wood and a chalkboard graphic, and a font called Eraser, but there are also several fonts that look like chalk that you could use.  Opening Inkscape, you will already have a blank sheet. It doesn't need to be very big, so go to File > Document Properties and change the size to 640 x 480 (landscape). While you are there, make sure that on the Snap tab, Snap to Object and Snap to Grid are checked. 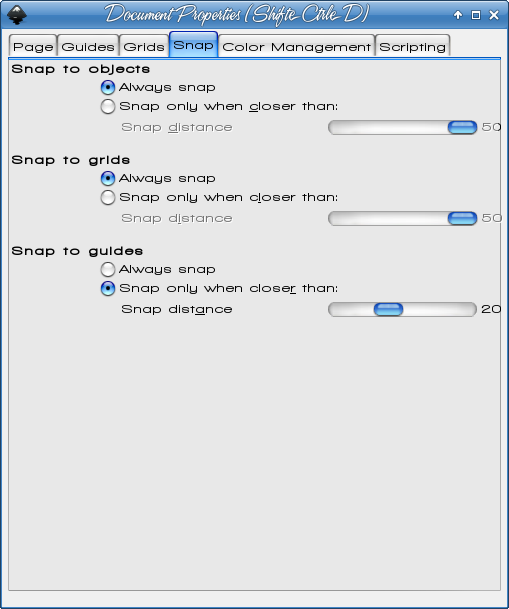 Also, go into your Inkscape Preferences. In the list at the side, towards the bottom of the list, choose Steps, and make sure the setting for "Rotation snaps every ___ degrees" says 15. OK, so let's get started on the frame. Draw two rectangles on your page, one of them 640 x 40 and the other 40 x 480. The long one will go at the top of the page and the long one down the left side. Make sure the Stroke is set to none on both of these. Making them each a different Fill color will help you to see what you are doing. We're going to end up with wood-grain anyway. 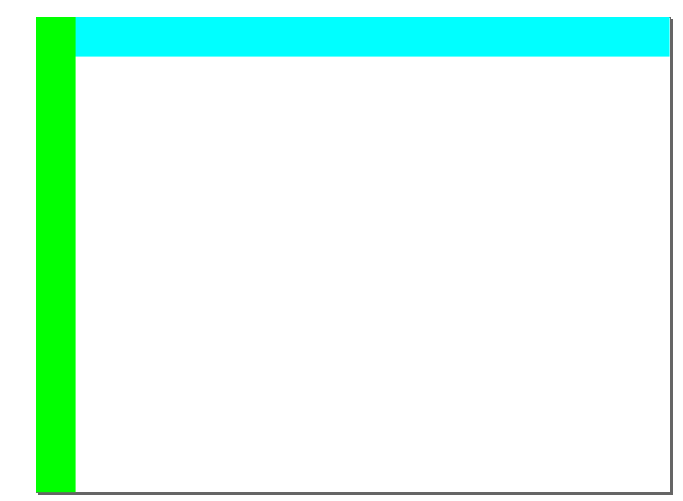 You want to select each of these rectangles and click Path > Object to Path. We're going to move a node on each. Starting in the top left corner, choose the left side rectangle with your Nodes tool. Grab the node on the top right corner and pull it down until it is even with the bottom of the top rectangle. Shown below, I have pulled it partway down on the left and finished on the right. 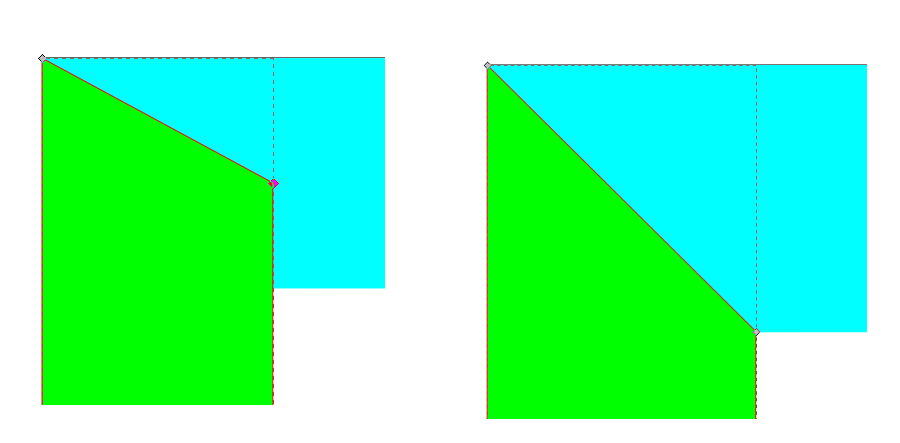 Now choose the top rectangle and do the same, making a mitered corner there. Choose your left side rectangle and duplicate it. Move the duplicate to the right side and flip it. Your corner is already done there but not on that end of the top rectangle, so do that one. Then duplicate the top rectangle and flip and move it to the bottom. Do any corners that aren't done yet. When we are finished both ends of all rectangles should have the mitered corners. Try to make sure they match up: if you have a white space in between the objects, there will be a white space between the corner pieces of your frame. 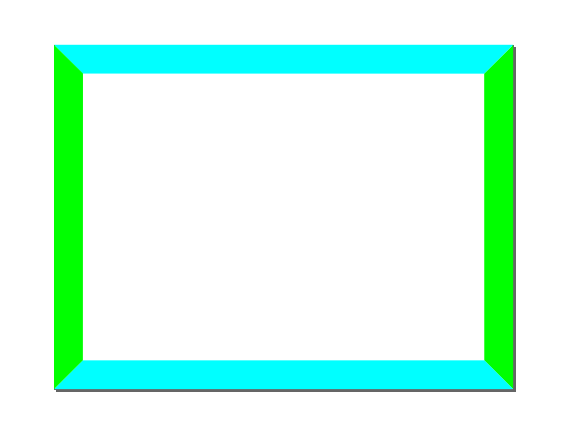 We're going to add the wood texture now. Choose your top and bottom rectangles (above, the blue ones) and group them. Do the same with the left and right ones (green above). Import the wood texture graphic into your drawing, and make a duplicate of it. Rotate the duplicate 90 degrees. Now it should look like this: 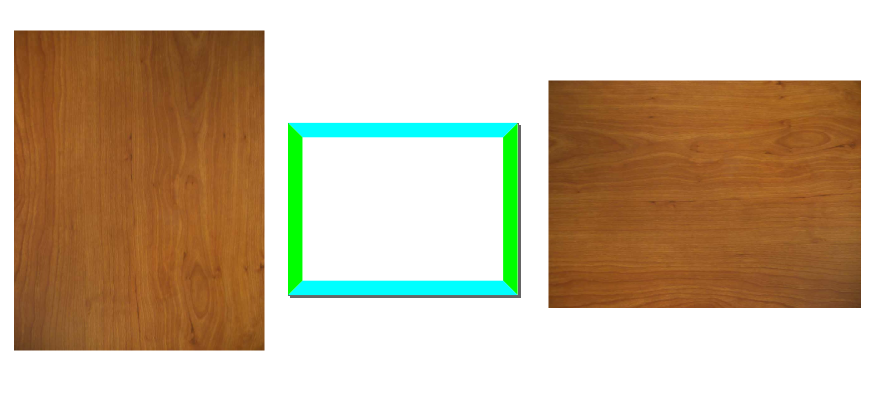 Position the horizontal wood texture behind your frame and deselect it by clicking somewhere else in the window. Select the top and bottom grouped rectangles, hold down the <Shift> key and select the wood texture. Now click on Object > Clip > Set. Your wood texture should now be visible in your top and bottom. Do the same thing for the left and right group. Remember to select the frame before the texture. Now we have a nice wooden frame for our chalkboard. 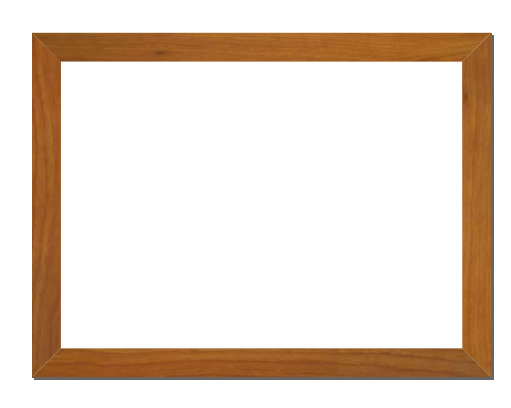 OK, before we put anything in our frame, let's give it a little depth. Using your Bezier tool, draw a line inside the frame from the top left corner to the top right corner, then from there to the bottom right corner, right along the edge of the frame. Make the stroke 3 px wide and try to make sure it is centered, covering both the frame and the white inside. You can always set your transparency down to about 50% so you can see, then set it back up to 100%. 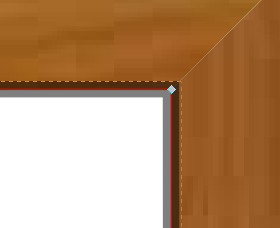 Also, make sure that the ends of your lines stop a little short of the frame edge. Make sure your opacity is set back to 100%, then change your blur to 1. You will get a nice shadow on two sides of your frame that will give the illusion of depth. Using the other two sides of your frame, but on the outside of the frame, do the same thing again. 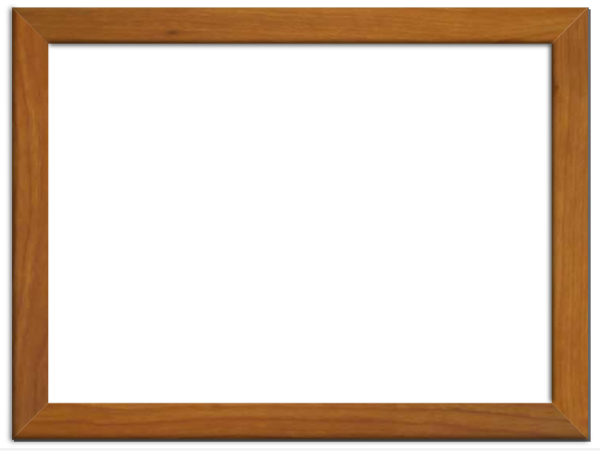 Let's add the chalkboard. Draw a rectangle the same size as your drawing (640 x 480). Make the fill any color you want with no stroke. Slip it behind the frame. Now, import the chalkboard graphic. It's large so you will have to resize it. Make sure it's still big enough that whatever you put into the frame looks the way you want it to look. There is a seam in the graphic you might want to leave out of your project.  Just as before, click on the rectangle, then on the chalkboard, then click Object > Clip > Set. 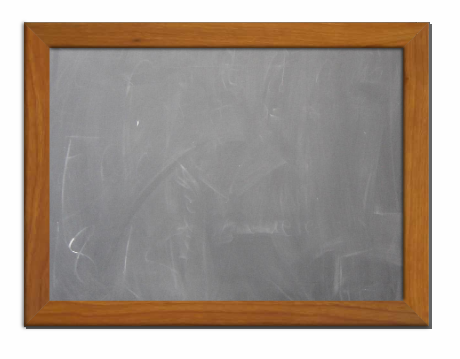 We're almost finished but let's do one more thing for depth. Using your Bezier tool again, draw another line on the inside of the frame on the other two sides (left & bottom). Make that line white, stroke size 1. Zoom in to get it just on the edge of your frame, but not all the way to either corner. In your Fill & Stroke window, change the color to a radial gradient. Click on the Gradient tool and drag the corner handle to a spot outside and to the bottom left corner of the frame. In your toolbar, you will see the gradient. Click the edit button on the right and add a stop. 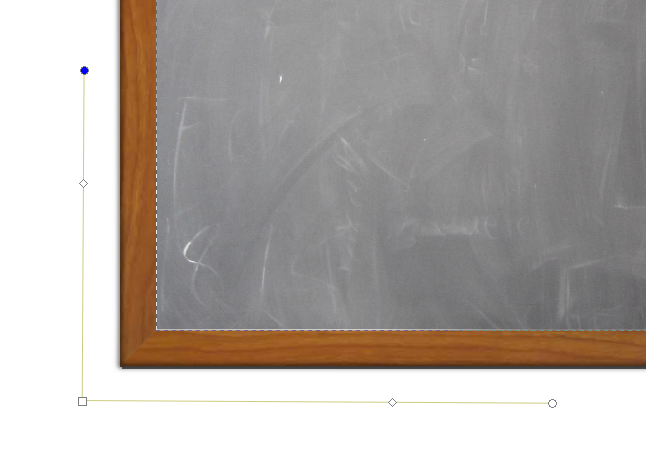 You then want to edit your gradient so it shows a little white on the two edges but not all along both sides of the frame. My gradient looks like this in the toolbar:  But yours could look however you want. The last thing is to write on our chalkboard. A tutorial I read says you can design your own filter to make text look like chalk, but I opted to use the Eraser font. Click on the text tool at left and then click where you want to write. Type whatever you want, then highlight the word(s) you typed. Click on the text toolbox in the top toolbar, and a window will pop up. This is the Text Formatting window. Change your font, size, alignment and spacing here. When you get it the way you want it, you can Apply and Close that window. Now, if you select the text with your cursor, you can rotate the text if you like, or leave it straight. You can also make it a bit bigger, too. Save your work when you are satisfied, and export your project.  Here's another version with the font Chalkboard:  This one was fun! With different graphics, you can make a white board and use a blue marker, or make just the frame for your favorite photo. The possibilities are endless! |