| Previous
Page |
PCLinuxOS
Magazine |
PCLinuxOS |
Article List |
Disclaimer |
Next Page |
GIMP Tutorial: Editing An Image |
|
by Meemaw We've made bunches of pretty things with GIMP! We've also done a little bit of photo editing, but I know there are more tips to editing digital photos than the ones I've covered already. When a digital photo is opened for the first time, even expert photographers will do something to improve the shot. From Chapter 10 of the GIMP Manual, "Most commonly the things that you want to do to clean up an imperfect photo are of four types: improving the composition; improving the colors; improving the sharpness; and removing artifacts or other undesirable elements of the image." Let's look at some things we can do to improve our photographs. I will follow the four topics listed in the GIMP Manual's Intro to Chapter 10 above. I have a folder of photos from a recent trip to edit. I am going to copy all of them into a sub-folder called Originals before I start, just in case I really mess one up! Also, remember, anything you do to a photo can be undone just by pressing <CTRL> + Z or clicking on Edit > Undo. Make sure you have your photo the way you want it before you save. Improving Composition
No matter how hard you try, sometimes you just haven't held your camera absolutely level. If you are scanning a photo for saving, you haven't placed it in the scanner straight. Rotating your image will remedy that error. GIMP's rotate tool looks like this: 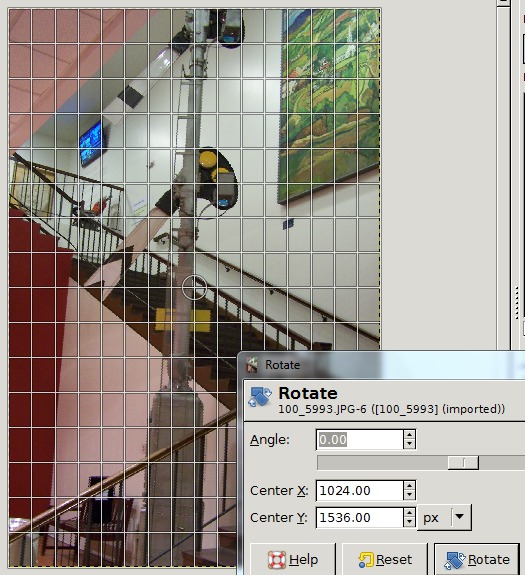 If you need to rotate clockwise, you should click the up arrow next to the angle, and if you are going counterclockwise, the down arrow should be clicked. You can do it by hand with your mouse, of course, but this is much more precise. A tip is to rotate a bit, then click OK to see how you did. Clicking in the center of your photo will replace the grid squarely and you can see if you have it rotated enough (or too much!) I rotated this photo -2.00 degrees, then another -1.5 degrees. I wanted the signpost to be straight, and I wasn't happy with it the first time. I clicked the photo a third time, and the signpost was straight, so I canceled out of that window. To keep from accidentally starting the rotate tool again, I chose some other tool. 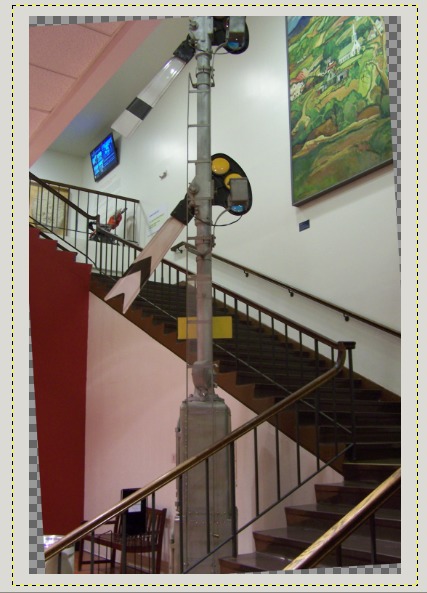 Notice that the edges of the photo now have some transparent sections. That's because Gimp rotated the photo, but there wasn't anything to place in those corners. One option is to crop the photo.
Choose the Rectangle Select tool Another cropping tool is the actual Crop tool.  On either tool, you are able to adjust the sides of you rectangle before you actually crop your photo, just in case your rectangle isn't quite where you want it. (This photo is of the entrance to the Miniature Railroad Museum at Balboa Park in San Diego, CA.) 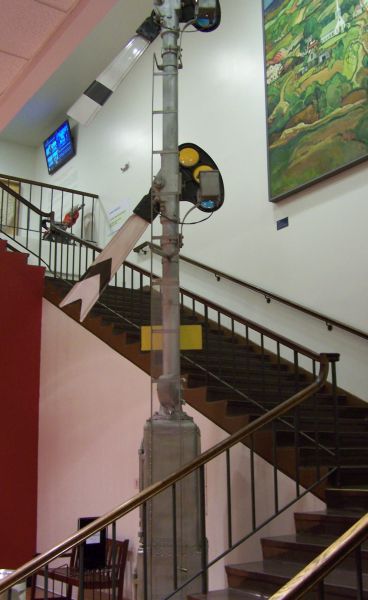
Improving Colors
Heaven knows I'm not a perfect photographer! Most of us aren't, so we take loads of photos and then weed out the bad ones, leaving us with the ones that are most promising. Sometimes a photo will be really good, except that it's just a bit dark. We'll want to do a little color correction on that. The easiest tool to use is the Brightness-Contrast tool. You can slide the sliders or use the up and down arrows, which will be easier if you only have to adjust a little bit. I have a few photos that are just a bit dark, so I will open one in GIMP and choose Colors > Brightness-Contrast. A window will open that shows sliders for brightness and contrast. You will also see a checkbox that says "Preview." Make sure it is checked. As you slide the sliders or use the up & down arrows next to the values, your photo will reflect the change. 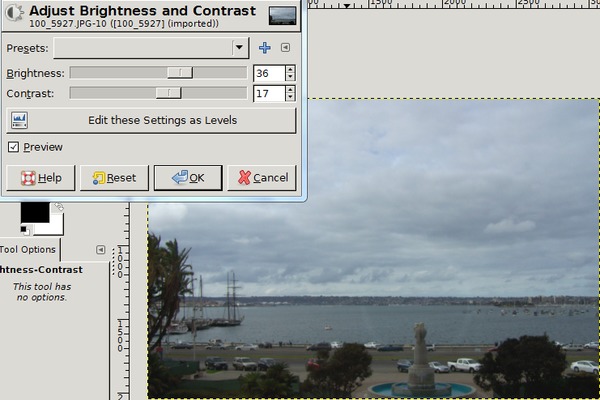 If you are tempted to use only the brightness setting, I should warn you that some of your photos will look washed out or way too light if you don't adjust the contrast as well. See the difference below: 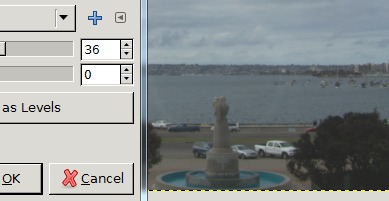 (This is a photo of part of the bay in San Diego, CA.) The Levels tool is another tool that can help you adjust your highlights and shadows. I opened this picture. It turned out really dark when I took it, and after I used the Brightness-Contrast tool on it, I got this result:  I said it was really dark! Then I chose Colors > Levels. When the window appears, there are three arrows below the histogram, one at each end and one in the center. Adjusting the arrows below the histogram, I was able to lighten the photo up considerably. 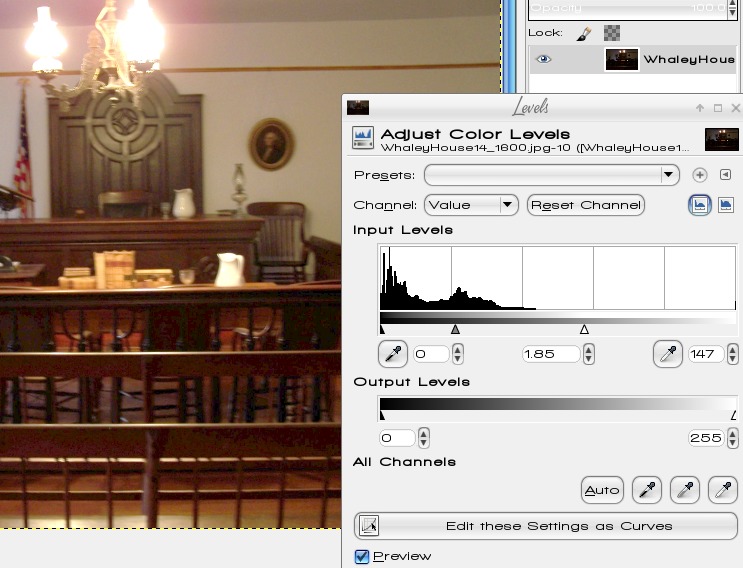 Please be aware that large adjustments here will not only lighten the photo, but add noise. However, a slightly noisy photo where you can actually see Uncle Jimmy and Aunt Sally is better than a dark photo where you cannot. 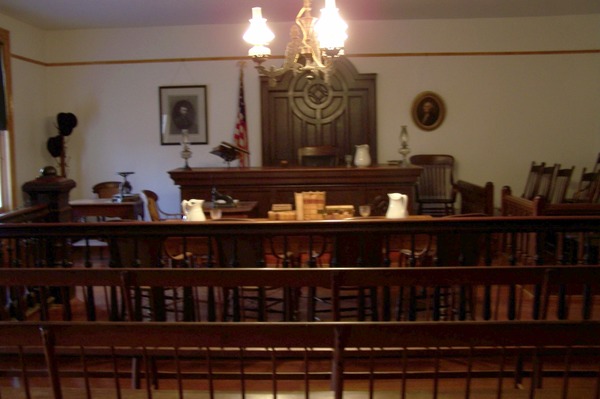 This is a photo of one of the rooms in Whaley House at Old Town, in San Diego, CA. Adjusting Sharpness I don't know about you, but I can't always hold absolutely still while taking a photo, and it come out a bit blurry. Many of those aren't repairable, but sometimes a blurry photo can be helped with a couple of tools. One is Filters > Enhance > Unsharp Mask and it might be able to reduce some of the blur. 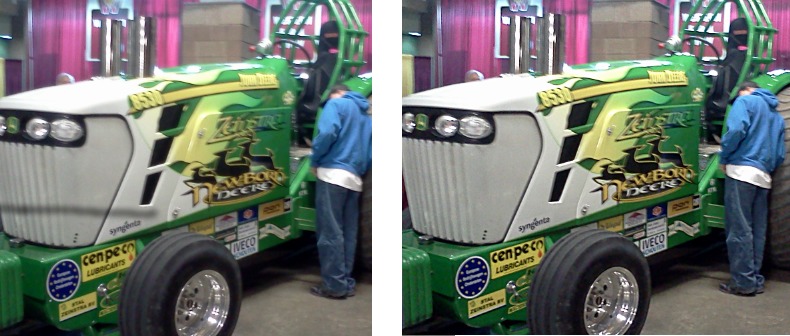 Something else that might help is Filters > Enhance > Despeckle. With both tools, you need to play with the settings until you get the result you want. Be very careful here, adjusting only a bit at a time, as over-sharpening looks glaring and artificial. If it seems too sharp, then you might try Filters > Blur. Sometimes a photo will look better if it is softened a bit. Removing Unwanted Objects I have taken a photo in the rain before. Then, when I look at it, the rain detracts from the photo quality, of course. Using Filters > Enhance > Despeckle may be able to remedy that. Here, I took the photo through a dirty windshield... despeckle didn't take everything out, but it looks better (right). 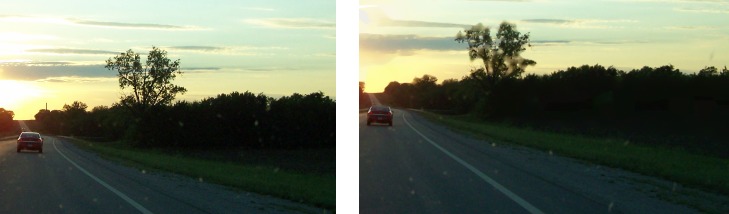 We have already learned how to remove unwanted items in a photo using the Clone tool, which will help fix the photo above, too. The Healing tool should work as well. There is also the Resynthesizer plugin available for Gimp, but it isn't included in the default Gimp installation. You can install it from the repo through Synaptic. Many photos have the dreaded red eye effect. To remove it, use Filters > Enhance > Red Eye Remover. You need to outline the area you want to change with the lasso or ellipse select tool first. Another method is to choose a brush (paintbrush tool) with soft edges, and size it a tiny bit larger than the red you want to remove, then paint a dark color into the red. If it doesn't look right, use <CTRL> + Z to undo it, and try again. 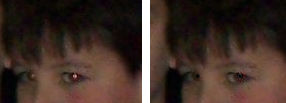 Wow! We've covered a lot of tips. I am sure that your photos will be even more beautiful now! |
 When you click on it, then click inside your photo, you will find your photo covered with a grid, and the rotate window will appear.
 and draw a rectangle around your desired area. Click on Image > Crop to Selection and everything outside the rectangle will be eliminated.
 Your cursor will change to a cross and you will be able to draw a rectangle around the area you want to keep, then press Enter or click on your selection.