| Previous
Page |
PCLinuxOS
Magazine |
PCLinuxOS |
Article List |
Disclaimer |
Next Page |
GIMP Tutorial: Sphere Variations |
|
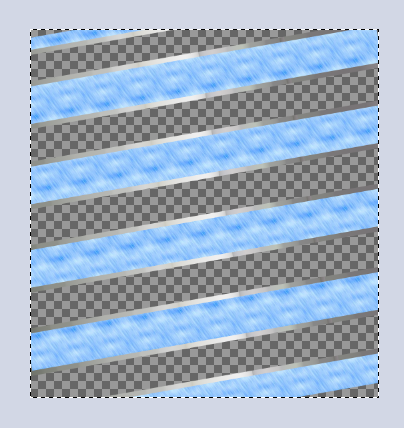
by Meemaw In the March issue, we created a spinning globe which had text or an image on it. This time we're going to use a different GIMP filter to create another globe, or sphere, with two different effects. The first effect will be a "photo sphere." The first time I did this was with pictures of my grandchildren. This time I am using sections of my favorite wallpapers created by many of our PCLinuxOS family members. I edited sixteen images, all 450 x 450 px, set into an 1800 x 1800 px grid. Create a new image, 1800 x 1800 px. Grab three guides from top and side and place them 450 px apart to make a grid. Copy and paste your images into your grid. It should look similar to the following; 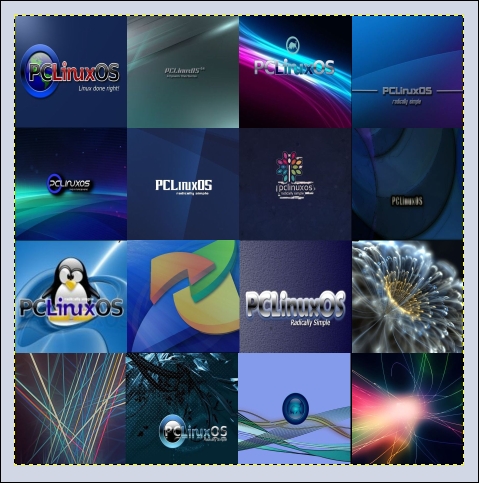 Now, Click on Filters > Map > Map Object. The following window will appear. Choose Map to Sphere and check Transparent background, and Create new image (unless you want the sphere to appear over your grid). 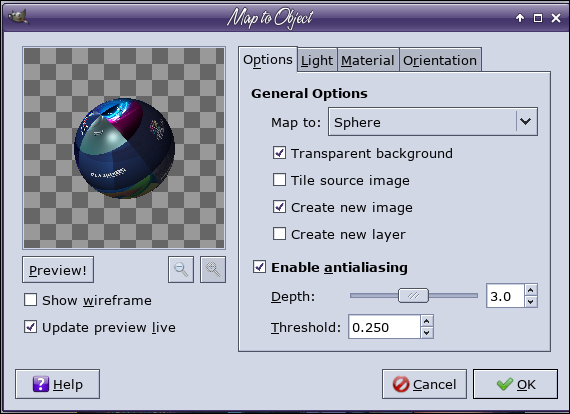 Click on the Orientation tab and choose the following rotations: 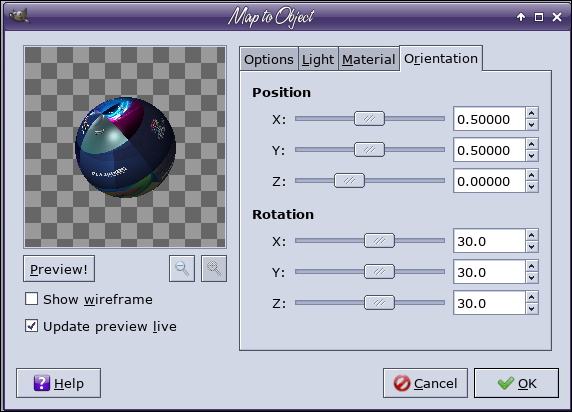 The result: 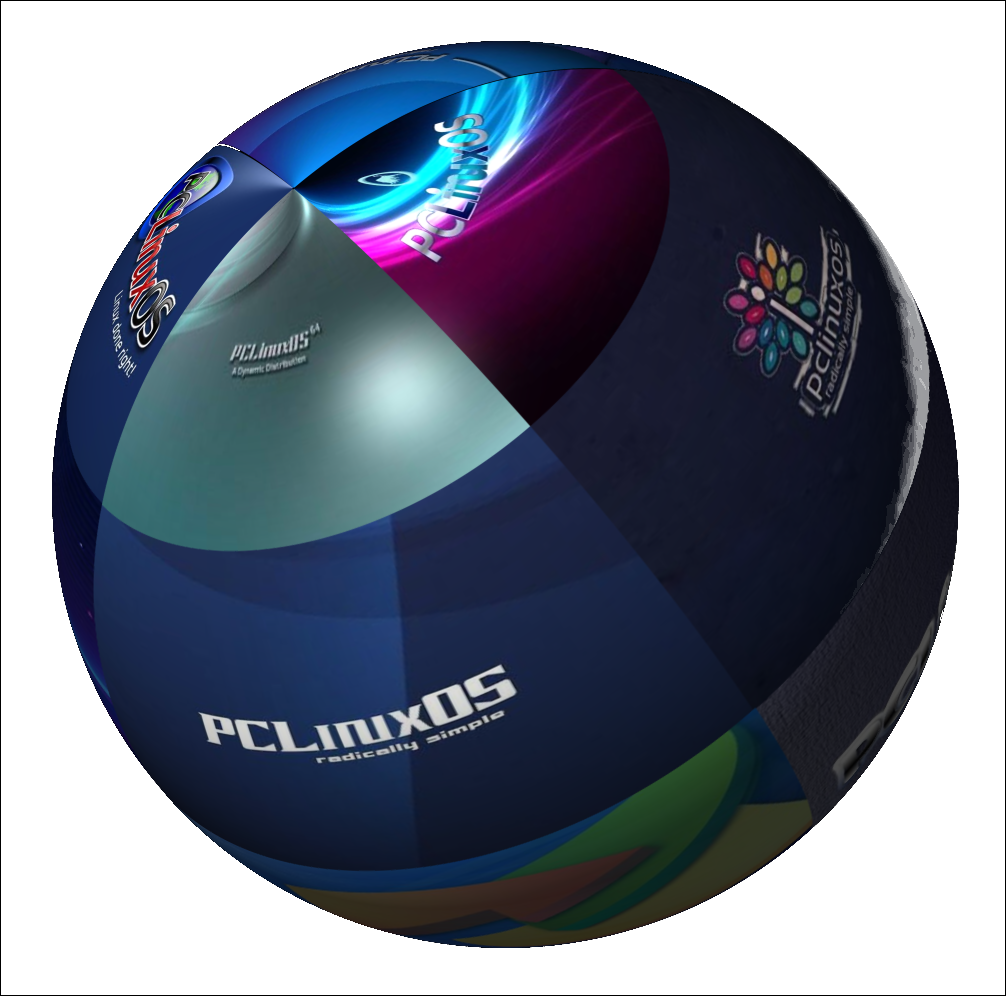 You'll see different parts of the sphere if you change your rotation settings. Our other variation is a spiral. Create a line of black stripes. 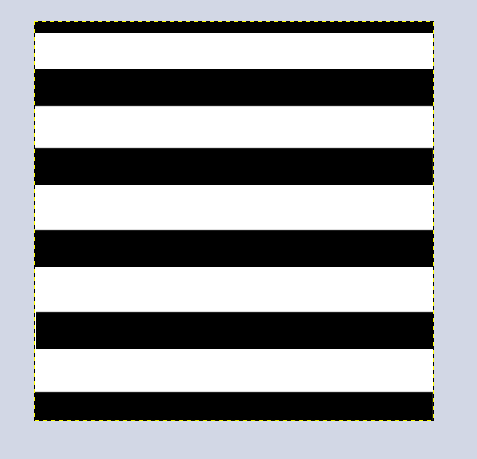 Select the black, then click Select > Grow and grow the selection by 15 px. Create a new layer and choose the Gradient tool, then fill the selection (in the new layer) with a brushed aluminum gradient. Then move it to the bottom and merge the layers. Click Colors > Color to Alpha and choose white. Choose a pattern to fill the black (I used a water pattern) and use Bucket fill. 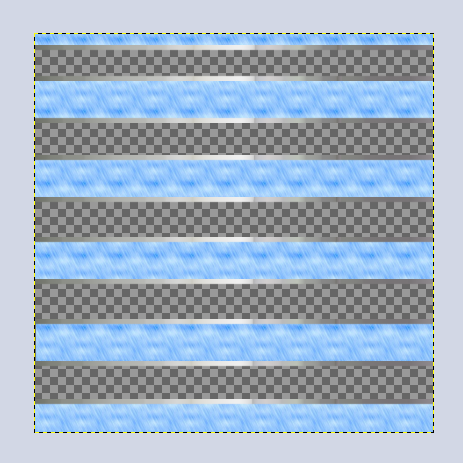 Now choose the rotate tool, and rotate your stripes -10 degrees. 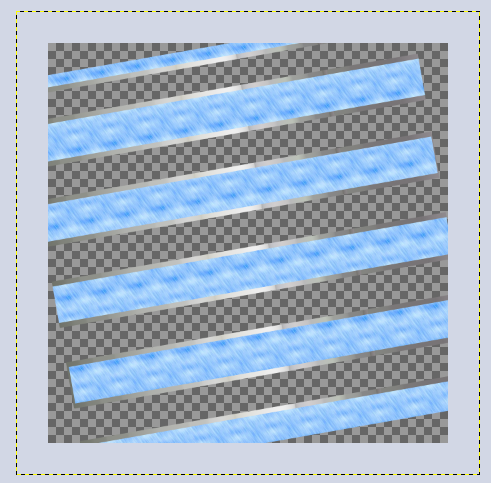 Crop it down so you have stripes clear to the edge all around.
Save your work. Now click on Filters > Map > Map Object, and choose the same settings as before. 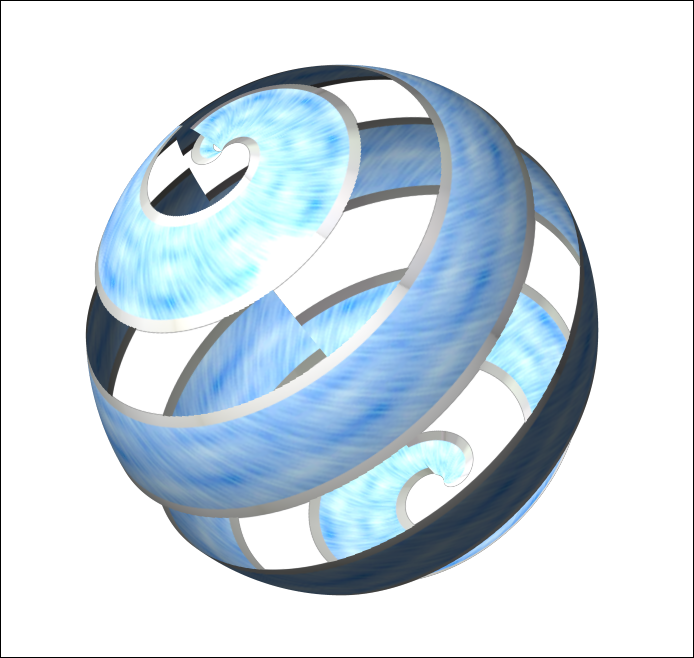 With a bit of planning, you can make the stripe continuous. If you don't rotate your stripes, it comes out nice anyway. 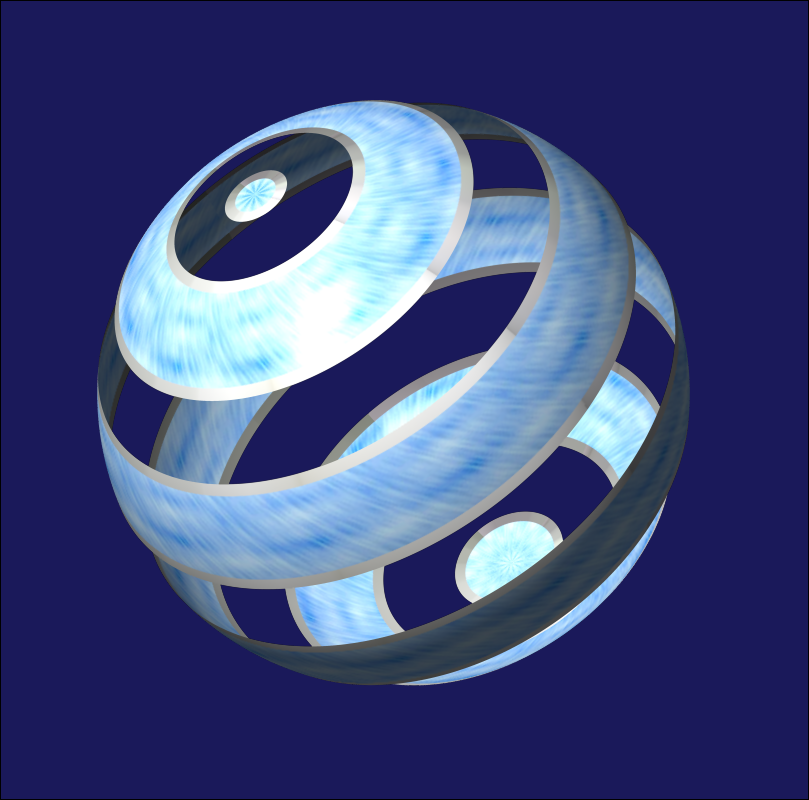 Let your mind wander. The possibilities are endless! |