| Previous
Page |
PCLinuxOS
Magazine |
PCLinuxOS |
Article List |
Disclaimer |
Next Page |
Sharing A USB Drive From Your Wi-Fi Router |
|
by David Pardue (kalwisti) Background Many modern routers have a built-in USB port which allows you to easily share an attached drive with all of the computers on your home network -- wired or via Wi-Fi. I attempted to set this up with our Wi-Fi router (a TP-Link AC4000) and an old Seagate Barracuda HD (80 GB) that was already in a 3.5" external drive enclosure. You may use any type of drive with a USB connection -- external HDD or SSD, portable HD or even a high-capacity flash drive. 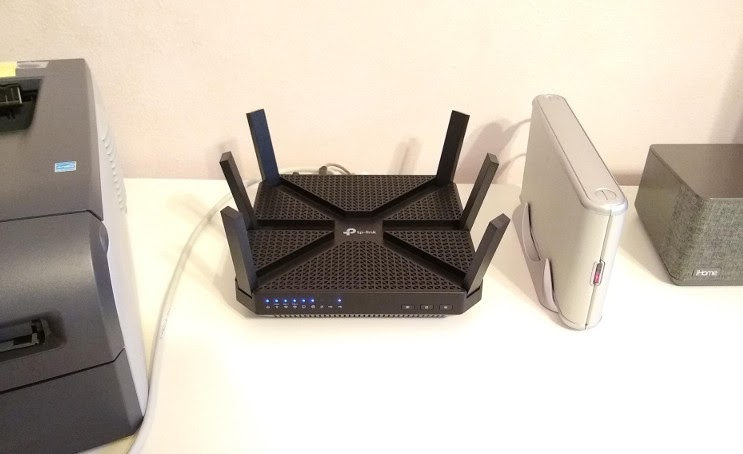 Caveat: Although my experiment succeeded, I am not a network guru by any stretch of the imagination, so the procedure outlined here might not be the most efficient or technically correct. However, you might find this write-up helpful if you are trying to accomplish this for the first time. I hope it will save you some time and effort. You should have realistic expectations about the performance of this "home cloud." A router's primary function is to host your network, so it will not be as capable as a dedicated NAS (Network-Attached Storage) server -- such as those made by Synology, QNAP, or Western Digital -- costing hundreds of dollars. Nevertheless, if you only want some casual network storage larger than the limits imposed by free services such as Dropbox, Box, Google Drive or even PCLOS-Cloud1, the approach outlined here is an inexpensive way to get more use out of your Wi-Fi router. Another advantage of this approach is that data transmission occurs only within your local network; no traffic is sent out to the internet unless you tell it to do so. Preparing the Hard Drive The TP-Link AC4000 has a USB port which can share resources on a USB device via FTP and Samba. It supports the NTFS, FAT32, exFat and HFS+ file systems; no native Linux file systems are supported, unfortunately. I opted to use NTFS, so my first step was to format the Seagate HD using GParted. I created a single large partition for data storage with ntfs as its file system. Next, plug your drive into the router's USB port and power it up. Enable USB Drive Sharing You will need administrative access to your router in order to activate USB drive sharing; this feature might also be referred to as Drive storage, File sharing or something similar. From any computer on your network, open a browser and navigate to your router's IP address. You can often find this information on the back of the router, printed on a reference card that came packed in the original box, in the device's manual, or online (the manufacturer's website). In most cases, the IP address will look like 192.168.X.X. This particular TP-Link Wi-Fi router is managed/accessed from the address http://tplinkwifi.net. (The address http://192.168.0.1 also works). When the page loads, you must log in with your username and password. If you have never changed your router's default credentials, there is a good chance that the username is admin, and the password is admin -- as this convention is used by several manufacturers (TP-Link, Netgear, Linksys, etc.). The web-based management page of my AC4000 looks like this:  After logging in, the configuration section for USB sharing is shown below. The router's management software auto-assigned the name volume1 (G:) to the Seagate Barracuda HD: 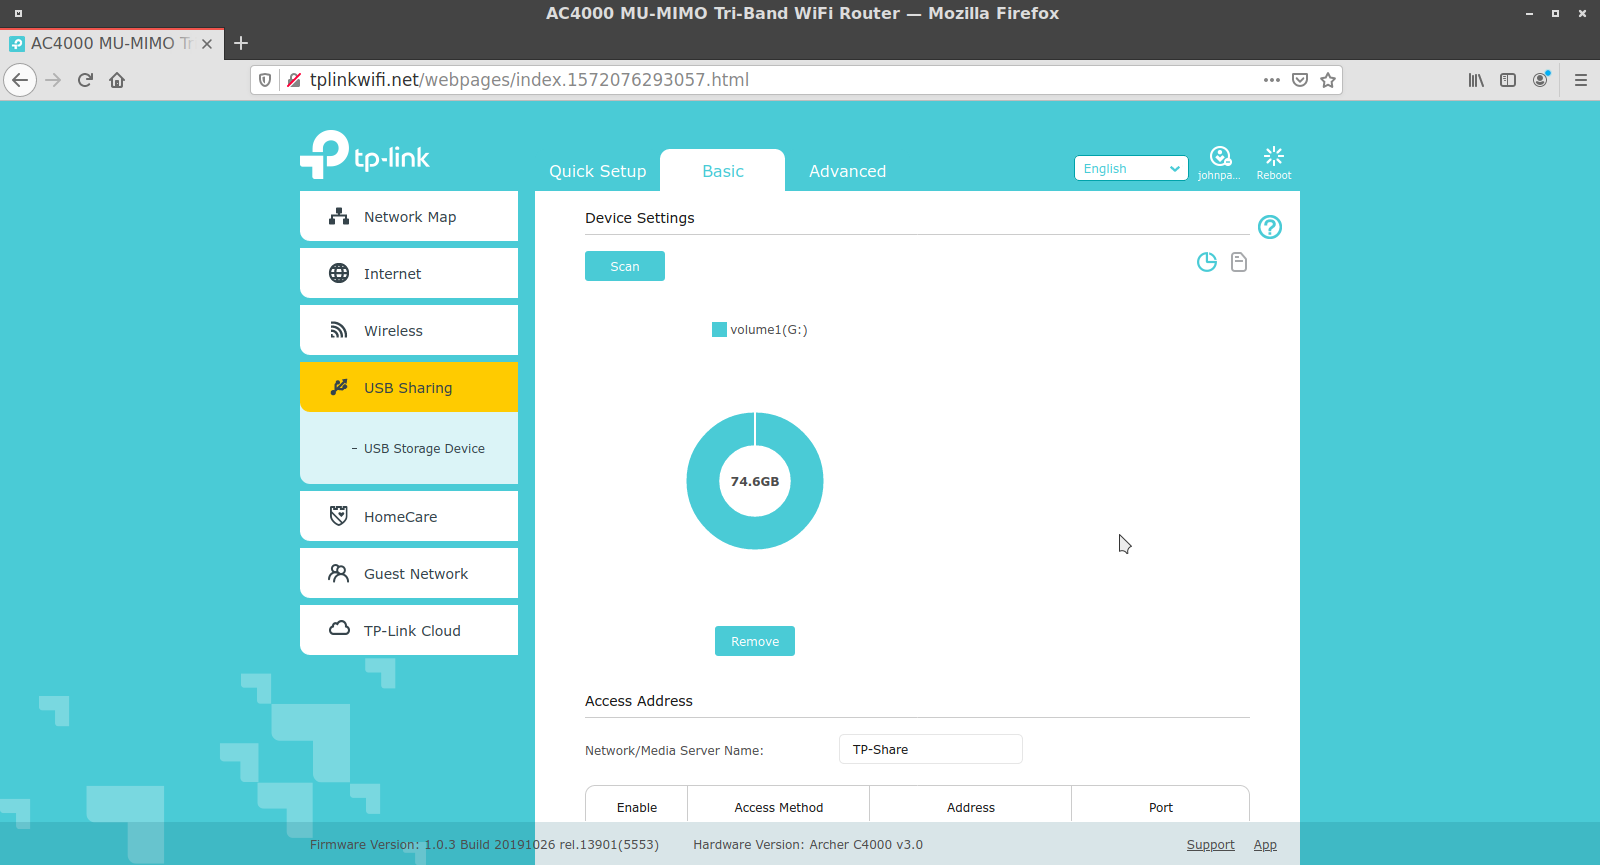 The software assigns the default name TP-Share to the external HD (although you may change its name if desired). You can also see the server's SMB and FTP addresses. 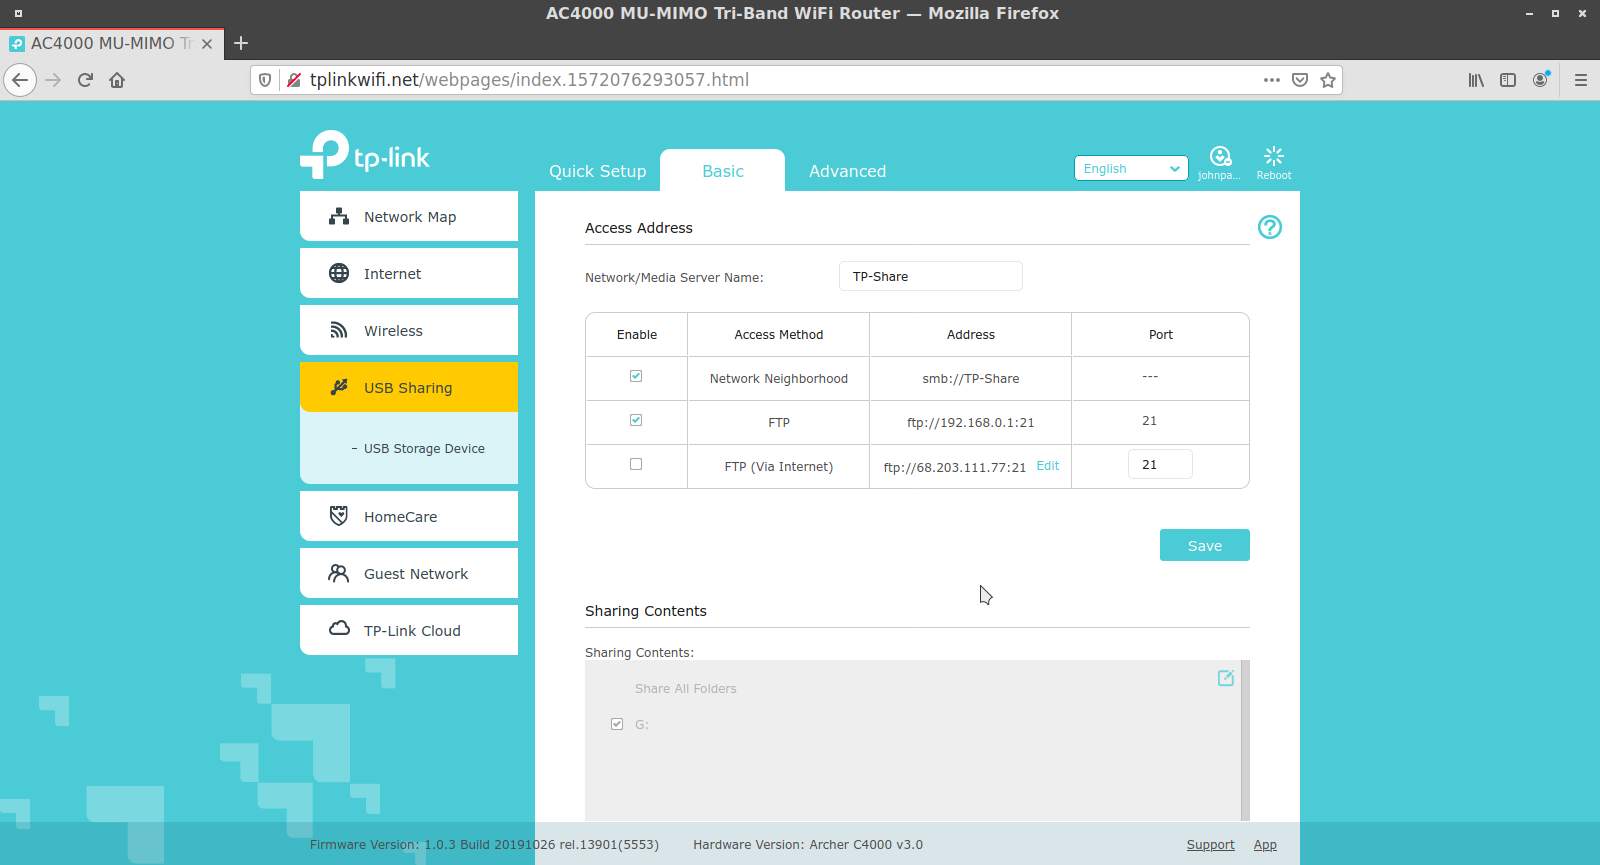 Although sharing the drive can be customized -- by specifying that only certain folders on the HD may be shared -- I chose to allow sharing the entire disk's content. The router allows you to set up authentication for your USB device, so that network clients will be required to enter a username and password when accessing the USB disk. However, after some discussion, we decided to turn off authentication and allow anonymous connections. Only three of us will be using this network storage, and we are all suffering from password fatigue. 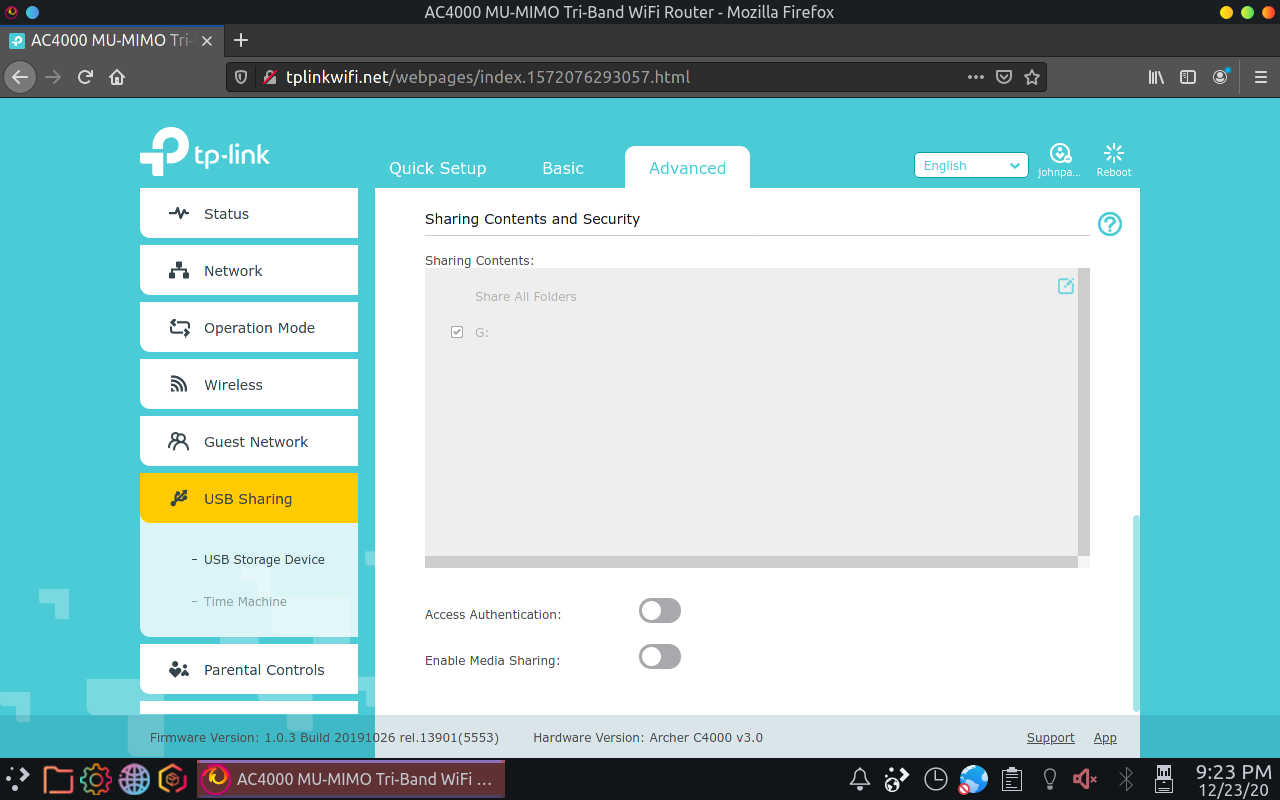 Access Drive/Create a Network Share (in Windows) If you have a Windows PC in your network, you probably want to make the USB disk accessible to Windows and map it as a Network Drive (if you plan on leaving it attached). We configured this from my son's desktop machine, since he uses Windows 10 for all his college coursework. 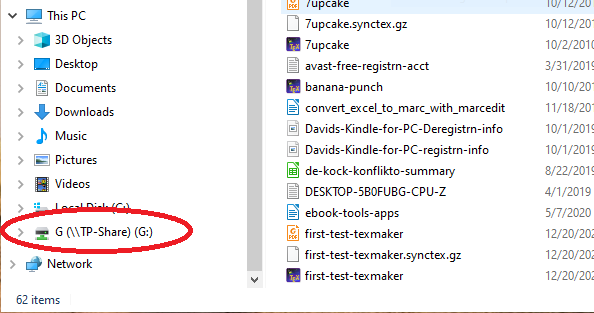 I will not cover this process in detail because you can consult this clear tutorial: https://www.groovypost.com/howto/share-usb-drive-wi-fi-router/ Burgess, Brian. "How to Share a USB Drive from Your Wi-Fi Router." groovyPost 26 July 2019. Package Check To make sure that everything works correctly, check whether the packages below are installed on your system. (In my case, they were already present).
Although Samba is more feature-rich, in this article I will focus on FTP because it is more straightforward to set up. FTP is OS-agnostic; it works regardless of which OS you prefer. The protocol was developed in the 1970s by Abhay Bhushan while he was a graduate student at M.I.T. (Mr. Bhushan is also credited with authoring early versions of e-mail protocols). I will discuss four PCLinuxOS DE's in order of my familiarity with them. I have primarily been using the MATE desktop since around 2016; prior to that, I ran Xfce for several years. My first contact with Linux involved KDE 3.5, so exploring Trinity is a fun blast from the past. Although I used KDE 4, I have been away from KDE long enough that Plasma 5 makes me feel somewhat lost at sea. MATE DE FTP With FileZilla FileZilla is the most well-known and popular FTP client today. It supports all the major operating systems -- Linux, Windows, macOS -- and has built-in security features. The program's interface is fairly intuitive; however, I included a few tips below in case it has been a while since you have used FileZilla. FileZilla's default protocol is FTP, so you do not need to type "ftp:// " prior to the server's IP address (Host). The default port for FTP is 21, so you may omit it, if you wish. In the screenshot below, I included them out of habit. 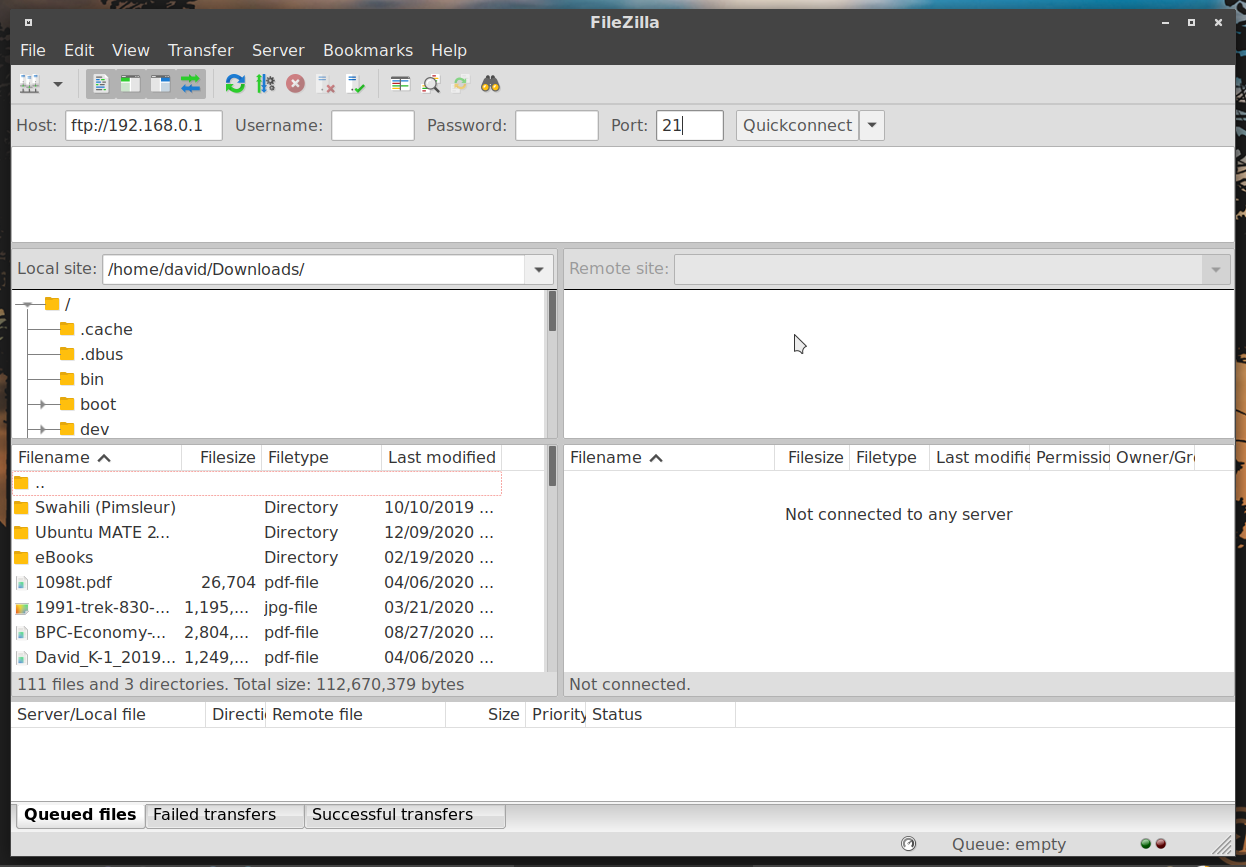 Since I disabled access authentication for the USB disk, FileZilla gives an "Insecure FTP connection" warning message when I try to connect to the server. To dismiss the notification dialog, you can select "Always allow insecure plain FTP for this server." 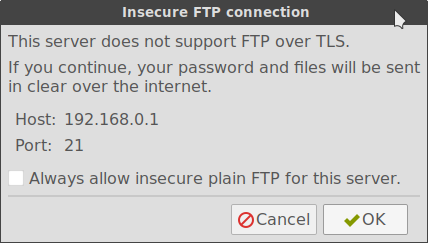 Once FileZilla connects, you will see the USB disk's contents displayed in the Remote site panel. 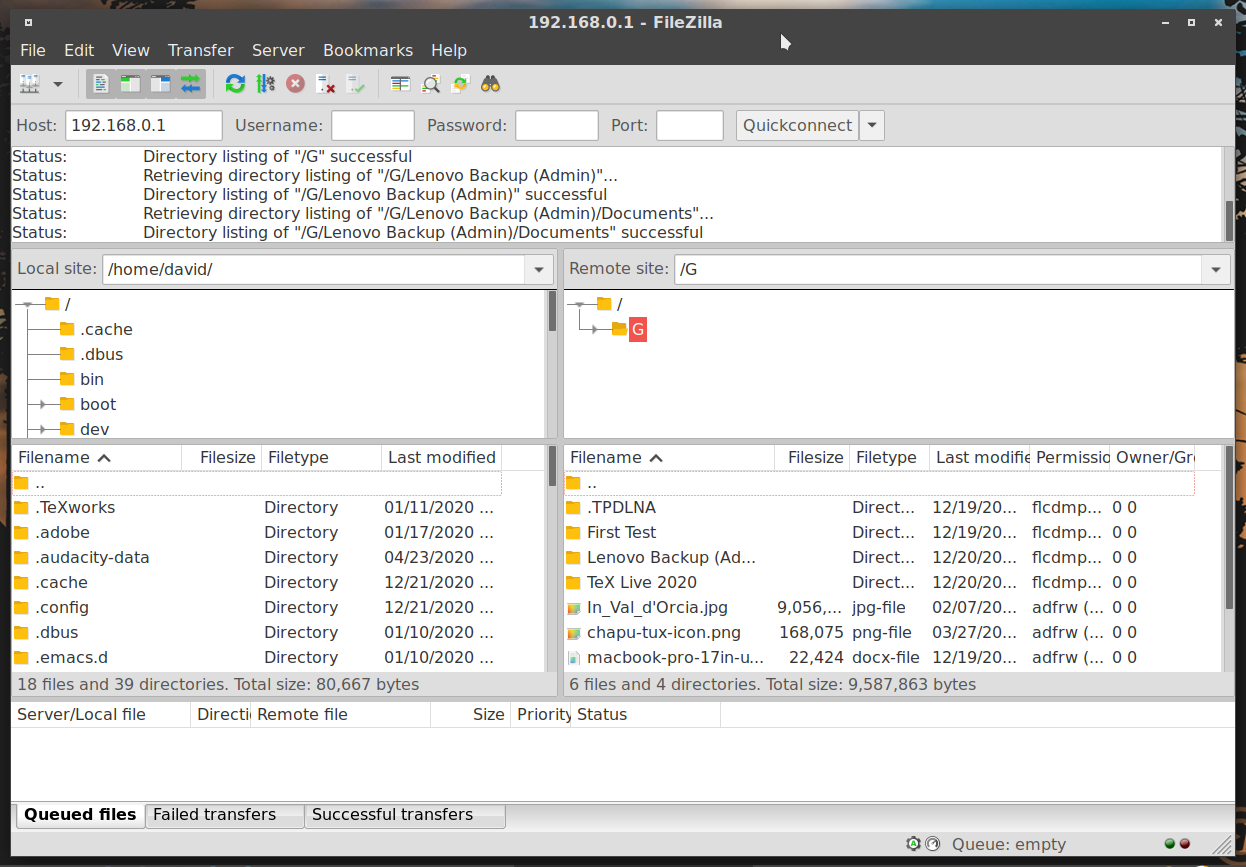 To upload a file (or folder) from your computer to the remote USB drive, right-click on the source file and choose Upload from the menu. FileZilla will notify you when it has been successfully transferred. 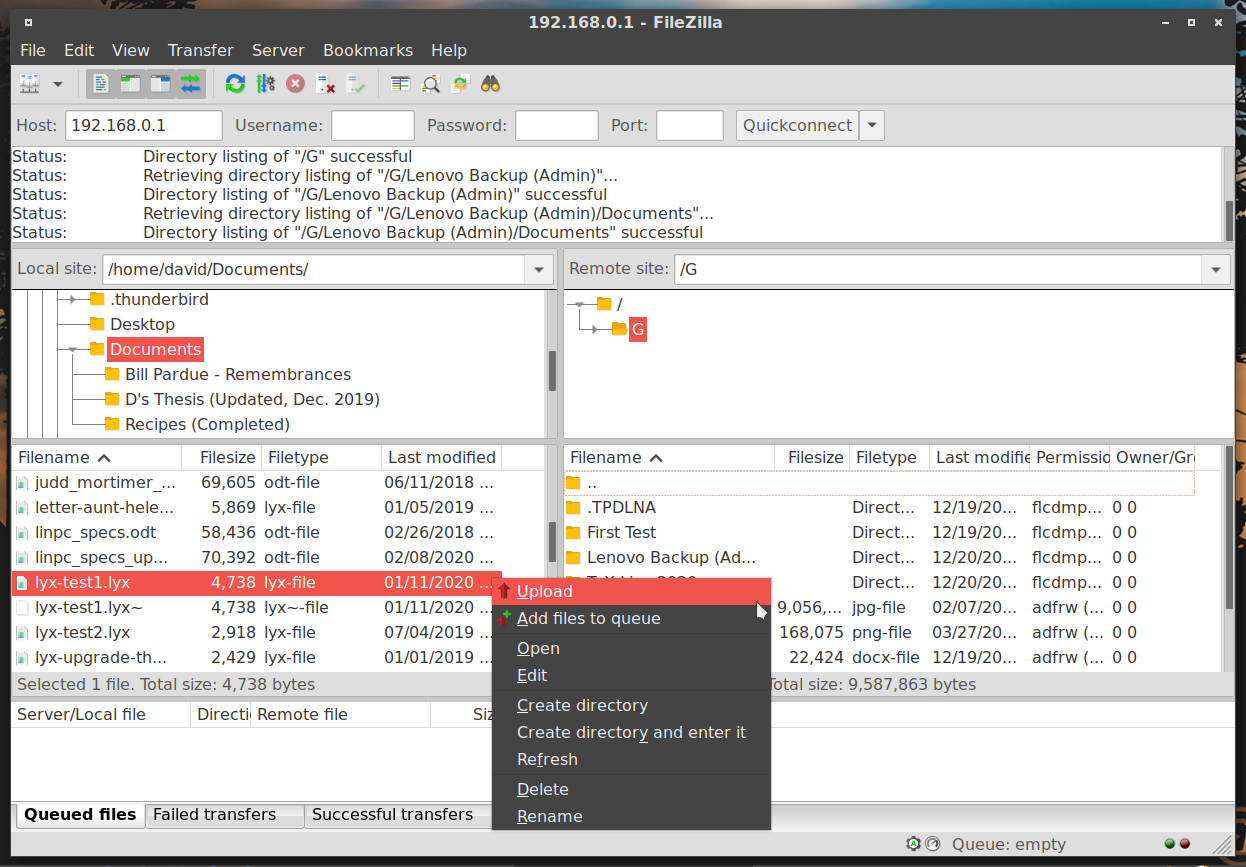 To download a file (or folder) from the FTP server to your computer, right-click on the source file and select Download from the menu. 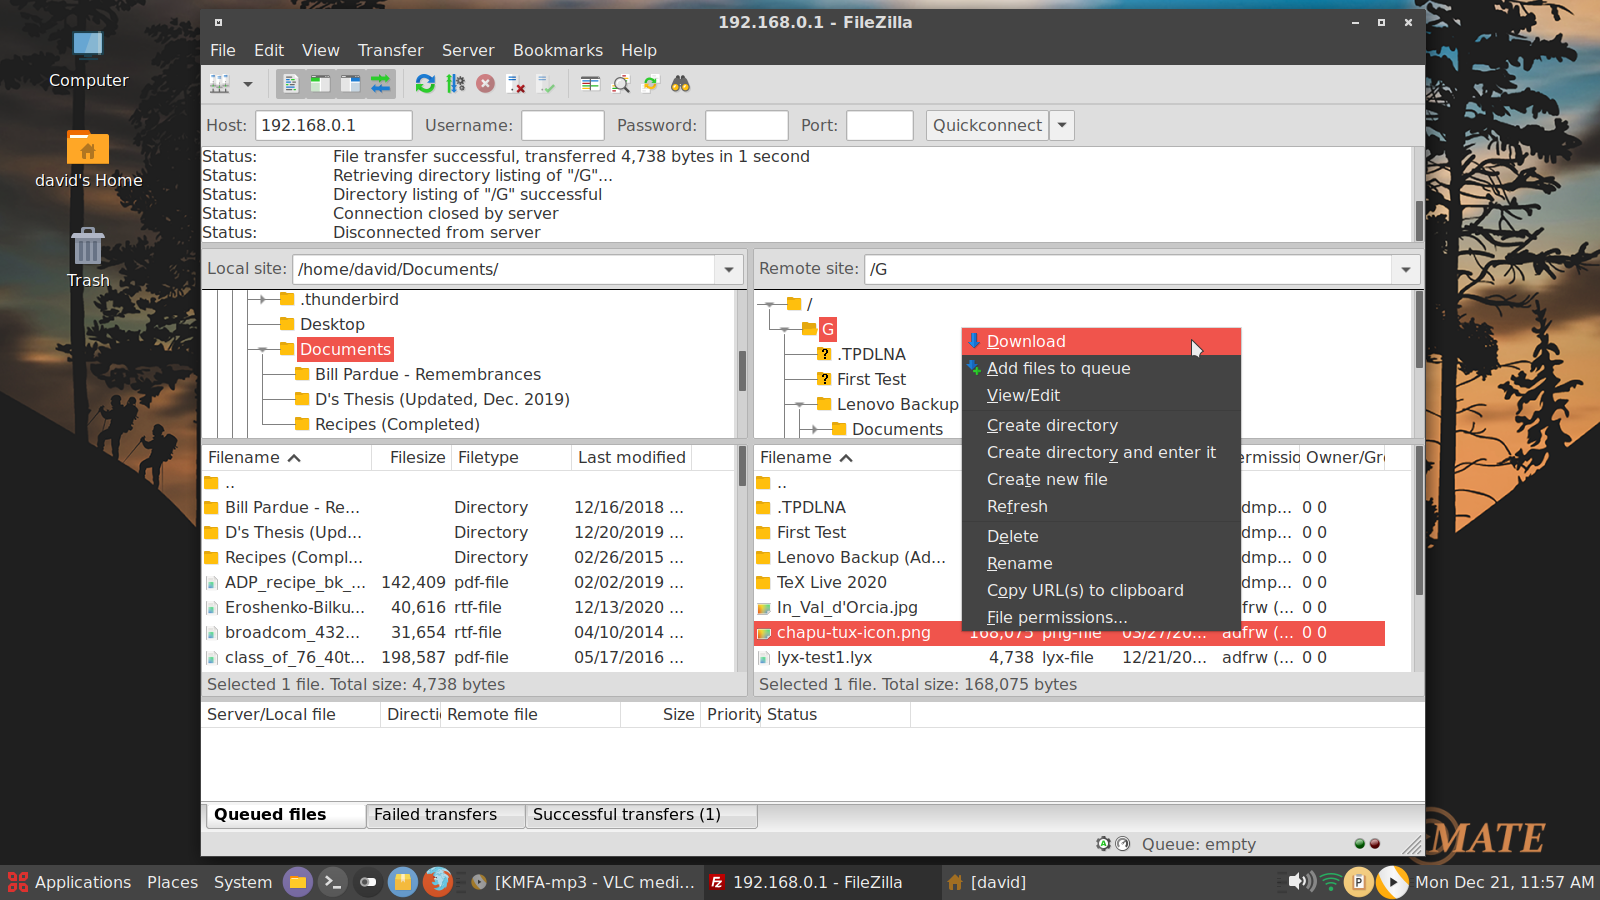 To finish your session and disconnect from the FTP server, click on the 'offline computer' icon in the toolbar. 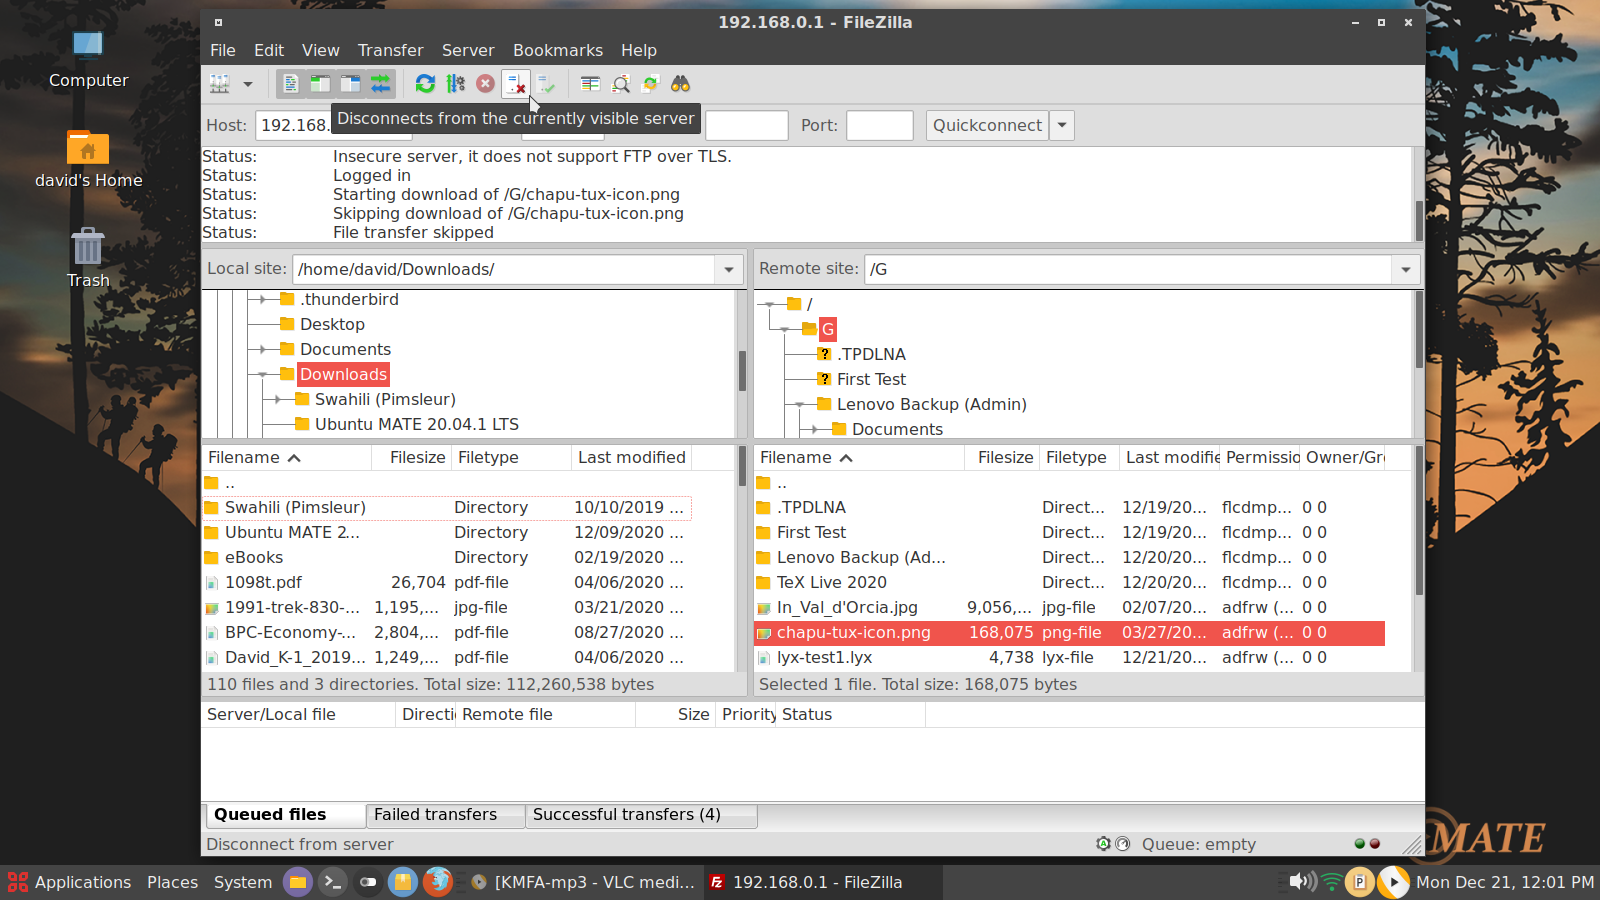 FileZilla has a neat tool called Site Manager (under the File menu > Site Manager) that allows you to store information about your previous connections. You can use it to directly connect to your FTP server, without having to retype the login details. 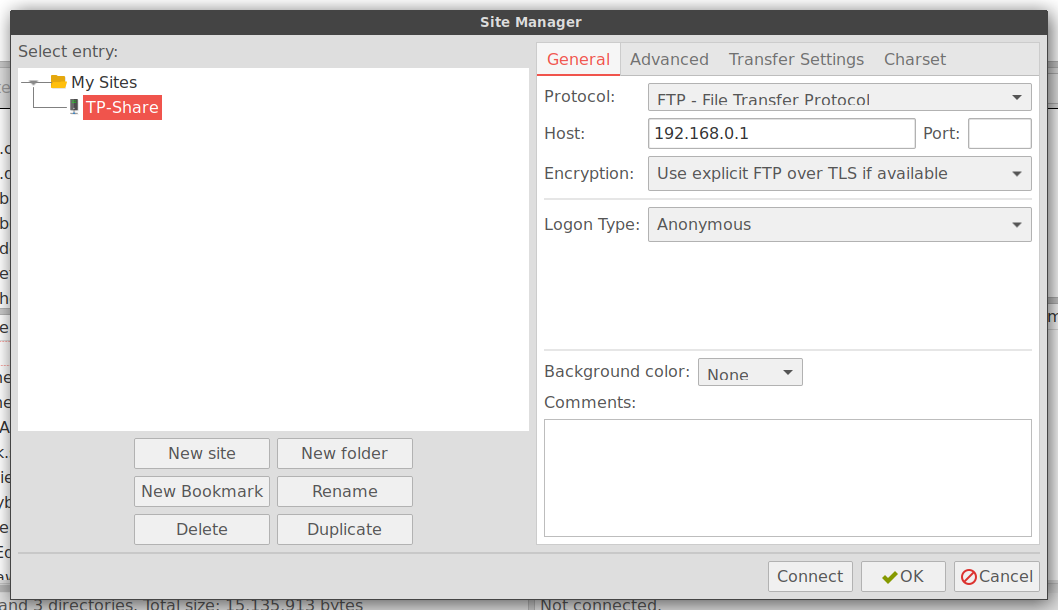 Additional information on Site Manager is available from FileZilla's Wiki: https://wiki.filezilla-project.org/Site_Manager Via FTP (using Caja 1.24.0) From the Go menu > select Location. In the Location bar, press the eraser icon to delete your current path. Or, you can manually backspace to delete the path. 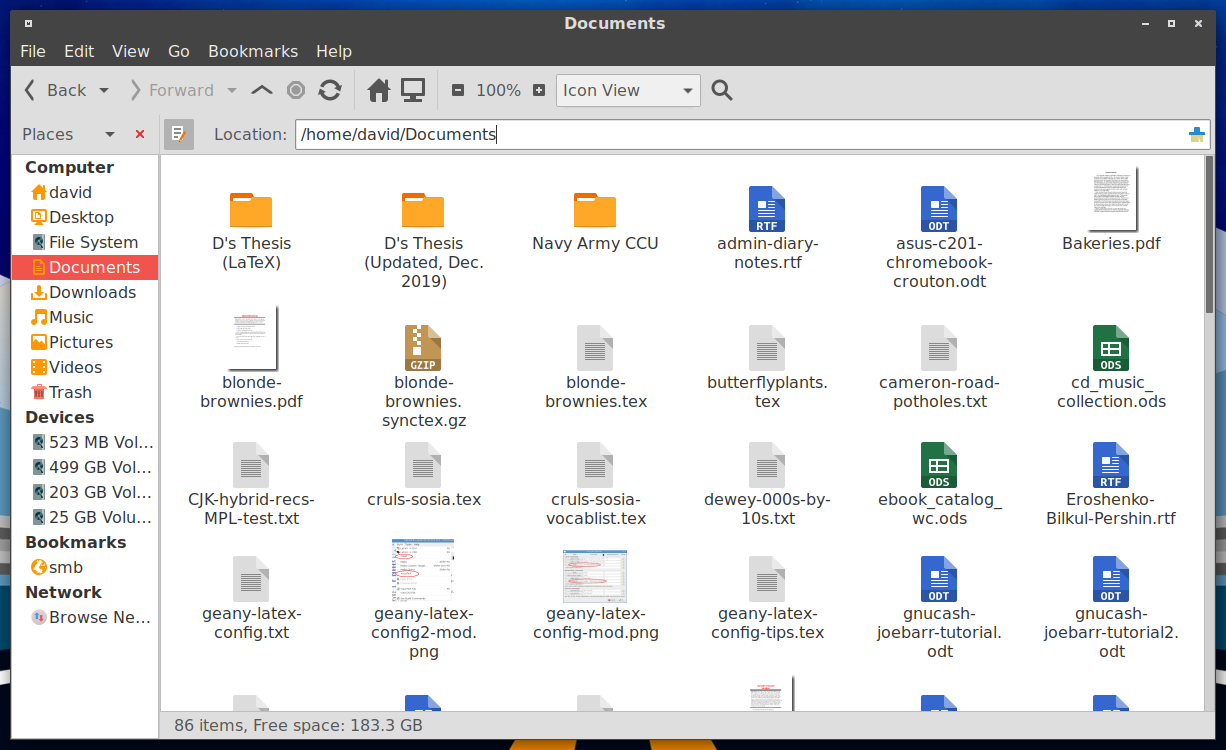 Type: ftp://192.168.0.1/G. Press Enter (or click on the blue "Go to" arrow). The "Enter password" dialog window appears. 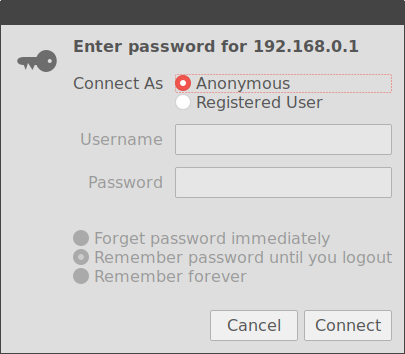 Click the Connect button. It connects to the FTP server. 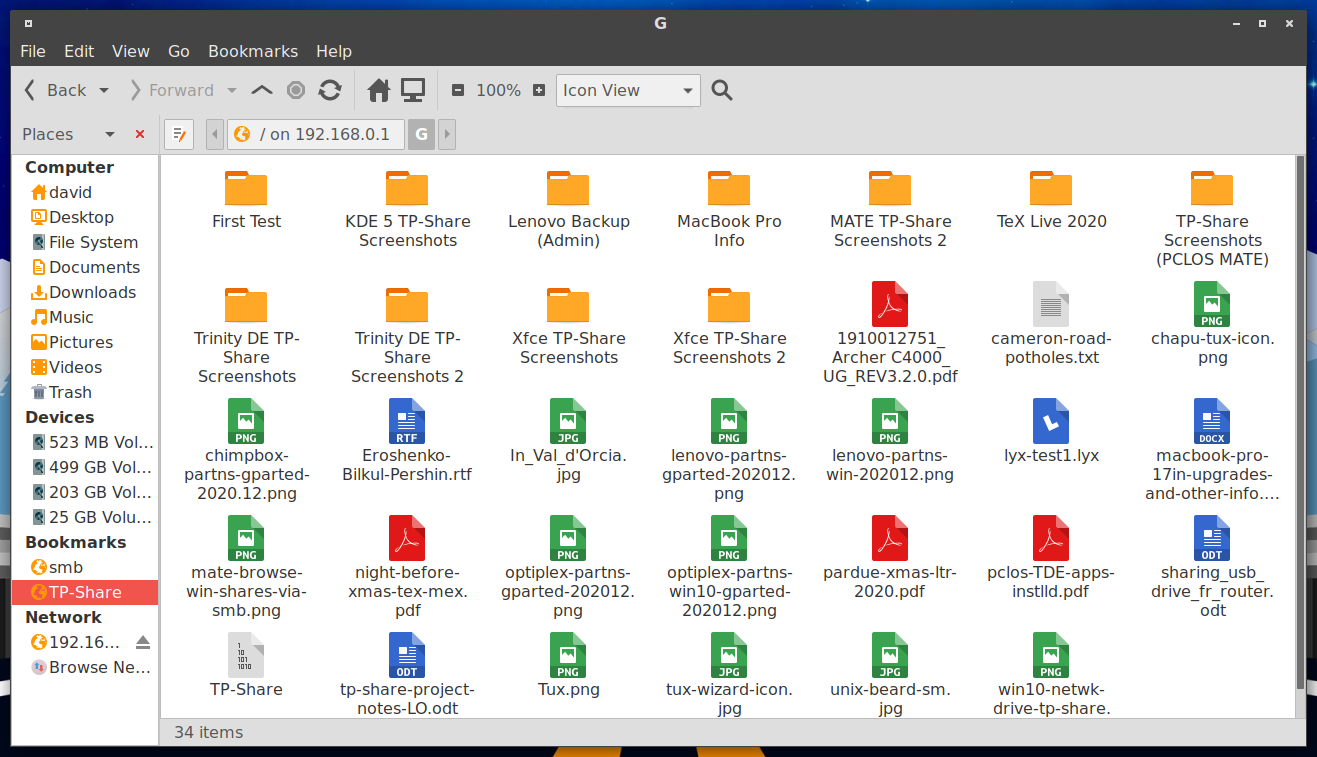 To add a bookmark, while Caja is open, choose "Add Bookmark" from the "Bookmarks" menu. Then, right-click on G under Bookmarks, and select Rename. 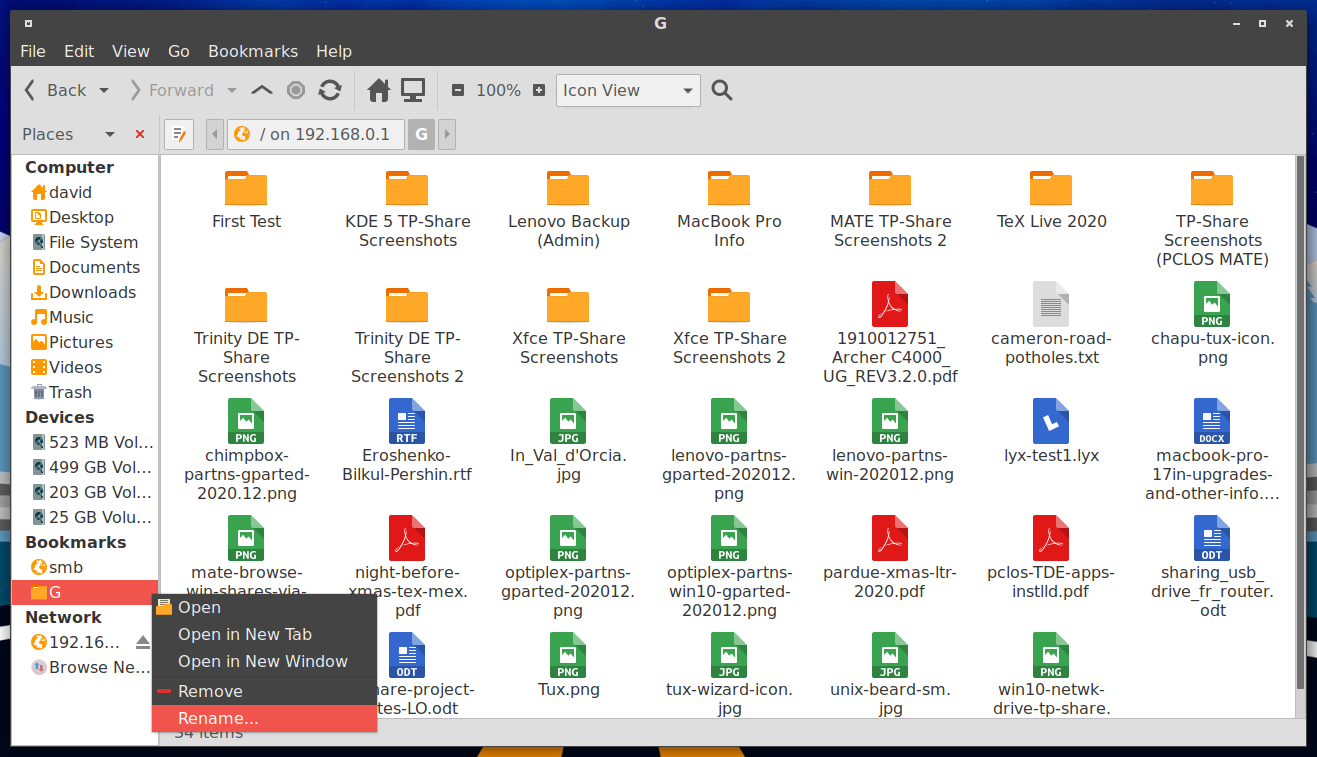 Type in the new name: TP-Share. When you open Caja next time, the bookmark is persistent. Caja has a split window option, which makes it easy to transfer files between locations. Caja developers call this feature an "Extra Pane." Activate this from the View menu > Extra Pane, or press the F3 function key. 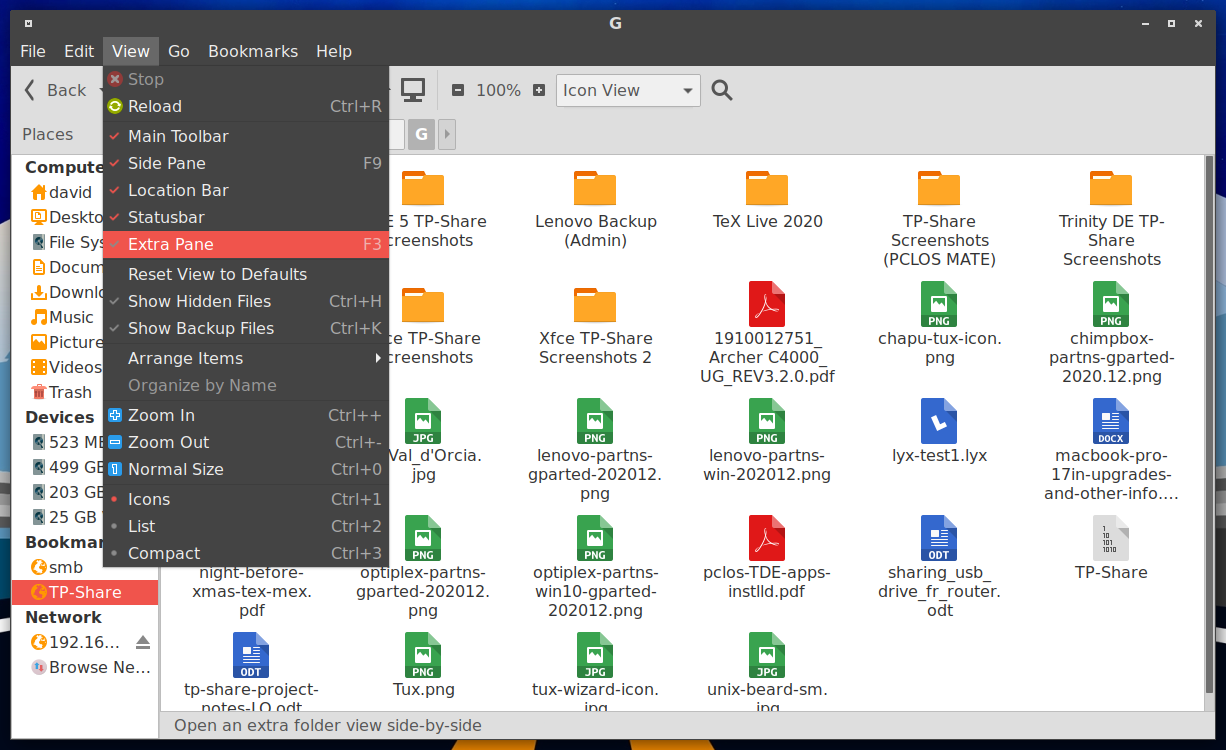 Below is a screenshot of Caja with its Extra Pane activated. 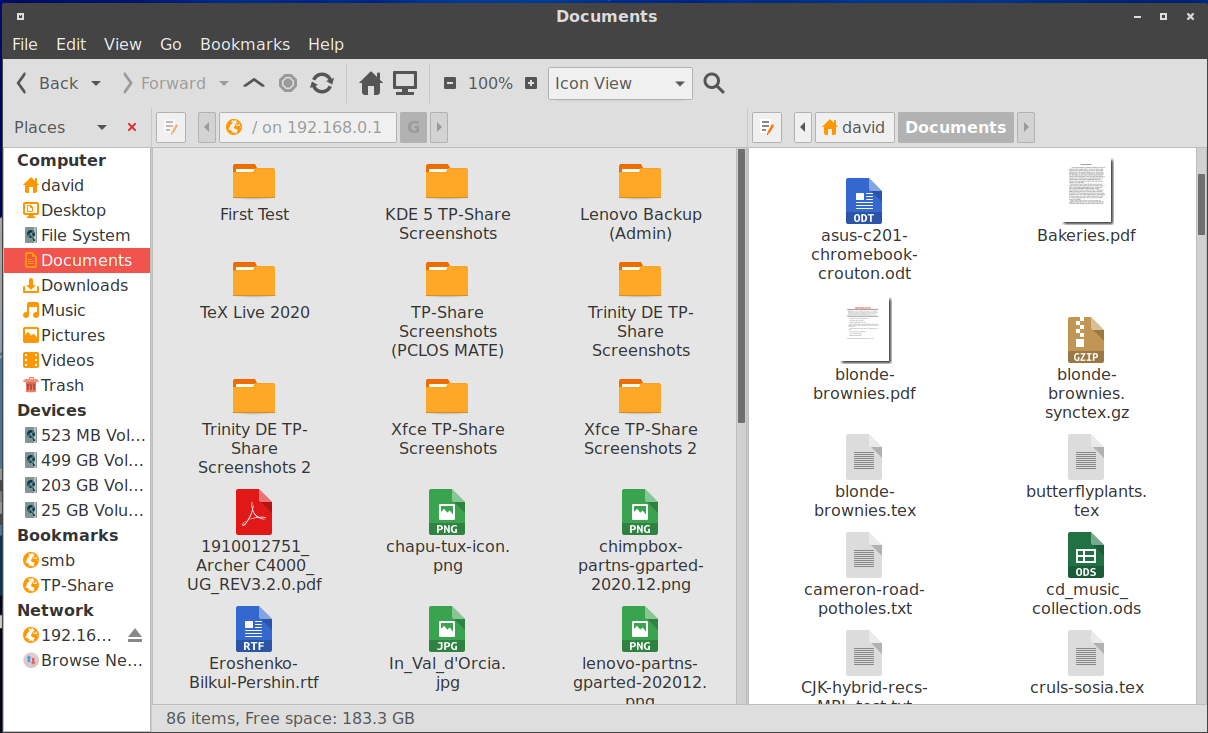 Based on my testing, I found Caja's behavior with FTP a bit flaky -- with unpredictable crashes. This surprised me, because it is typically a rock-solid file manager. I would recommend FileZilla for dependable FTP use within MATE. Xfce DE The FileZilla method works identically to what is described in the MATE section above. Via FTP (using Gigolo, with help from Thunar [1.8.15]) Gigolo is a frontend tool to easily manage connections to local and remote filesystems. The application's developer, Enrico Tröger2, playfully named it Gigolo because ... (a drumroll, please) ... "It mounts what it is told to." Based on my experience, Gigolo works well. Open Gigolo: 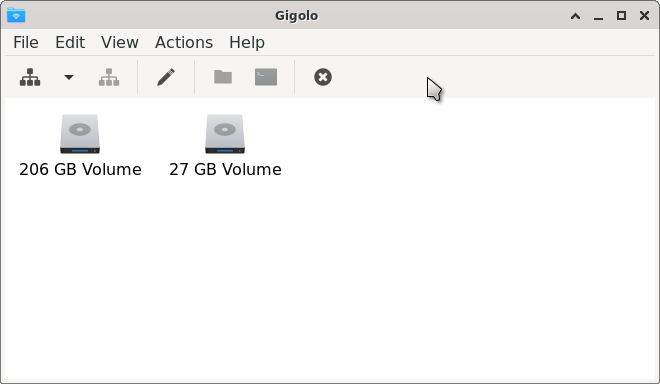 From the Actions menu > choose Connect. A "Connect to Server" dialog window opens. Fill in the information as indicated below:
FTP Then, press the Connect button. 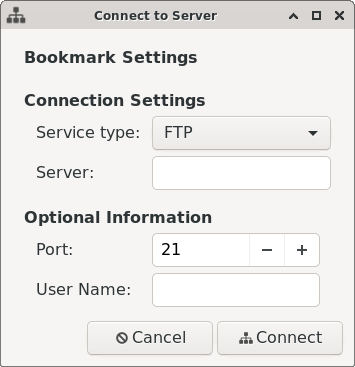 An "Enter password..." dialog window opens. Enter your username and password (if applicable). Click on the Connect button. 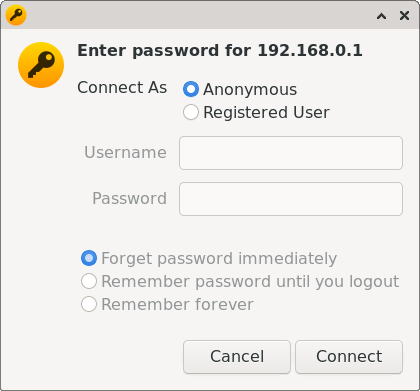 An icon for the remote system should appear. 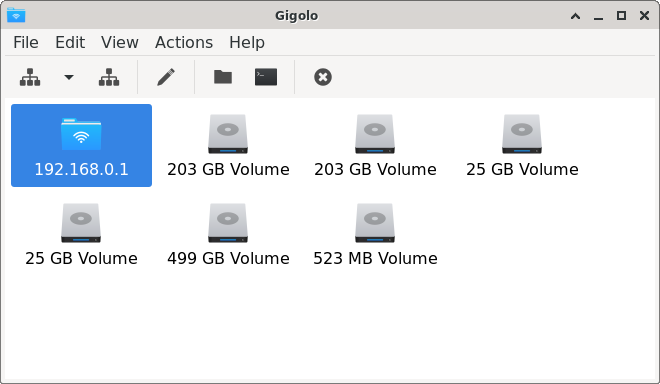 Open it. N.B.: By default, it will open in Firefox. 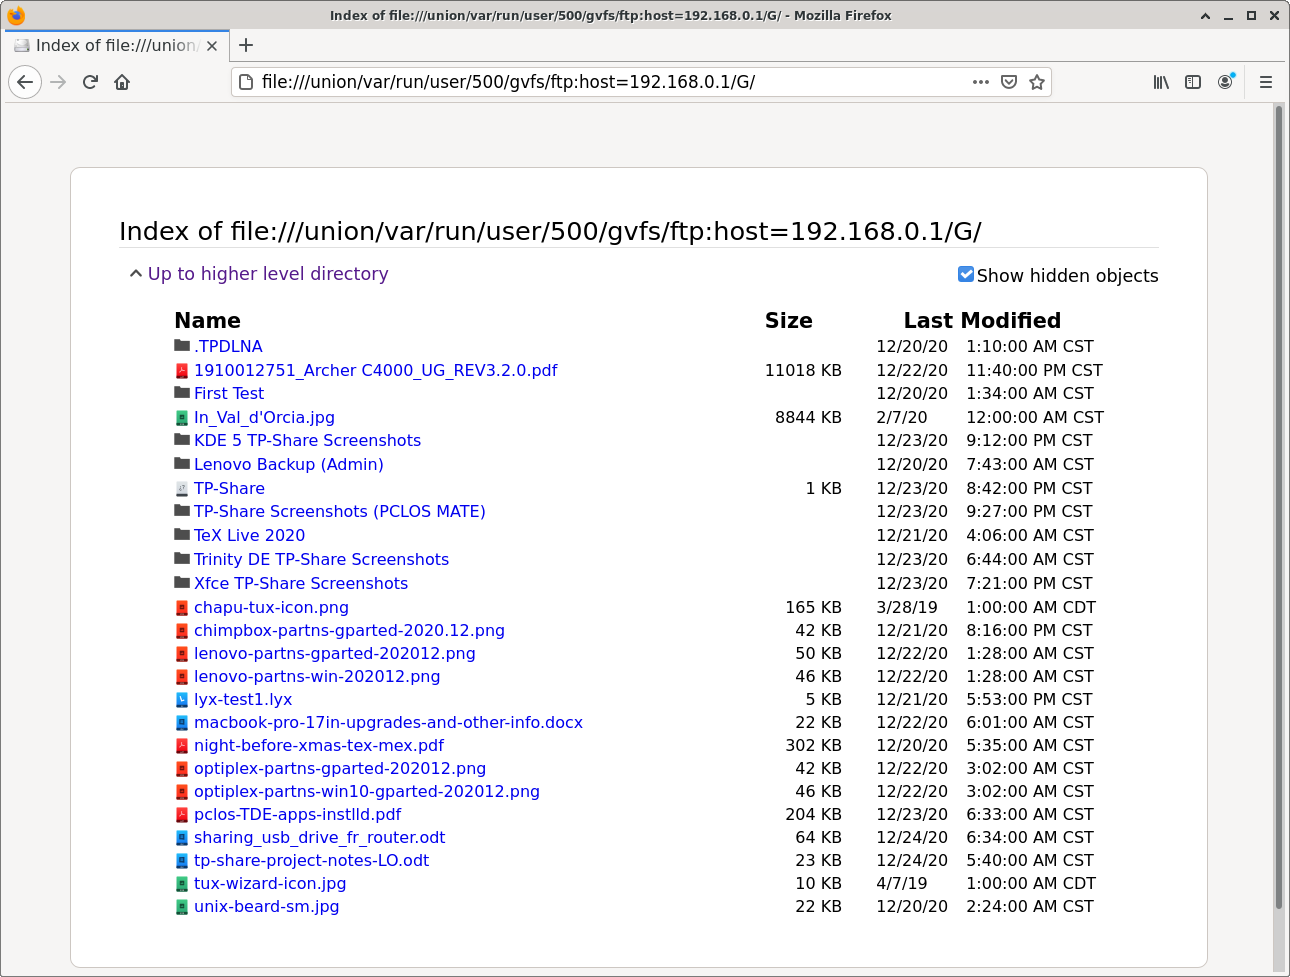 Although Firefox can browse/open FTP shares, it is not a "proper" FTP client because it does not allow you to upload files. Previously, uploading was possible using the FireFTP add-on; however, that was discontinued in 2017 as a "legacy extension." To change this behavior, select "Preferences" from the Edit menu. 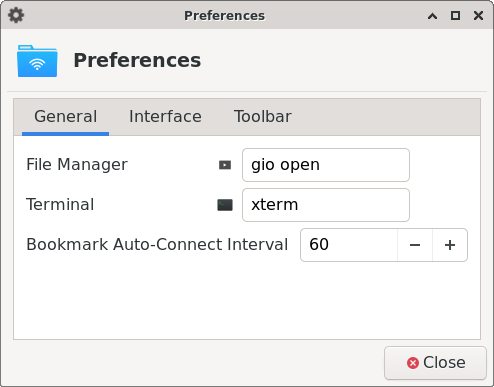 Change "gio open" to " thunar " (with a lower-case ' t '). Close Gigolo. Restart the application. The next time you connect to your FTP server, Gigolo will open it with the Thunar file manager. 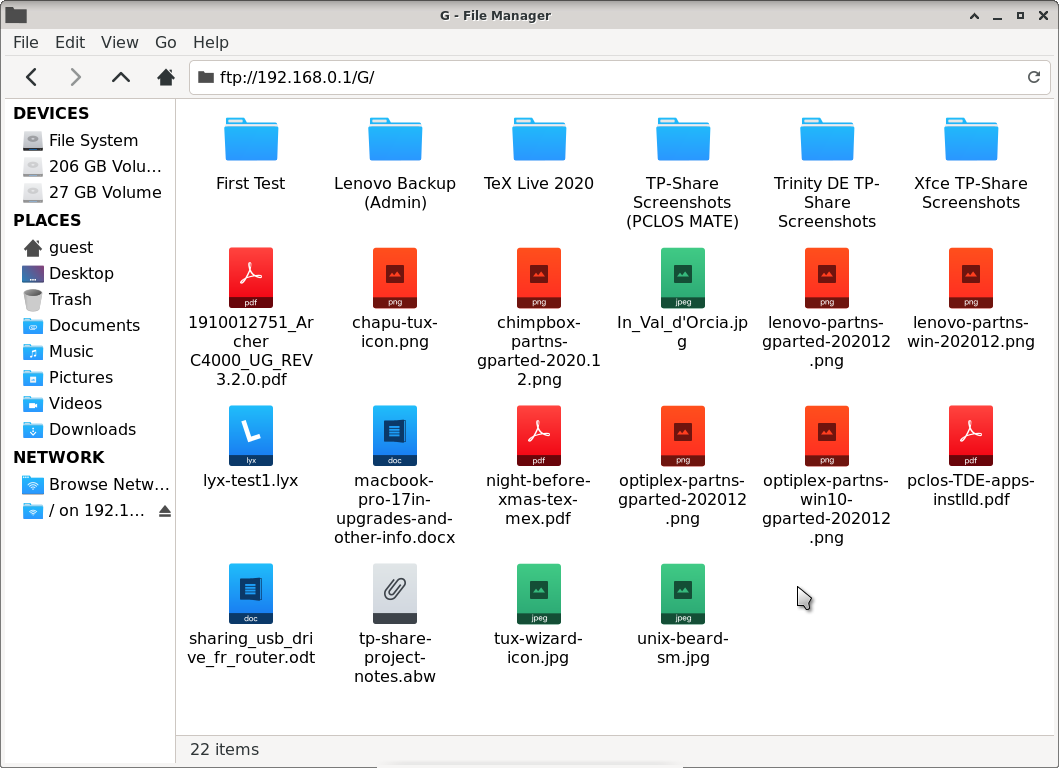 Creating a shortcut in Thunar is easy. In the left pane of the file manager, under "Network", right-click on the FTP share. Choose Create Shortcut. 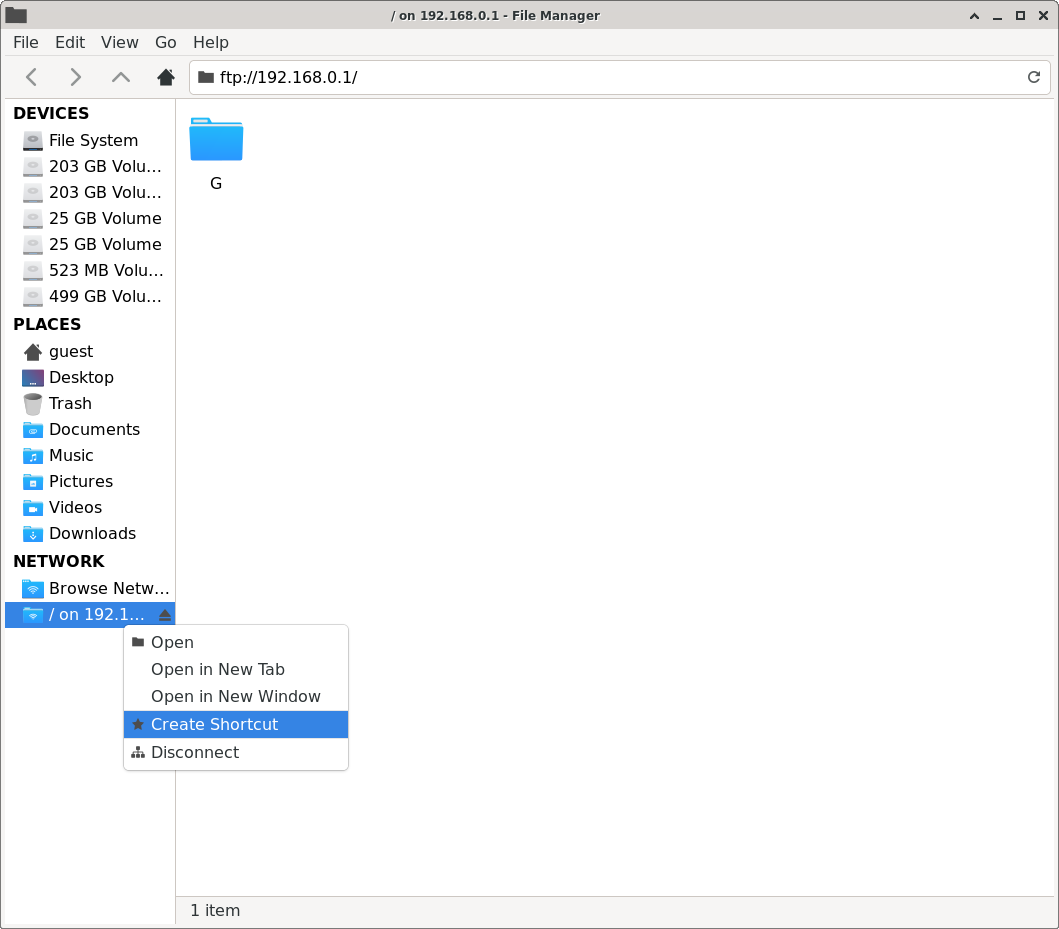 A new shortcut will appear under "Places" ( / on 192.168 ...). 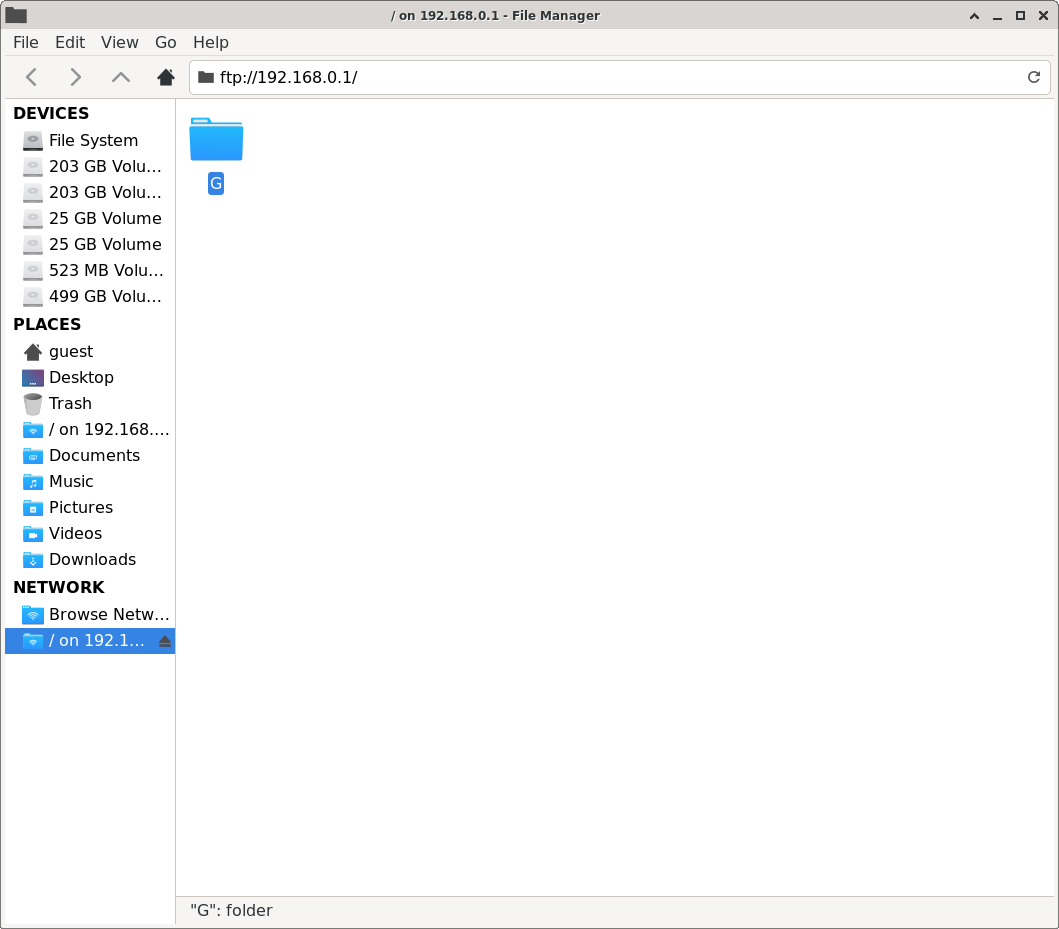 To add a bookmark in Gigolo, right-click on the Network share's icon (from within Gigolo's main window). Choose Create Bookmark. 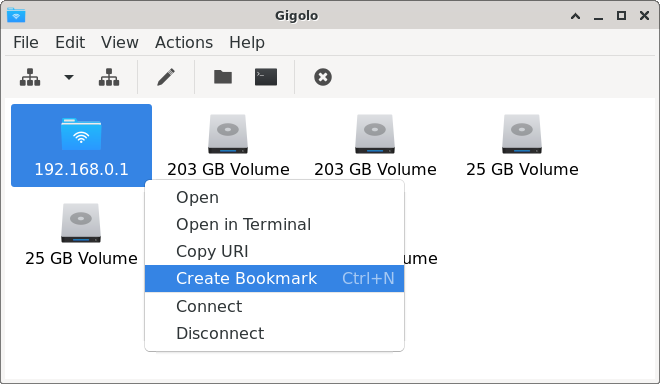 Afterwards, I renamed the bookmark "TP-Share" from within Gigolo's main window (not from within Thunar). The default "Name" is 192.168.0.1. I changed it to "TP-Share." Click the OK button. 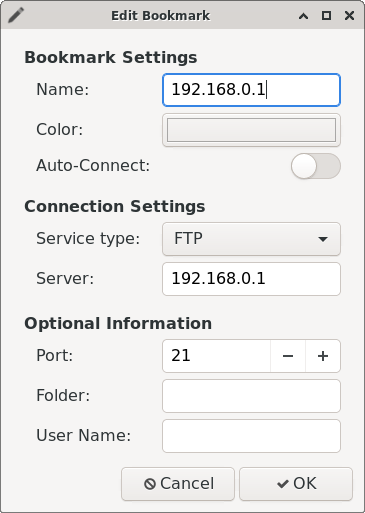 The folder's name should be changed to TP-Share. 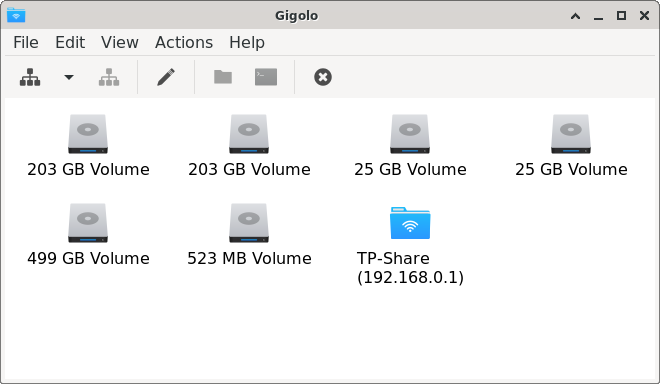 Click on the icon and the FTP share will open in Thunar. Unlike the other file managers discussed here, Thunar does not have a split-screen view. My understanding is that Thunar's developers intend for it to be a streamlined system, so that option is omitted. Nevertheless, it is possible to have two tabs open simultaneously in Thunar (by typing Ctrl+T, or activating it under the File menu > New Tab). With two tabs side by side, it is not too burdensome to copy files between the chosen locations. 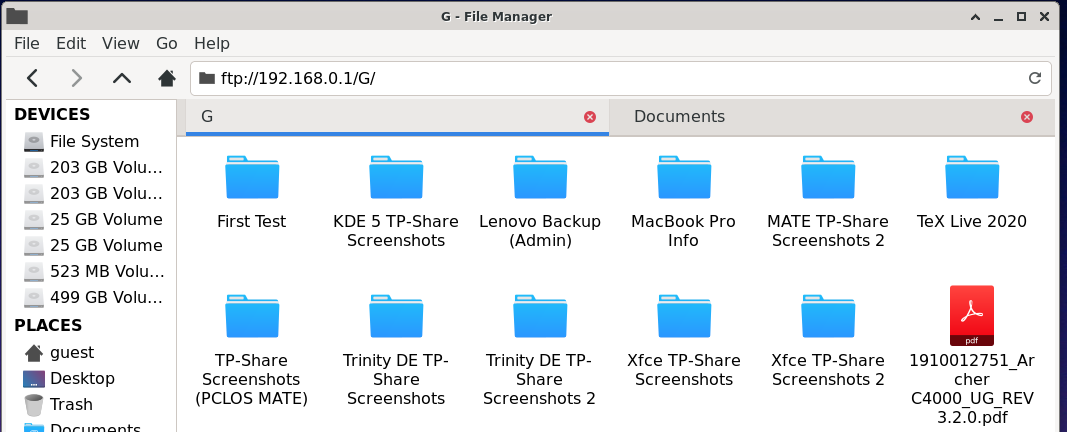 Trinity DE The FileZilla method works identically to what is described in the MATE section above. Via FTP (using Konqueror [R.14.0.9]) The venerable Konqueror -- Web browser and Swiss Army knife for any kind of file previewing -- is also a decent FTP client. Here are instructions for configuring it. On your desktop, you will see a My Network Places icon.  Open it. Next, open Add a Network Folder. 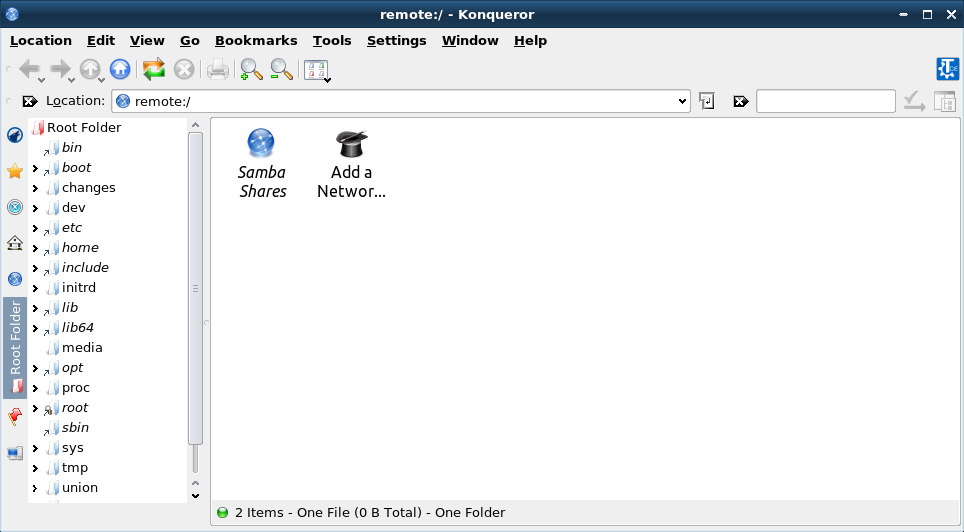 The Network Folder Wizard starts. At this screen, choose FTP, and then click on the Next button. 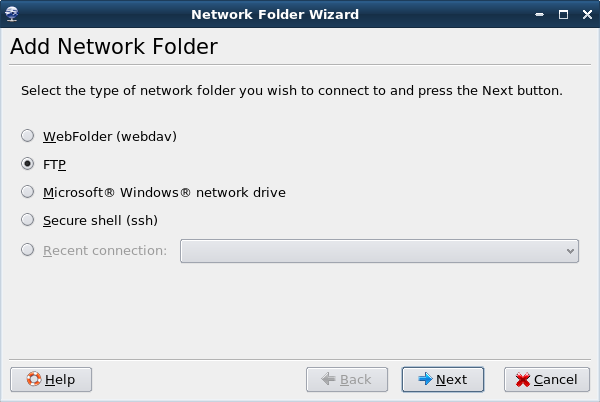 A Network Folder Information dialog window appears. By default, it is mostly blank. 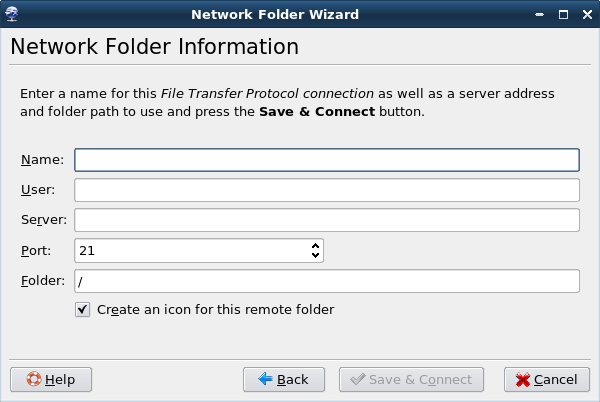 I filled in the information as follows:
Name: TP-Share Check/select Create an icon for this remote folder. 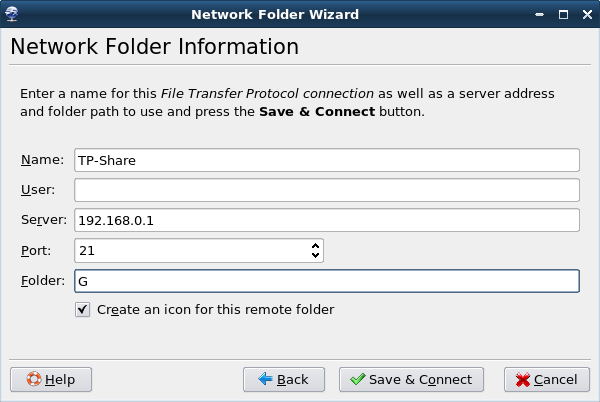 Press the Save & Connect button. An icon was added for: TP-Share (in My Network Places folder).  The link is persistent, so double-clicking on it will open TP-Share. 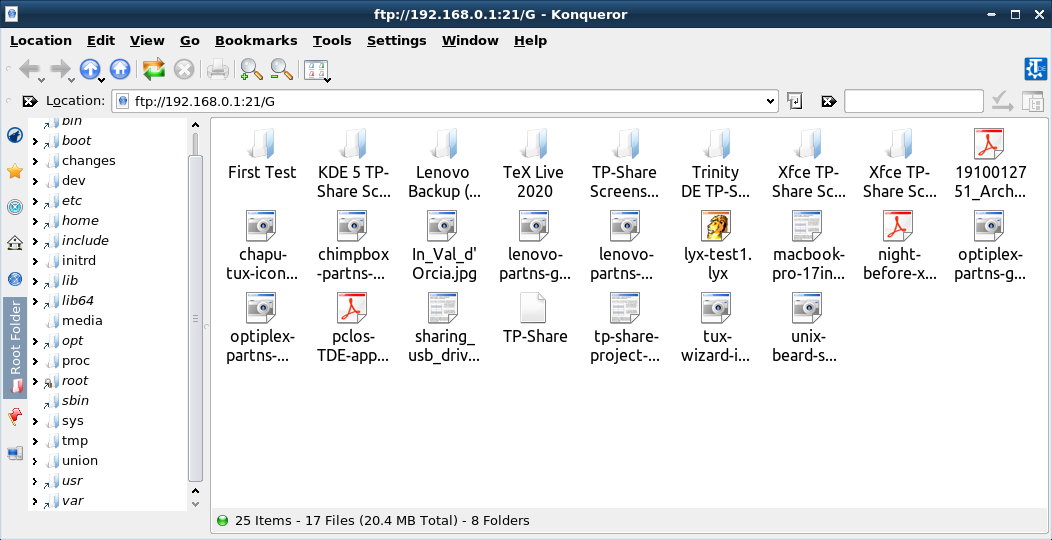 Thanks to Konqueror's "Split View" feature, it is simple to transfer files between your computer and the FTP server. Under the Window menu, choose either Split View Left/Right, or Split View Top/Bottom. 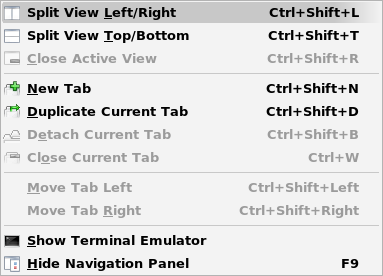 Below is a screenshot of the Split View Left/Right. 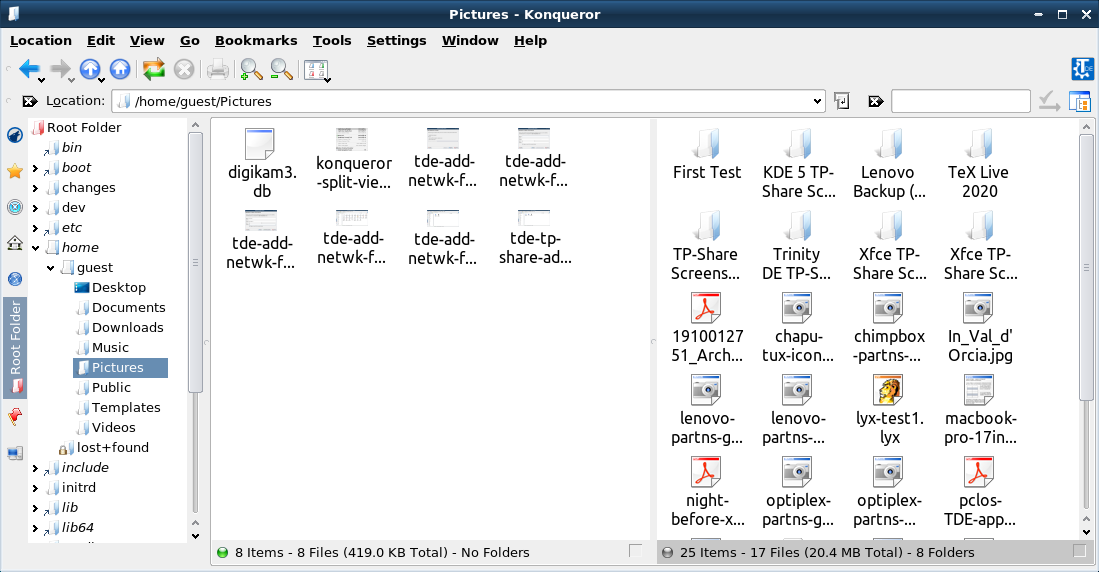 KDE Plasma 5 DE The FileZilla method works identically to what is described in the MATE section above. Via FTP (using Dolphin file manager [20.08.2]) Dolphin can handily transfer files from a remote location via FTP, Samba or NFS to your local PC. In the Location bar/box, click to edit the current location. (It will probably be / home / yourusername). Erase the text in the box, by pressing the backspace (aka 'clear' or 'delete') icon. 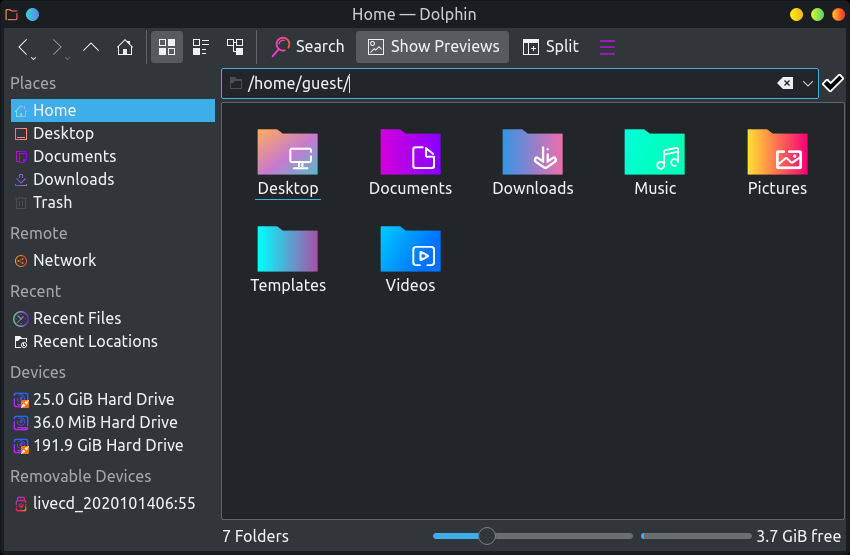 Then, type in the FTP address. Press Enter. It will connect to your FTP server. 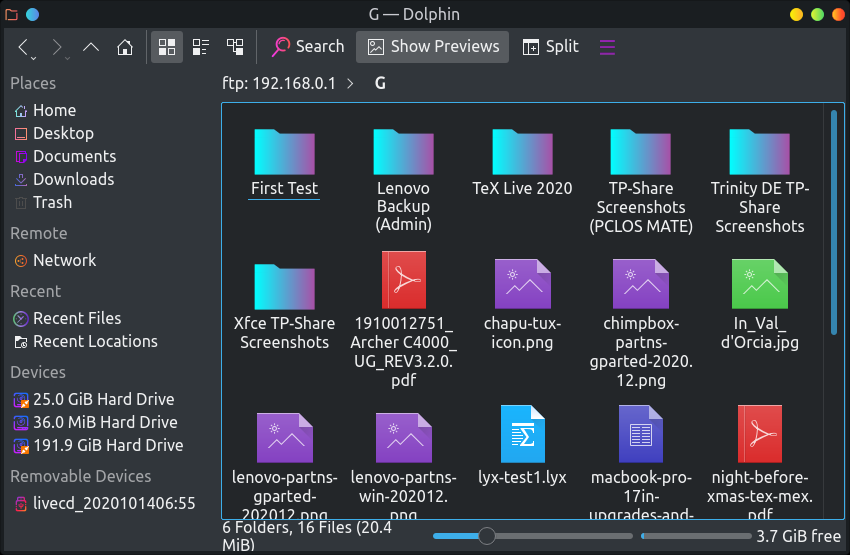 Thanks to Dolphin's "Places" feature, you can save remote connections for later, thus avoiding the need to retype the IP address during your next work session. Click on the "Add Network Folder" wizard. 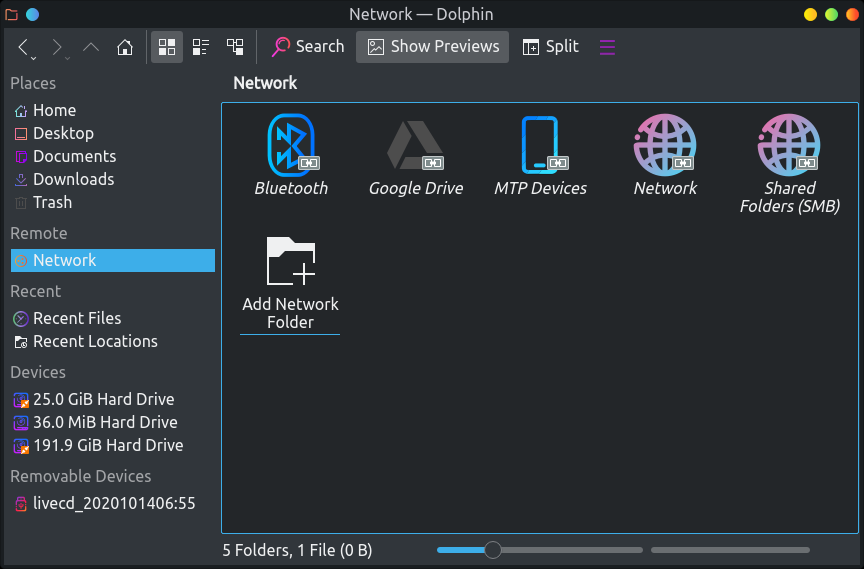 The wizard will start. In this window, select FTP, and click the Next button: 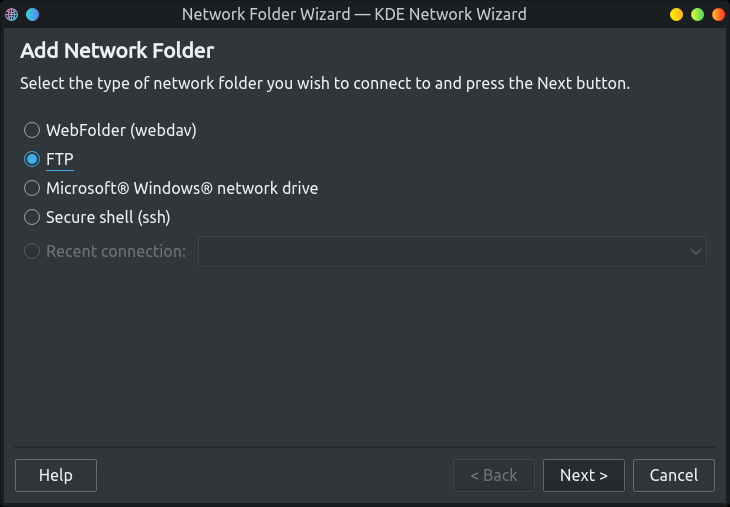 A Network Folder Information dialog window appears. By default, it is mostly blank. 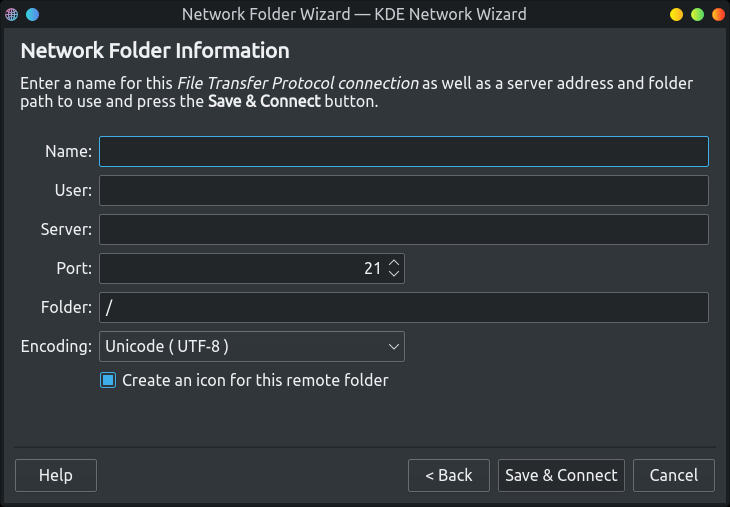 Enter the required information (as shown below). Click the "Save & Connect" button. 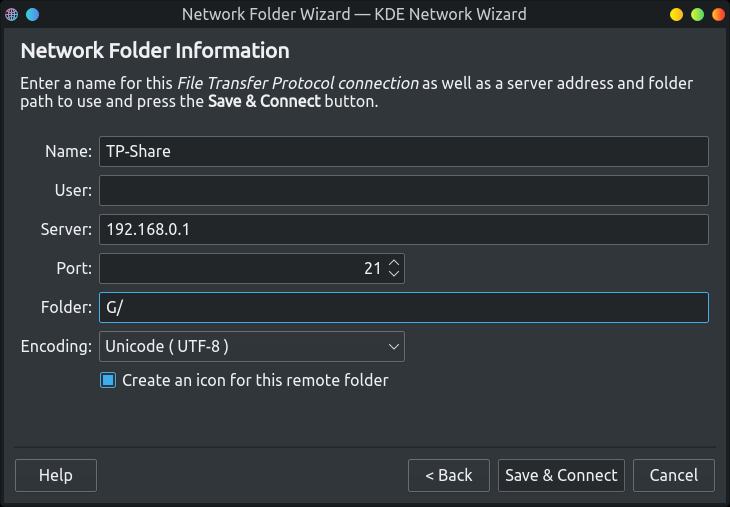 The wizard created an icon named "TP-Share" which will successfully connect to the FTP server. 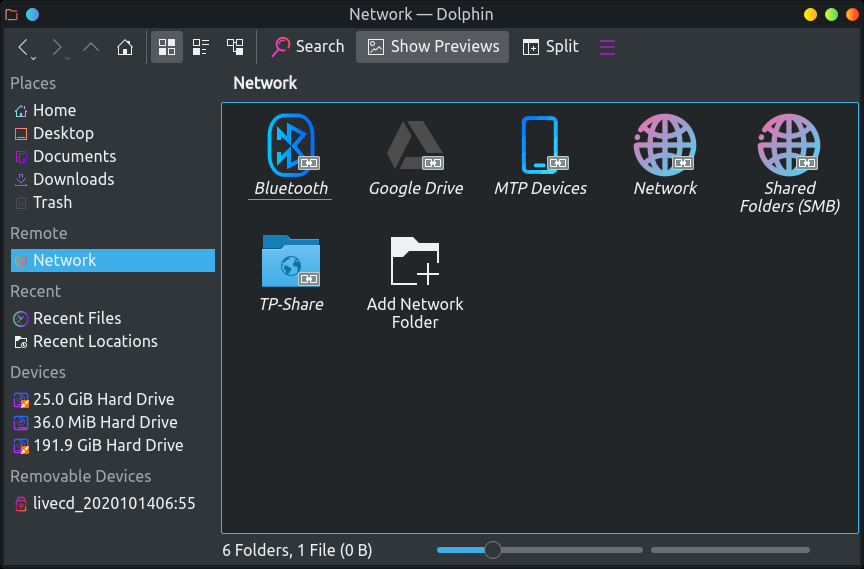 Once the TP-Share folder appears under the "Network" places, right-click it and select Add to Places. 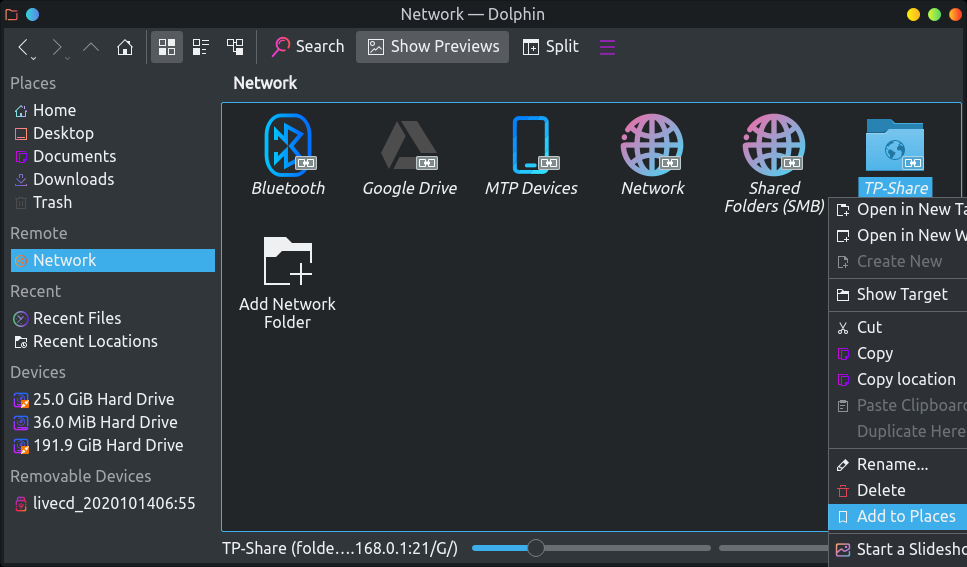 The TP-Share folder now appears under Places > Remote > Network.  Dolphin's "Split view" option (found in the menu on the toolbar) makes it very convenient to transfer files between your computer and the FTP server.  Conclusion I hope that you can now enjoy sharing documents, photos, music and/or videos on your home network, whether you decide to use FileZilla or your favorite desktop environment's file manager. Bear in mind that this drive will be accessible to everyone in your household, so you should avoid storing any confidential / sensitive files on it. 1 The PCLOS-Cloud service is maintained by our own TheCrankyZombie (David Moore). For more information on how to set it up, see his article in the April 2020 issue of The PCLinuxOS Magazine: https://pclosmag.com/html/Issues/202004/page04.html. If you are interested in evaluating cloud storage options, check out the magazine's series of "Alternatives to Dropbox" articles, written by Agent Smith (Alessandro Ebersol): Part 1 (Dec. 2018); Part 2 (Jan. 2019); Part 3 (Feb. 2019); Conclusion (Mar. 2019). 2 He is also developer of the cross-platform Geany editor. |