| Previous
Page |
PCLinuxOS
Magazine |
PCLinuxOS |
Article List |
Disclaimer |
Next Page |
Inkscape Tutorial: Stamp With The Spray Paint Tool |
|
by Meemaw I watched another tutorial recently by Rick at IronEcho Design. He has done several tutorials about making landscape scenes. In another tutorial, he shows us how to make "brushes" to use with the spray paint tool, and makes trees. Actually, the spray paint tool allows you to use any object you want as a brush. Since it's close to the holidays, let's make some trees. First, let's look at the tool we're going to use. If you open Inkscape and choose the spray paint tool, you'll see that there are many settings. The first three on the left are the modes of the tool. You can set it so it paints copies, clones or paths.  When you hover your mouse over them, the first one on the left says "Spray copies of the initial selection", which means that every object created is a copy of the one you started with. The one in the center says "Spray clones of the initial selection", and that means that each object created is a clone of the original. That opens up possibilities that the others don't have, like being able to change color and size of the original and having it change all the clones. The one on the right says "Spray objects in a single path". This means that everything you create with one click is a single path which can be edited. To the right of those is an eraser, which lets you delete some of the objects you painted. To the right of those tool settings are changeable settings to change size, amount, rotation and scale of the paint spray.  All right, let's start an evergreen tree. Since we're going to paint it, let's just create one branch to stamp with. Here I created one shape that could make the branch. I just used the bezier tool and drew it. We're going to end up making it really small so a great deal of detail isn't necessary, but at least give it some shape. 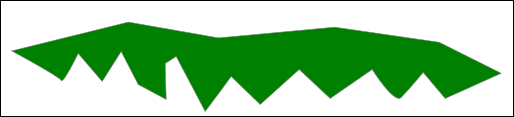 I gave it a dark green color for fill and a tiny dark gray stroke. Then I duplicated this one and changed the fill to a little bit lighter green.  To get a little texture and depth, I stacked them, then used the path editor to line up the points on each end, then grouped my two branches.  In the video, he suggests duplicating and resizing the branches to three different sizes, then making a set for each side of the tree. You should also put a trunk in your tree, using the bezier tool with the setting "Triangle Out" so that when you draw the line from top to bottom, it's wider at the bottom, like a tree trunk. Click on your spray can to see the tools. Start with these settings: Width - 5, Amount - 10, Rotation - 8, Scale - 30, Scatter - 5 and Focus - 0. As always, changing these settings will give you different results, but after you are familiar with the tool, feel free to test different settings. Now, starting at the bottom, select your bigger branch, then click on the spray can, then click on your page and drag the mouse upward. When you get higher, change to a smaller branch, and work your way up. 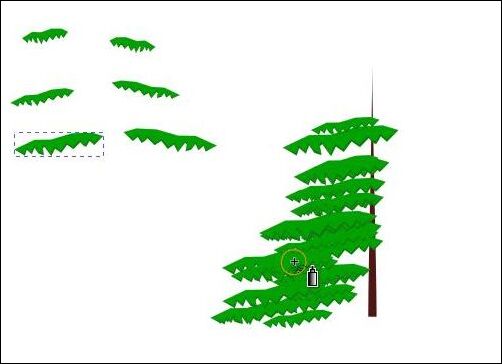 Go back and delete any you don't want. Feel free to move any you think should be repositioned. I've done this twice. The darker tree below was the first one. 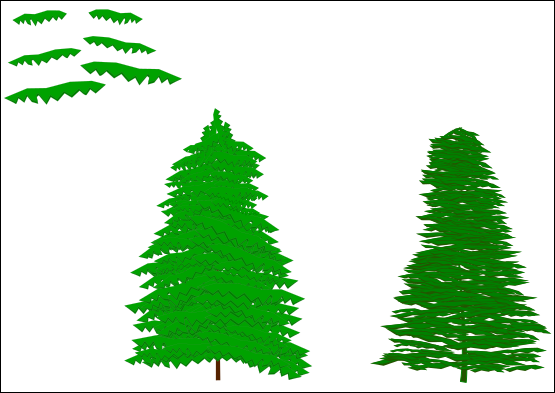 When you're happy with it, group all the branches and trunk. As always, this can be resized (tall & thin or short & fat) or reversed. Since all trees are different, you can either do it several times, or edit the one you created. Using these, you can create a winter scene. Resize the tree itself and use it as the stamp for the spray paint, but change the rotation setting to 0. Below, I just did a really simple snow scene with the trees. I know yours will be much more awesome! Happy Holidays! 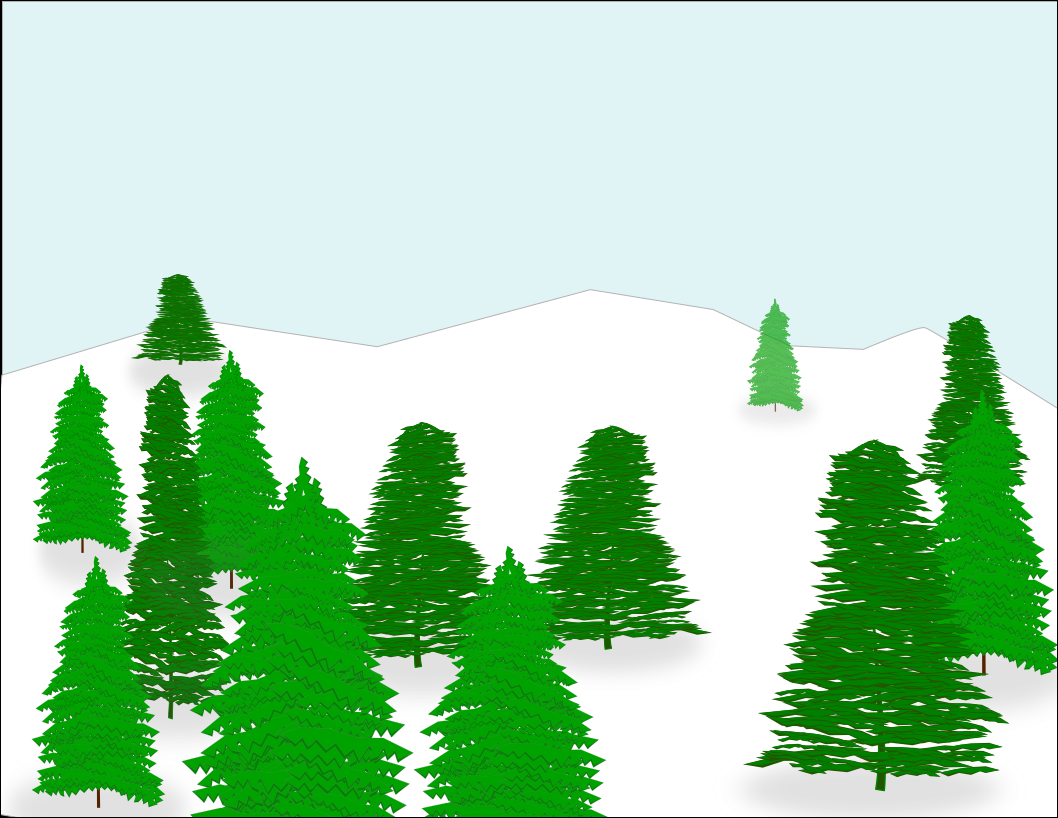 |