| Previous
Page |
PCLinuxOS
Magazine |
PCLinuxOS |
Article List |
Disclaimer |
Next Page |
Inkscape Tutorial: Live Path Effects |
|
by Meemaw
If you draw a path, then choose Path > Live Path Effects, you get the following ‘menu'. 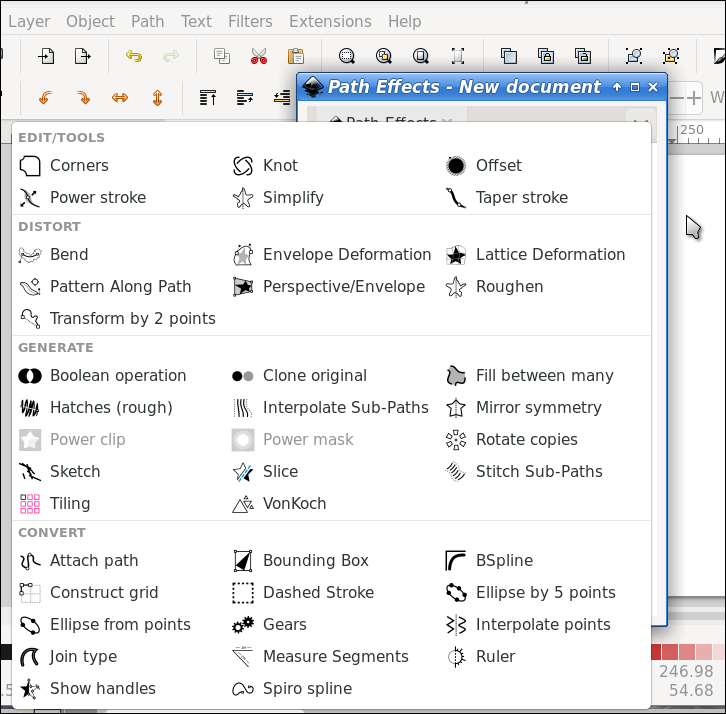 When you draw a path, which includes nearly any figure you can draw, you can affect that path with a Live Path Effect (LPE). The one I used in August was the Slice effect, and we sliced some text so we could arrange it on two or three sides of a box. You can use this effect on other items besides text, as shown in the image below. 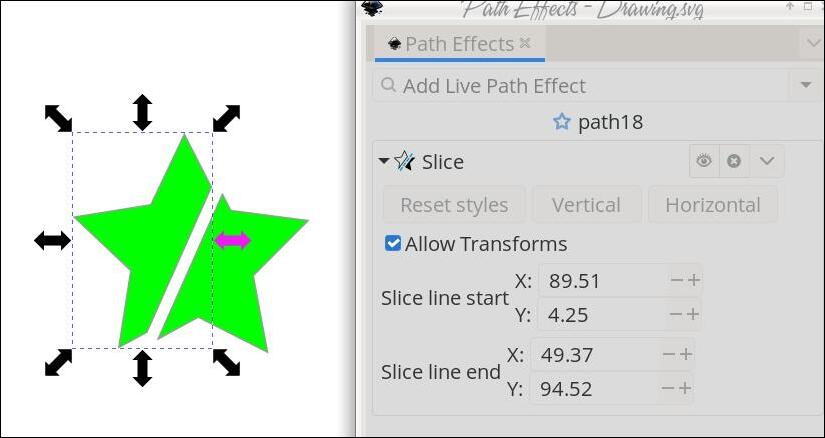 When you choose this effect, you get a box which slices the object down the exact center, but you can change to the nodes tool and move the nodes to change the slicing line before you finish it. Another effect that might be useful is Dashed Stroke, which turns your path into a dotted line. Settings include how many dashes you want between nodes, and how big you want the spaces in between. 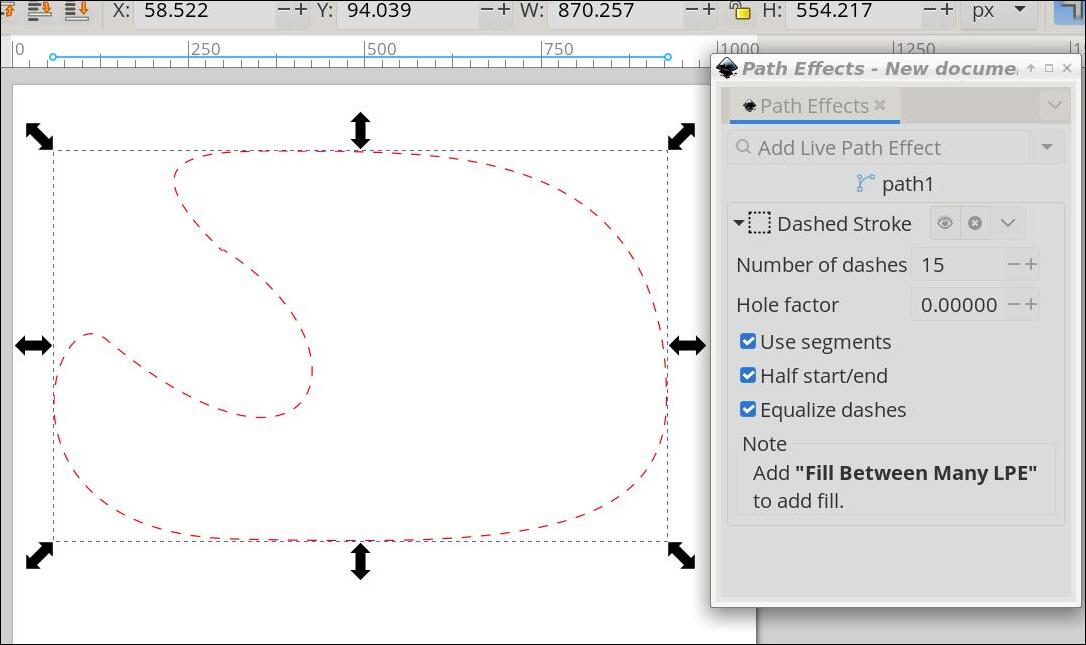 Another effect is Knot, which takes a path and puts spaces into it where the lines cross. You can choose whether each crossing line has a gap or only one has. 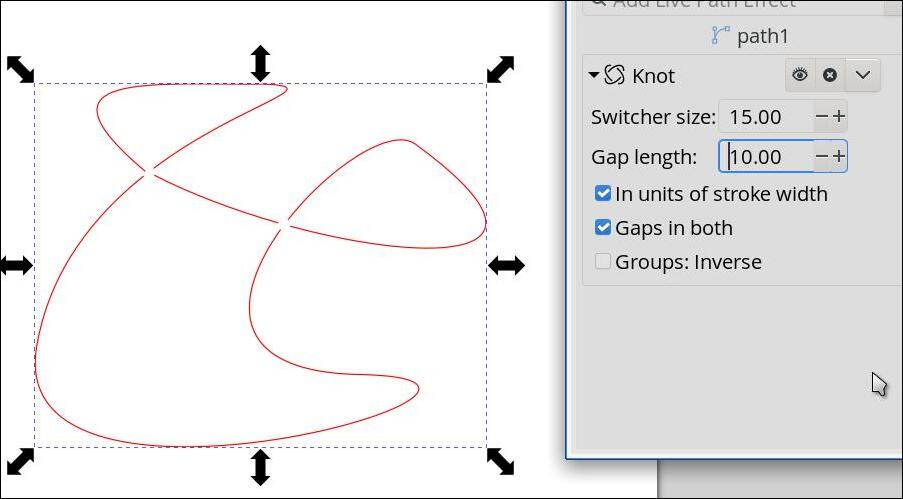 In December of 2016, Khadis showed you how to use a path effect called Envelope Deformation which used text to fill a shape. You can also use Power Stroke to give a little flair to your designs. Power Stroke widens your stroke while keeping the ends pointed or rounded, no matter what your line looks like. 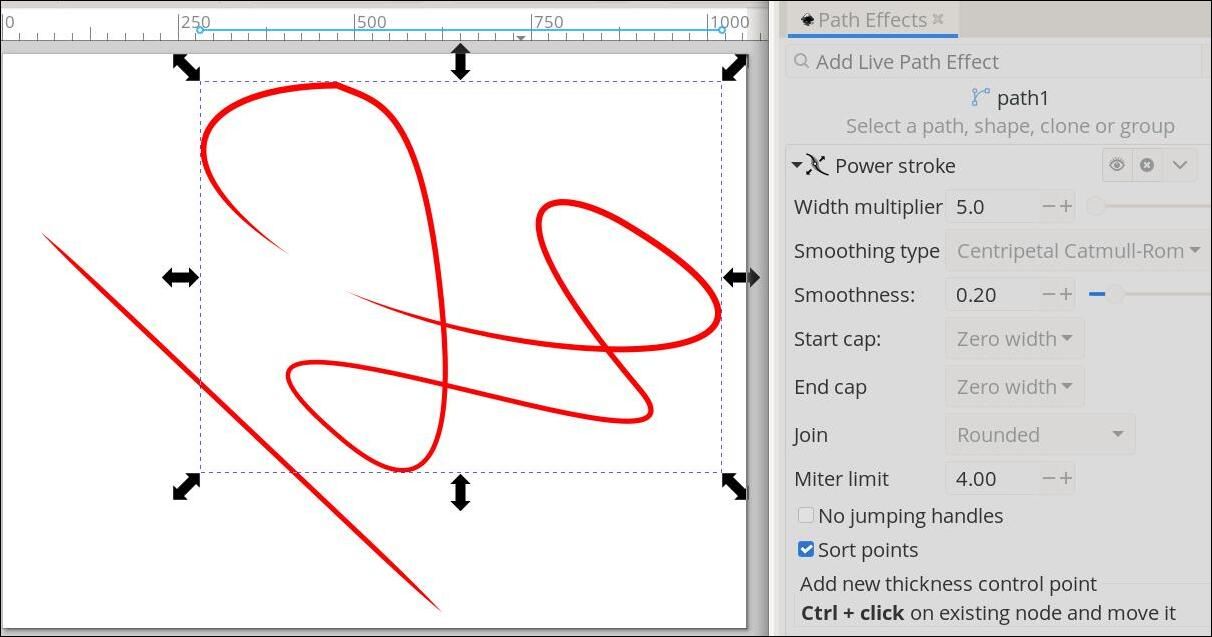 Another one is Gears. This effect makes a group of gears out of a line. In the Inkscape User Guide, it states, “The effect uses the nodes of a path to determine how the gears are drawn. At least three nodes are needed to specify the first gear. Additional gears require one additional node each. Some nodes may be skipped if they would result in impractical gears.” The gray line in the drawing is the path I used for the gears, but when you create the gears, the line disappears. 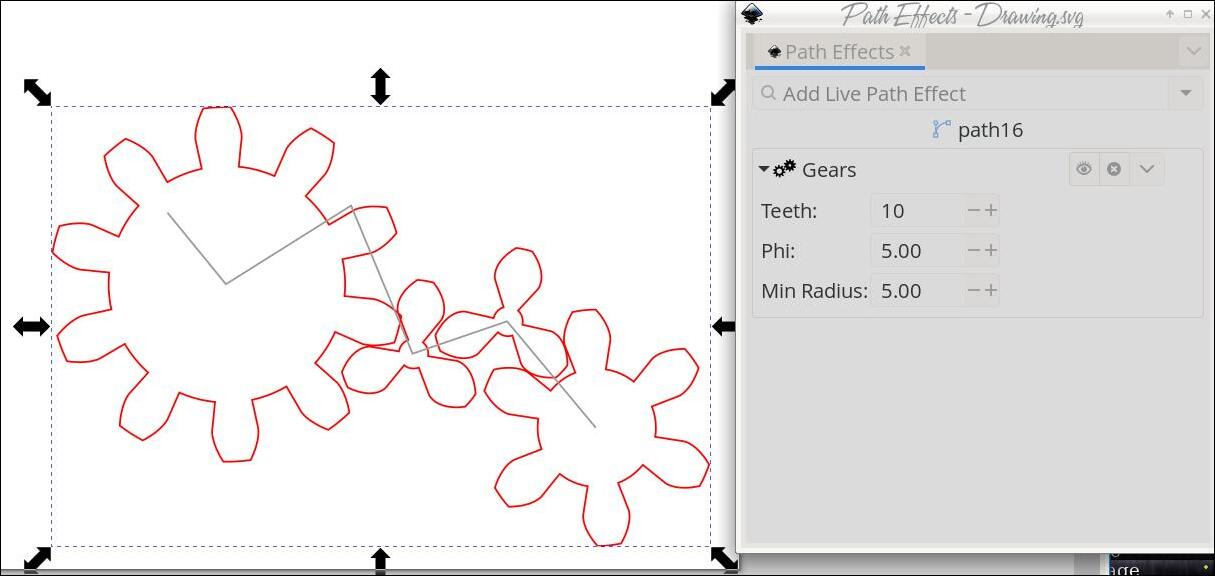 There is also an extension in Inkscape that you can use to generate gears. When you pull it up (Extensions > Render > Gear), you have to enter the number of teeth you want, how big you want them, and how big the center should be. When you click OK, you will get one gear, but you can duplicate and resize that one, or make more. It just shows that there is more than one way to do something, even in Inkscape.  I hope you will find some of these useful. |