| Previous Page |
PCLinuxOS Magazine |
PCLinuxOS |
Article List |
Disclaimer |
Next Page |
GIMP Tutorial: Layer Masks, Part 1 |
|
by Meemaw
I referred to a couple of places to get help with this subject. One was one of Davies Media Design’s tutorials, and the other was one from The GIMP Tutorials. A layer mask in GIMP allows you to control the transparency of different parts of a layer, enabling you to hide or reveal portions of the layer beneath it. The most common choices are White (Full opacity) and Black (Full transparency), but you’ll have to decide which is best for your particular situation. White (Full opacity) will keep the layer fully visible until you start painting with black pixels onto the layer mask, hiding the parts of the image that you don’t want to keep. I used this several years ago, on one of my first GIMP tutorials. In that one, I used two copies of the same photo, with one of them desaturated and placed on top of the colored layer. I painted on the desaturated layer and brought out the lower colored layer. It created a cool effect.  Black (Full transparency), the layer will immediately be completely masked out and hidden, which makes it much harder to work with because you can’t see the layer contents while painting your mask. We used this a couple of months ago, on the picture we “blew up”. I had two copies of the same photo again, but I used the layer mask to bring out the pieces of the top layer that I wanted to show.  When you decide what effect you want, you can right-click the layer you want to affect, and choose Add Layer Mask. You’ll get the following window, where you can choose the type of layer mask you want. The default choice is white, but if you don’t reset things when you exit, another type may be chosen. 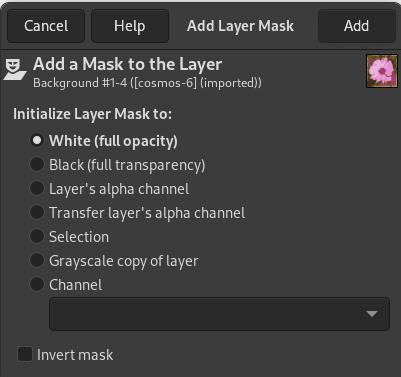 Maybe you want to design a path through fallen leaves. I found an image of fallen leaves I really like, so we’ll use that. 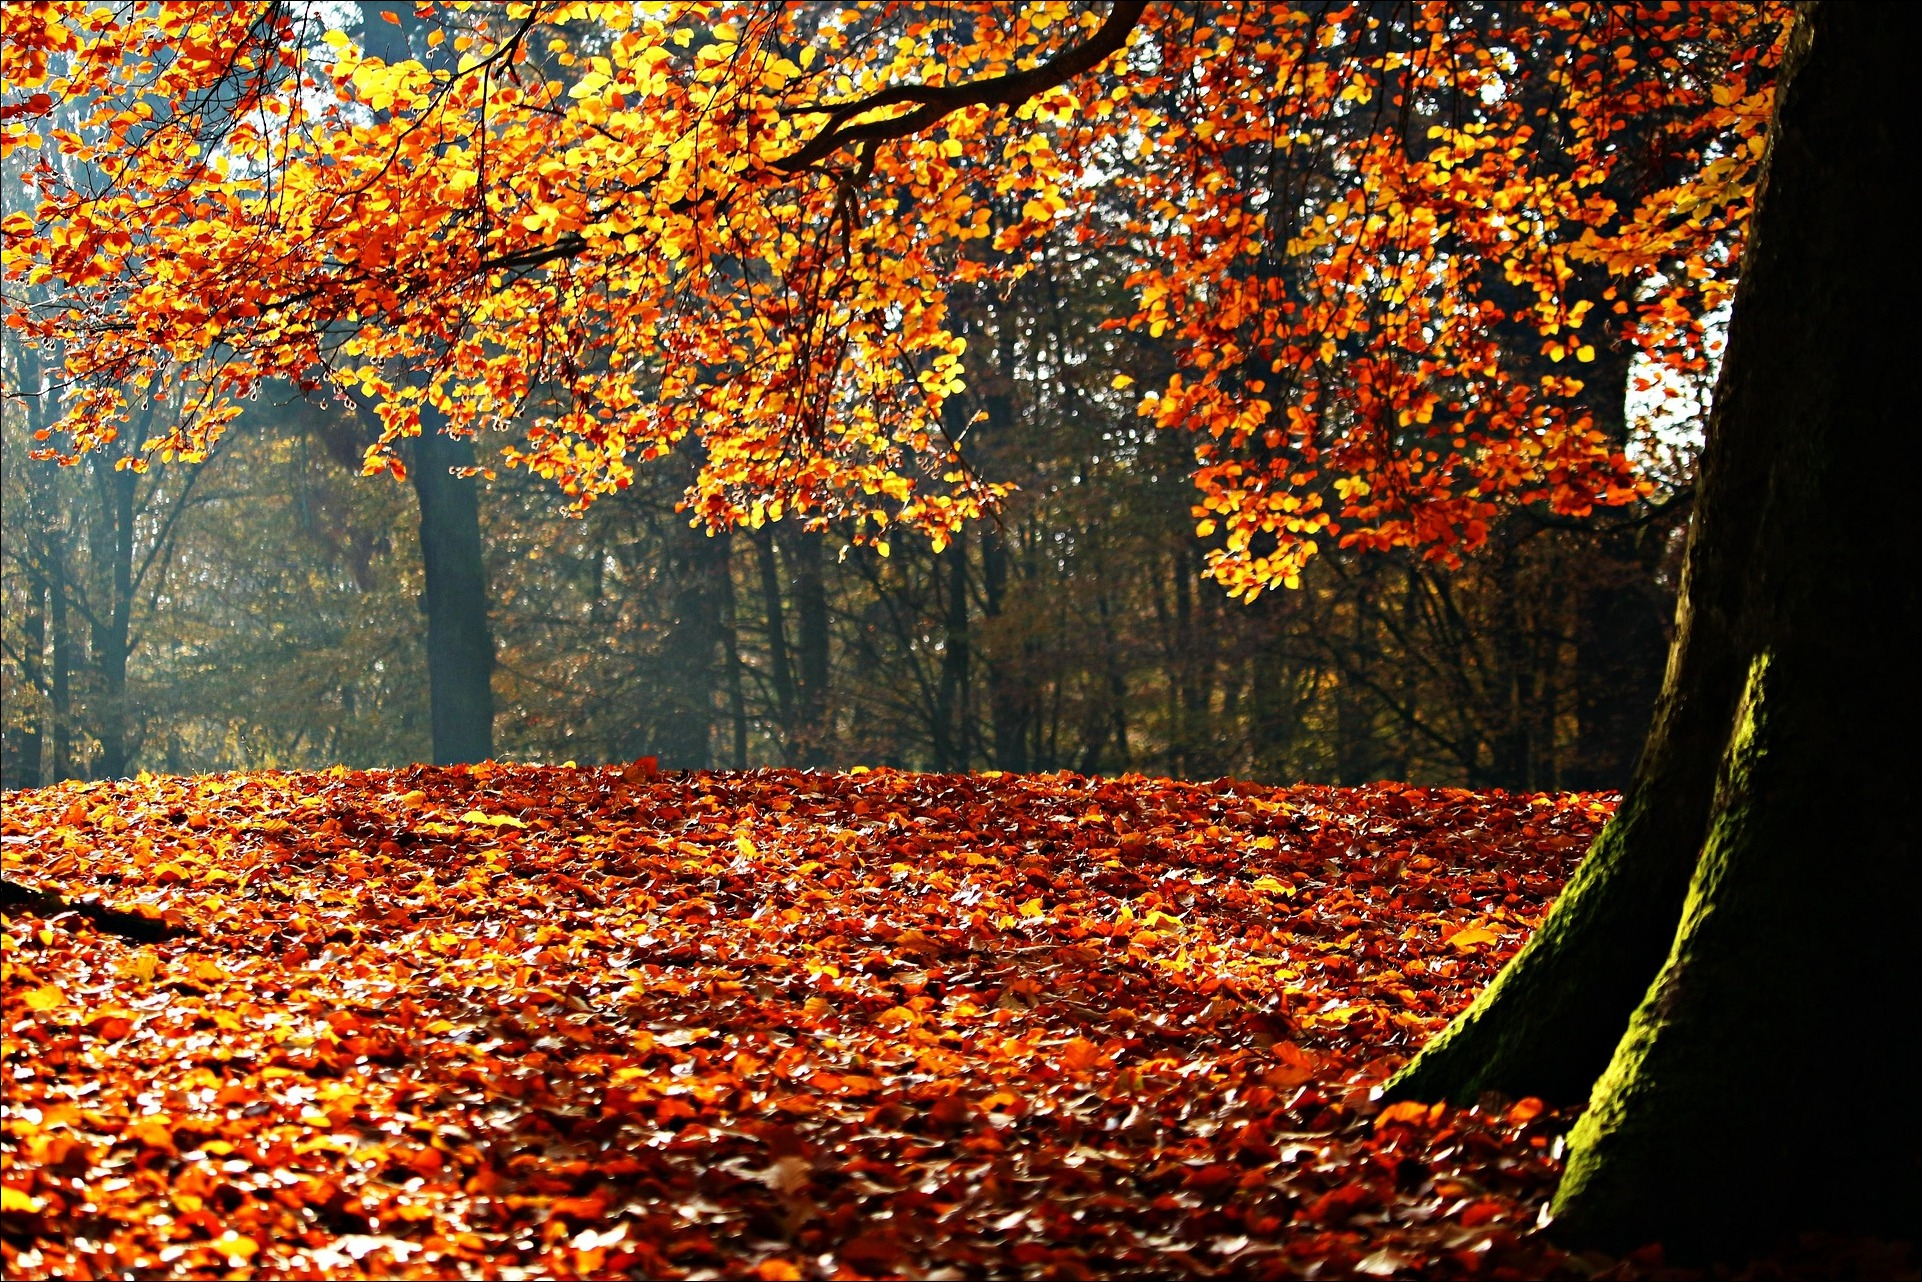 This path is going to be a sidewalk, so I found a graphic of concrete, and loaded it into GIMP, making it the lower layer. 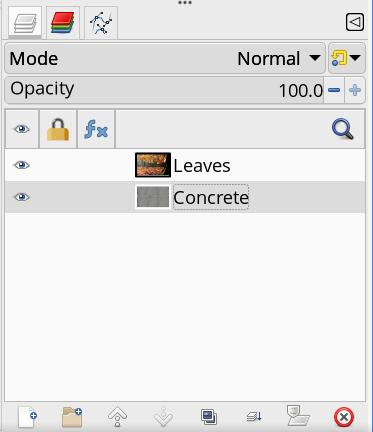 Now you want to change the leaf image, so the concrete shows through like a path or sidewalk. Choosing the leaf image layer, right-click on the layer and choose Add Layer Masks. The choice in the popup window will be White (Full Opacity). 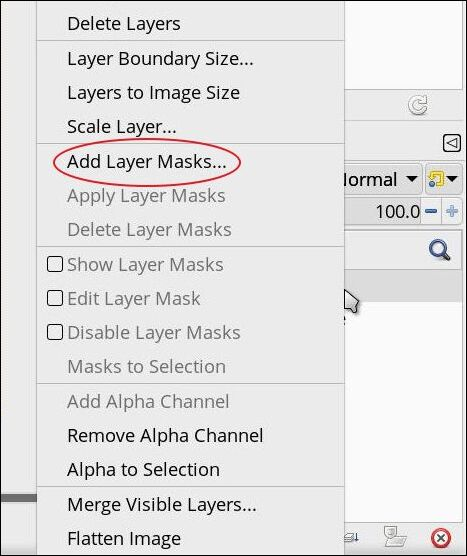 Now you see it in place. 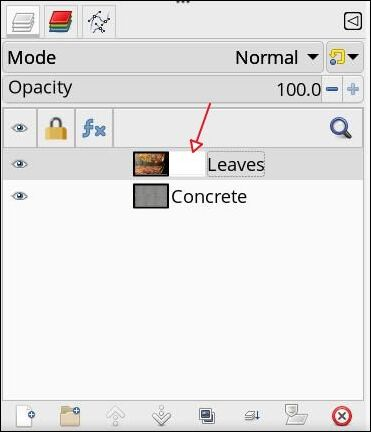 To use the mask, click on the mask, change your brush color to black, and stroke where you want the leaves to disappear. Adjust the brush size to something that works for you. Depending on the image size, the brush could be any size. This image is 1920 x 1260 px, so I made the brush 50px.  As you draw, you will see the black marks on the layer mask. If you make a mistake, change your color to white, and paint over the mistake, and you’ll get the leaves back. Remember to change your color back to black to finish the path. The next thing I did was add some leaves back onto the path (they don’t stay clean for long). However, since the layer mask erased the leaves, I had to add back to the concrete layer, or they wouldn’t have been visible. You could also add a transparent layer on top and place them there. 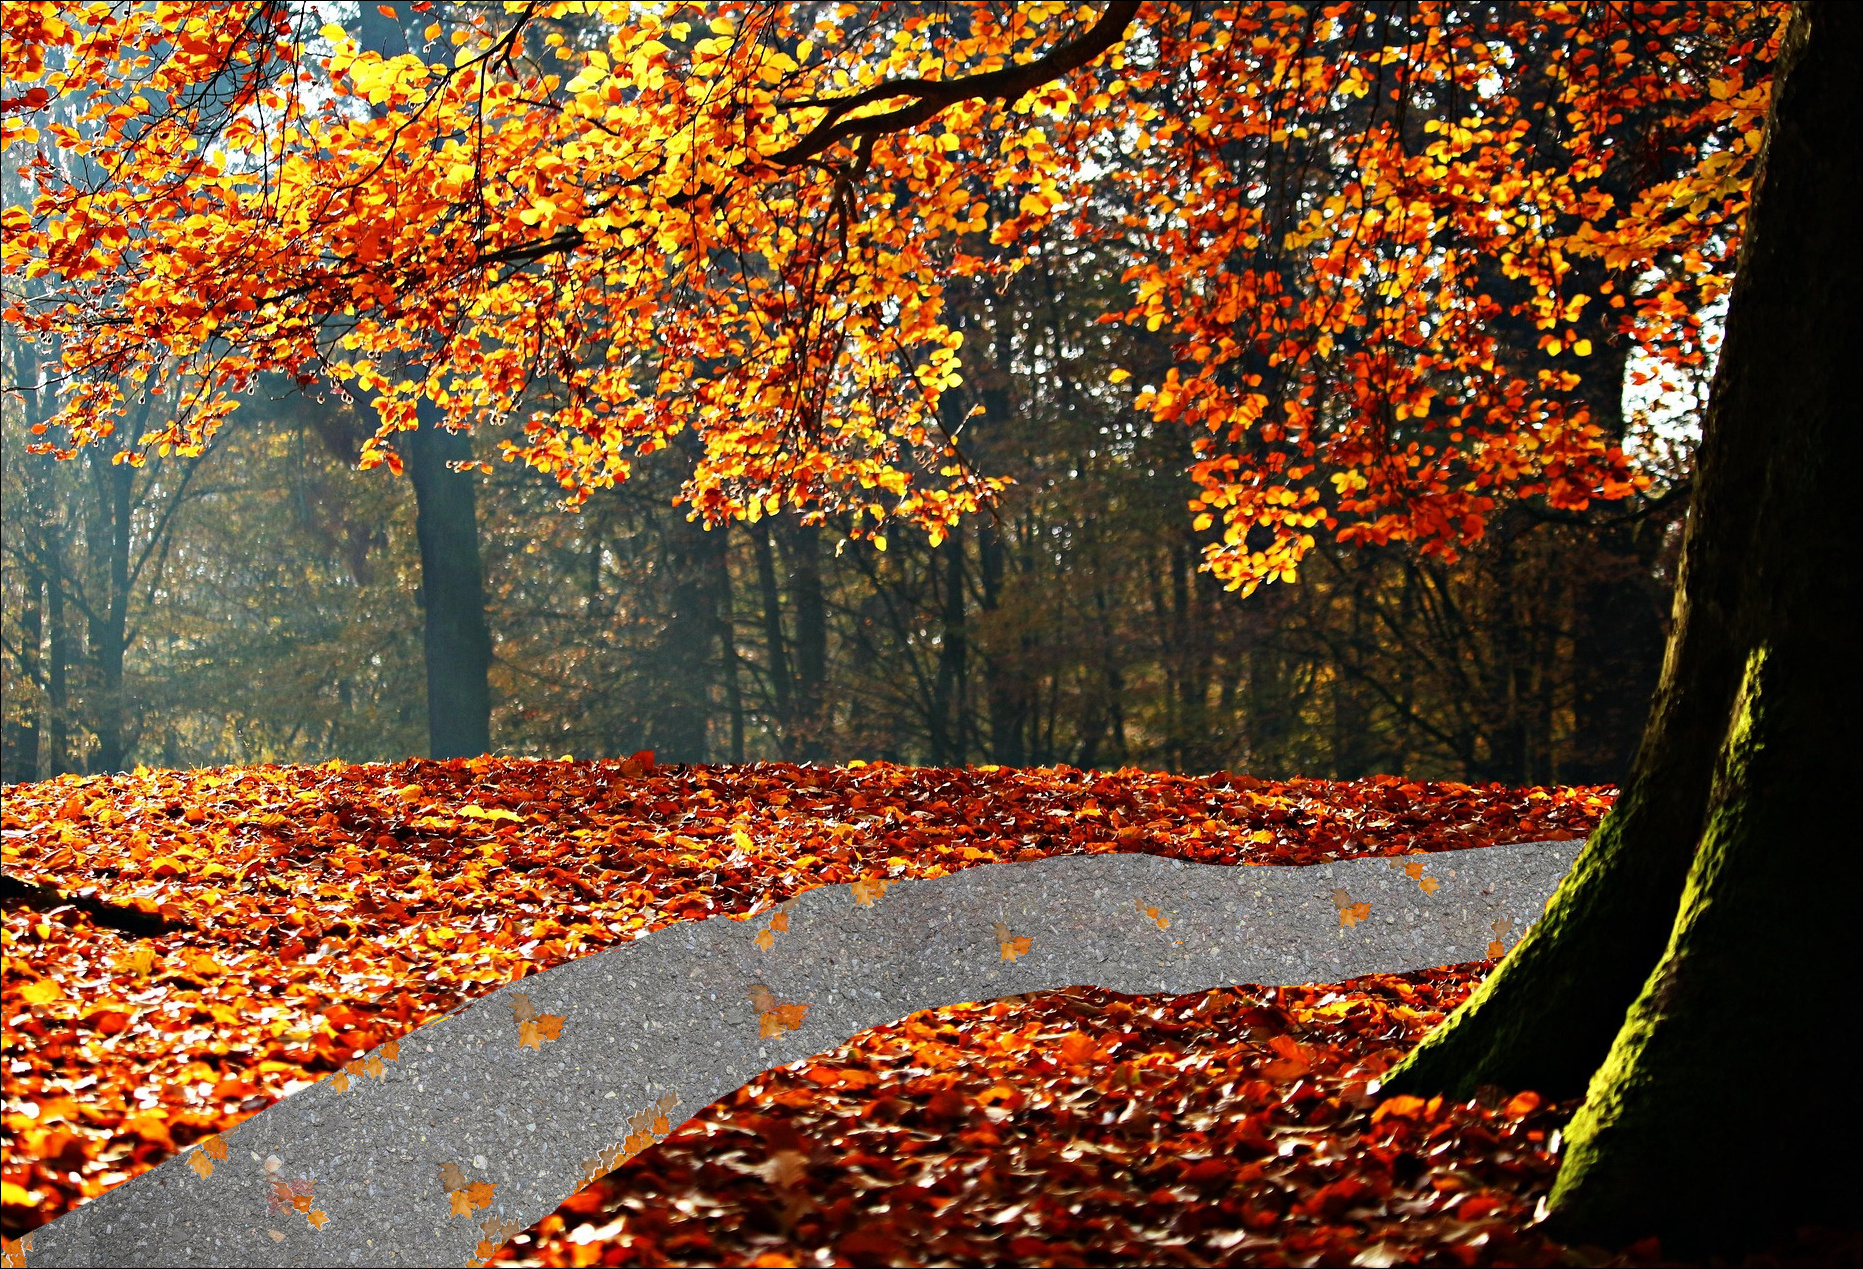 I would do a bit more to this, like adding shadows, but that’s the basics of a layer mask. The next mask on the list is the Black (Full Transparency), and it works when you want your layer mostly invisible and only want to bring out parts of it. Suppose you want to feature a certain group, but in a different background. I had this group I saw in a 4th of July parade a few years ago, but wanted to put them in a mountain scene. 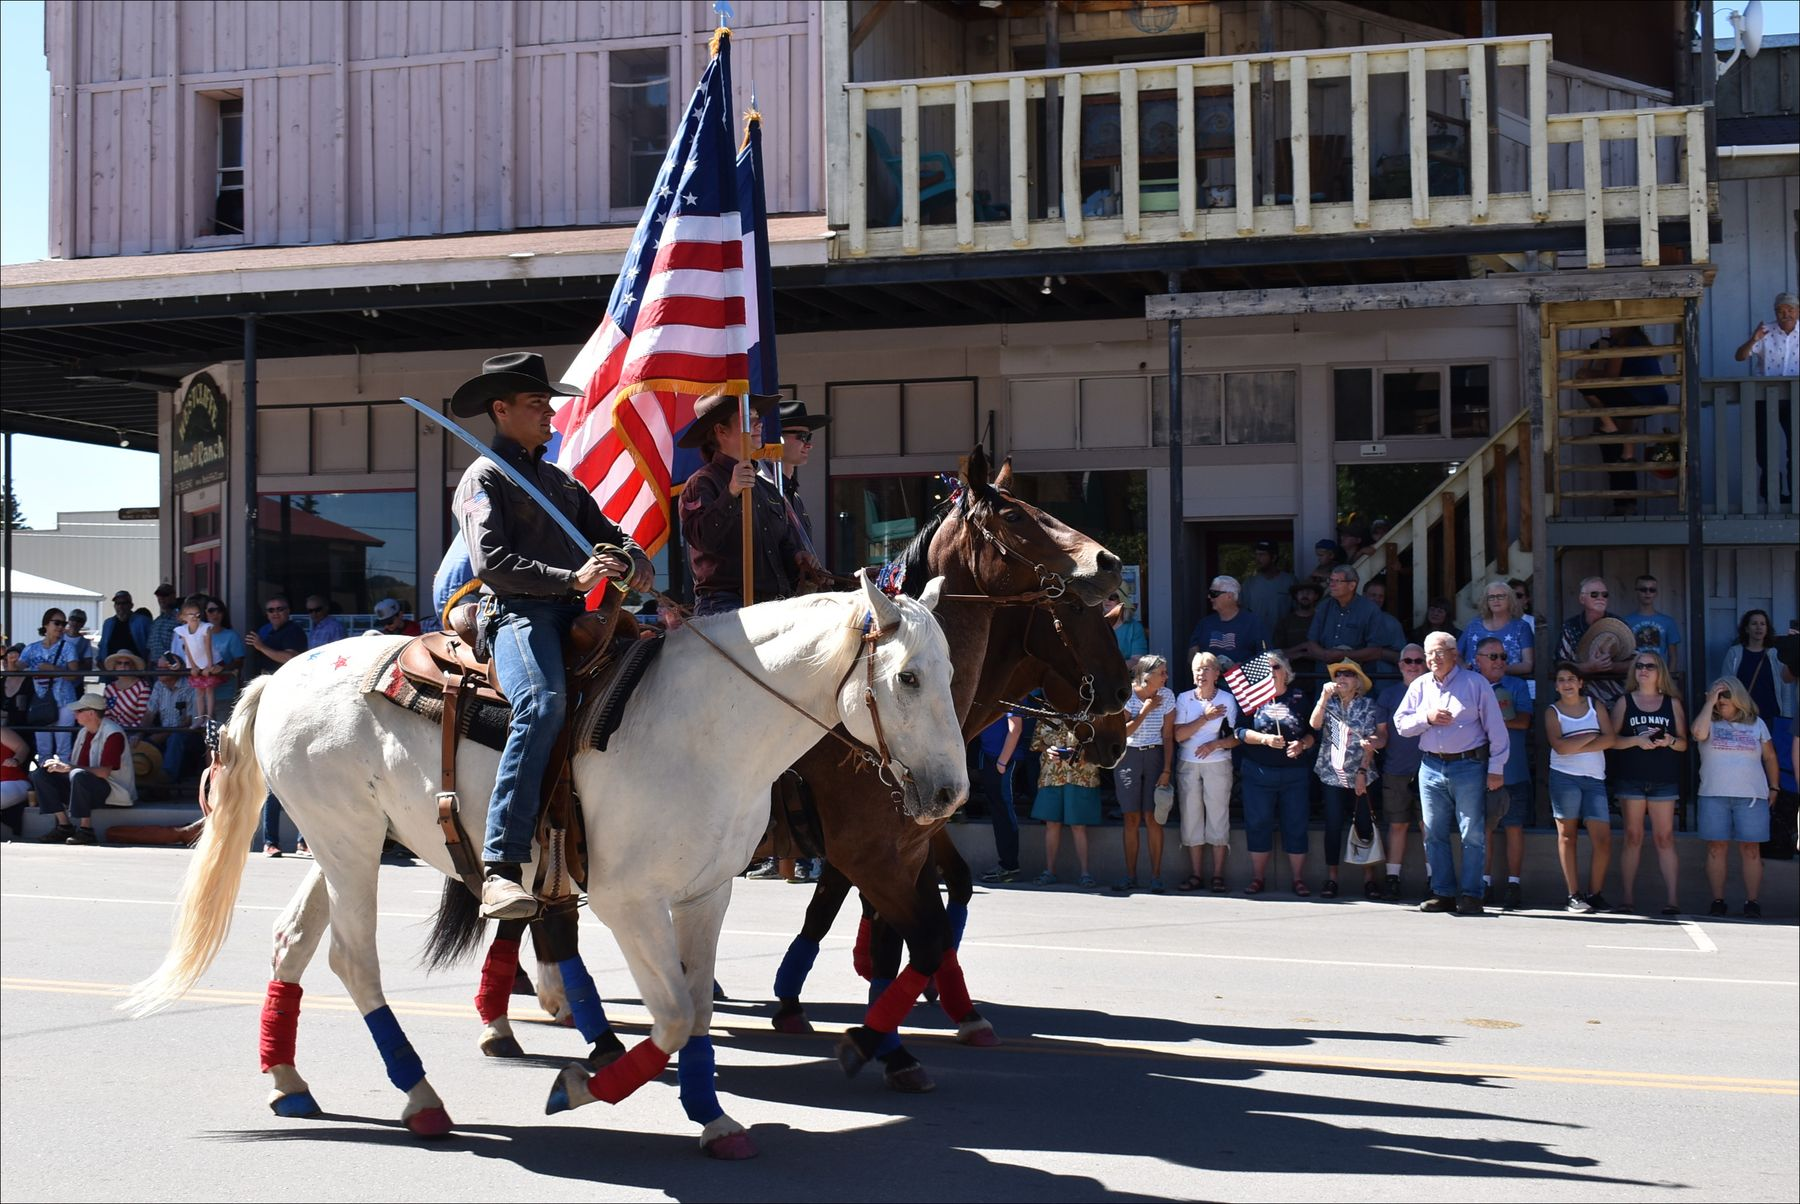
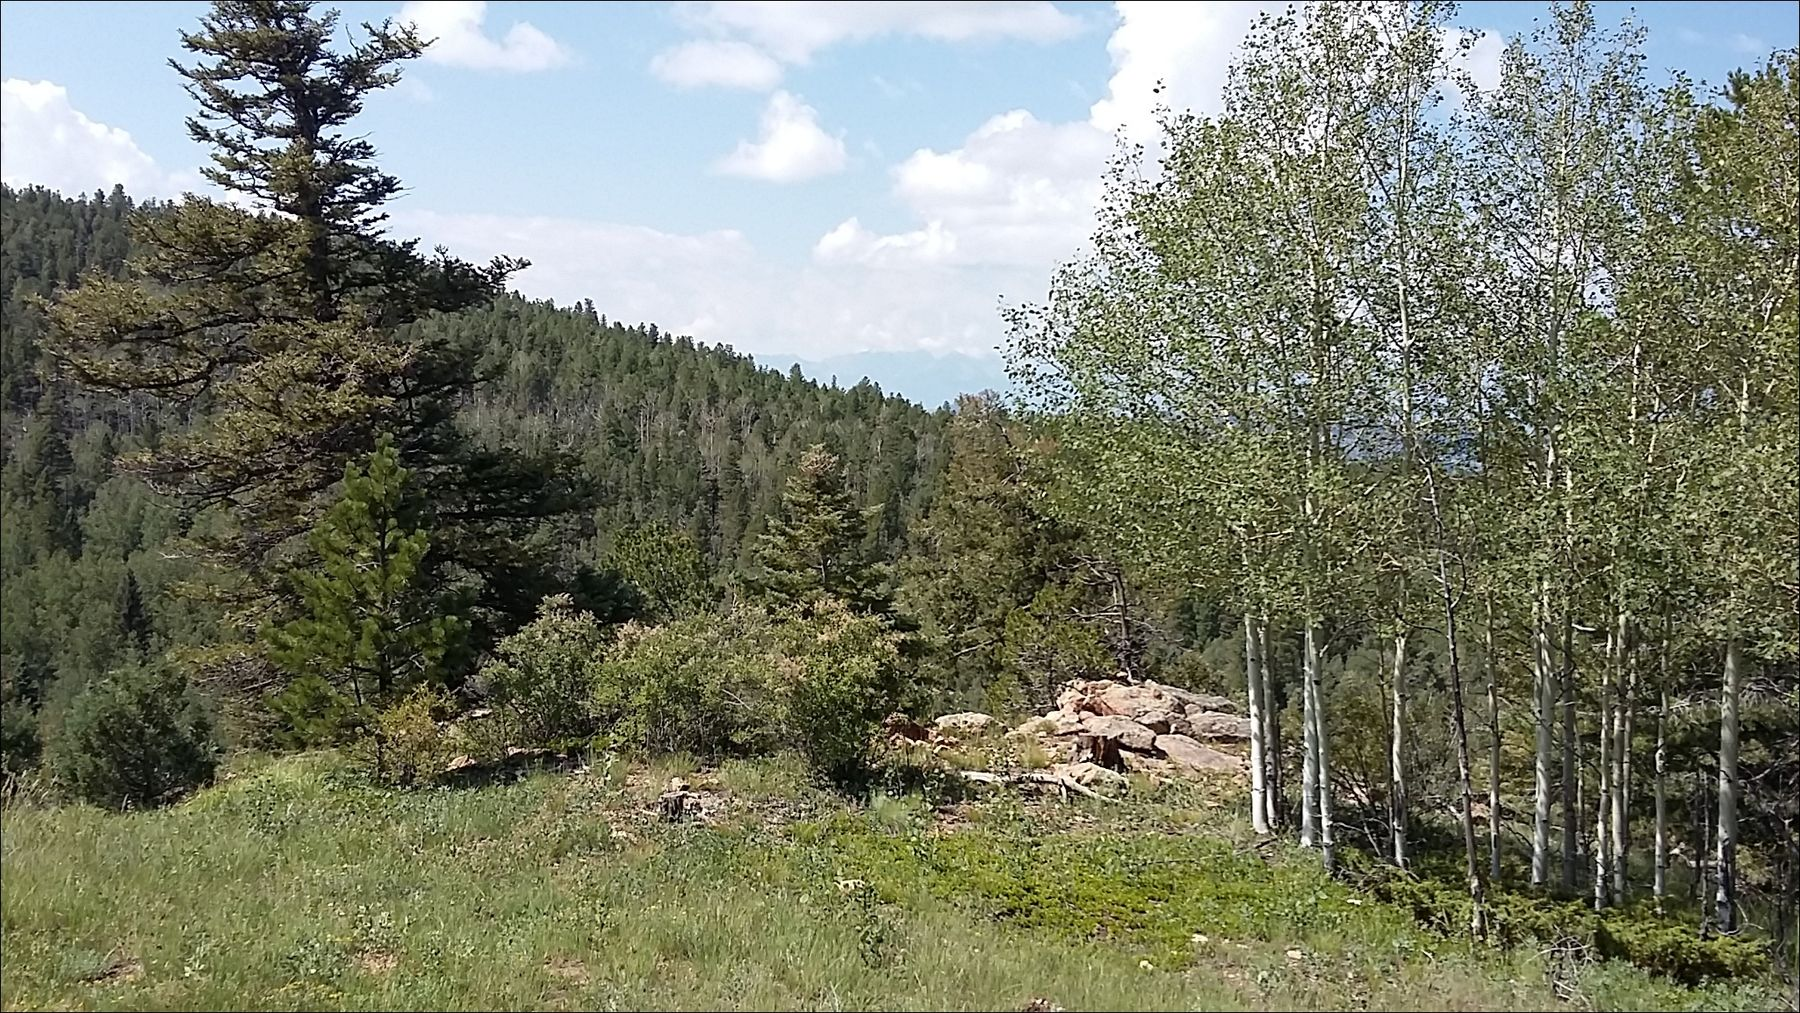 I opened these images in GIMP using Open as Layers. They opened in the same project. I had to resize the horse layer to put the group into the mountains. 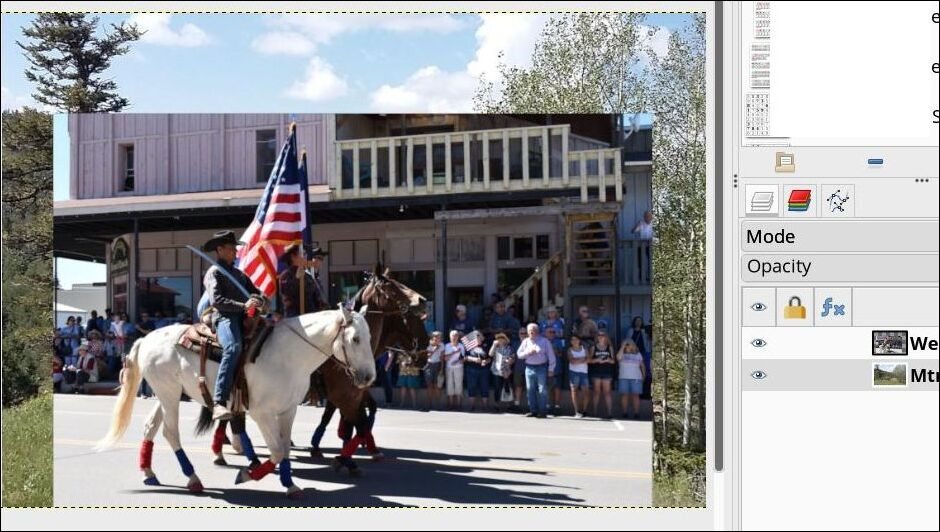 The first thing we will do is add an alpha channel to the top layer (horses). Right-click the layer and choose Add Alpha Channel. It has to have an alpha channel for the “paint” to be transparent. 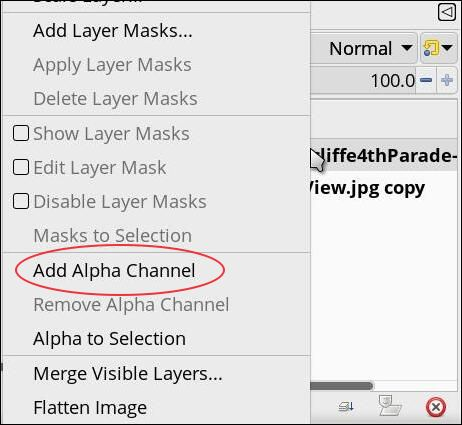 Now, right-click the top layer again and choose Add Layer Masks. This time we’ll choose Black (Full Transparency). 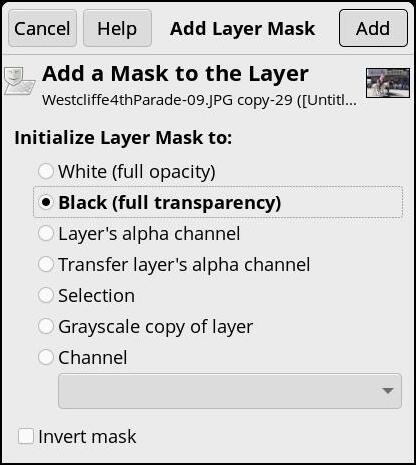 When you click OK, your layer will disappear. Since I scaled that layer down, I can see the edges of the layer in the other image. Since I already started to paint with white, I can also see part of the horse. To make it easier to paint accurately, I will alternate between the mask and choosing Disable Layer Mask in the layer menu so I can paint what I need to show. Uncovering the horse group seemed easier to me than covering the rest of the photo. 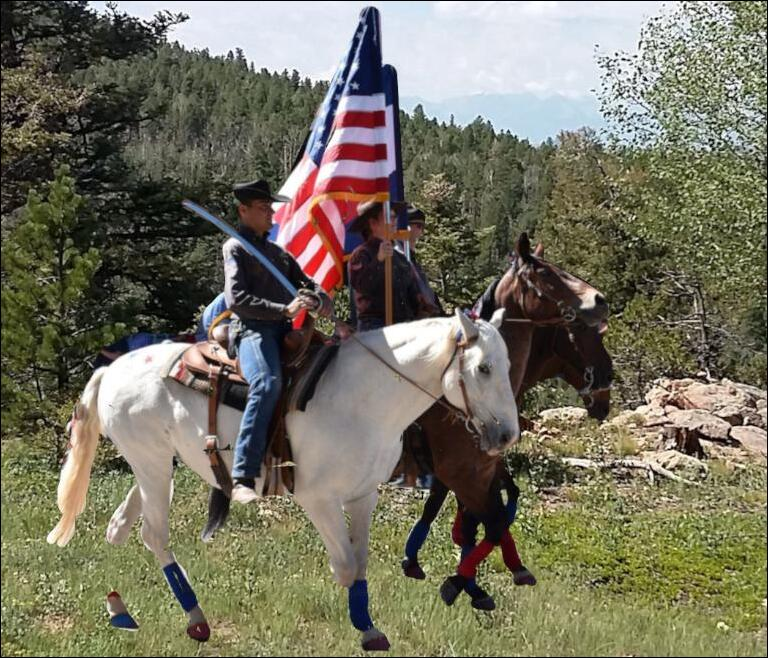 You can see that I’ve got a lot of the horses filled in, but I haven’t done the shadows yet. For that, I’m going to choose a grey to paint with because it will leave a bit of opacity, and hopefully some of the grass will show through. The color turned out to be a light grey (bcbbb9), but I need the shadows to be darker, so I’ll use a lighter grey. I have to “fine tune” it, but I have the basics done. 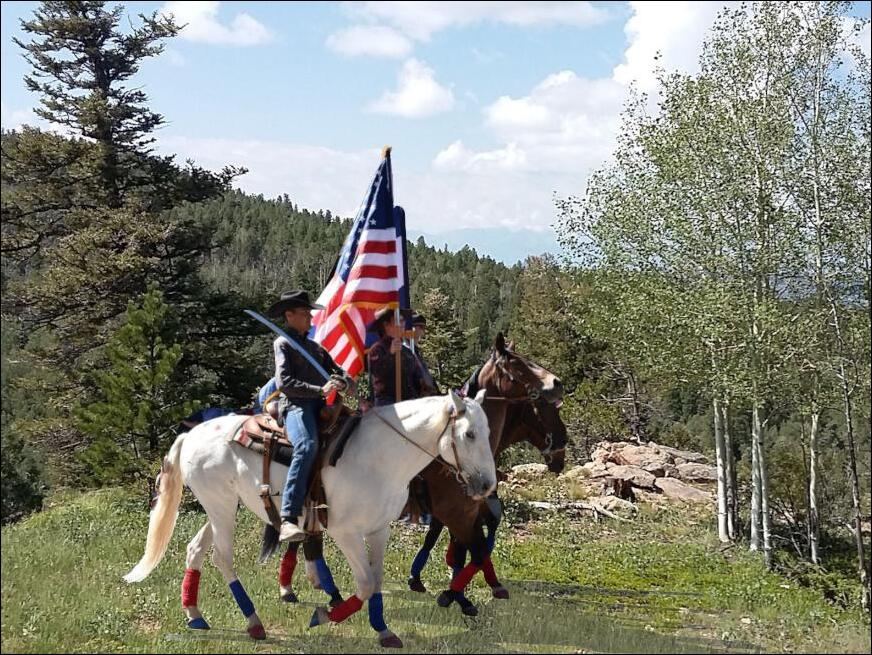 Of course, in GIMP, you can also use your scissors tool, cut out the horse group and insert it into the mountain image. There’s always more than one way to do something. We’ll visit the other types of layer masks soon. |