| Previous
Page |
PCLinuxOS
Magazine |
PCLinuxOS |
Article List |
Disclaimer |
Next Page |
Gimp: Exploring the Create Menu
|
|
by Meemaw I've been using Gimp for quite a while, and had never noticed a section in the File menu. It says 'Create' and in it are several already-configured items that you can make in just a few minutes. 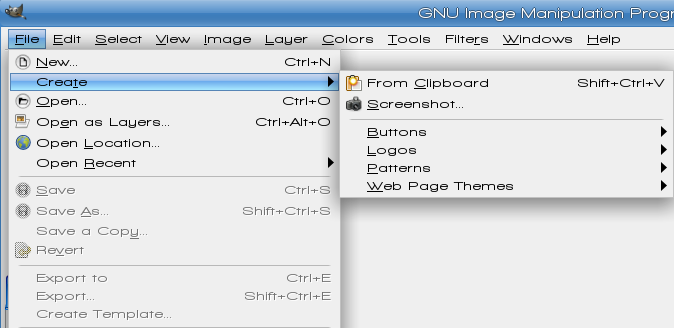 Let's play a little. After opening Gimp, click on File > Create > Logos. You will see many options. 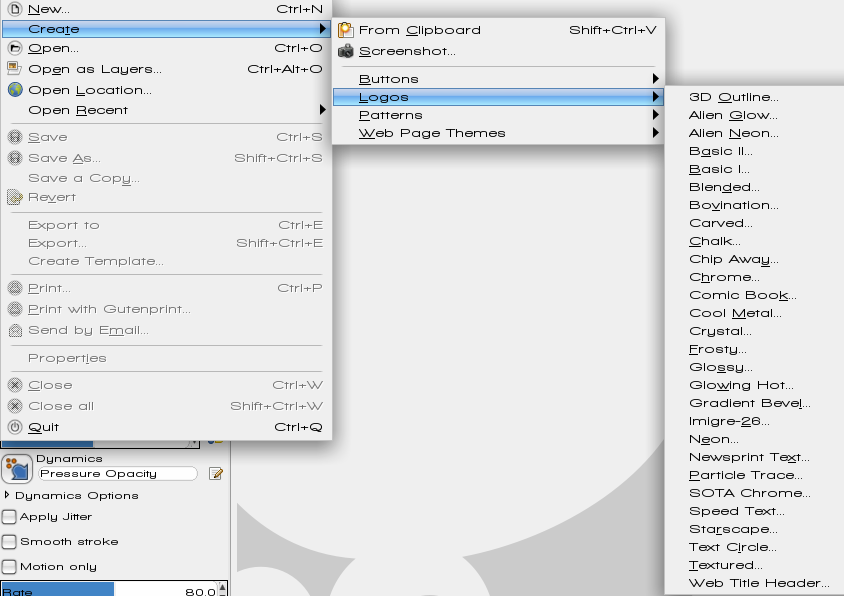 Let's do a Glossy logo. Choose Glossy from the list and you will see this window: 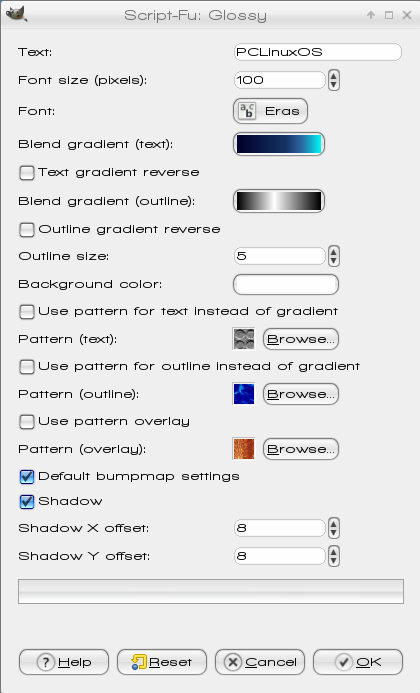 This window contains all the configuration items you need. You can change the text, font and size, along with the gradient you want to use for the text (Deep Sea or Caribbean Blues) and outline (Brushed Aluminum) plus the color for the background (Dark Blue). You can experiment with many of the settings, including using patterns for the text or outline, or even overlaying the whole thing with a pattern. Make as many as you want and save the ones you really like. 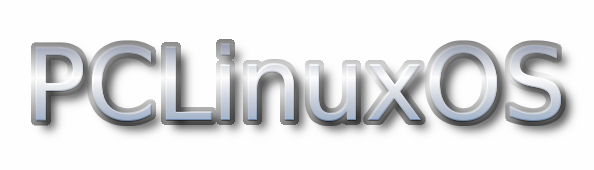  Now, let's do a button. Click on File > Create > Button. 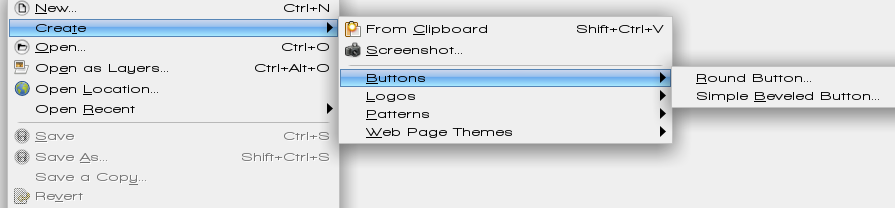 There aren't as many choices. Let's do a simple beveled button. The only way to increase the size of your button is to change the font size. The ones below are 63 pixels wide and 24 pixels tall with the font size 15.  I changed the upper left to purple and the lower right to dark blue (my colors of preference). After I made one, I changed the text color to white. Then I made a third and clicked the "Pressed" check box. This one looks like a button after I have clicked on it.  As always, experiment with colors and settings to get just what you want. Another section in the create menu is Create > Pattern.  I chose Camouflage 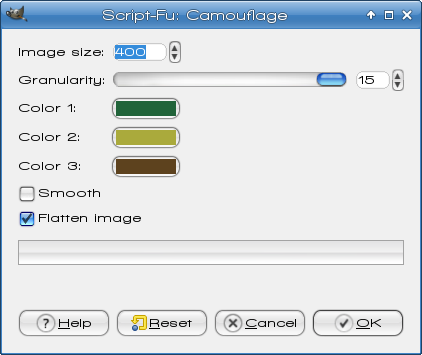 Image size is how many pixels on each side, so with 400, it will be a 400 x 400 square. Granularity is how much detail the camo has. In the image below, the left side's sample has granularity of 2, and the right side's is 15. 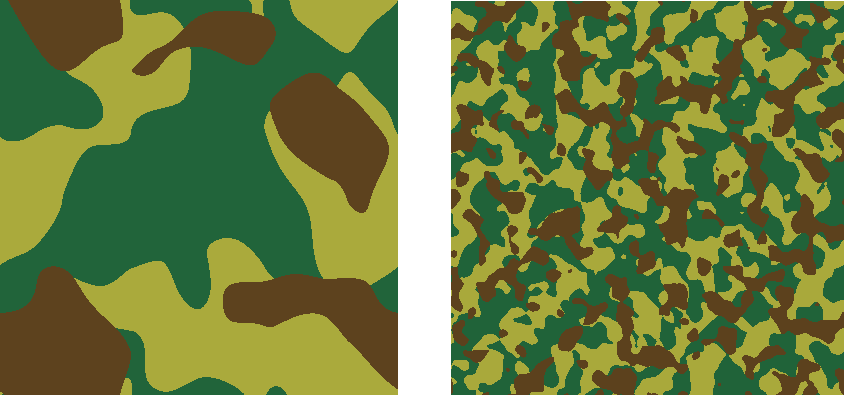 As you can see, there are 3 colors to set. The 'Smooth' checkbox puts a blur into your camouflage and the 'Flatten' checkbox merges all the layers together. The Create menu has many different items you can try. Another couple of patterns are below: 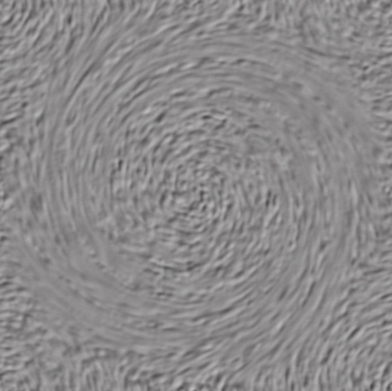 Swirly Tile 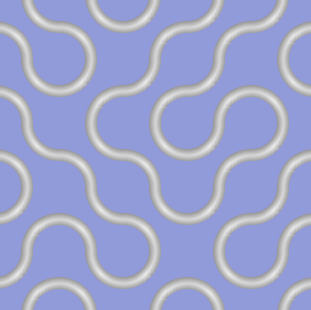 3D Truchet You can also design items for web pages, including arrows, bullets, buttons, headings and Hrules (horizontal rule, which can be used as a border or divider) in two different patterns: 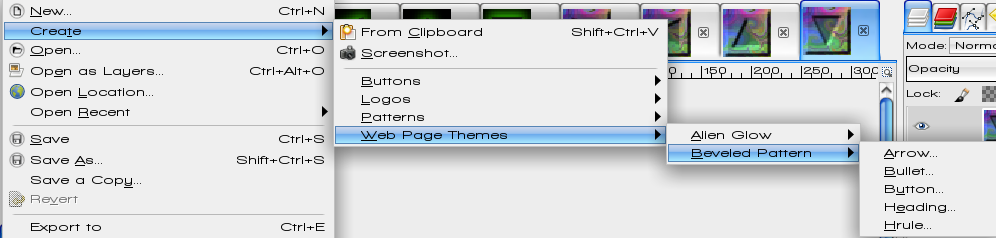 Arrows for the two patterns are shown below on the tabs in Gimp. The design on the left is called Alien Glow, and the one on the right is called Beveled Pattern.  Two other items are at the top of this menu. The first, Create from Clipboard, places clipboard contents directly into Gimp so you can work on it. The second is Create from Screenshot. Choosing it gives you the following window: 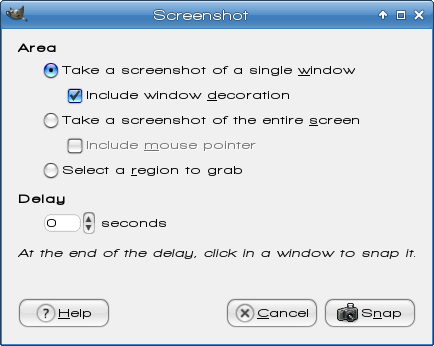 You can configure your screenshot method (window, screen or region) and any delay you want, click Snap, then the screenshot is imported into Gimp for you to manipulate. We've had some fun with the Create menu. Its ready-made configurations are nice if you need to design something quickly, like a button or a pattern. |