| Previous Page |
PCLinuxOS Magazine |
PCLinuxOS |
Article List |
Disclaimer |
Next Page |
Using Kate As A Typst Editor |
|
by David Pardue (kalwisti)
I could not find a tutorial on how to use Kate as a Typst editor, so I documented the procedure that I followed. I hope it will enable you to set up a productive workflow with these tools.  Kate (KDE Advanced Text Editor) is billed as “a programmer’s text editor by KDE.” Kate can be recommended for multiple reasons; it is fast, lightweight and probably comes installed by default on your KDE Plasma system. The app is highly customizable and features syntax highlighting, code completion, as well as advanced editing options. Kate has built-in Terminal support (via the Konsole widget) and an option for Open Document tree display. It supports a wide variety of programming languages – including Typst. An advantage for Typst users is that Kate has LSP (Language Server Protocol) support – specifically, for Tinymist – out of the box. (Currently Tinymist is the preferred LSP for Typst.) Language Server Protocol is a standardized way for development tools, such as Kate, VS Code, Vim, Emacs, etc. to communicate with language-specific services (called language servers). Core features of LSP include autocompletion, syntax formatting and marking of warnings/errors. If you would like more details, see Ansh Arora's article published on the Open Science Labs blog (2025). 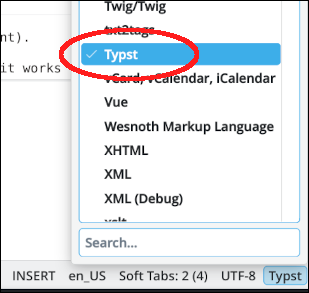 This method uses Kate along with the Tinymist integrated language service, and a separate PDF viewer (as the external Preview app), to edit your local Typst files. The preview is asynchronous, i.e., not real-time, but after you make an edit in Kate and save your file, the PDF will auto-update.
A local Typst installation with the Typst pre-built binary (ver. 0.15.1, 17 July 2026). Please see my previous tutorials (Sept. 2026 and/or Dec. 2024) for installation procedures. (Optional but recommended) A local installation of the Tinymist language server for Typst. Installing and configuring Tinymist will enable some “goodies” such as autocompletion (code completion/suggestion), code navigation, tooltips on hover, etc. when editing Typst files. Although installing Tinymist is not difficult, I will cover that in a separate section because it is a multistep procedure which was unfamiliar to me. Kate. As of mid-September 2026, its version is 26.08.1 (on Plasma 6.7.5) The ktexteditor-plugins package (not installed by default on PCLinuxOS). PDF Viewer (such as Okular, Evince, Atril, etc.).
Preliminary Configuration in Kate Before editing your Typst file(s) with Kate, I suggest you take a moment to check the settings below. They will help make your editing sessions a smoother experience. Plugins Under the Settings menu > Configure Kate > Plugins section > Plugin Manager, verify that the items below are checked/enabled: Documents Tree, LSP Client, Search & Replace, Terminal. 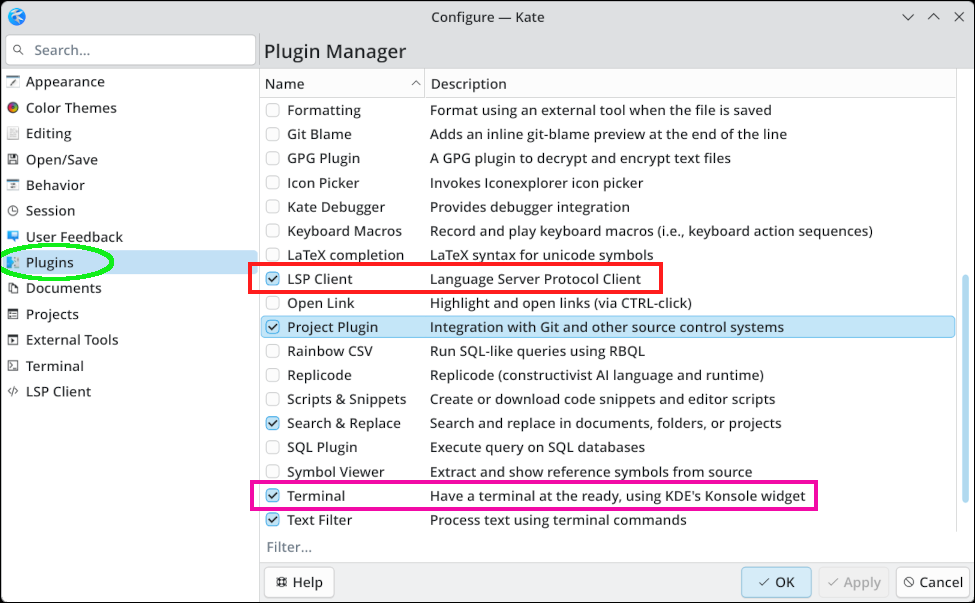 LSP Client Under the Settings menu > Configure Kate > LSP Client section > Default Server Settings tab, scroll down (the list of programming languages is alphabetical) and check that there is an entry for “typst”. The “url” field should point to Tinymist on GitHub (as shown in the screenshot below): 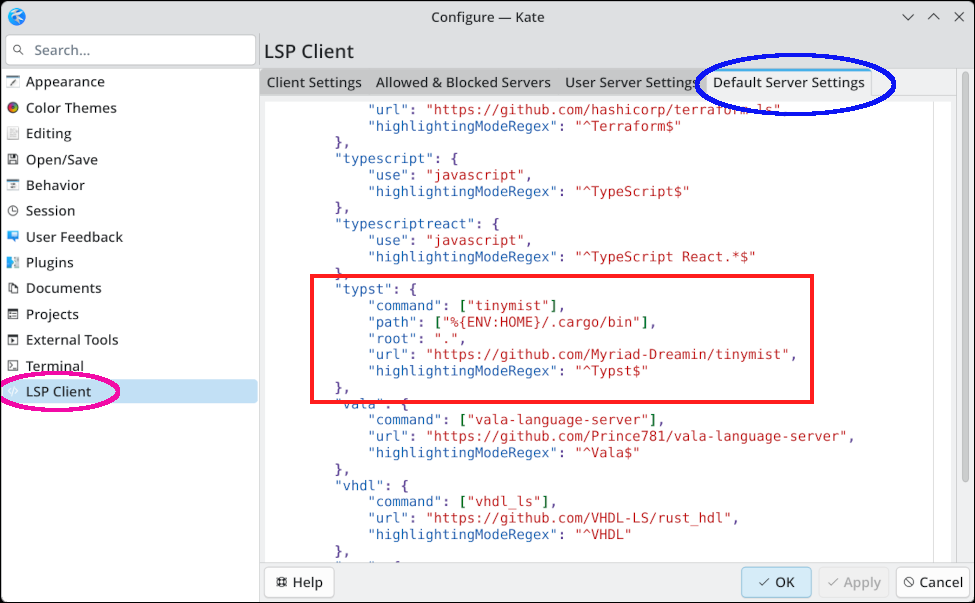
If desired, you can configure Kate’s built-in Terminal to cd into the directory of the active document when launched, and when a new document gets the focus. If this setting is not enabled, you must do all your navigation in the Terminal manually. Change this behavior from the Settings menu > Configure Kate > Terminal section > then click the radio button beside “Automatically synchronize the terminal with the current document when possible”. (Alternatively, right-click on the Terminal button in Kate’s bottom taskbar and select Configure.) 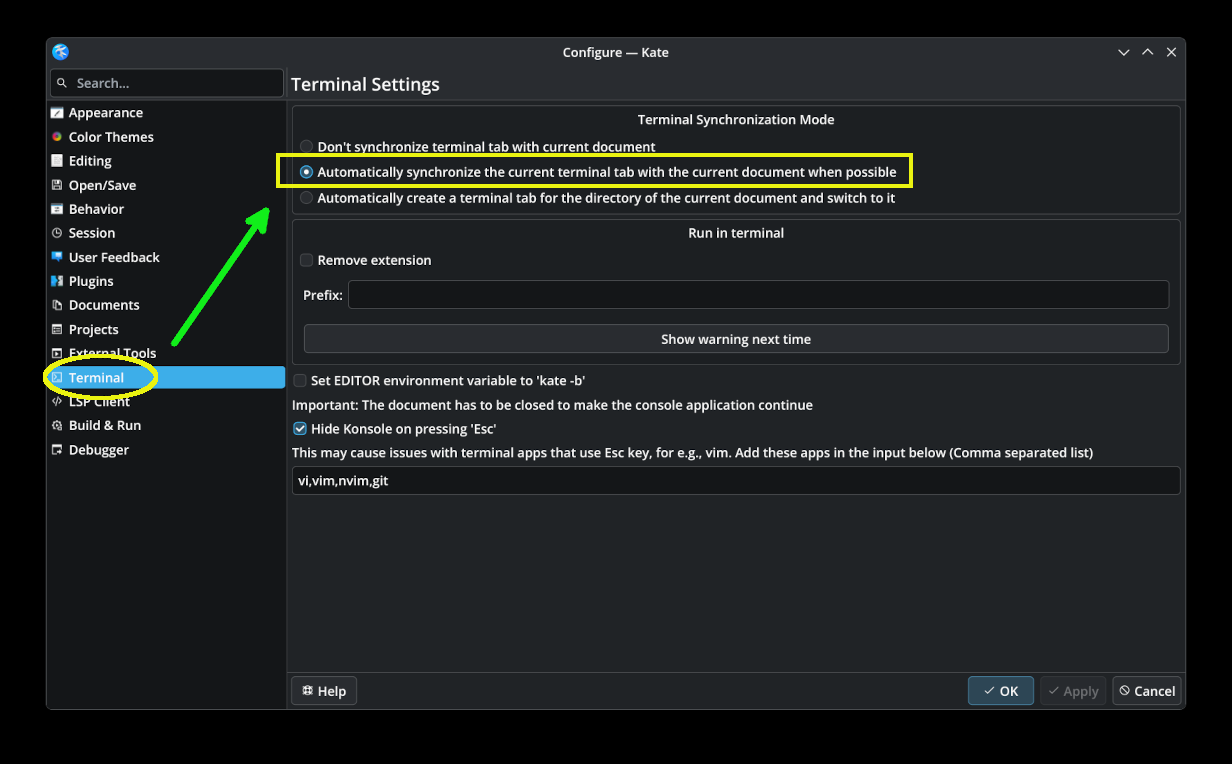
As mentioned above, installing and configuring Tinymist will enable some IDE-specific features such as autocompletion, code navigation and tooltips on hovering (above certain Typst functions). Kate includes a default configuration for Tinymist. However, you must first install the Tinymist binary and place it in your $PATH. This process is not difficult, but it does involve multiple steps. I will walk you through them.
First, go to Myriad-Dreamin's GitHub page, which hosts the Tinymist language service. (Myriad-Dreamin is a developer who is a well-respected member of the Typst community.) Click on the Releases hyperlink in the right-hand column of the page. The current release (as of mid-September 2026) is version 0.15.8. Scroll down to the Assets section > then click on the “Show all 172 assets” link. Scroll down until you find the file named “tinymist-installer.sh." 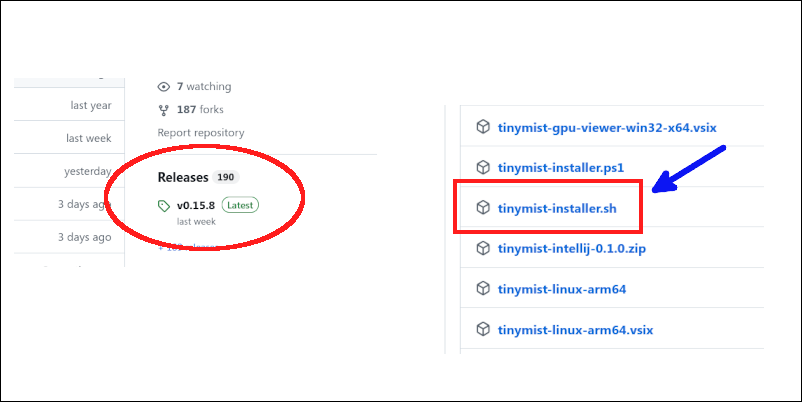 Click on that file to download it. The “.sh” suffix indicates that the file is a shell script. You will begin by making the script executable. Using your DE's file manager, navigate to the directory where the file was saved and right-click on it. Click on the Permissions tab to bring it forward, then check/tick the box next to the Execute option. 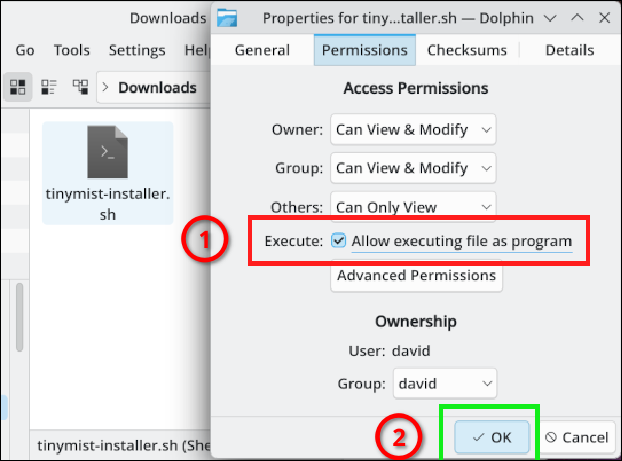
(Alternatively, you can make the shell script executable via the command line. Open a Terminal/Konsole and issue the command: " Next, you will run the script to install Tinymist. The script is quite handy and takes care of everything “under the hood” for you. It detects which platform you are on, fetches an appropriate archive from the Tinymist GitHub page, then unpacks the binaries and installs them to the ~/.local/bin directory. It will also add that directory to the $PATH by adding the appropriate line to your shell profiles.
To run the installer script, open a Terminal/Konsole and type (You do not need root privileges to run the script. Remember to include the “./“ at the beginning of the command.) The installation sequence and Terminal output will look something like this:
In PCLinuxOS, the script installs Tinymist to the ~/.local/bin directory: 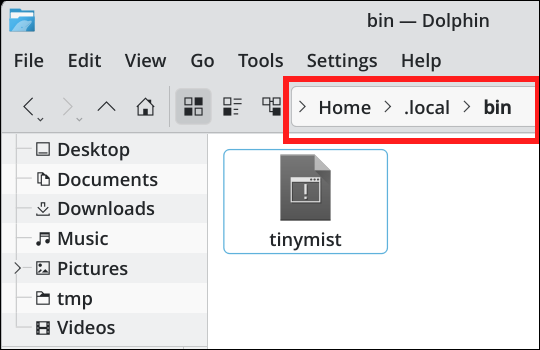 Restart Kate and open your Typst file, so that Kate can detect the new Tinymist binary. A pop-up dialog will appear, asking if you want to start the LSP server. 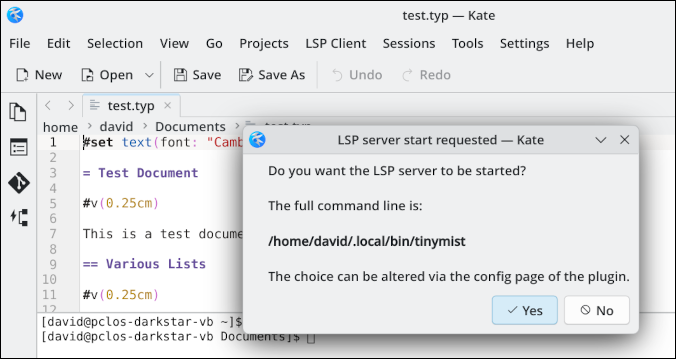 Click on the “Yes” button. Afterwards, check that the Tinymist language server is working. Look at Kate's Output panel; you should see a log similar to the screenshot below. 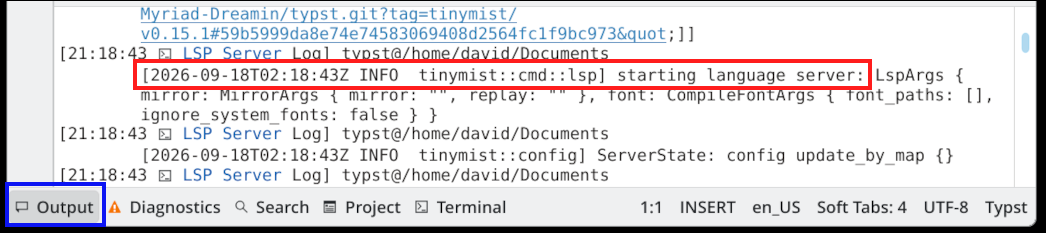 You will also notice that Tinymist is now listed under the Allowed & Blocked Servers (Settings menu > Configure Kate > Plugins section > LSP Client): 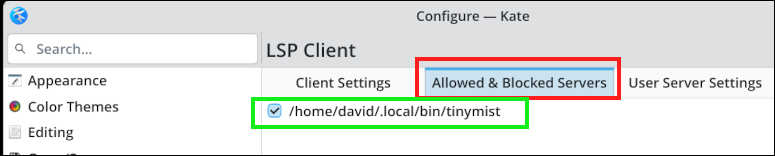
Below are two screenshots to illustrate IDE-specific features provided by Tinymist. The first image shows autocompletion in action; the second image shows a tooltip while hovering. 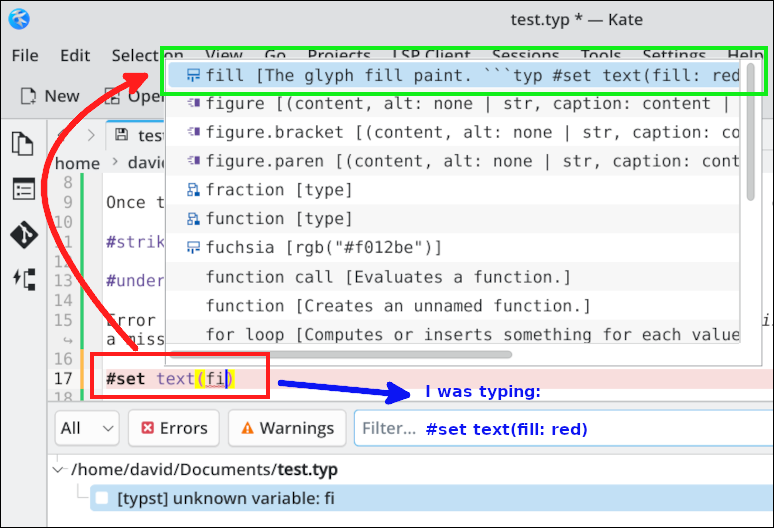
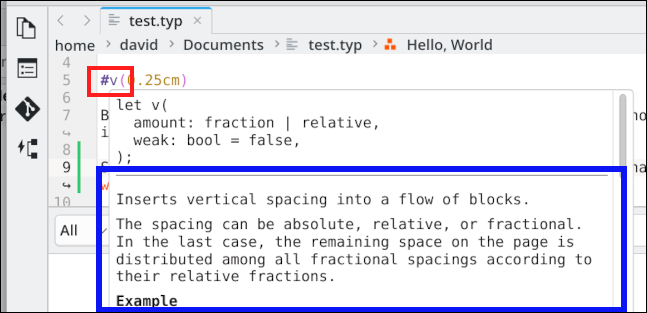
Open your Typst source file with Kate. (Optional) If your document is in a subfolder with associated image files, and you want to see all the items in a tree display, open it via the File menu > Open Folder …
Using Kate’s built-in Terminal widget, first generate a PDF file by issuing the command Open the Typst-generated PDF with Okular (in a separate window on your desktop). Leave the PDF Viewer open on your desktop.
Go back to Kate’s built-in Terminal widget and issue the command typst You should see output similar to this:
The When you make an edit in Kate and save your source file, the PDF will auto-update. So, you will have two separate windows open (with an asynchronous preview): 1. Kate (with your Typst source file) 2. Okular (displaying the compiled/rendered PDF output) The screenshots below illustrate how this arrangement looks. (You can toggle between windows as needed, or position the windows side by side.) 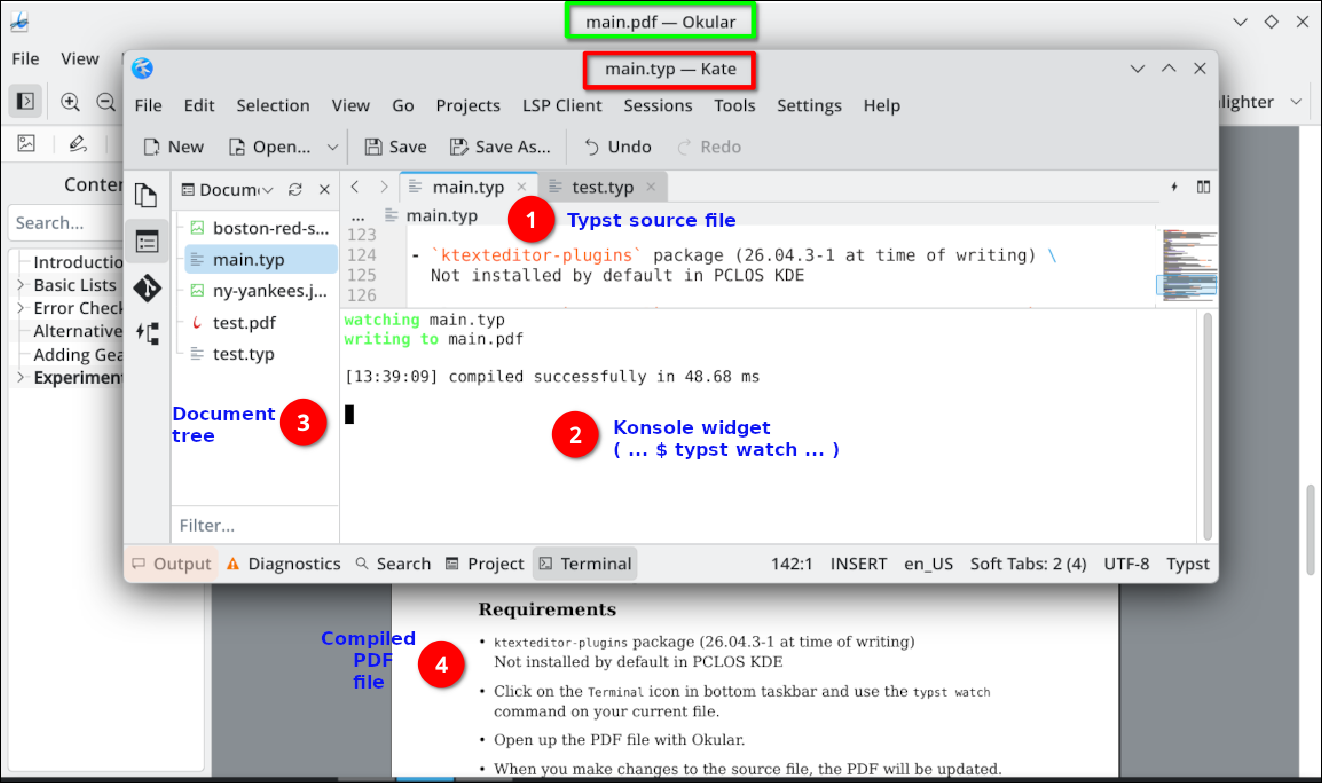
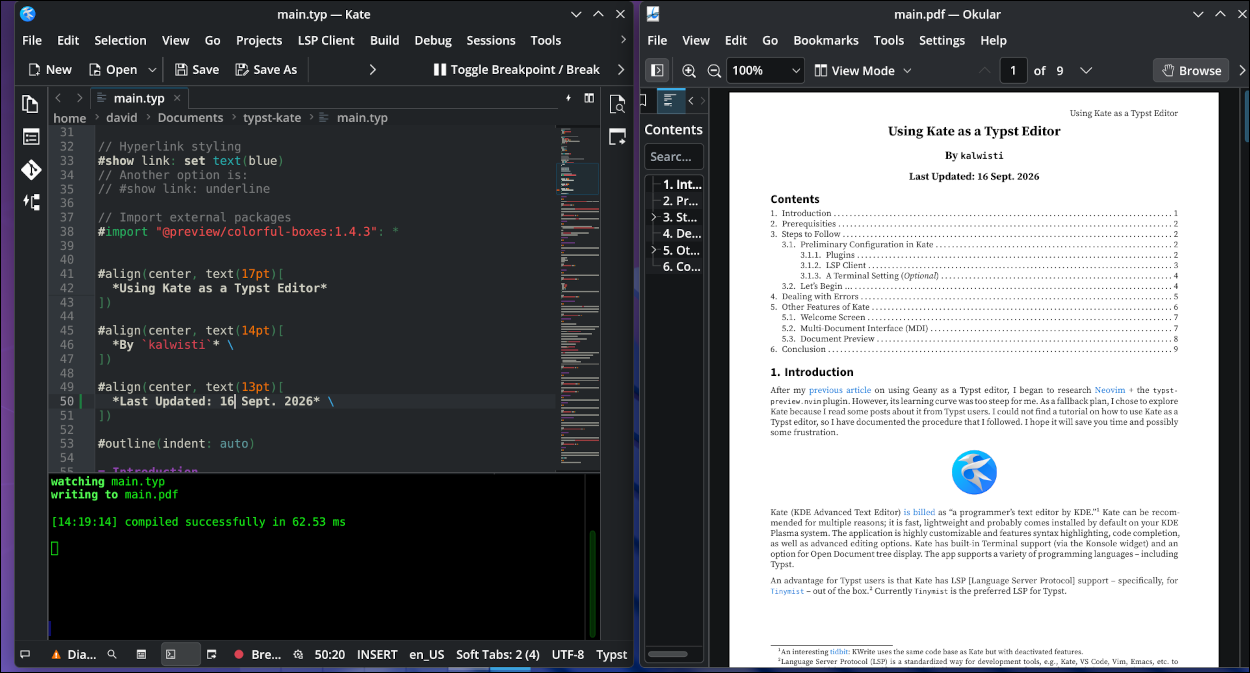
Error messages' formatting will look slightly different, depending on which of Kate's bottom panels is active/focused. The Terminal panel displays error messages generated by the Typst CLI, while the Diagnostics panel displays error messages generated by the Tinymist language server.
If you commit a syntax error in your Typst source file, the PDF will not compile. You can then check output in the Terminal widget (where the Typst CLI is running) for detailed error messages about the problem and how to fix it. Based on my testing, the Typst CLI provides slightly more detail than the Tinymist language server. In the example below, there are two closing delimiters missing. (The Typst source file should read “_two mistakes_” and “*tagging markup*”). I received the message “compiled with errors” but the CLI output helpfully indicates the line number (and character positions) of the errors. 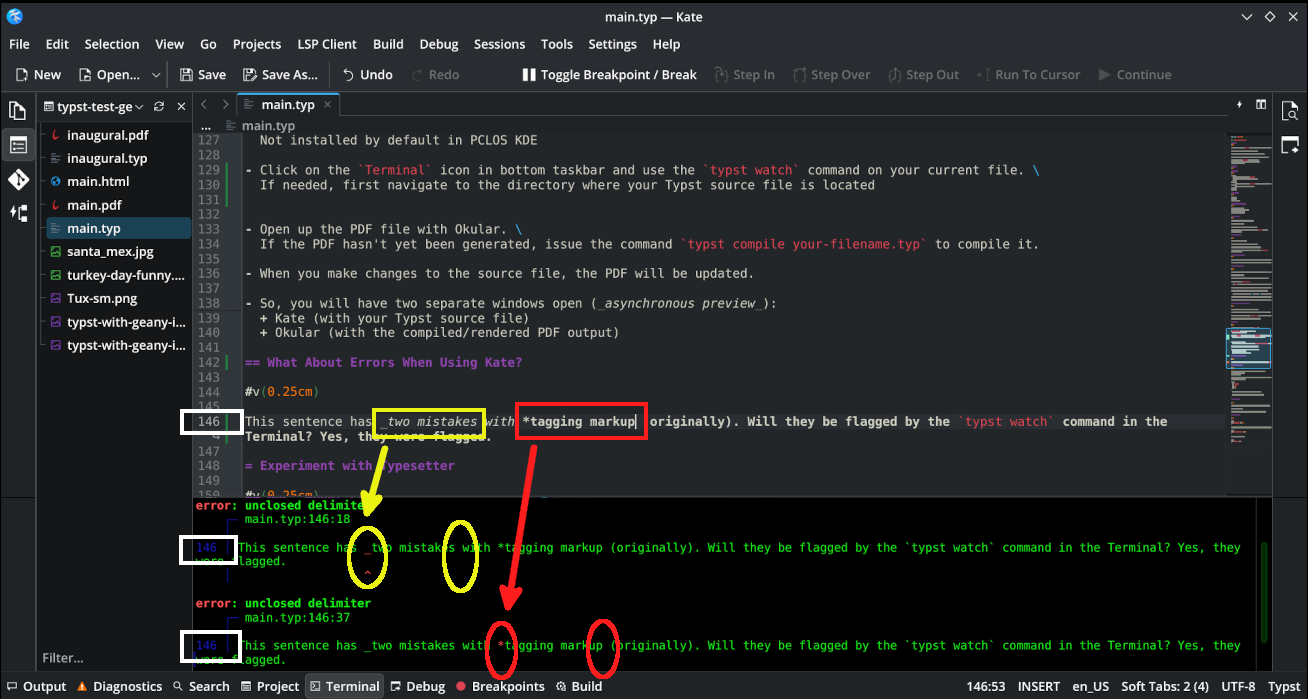 Once you have corrected these two minor mistakes and saved your change, the Typst source file will compile successfully to PDF: 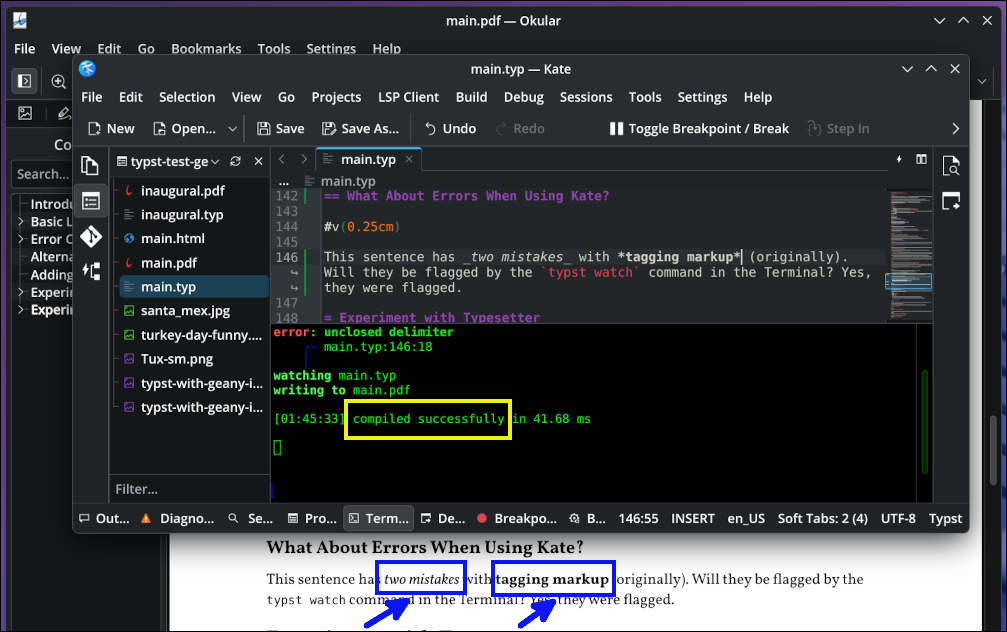
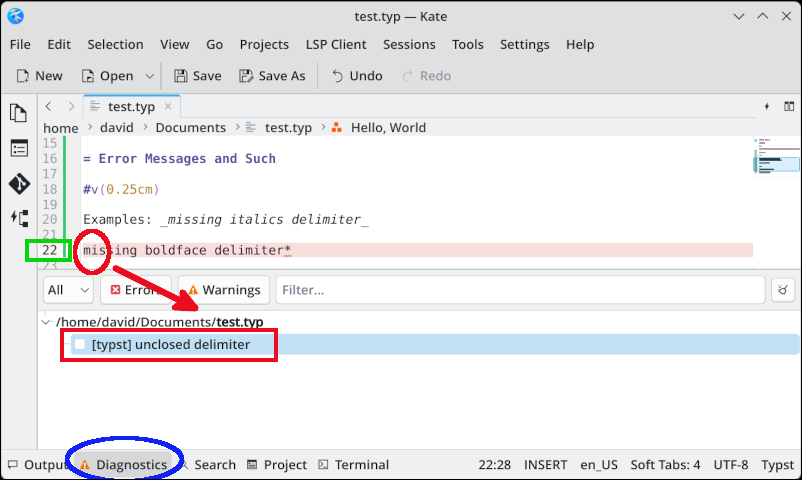
In the examples below, there are markdown delimiters missing. (The Typst source file should read “_missing italics delimiter_” and “*missing boldface delimiter*”). The Diagnostics panel is active because in this editing session, I chose to view the error messages generated by Tinymist. As we can see, Tinymist's error messages are less verbose than the Typst CLI's messages. Tinymist alerts us that there is an unclosed delimiter; it does not state the line number textually, but the line is highlighted in pink in Kate's main Editor pane. 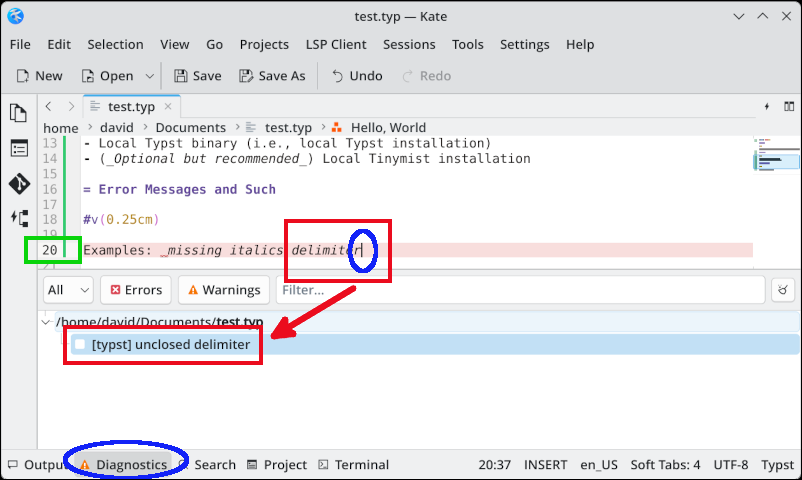
 Other Features of Kate Kate has many useful features worth exploring. The Kate Handbook is an excellent guide with detailed information which you can access by pressing the F1 function key, or via the Help menu > Kate Handbook.
Although the technical details are mostly beyond my grasp, I will attempt to explain why this functionality is currently lacking for Typst files. Real-time document preview requires writing a dedicated, separate KParts viewer plugin. KParts is a KDE component technology that allows applications to embed and use dynamically loadable modules for various functionalities, such as document viewing or editing. This plugin for Typst files has not yet been written, so no real-time preview is possible at the moment. However, if/when a Typst viewer plugin is created, it would likely be similar to the Markdown Viewer KPart (shown below in action).
Editing Typst files with Kate was an enjoyable experience. I prefer it over the Geany editor + Typst, and perhaps even more than the combination of VSCodium and Typst. If KDE Plasma is your favorite desktop environment, I encourage you to try editing your local Typst files with Kate. You might well find this workflow more productive than editing with VS Code/VSCodium. I am on the fence about the distraction level of Tinymist's autocompletion feature. I intend to experiment with it a bit longer before making a final decision. My ambivalence is due to the fact that I became accustomed to checking Typst's online documentation when I am uncertain about syntax. If you choose not to install the Tinymist language server, another viable option is to download the print version (PDF, 692 p., 26 MB) of Typst's documentation for release 0.15.1 and to consult it offline. |